
Week 18: October 3, 2022
Holy cow! We’ve done it! We have (nearly) finished our first season of CSA together. I will take some time once the fields are cleaned up for the winter to make some notes about what I should do differently next year (more heirloom tomatoes, more tender Chinese broccoli, prune those pumpkins!). I will also crunch some numbers, but even without knowing the final yields, I am feeling very grateful for what the land produced and for all of you who took a chance on us, most of you having never belonged to a CSA before.
I wasn’t sure whether starting a CSA was a good idea last winter when I decided to try it. I’d never done anything like this before and the one CSA farm I spent a summer working on was so horribly mismanaged that I didn’t learn much about how to do it properly. Still, it had always been something I’d thought I might like to do, and Erik helped convince me to take on the challenge. The worst that could happen was that it wouldn’t work, but at least I would have given it a shot.

I’m so glad that I did. Running a CSA has been the most intellectually challenging type of farming that I’ve ever done. It required a lot of planning to get the timing of things right and to provide a nice variety or veggies each week. It also necessitated a fair amount of just “winging it” when things didn’t go according to plan, and the need to do a whole bunch of research to figure out how to bounce back. Since I’m the type of person who would be constantly taking classes if I could, I loved that aspect of it.
Your support – both financially and in terms of the feedback you provided – were key in allowing me the flexibility to figure things out and try new methods and crops which made farming more fun and satisfying than it had been before the CSA. I couldn’t have asked for a better group to try this out with; you are all fantastic!
I know that you had to learn a lot, too, and that cooking the “CSA way” presents its own unique challenges and rewards. I know, as I also had to learn how to do it, and every year I discover something new about cooking so seasonally. Happily, the reward for such hard work is a bellyful of delicious, healthy food and, if you’re like me, that is one of the greatest pleasures in life.
I hope that you all enjoyed being part of our CSA as much as I have enjoyed getting to know you and growing food for your families. Thank you so very much for being a part of the inaugural year of the Middle Fork Farm CSA.
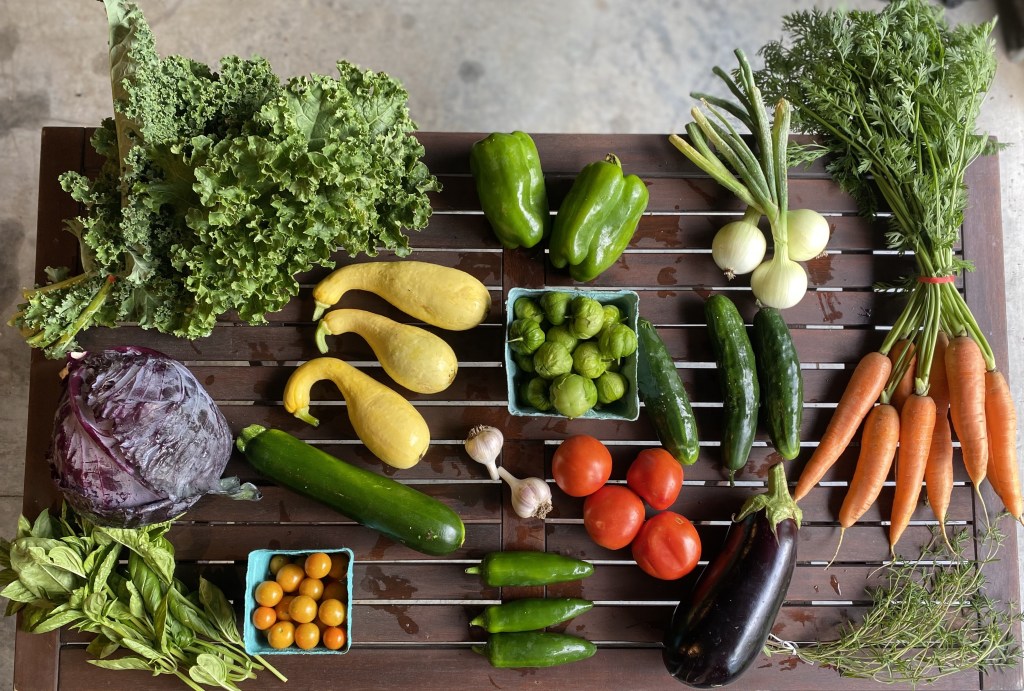
What’s in My Box this Week?
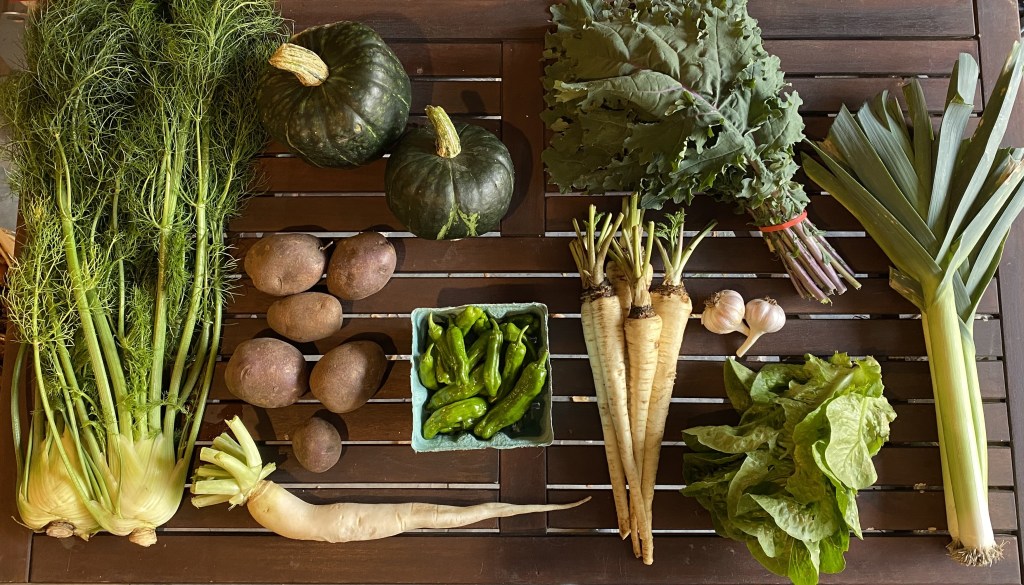
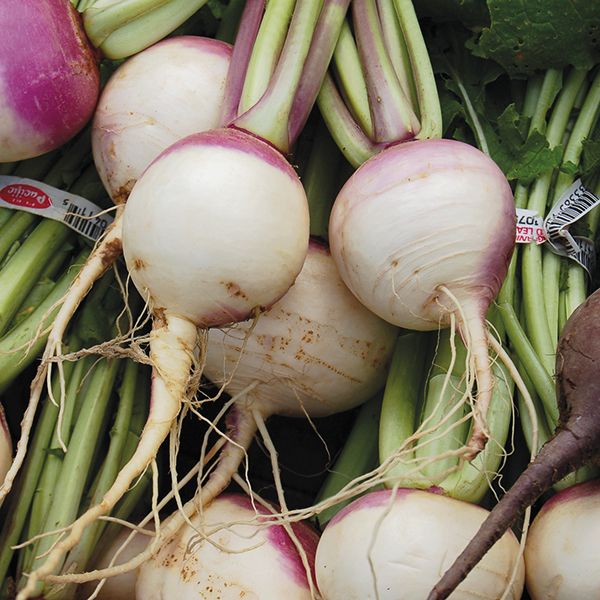
Daikon – I thought I would see if the second planting of daikon were any prettier than the first round and to my amazement, they were, so I’m going to give you one more of these this week. To store, refrigerate in a plastic bag in the crisper drawer of your fridge for best storage. They will easily keep for six to eight weeks this way. If you have to store them loose, they should still last a month. After that they will begin to get a bit softer but will remain usable for two to three months.
Fennel (Large Shares Only) – If you plan to use the fronds (delicate leaves), remove these before storage. Place the bulbs in a plastic bag in the fridge for up to two weeks. Wrap the leaves in a moist paper towel and store in the fridge for up to a week. Here is a tutorial from Lauren at Raleigh’s Hilltop Farm about how to cut it up.
Garlic – Keep in a dark, dry, well-ventilated place at a cool room temperature. It can keep for several months if stored appropriately. Warm temperatures will encourage the cured garlic to sprout which will reduce the quality of it.
Green Lettuce – Store loosely in a plastic bag in the crisper drawer of your fridge. Keep unused leaves on the head. Ideally use within a week, but it will probably store for up to two weeks if needed.

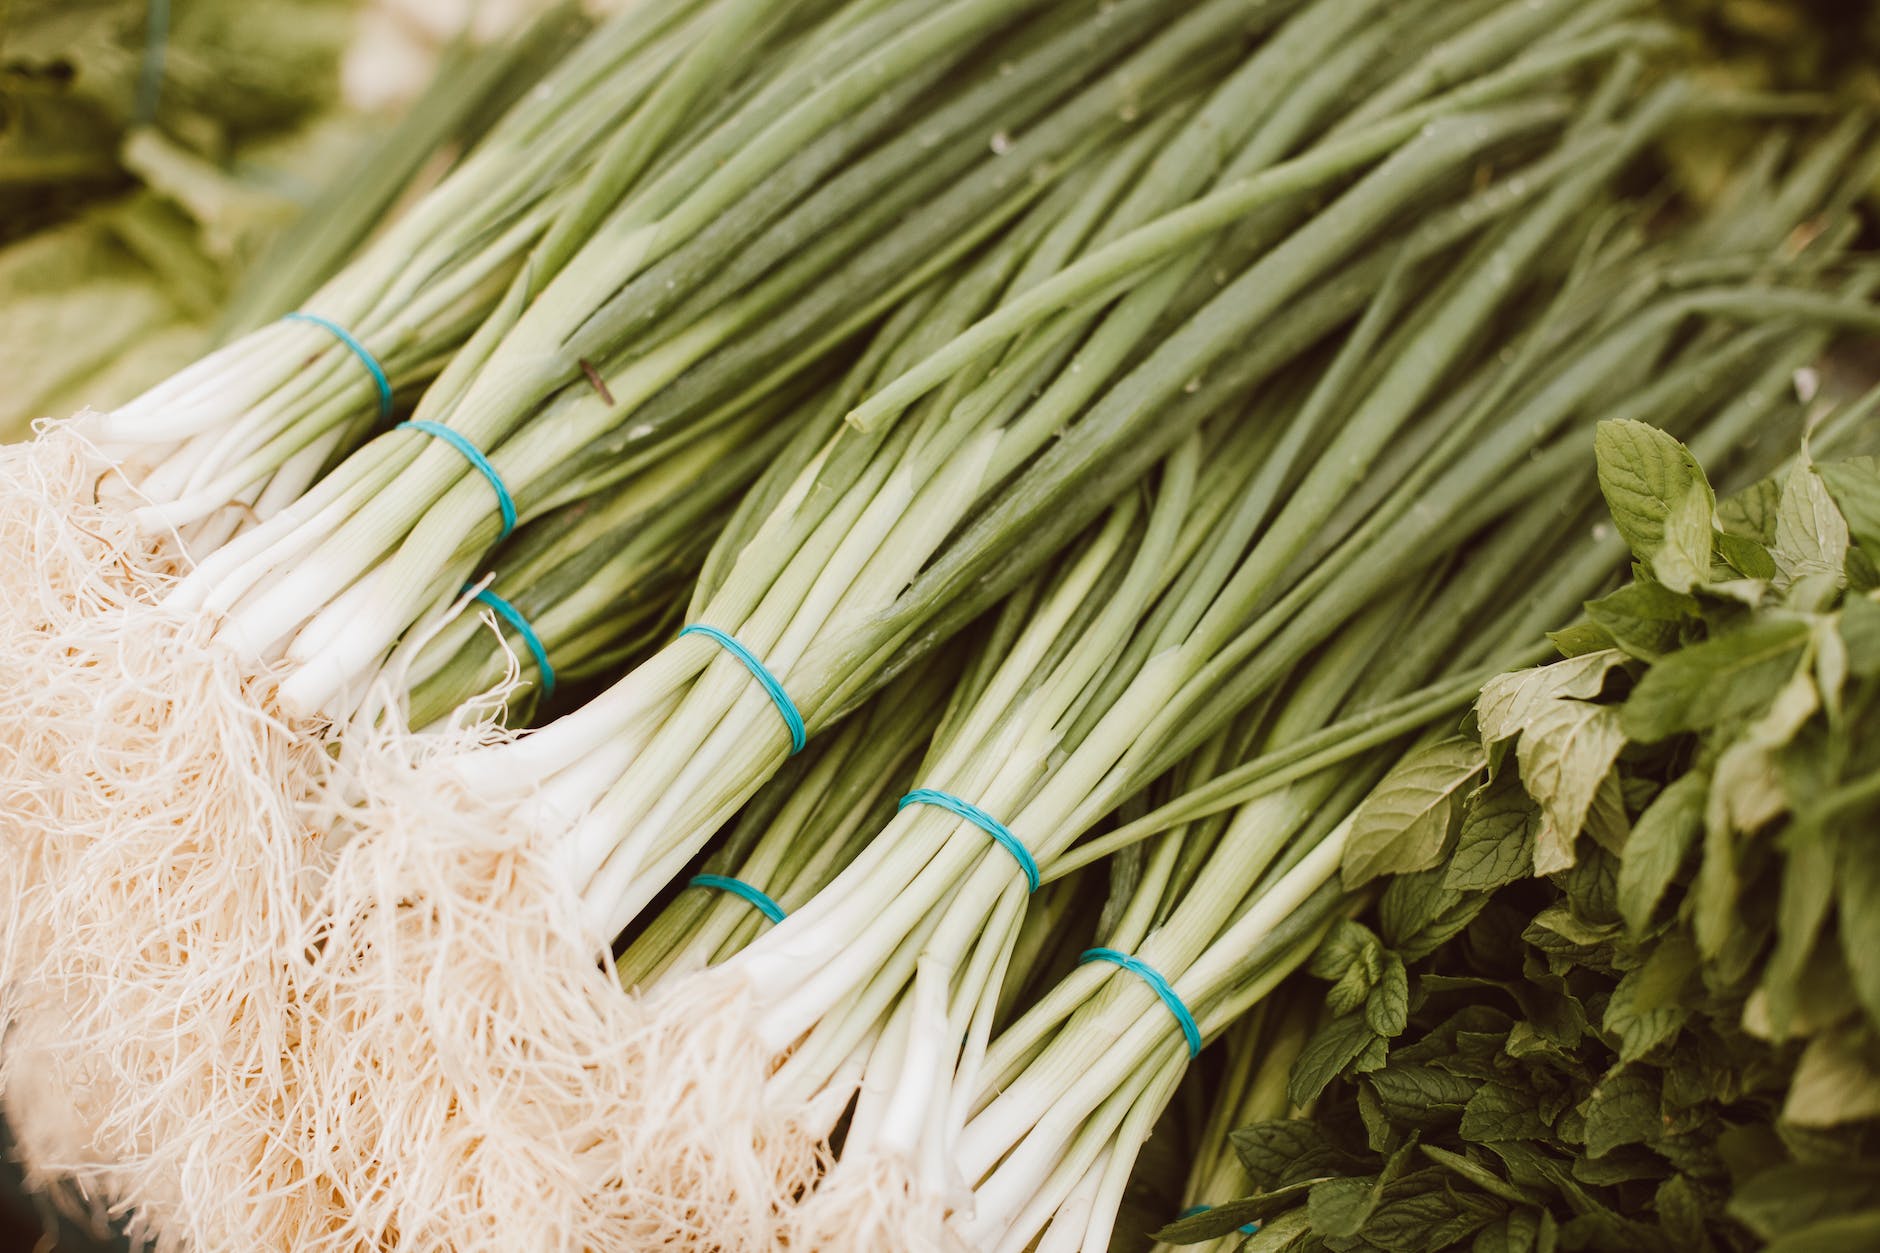
Leeks – I tried an experiment with the leeks this year and it wasn’t very successful. I’ll spare you the details, but the result was skinny leeks rather than the nice, big fat ones we’re used to getting at the store. Still, skinny or not, it’s the taste that matters, so I’ve decided to go ahead and include them in your boxes this week. You might get a bunch of leeks rather than a few fat ones, but you can use them the same way. (Photo: Johnny’s Selected Seeds)
Store in the fridge and try to use within 2-3 weeks. The outer leaves may get a little slimy after that but you can peel away the outer layers.
Parsnips – Parsnips have a tender-hearty texture and a nutty-sweet taste that improves after frost. Refrigerate unwashed in a loosely-wrapped plastic bag for two weeks in the crisper drawer.
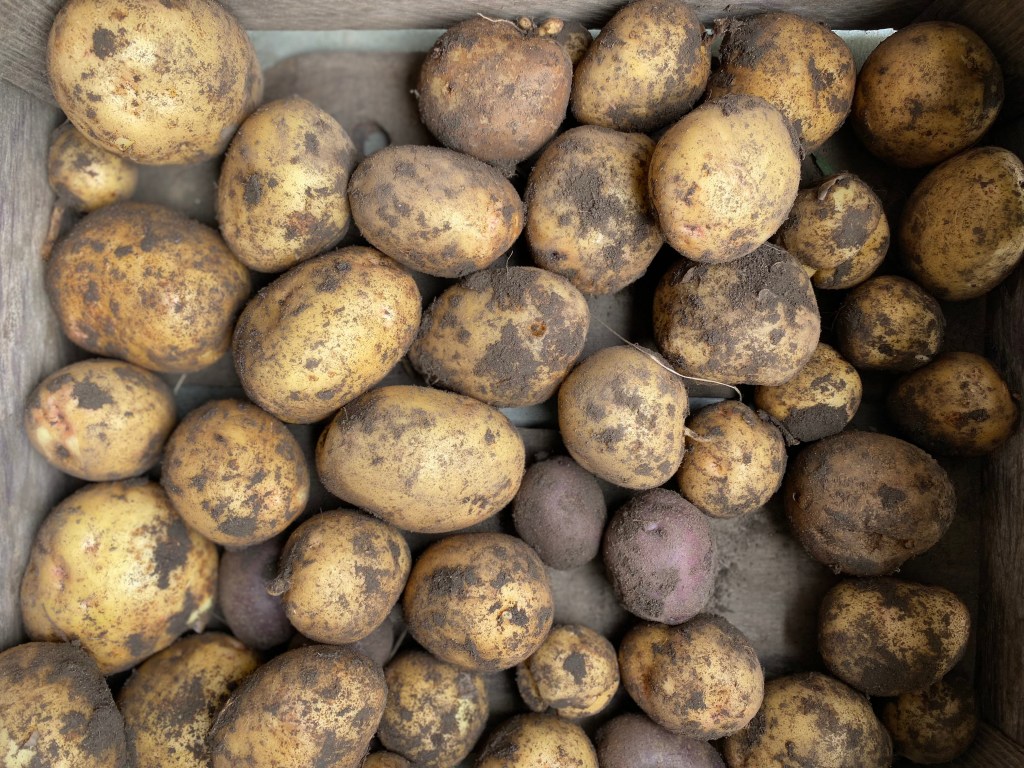
Potatoes – This week you’ll be getting purple Peter Wilcox potatoes again. They are earthy-flavored and delicious roasted, boiled, sliced, or fried. We just harvested the last of the potatoes this weekend, so their skin is really delicate; thus, I’m not going to wash them before giving them to you.
Red Russian Kale (Standard Shares Only) – Now that the kale has experienced some frost, I want you to try it and see if you can notice a subtle difference in the taste. It ought to be slightly sweeter now. Wash the greens only right before using. To store, place in a plastic bag with most of the air removed and put in the fridge. It is best used within a few days.
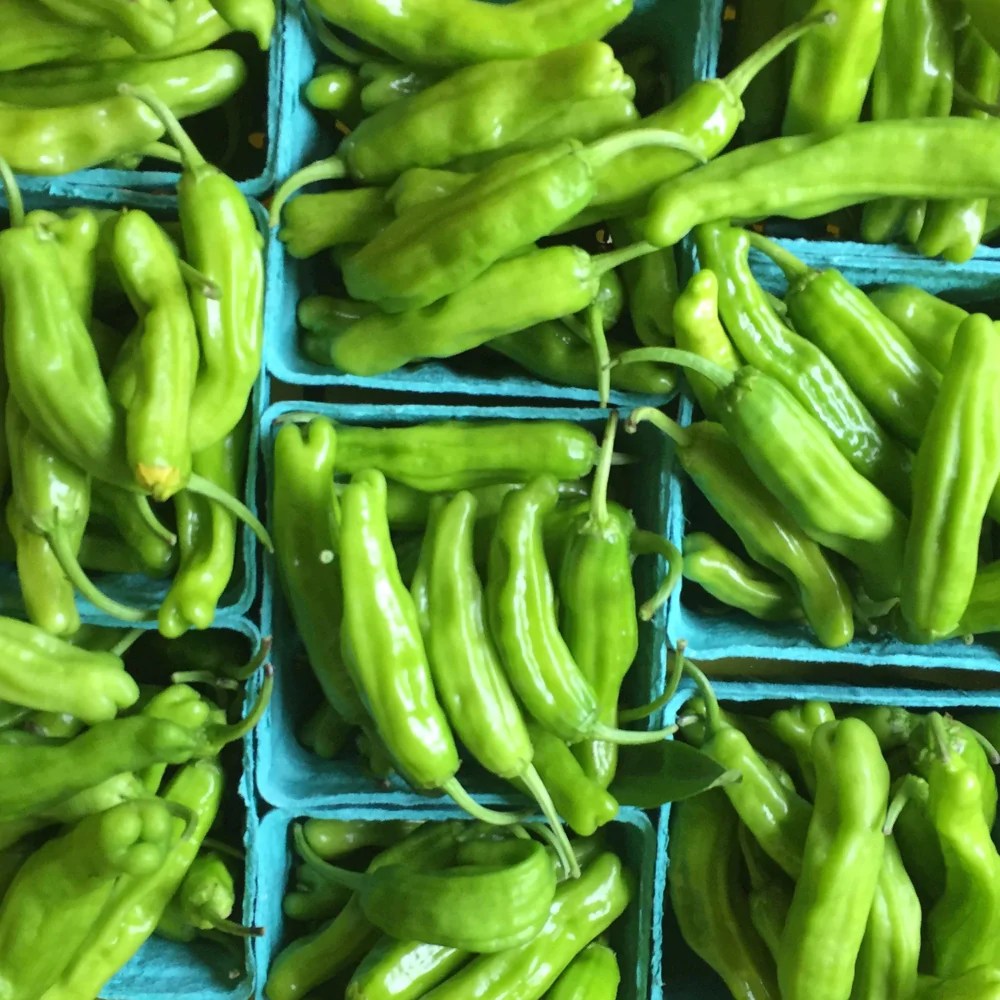
Shishito Peppers (Large Shares Only) – Shishito peppers are quite popular in Japanese cooking. In fact, the name “shishito” means “Lion Head pepper” in Japanese. Nine out of ten times, shishito peppers are mild, but every now and again, you’ll get a spicy one that makes eating these little beauties fun and surprising. (Photo: Hudson Valley Seed Company)
I had wanted to grow enough for everyone to try some, but I don’t think it will be possible. This is a new kind of pepper for me and I underestimated how much each plant would yield. Even the large shares aren’t going to get an ideal quantity (most recipes require about a pound of them), but you’ll at least be able to sample them a little bit. Accordingly, I have included recipes below that use lesser amounts of shishitos. You can also just roast or grill them, adding some coarse salt and lemon juice. They are delicious this way.
To store, refrigerate peppers unwashed in a sealed plastic bag in the crisper drawer for one to two weeks.
Winter Squash – Store winter squash in a cool, dry place and try to use within a week or two. Do not store in the fridge. This will cause it to spoil much more quickly.
Notes from the Field
As you know from my emails last week, frost arrived on the farm last Tuesday and Wednesday nights. It was a little early this year; the average date for the first fall frost is around October 10, but truthfully, I was okay with it. We’ve had bountiful eggplants, bell peppers, and tomatoes – the crops that perished in the frost – and I’m ready for the fall veggies to take center stage on our dinner plates now. It’s funny how much I look forward to the first tomato harvest of the season and how two months later, I’m over it. I know I’ll crave a fresh, field-ripened tomato come February, but for now, I’m satiated.
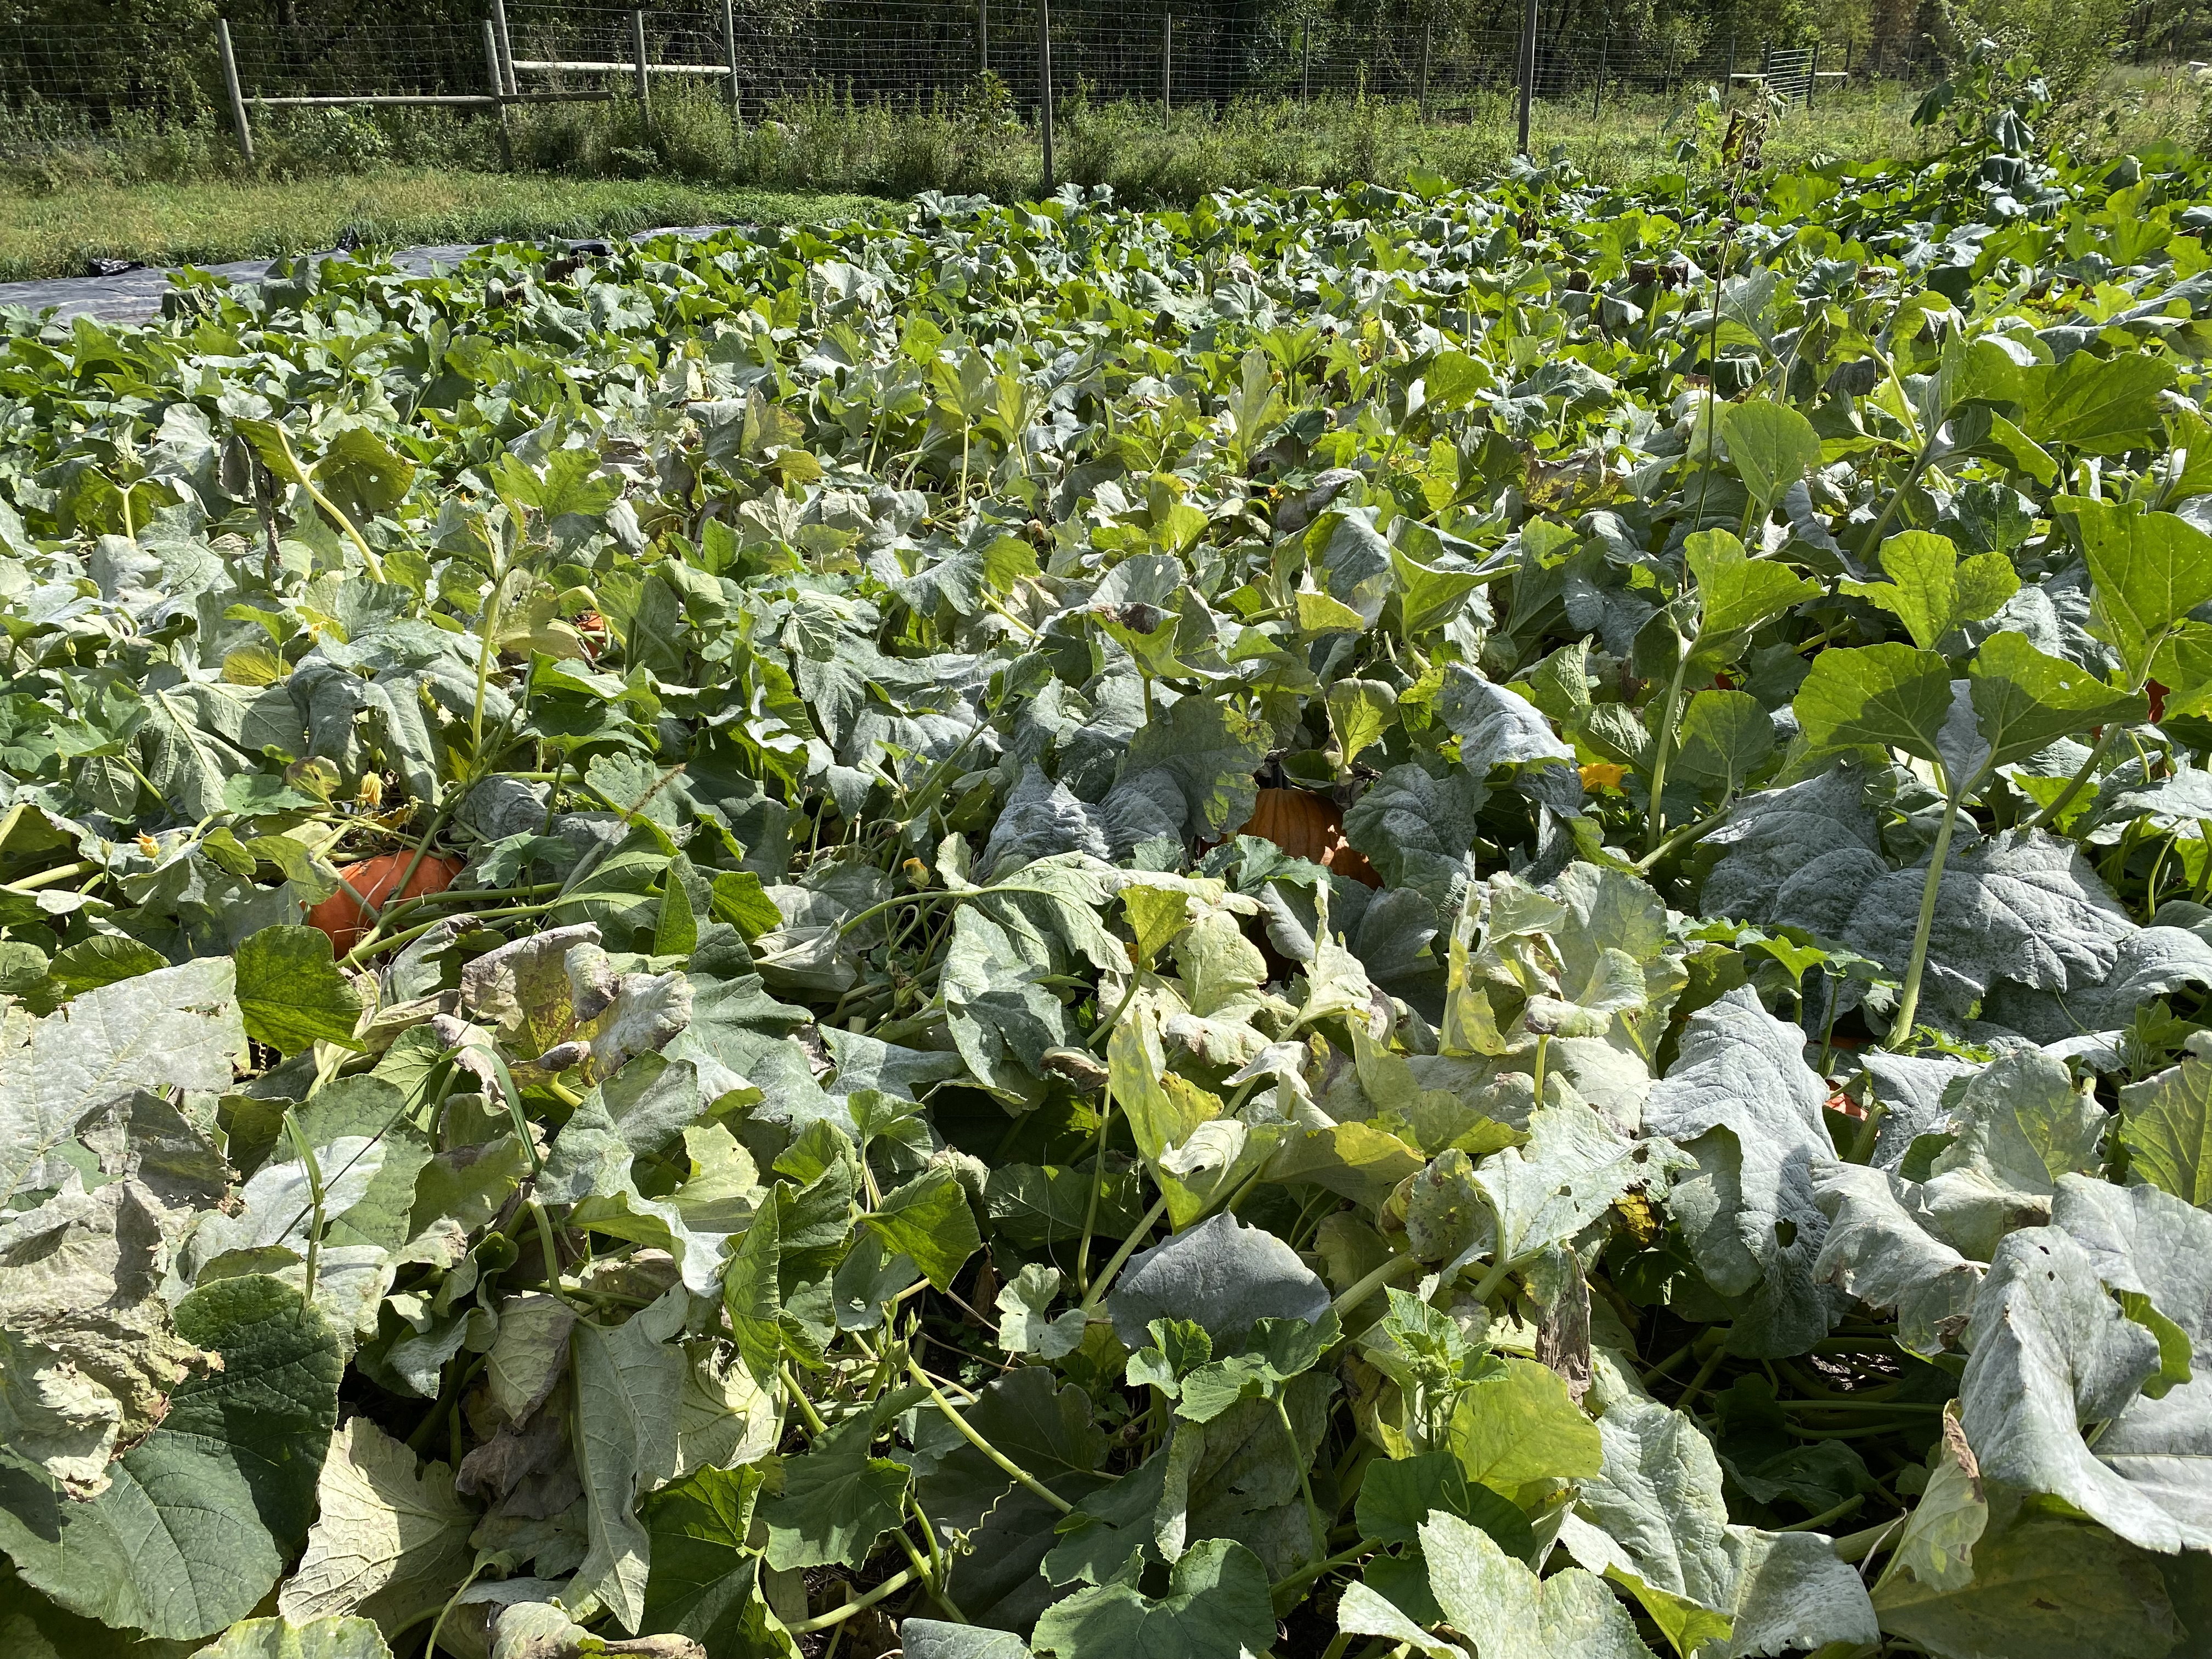

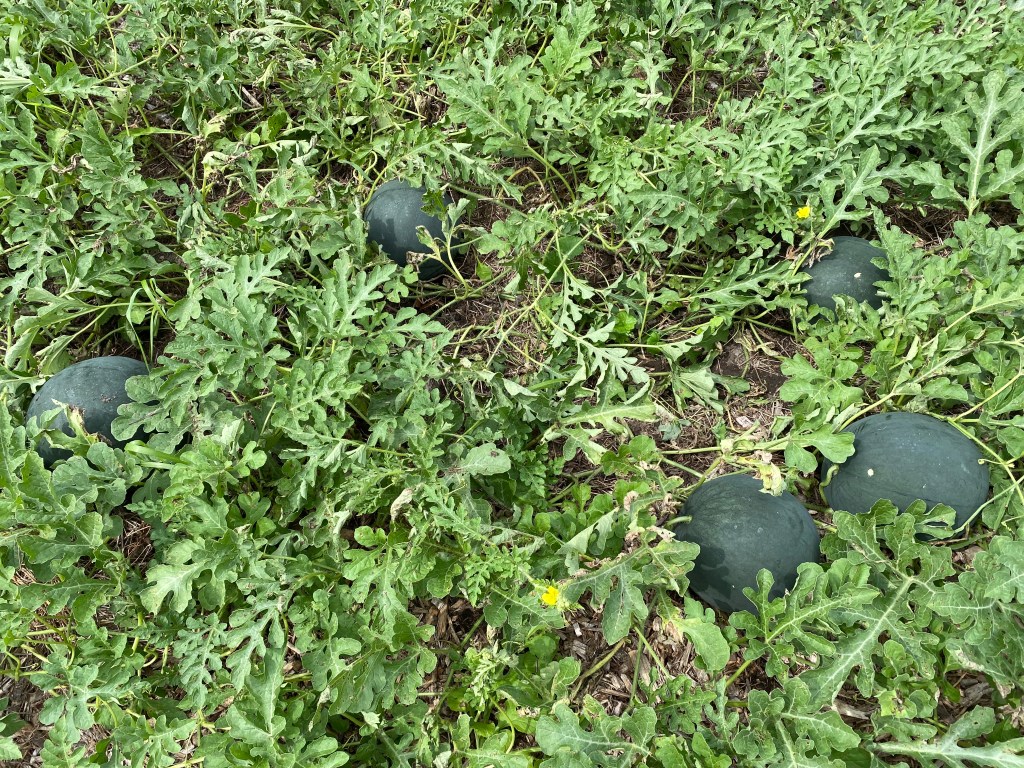
This past week, we harvested a gazillion pumpkins from mini Jack-Be-Littles to the 15 pound Rouge vif d’Etampes. These latter one are affectionately called “Cinderella” pumpkins because their shape is reminiscent of the carriage that Cinderella took to the ball.
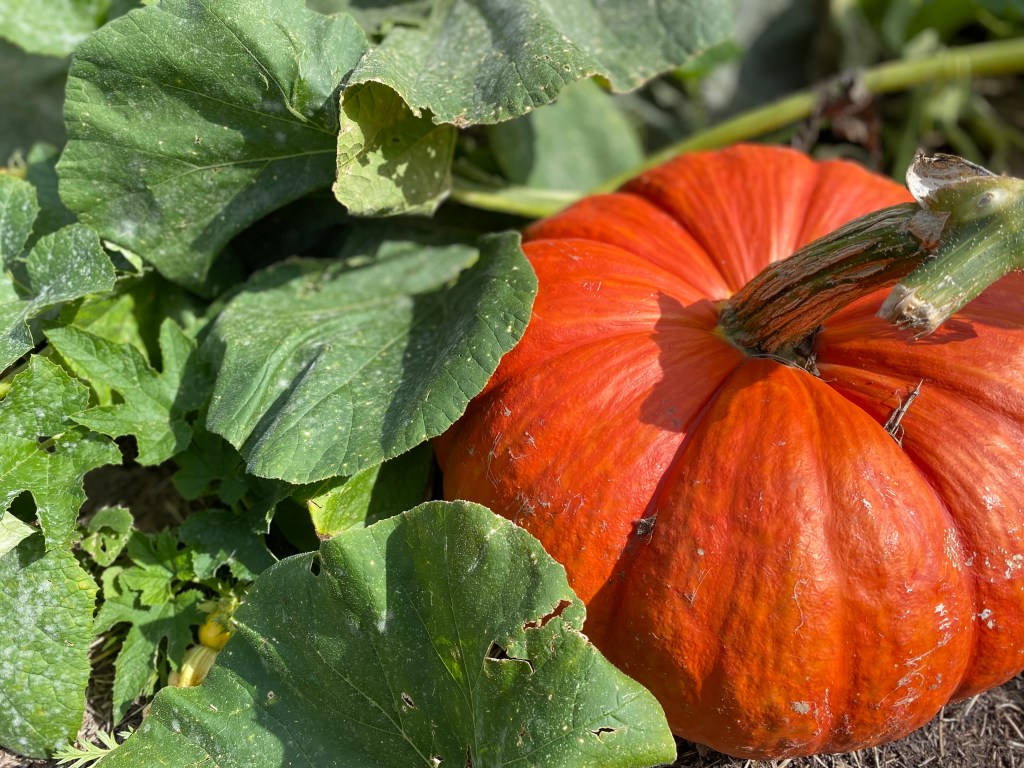
We will place these all over the farm for decoration and cook some down and freeze them for soups, breads, and pies later. I’ll also see if the food shelves might want some. One of these could feed a family of four for days!
Other than that, I covered some frost-sensitive crops – artichokes, shishitos, lettuce, fennel – with row cover to buy myself a few extra weeks and to make sure you still had some of these in your final boxes. I was really, really hoping the Romanesco would be ready by now, but they still haven’t formed heads yet. Next year, I will start them out in the field even earlier, so I can harvest them in time for the last week or two of the CSA.
Finally, I brought a whole lot of produce to the Oronoco Food Shelf and Rochester Outreach Center. Even we can’t eat all that we harvested before the frost. The man who manages the food shelf at ROC is Middle Eastern and he was thrilled to see so many eggplants, a staple in his culture. He gave me all sorts of suggestions for how to cook with it which I will share with you next year.
Last up on the farm will be pulling out the dead tomato vines and hauling them far away from the production field so as to prevent the leaf spot disease they had from overwintering in the field and infecting next year’s plants. I will flail mow down the remaining crops and let them decay in place, providing cover for the soil and food for the critters that live in it. The garlic will be planted in the next couple of weeks and the strawberries covered in a thick layer of straw mulch to keep them nice and cozy until spring. At that point, I will also be nice and cozy, more indoors than out for the first time in months, looking through seed catalogues and sipping hot cocoa with the cat purring on my lap. Wish me luck as I make plans for a wonderful 2023 growing season!

Recipes
Beet Pasta with Caramelized Leeks, Hazelnuts, and Blue Cheese // Uses Leeks // Vegetarian
Honey Roasted Parsnips // Uses Parsnips // Vegetarian
Mashed Parsnips // Uses Parsnips // Vegetarian
Mini Mushroom and Parsnip Pot Pies // Uses Kale, Parsnips // Vegetarian
Potato Leek Soup // Uses Garlic, Leeks, Potatoes // Vegetarian (if you use veggie broth)
Shishito and Potato Breakfast Bake // Uses Potatoes, Shishitos
Recipe from The Leek & The Carrot
Serves 6 to 8
Takes 1 hour (most of it inactive)
1 tablespoon olive oil
3 to 4 cups shredded potatoes
6 to 8 shishito peppers, sliced (about 1 cup)
1/2 yellow onion (or 1/2 bunch scallions), diced
1 pound breakfast sausage, browned**
8 eggs
1/2 cup whole milk
1 teaspoon hot sauce
1 teaspoon mustard powder
1 teaspoon Kosher salt
1/2 cup favorite cheese (I used a lovely dill havarti)
- Preheat oven to 350 degrees.
- Grease a 9×13 casserole dish with olive oil.
- Combine potatoes, peppers, onion and pork sausage in prepared casserole dish. Toss to combine.
- In a medium bowl, whisk together eggs and milk. Add hot sauce, mustard powder, and salt. Pour evenly over potato mixture.
- Place in preheated oven and bake for 30 to 40 minutes until the eggs are set. Add cheese and cook 5 minutes longer just to melt (or lightly brown).
- Enjoy!
**If you are vegetarian, feel free to substitute in 16 to 20 ounces of the most flavorful mushrooms you can find for the sausage. Then add in a couple cloves of garlic, a tablespoon of dried sage, and a pinch or two of red pepper flakes while sautéing them.
Slow Cooker Sweet Potato and Butternut Squash Chili // Uses Garlic, Leeks, Butternut Squash (could sub any other winter squash) // Vegetarian
Recipe from The Leek & The Carrot
Takes 20 minutes (active time) + 4 hours (in slow cooker)
Serves 8-12
1/4 cup olive oil
1 large leek, white and pale green parts only, roughly chopped
2 garlic cloves, minced
2 cups diced red, orange or yellow pepper
4 cups water
6 cups diced tomatoes (from fresh tomatoes, canned tomatoes or things you froze earlier in the year)
2 cups chopped sweet potatoes
4 cups chopped butternut squash
1 can (15-ounce) spicy chili beans
1 can (15-ounce) black beans, rinsed
1/4 cup brown sugar
1/4 cup chili powder
2 tablespoons Kosher salt
2 tablespoons cumin
1/2 teaspoon cayenne powder
Pinch cinnamon
- Add olive oil to crock pot or slow cooker along with leek, garlic and peppers. Turn crock pot up to high and let cook on it’s own with the lid off for 10-15 minutes while you peel and dice your squash and sweet potatoes and get the rest of your ingredients assembled.
- Add remaining ingredients to the crock pot. It will be a tight fit even in a standard 8-quart crock pot. Place lid on crock pot and cook for at least four hours on high heat. If you are making it and leaving for the day, eight hours on low heat will work just as well.
- Enjoy with cheese, diced raw onion, Greek yogurt and a handful of chives. Store whatever remains in your fridge to eat throughout the weekend/week.
Spicy Roasted Parsnip Soup // Uses Parsnips // Vegetarian
Week 17: September 26, 2022
This week marks a big turning point on the farm: the first frost of the fall. Normally, I am pretty obsessively looking at the weather report all week to see whether we will have rain, but I was distracted the past few days with other chores and so was caught completely by surprise when I saw frost forecasted for the beginning of this week. I should have known it was coming. It is the end of September after all. This month has just flown by and so it doesn’t feel as if we could already be here, but here we are nonetheless. Many of our most beloved crops – tomatoes, peppers, potatoes, beans – will die once the frost hits, but the ones that survive will only taste better for it. Cabbages, broccoli, Brussels sprouts, and root vegetables convert some of their starches to sugars when the mercury drops, making them all the more delicious. I’m glad that you’ll have a week or two of frost-kissed veggies in your boxes before our season ends.
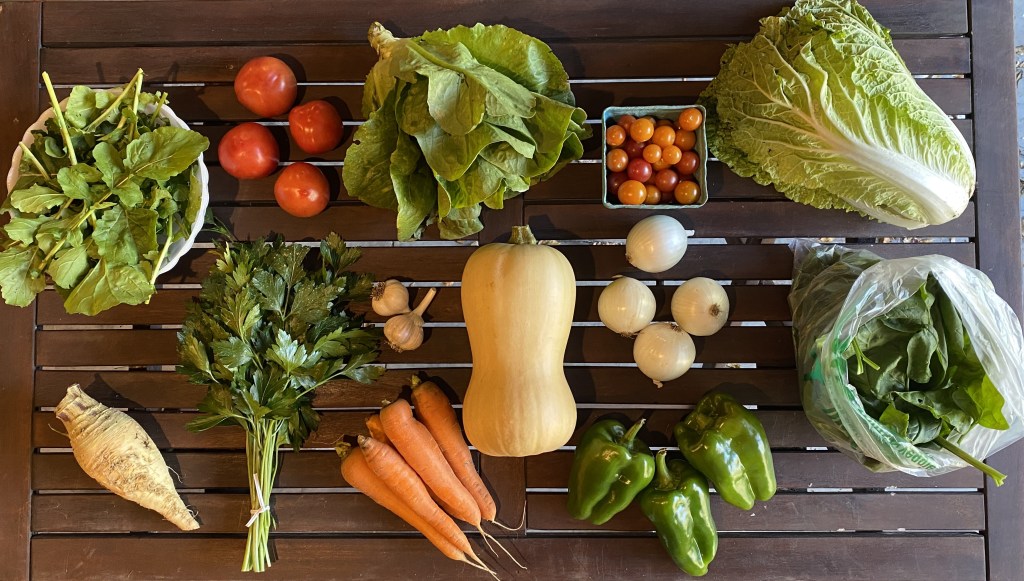
What’s in My Box this Week?
Arugula (Large Shares Only) – Arugula doesn’t last much longer than a couple of days, so try and use it right away. Store it in the fridge in a plastic bag.
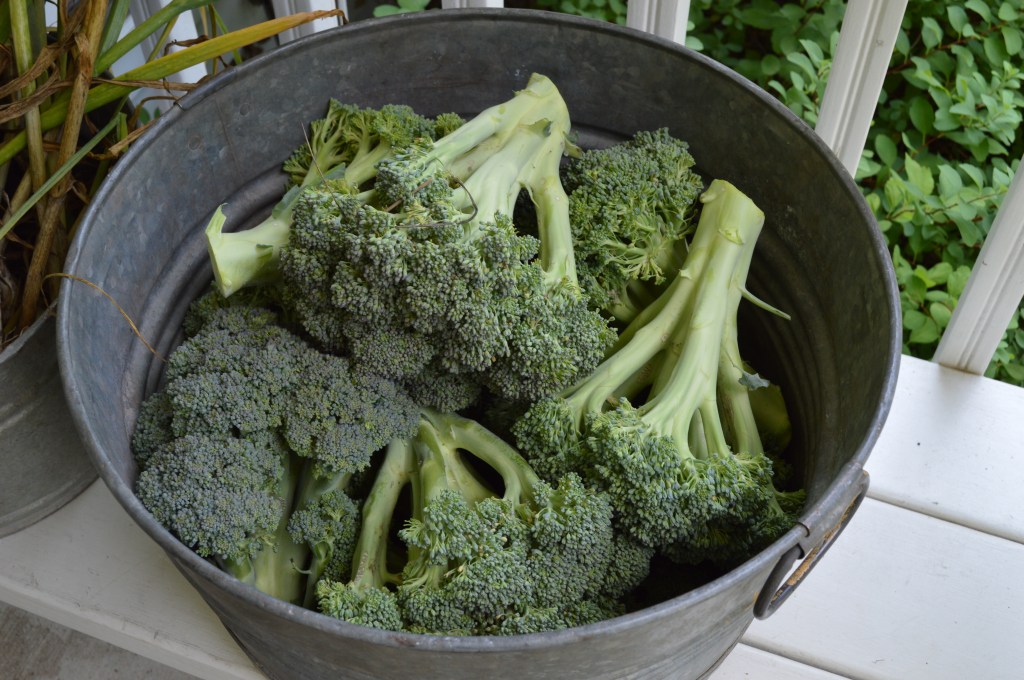
Broccoli (Large Shares and Some Standard Shares) – Wrap broccoli loosely in a plastic bag and keep it in the crisper drawer of your refrigerator. The colder, the better. Store for a week.
Carrots – The rogue bunny ate all of the carrot tops, so you’ll just be getting the roots this week. Place these in a plastic bag in the crisper drawer of your refrigerator. They will last for several weeks. You can also store them in a bin of water to keep them crisp, changing out the water every few days.
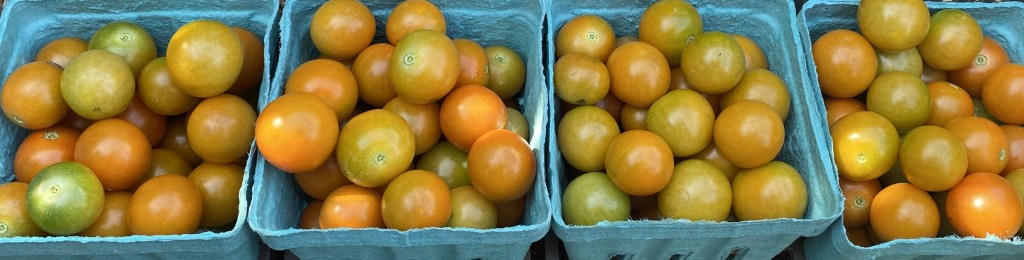
Cherry Tomatoes – Our last week of cherry tomatoes will be a mix of orange Sungolds and red Peacevines. Cherry tomatoes can over-ripen pretty quickly, so it can be a good idea to store them in the fridge if you’re not going to eat them right away.
Garlic – Keep in a dark, dry, well-ventilated place at a cool room temperature. It can keep for several months if stored appropriately. Warm temperatures will encourage the cured garlic to sprout which will reduce the quality of it.
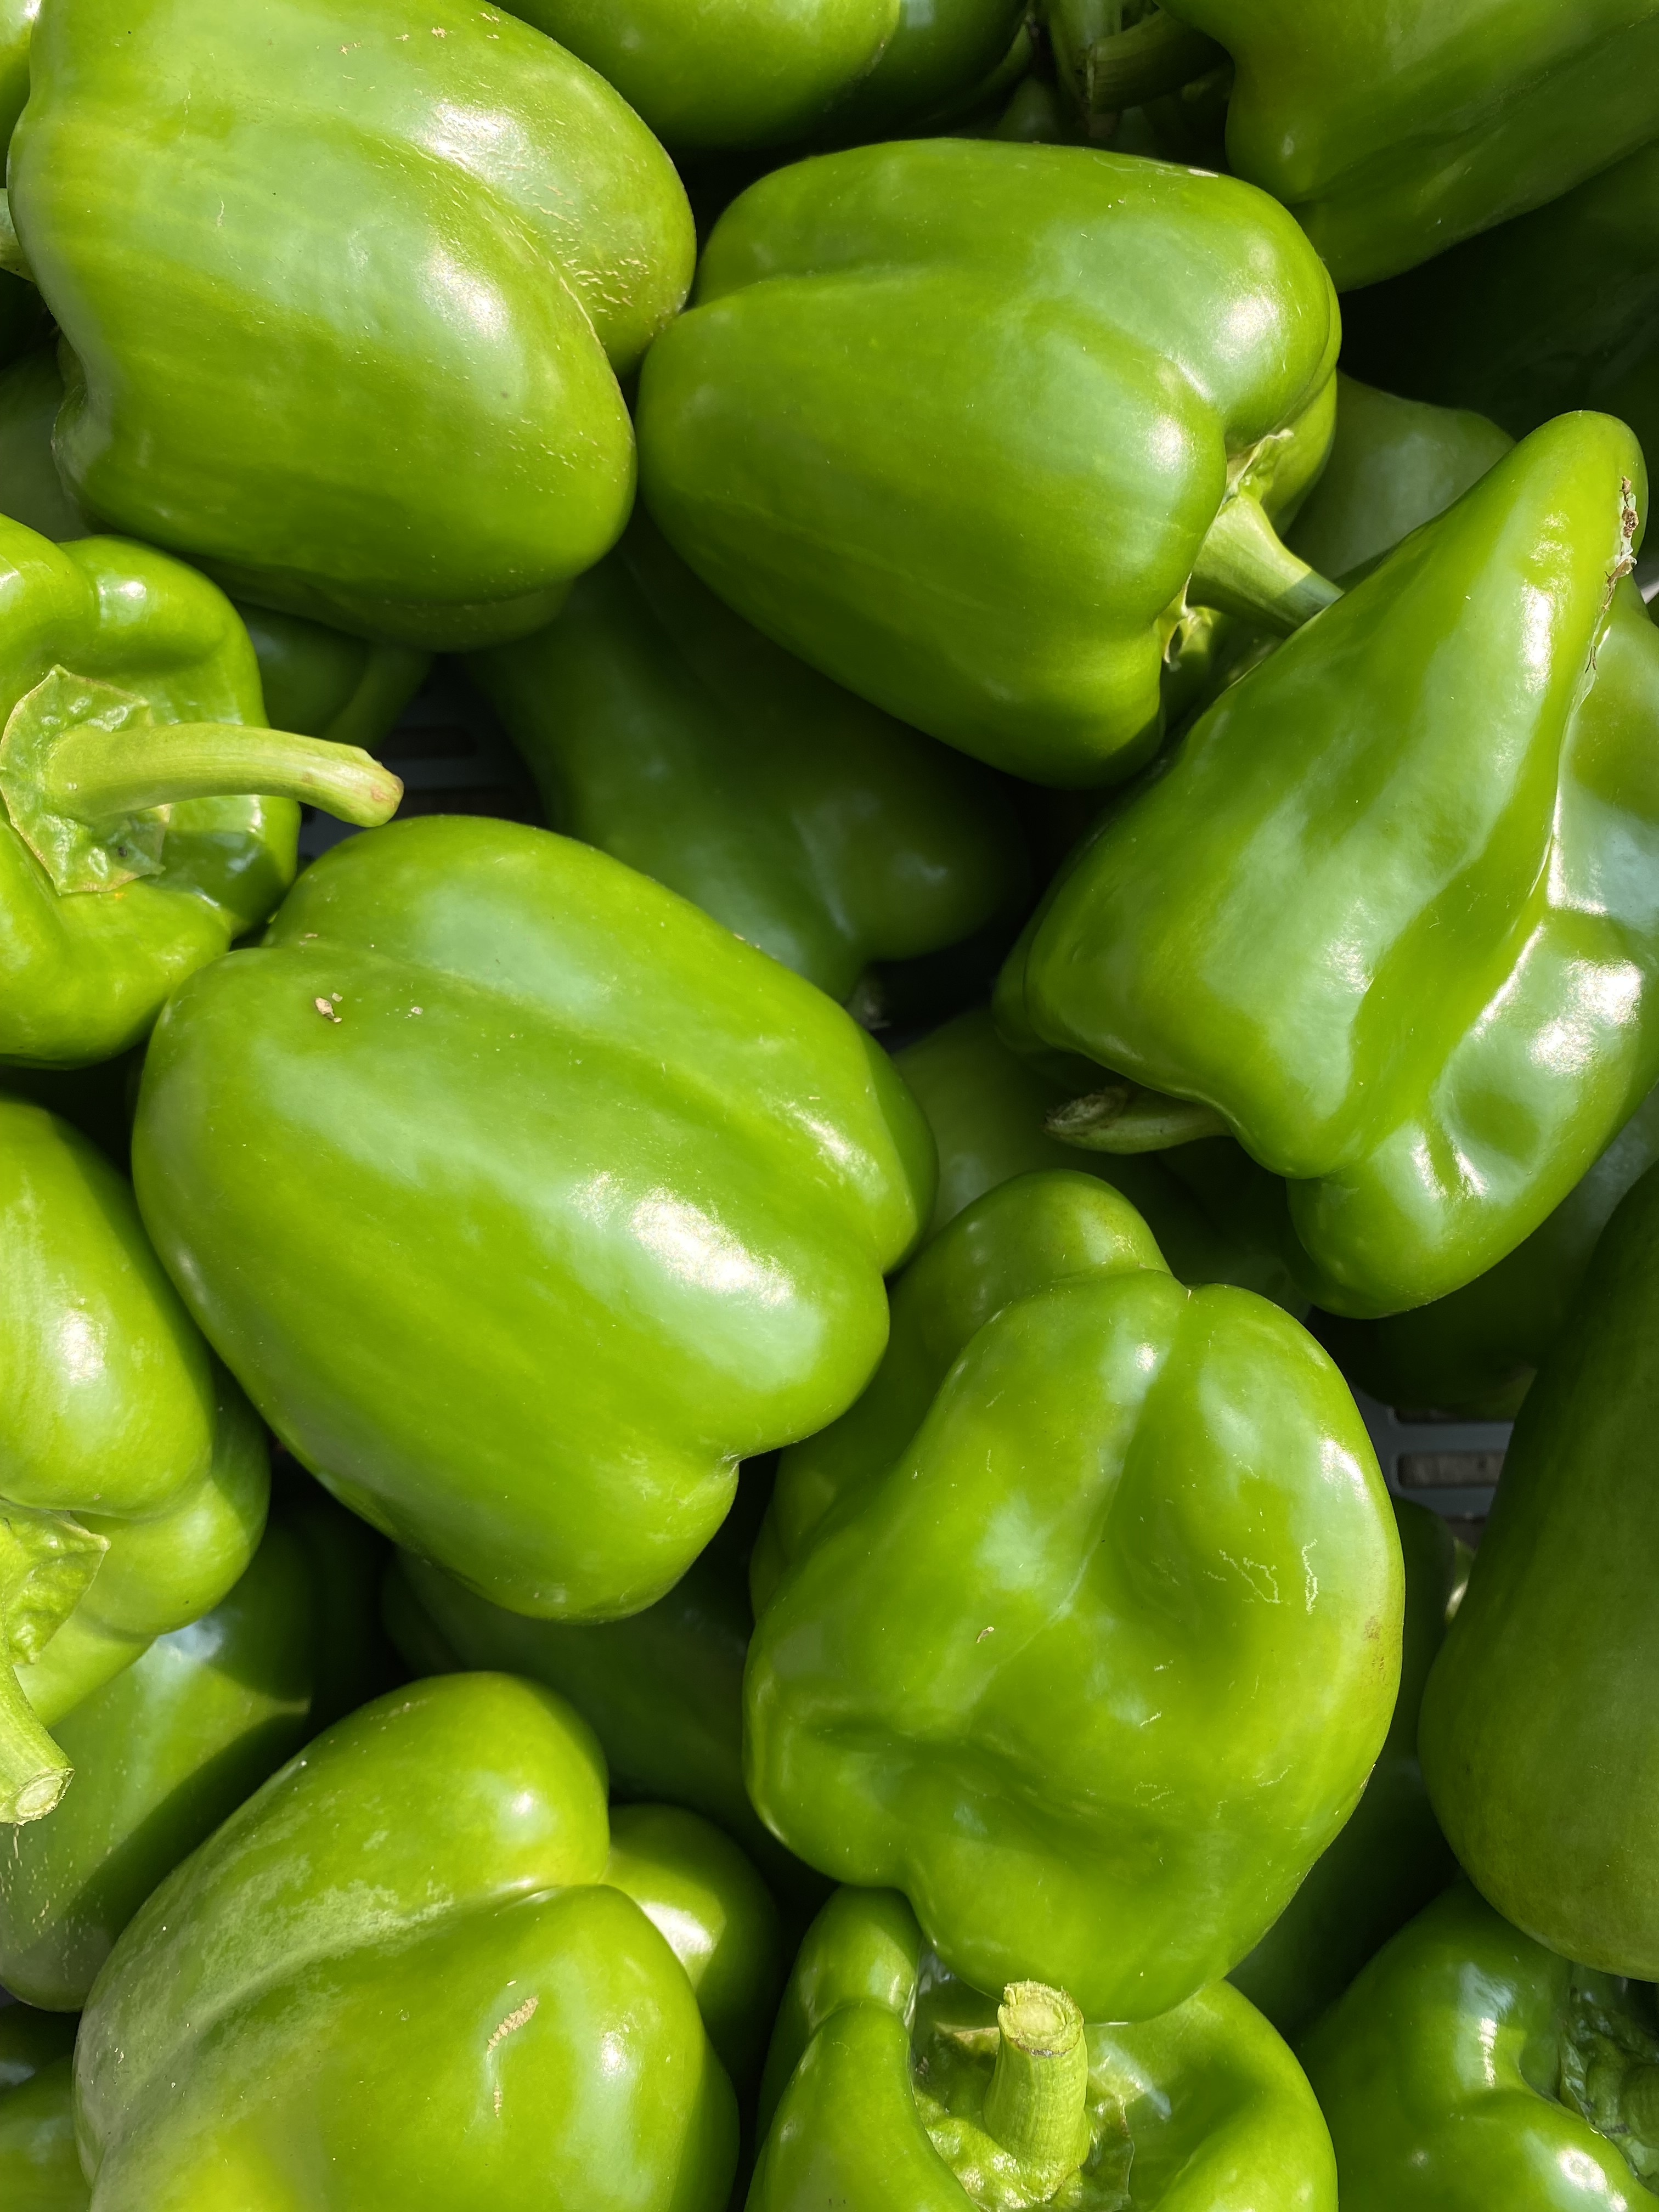
Green Peppers – Refrigerate peppers unwashed in a sealed plastic bag in the crisper drawer for one to two weeks.
Napa Cabbage (Standard Shares Only) – For maximum storage, remove any wilted or browning outside leaves, place in a plastic bag and store in the fridge.
Parsley – Store in the fridge in a small glass with about an inch of water, stem side down (like flowers in a vase) for best storage.
Romaine Lettuce (Large Shares Only) – Store loosely in a plastic bag in the crisper drawer of your fridge. Keep unused leaves on the head. Ideally use within a week, but it will probably store for up to two weeks if needed.
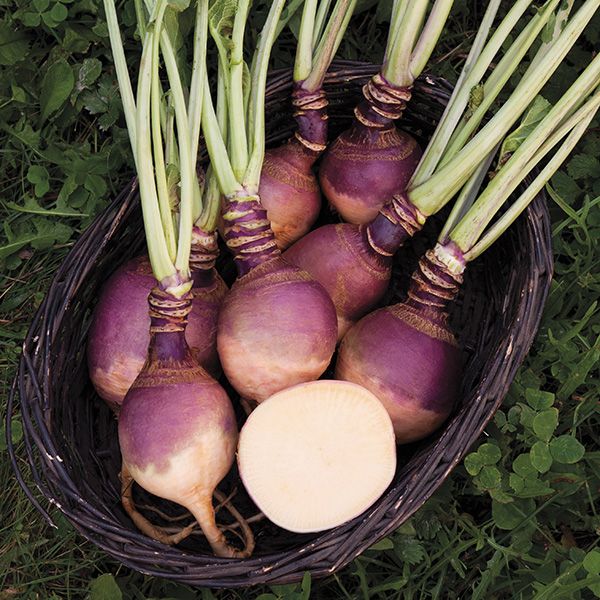
Rutabagas – Rutabagas originated in the 17th century and are a cross between a turnip and a wild cabbage. Because of this, rutabagas have a slightly bitter flavor similar to cabbage, but they are sweeter and milder than turnips when eaten raw. After cooking, they retain their sweetness while also becoming more savory. Store unwashed rutabagas in a plastic bag in the fridge for a month or longer. (Photo: High Mowing Seeds)
Slicer Tomatoes – Store at room temperature for up to a week. Do not refrigerate.
Spinach – Store dry, unwashed spinach in a sealed plastic bag for up to two weeks in the fridge. Right before using, wash the leaves in a basin of lukewarm water and spin dry. Try to use within a week. If the spinach does get limp, you can still use it in cooked dishes.
White Onions – Keep in a dark, dry, well-ventilated place at a cool room temperature.
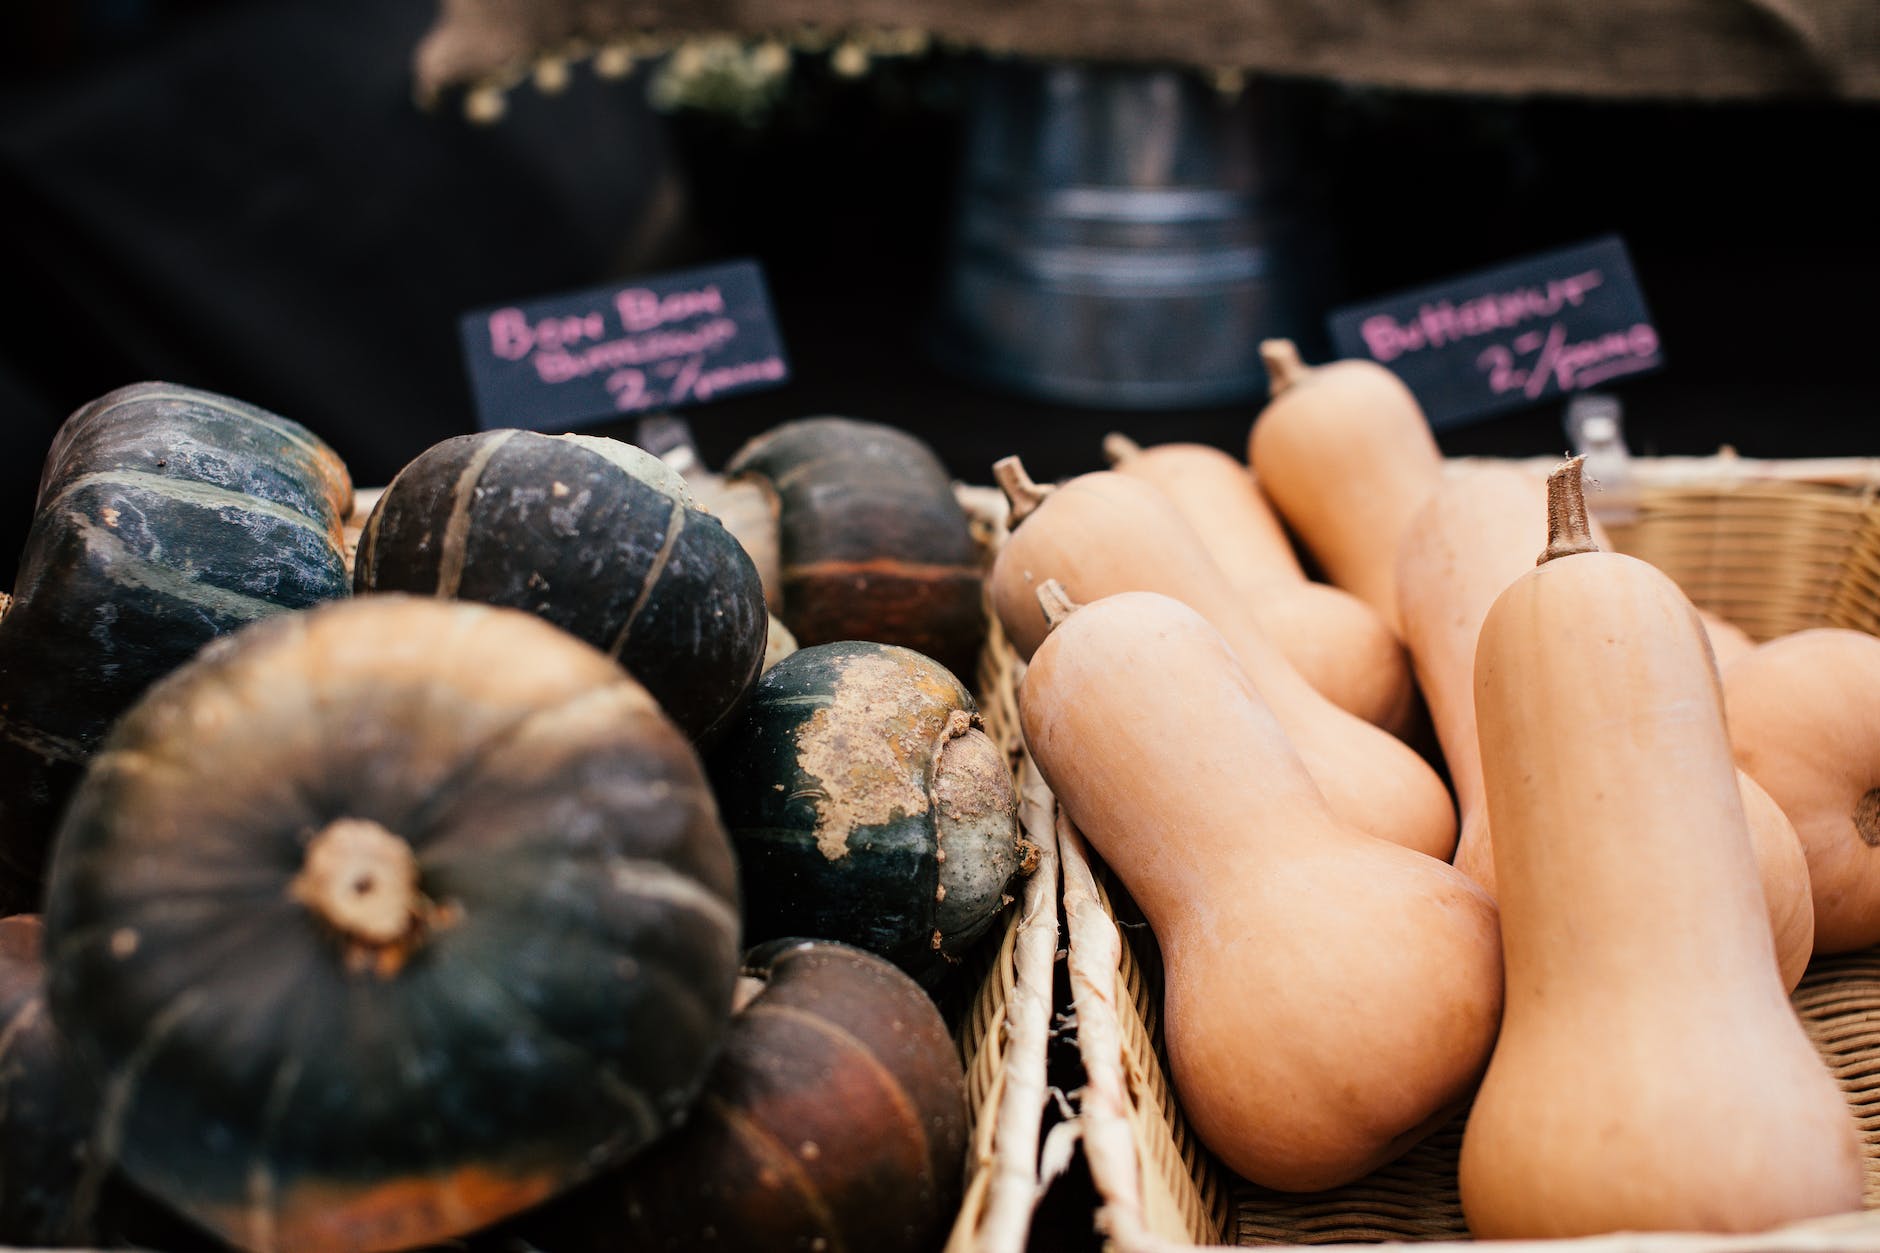
Winter Squash – The frost will kill the vines tomorrow night and then it will be easier to see what’s in there. You’ll either get a potimarron, butternut, or buttercup squash. Store winter squash in a cool, dry place and try to use within a week or two. Do not store in the fridge. This will cause it to spoil much more quickly.
Notes from the Field
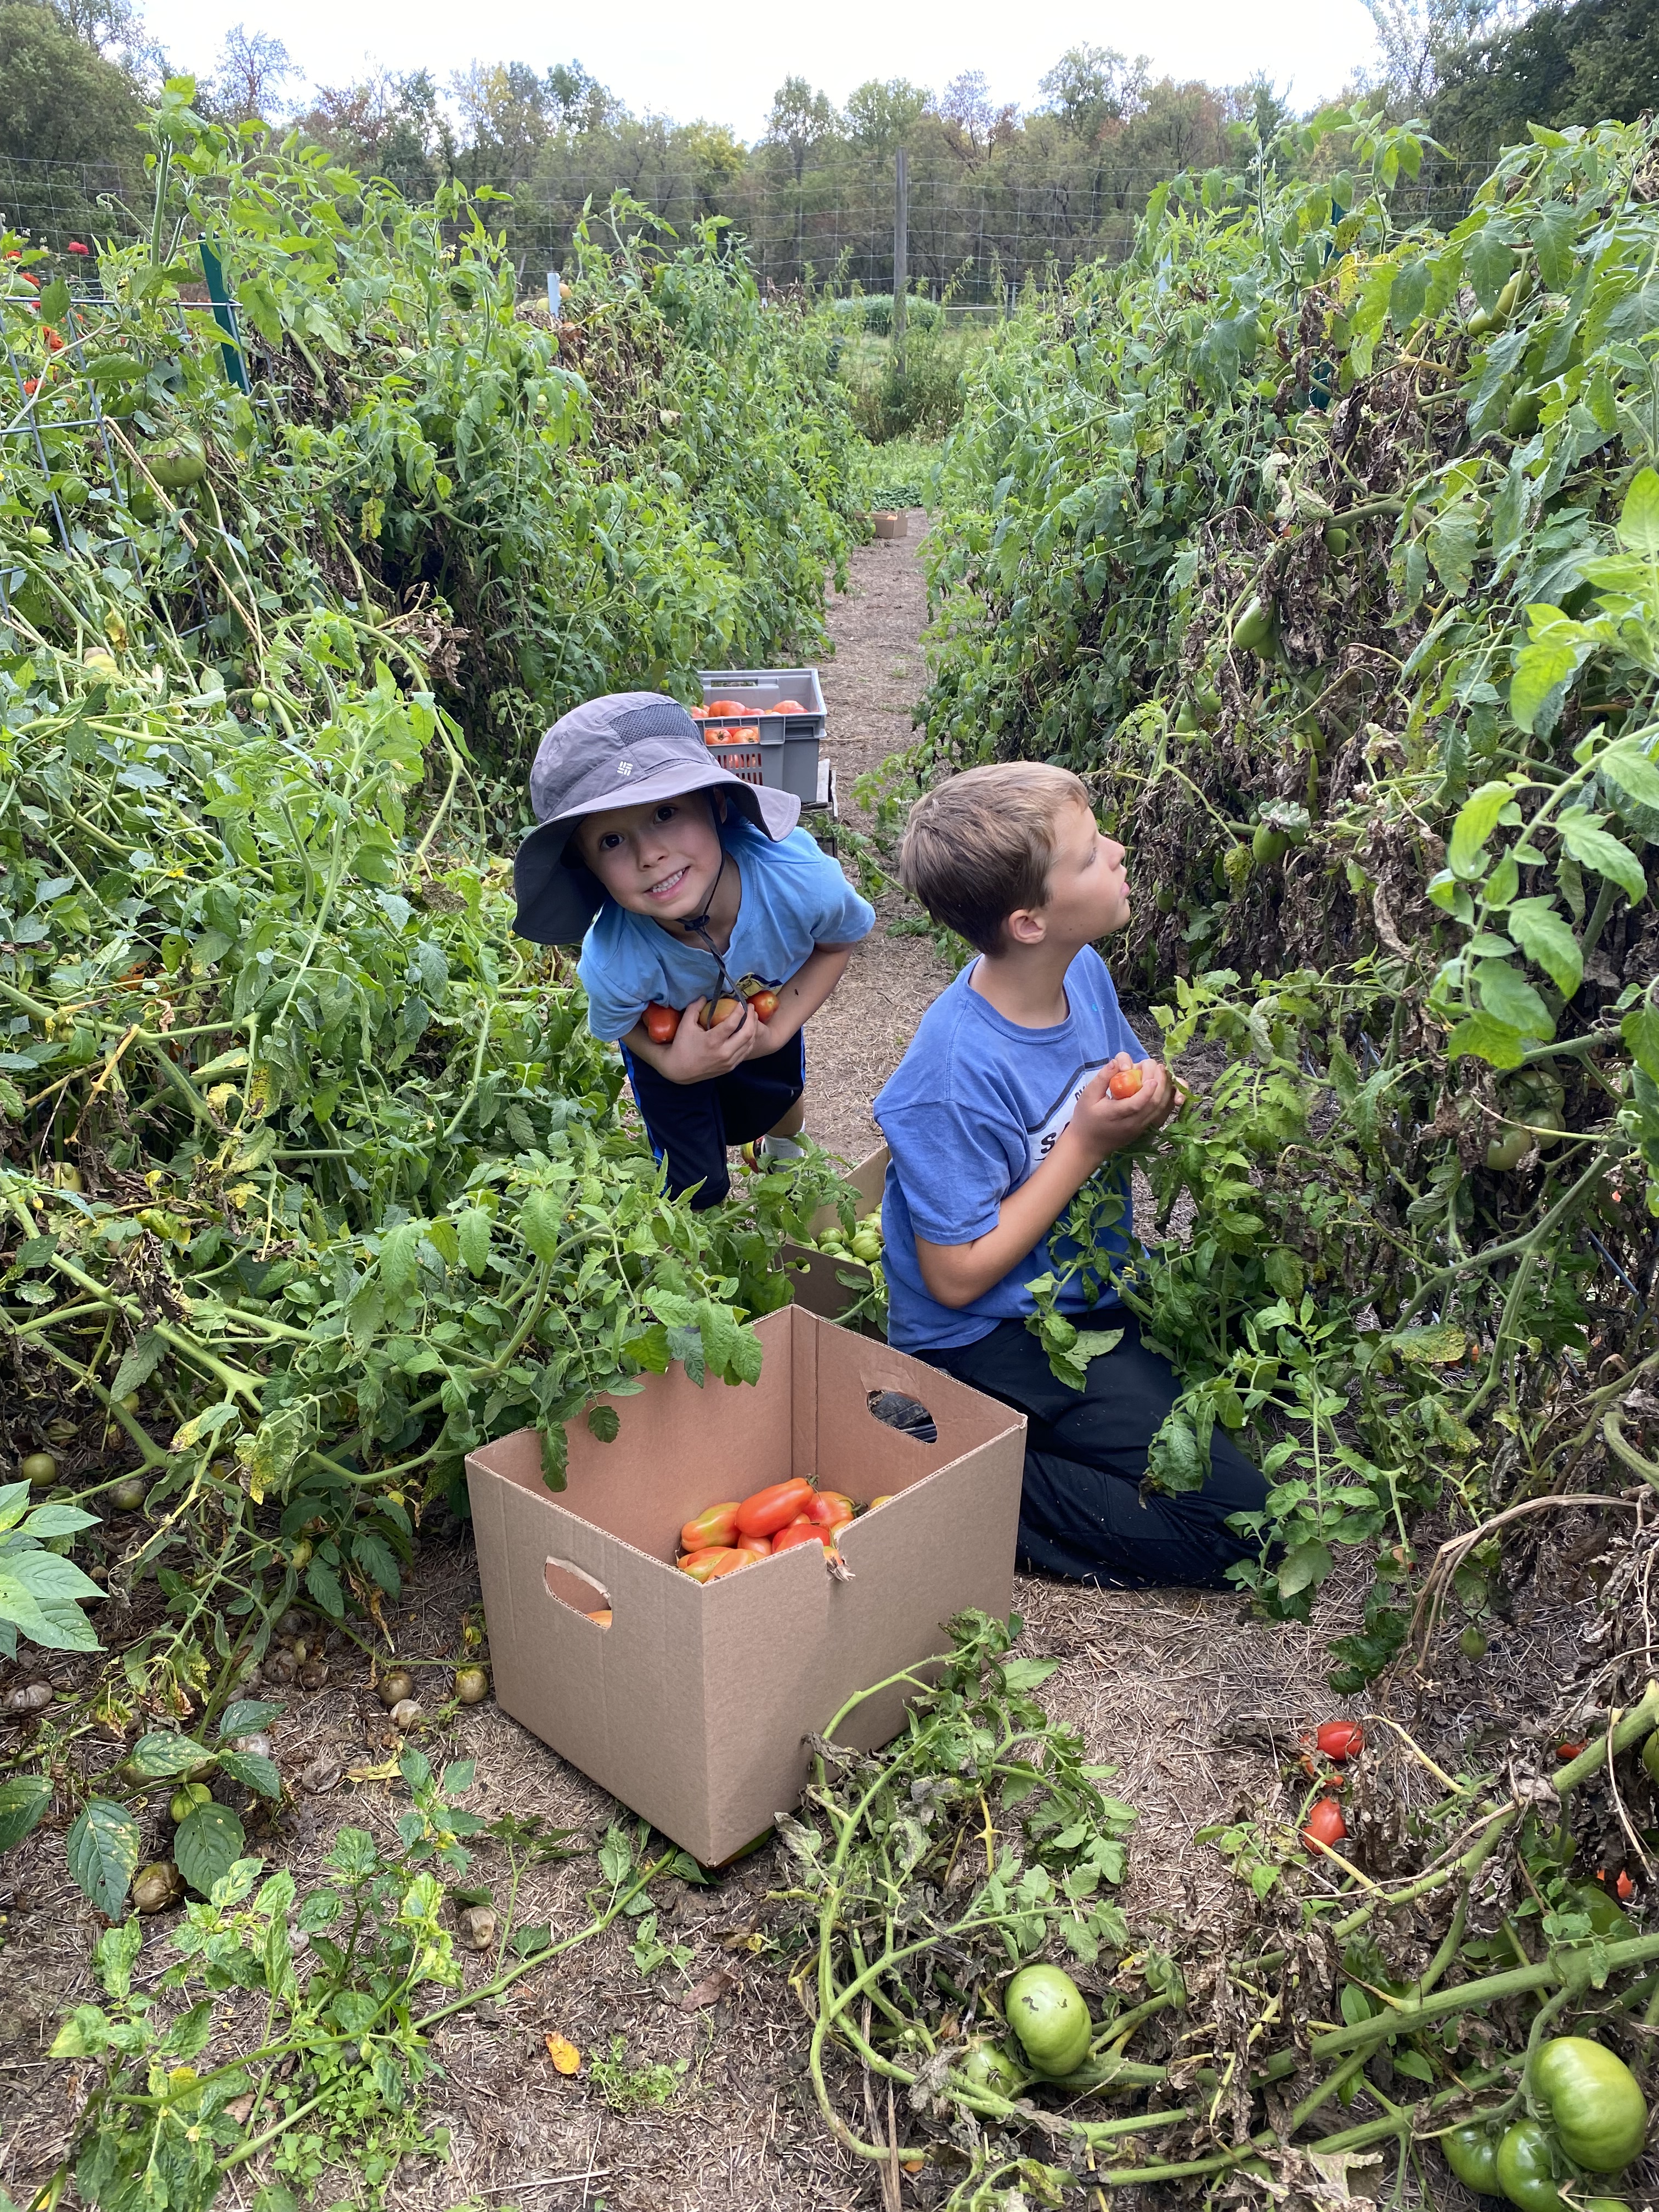
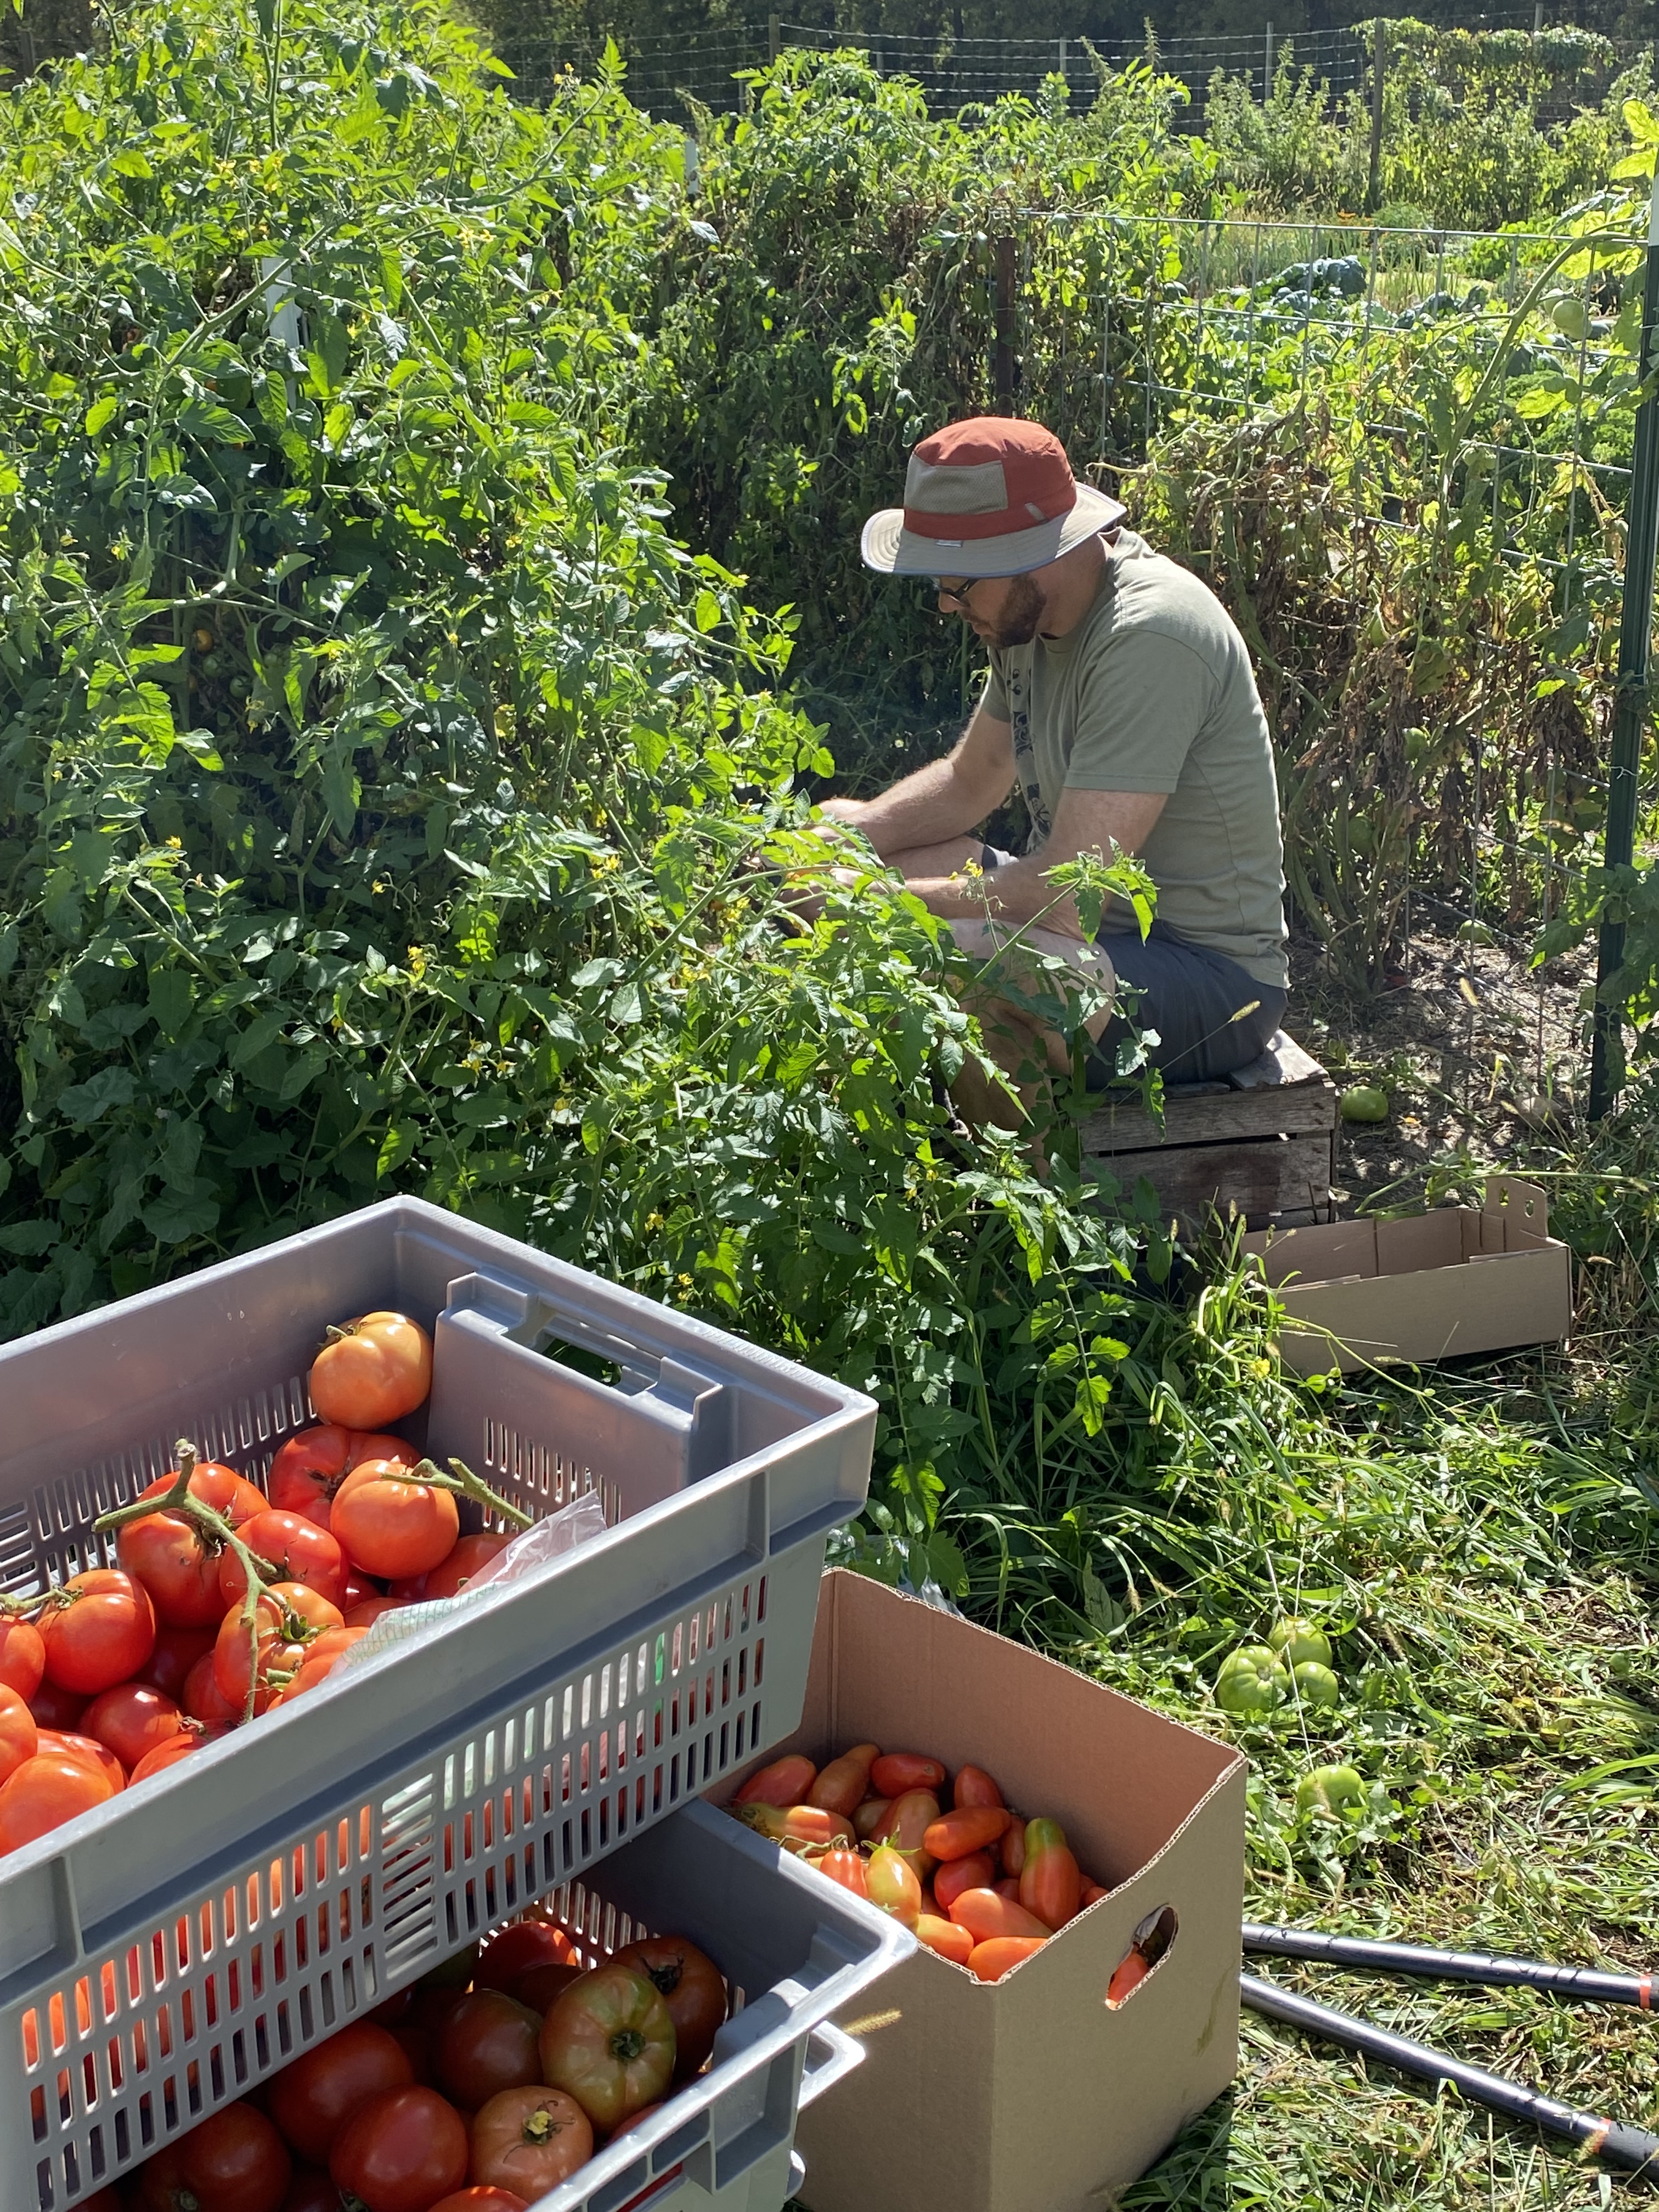
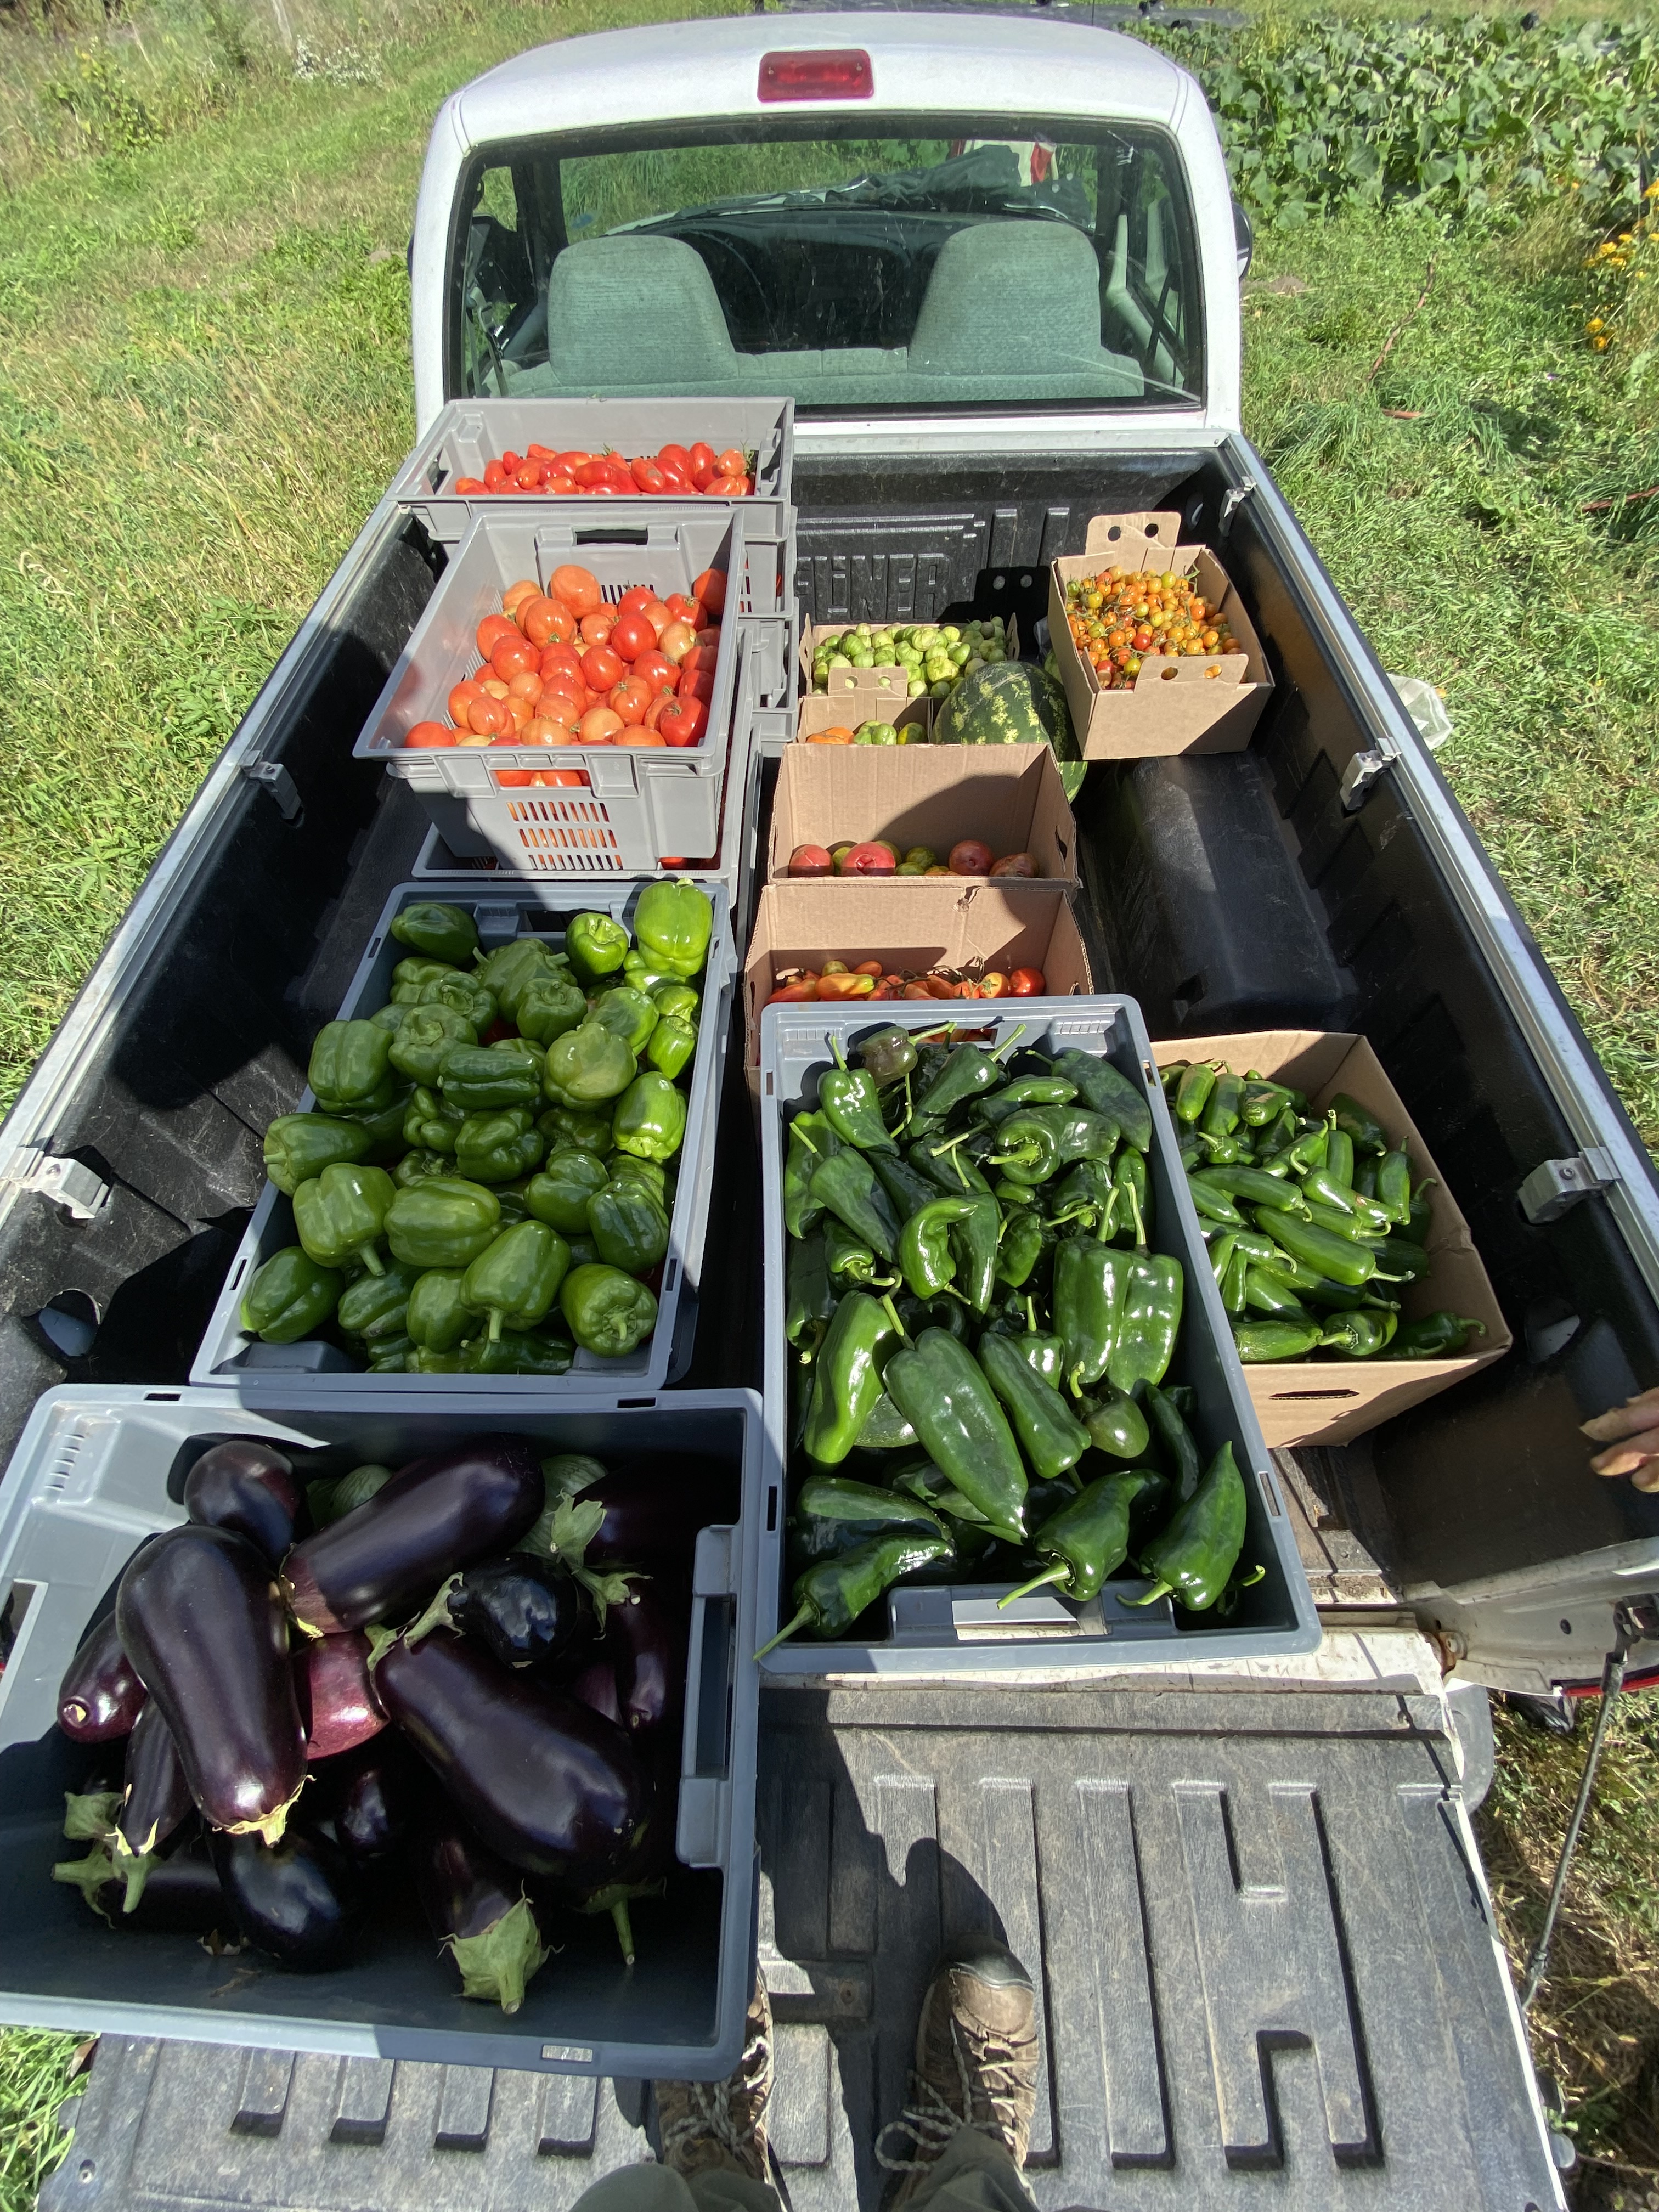
After discovering that frost was coming to the farm tonight, our family quickly mobilized yesterday to complete an epic harvest of all the ripe or ripening tomatoes and all the peppers, eggplants, tomatillos, and beans. Between shouts of “Thank you, tomatoes!” and “Thank you, eggplants!” we had fun racing to see who could harvest the most the fastest and marveling over just how many crates we were filling up. Erik was the most patient of us all, carefully cutting off vines laden with cherry tomatoes so that they could continue to ripen up in the barn without splitting.

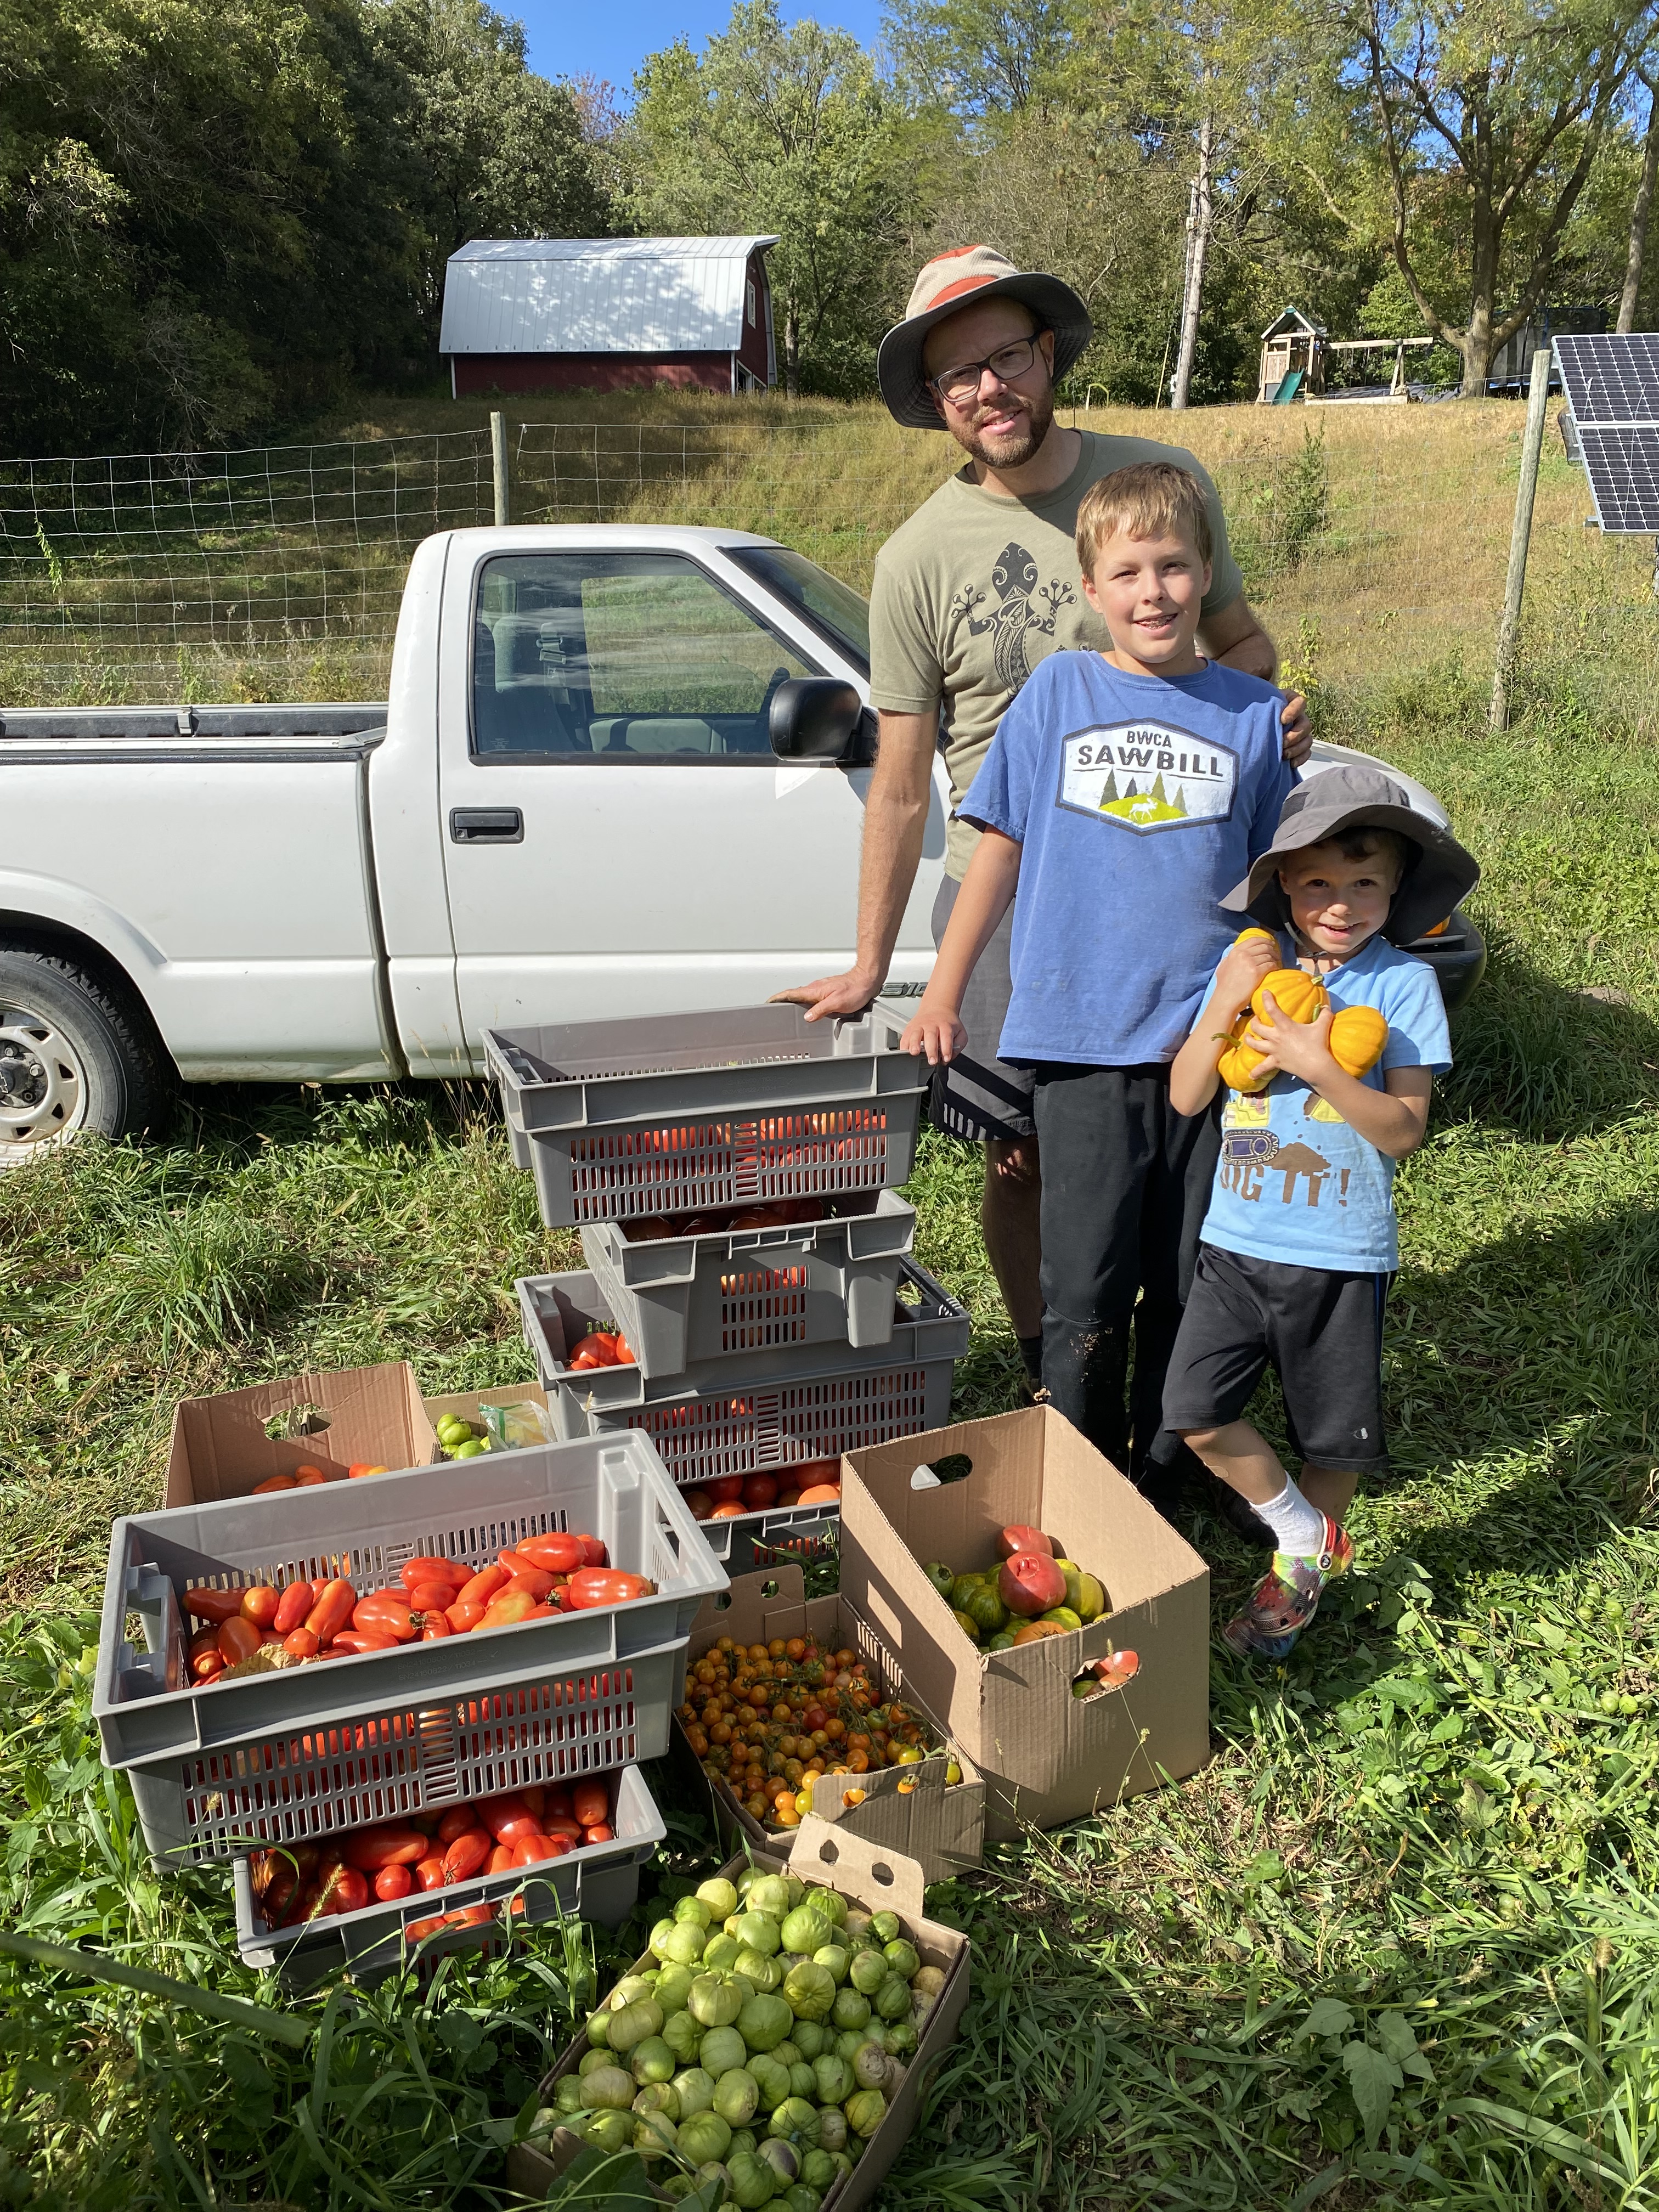
Once we had hauled the many, many pounds of slicing tomatoes out of the field, Erik and I debated about whether or not to include them in your boxes this week. I suggested that you might be tired of tomatoes since you’ve received them every week since the beginning of August, but he thought I should include them again. I mulled it over and counted how many months it will be until we have fresh, field-ripened tomatoes again (ten! Oi!) and decided that he was right. Also, despite the disease pressure in the tomatoes this summer, the slicers and cherries actually did really well and we have a bit of a bumper crop of them. Part of being a member of a CSA is that you share in the risk of farming (no strawberries this year because of flooding), but you also get to share in the bounty when there is one. Thus, you might get more of something than I initially planned for and valued as part of your membership, sort of like a bonus. In this case, it’s a bonus of tomatoes. I hope you will enjoy this last taste of summer!
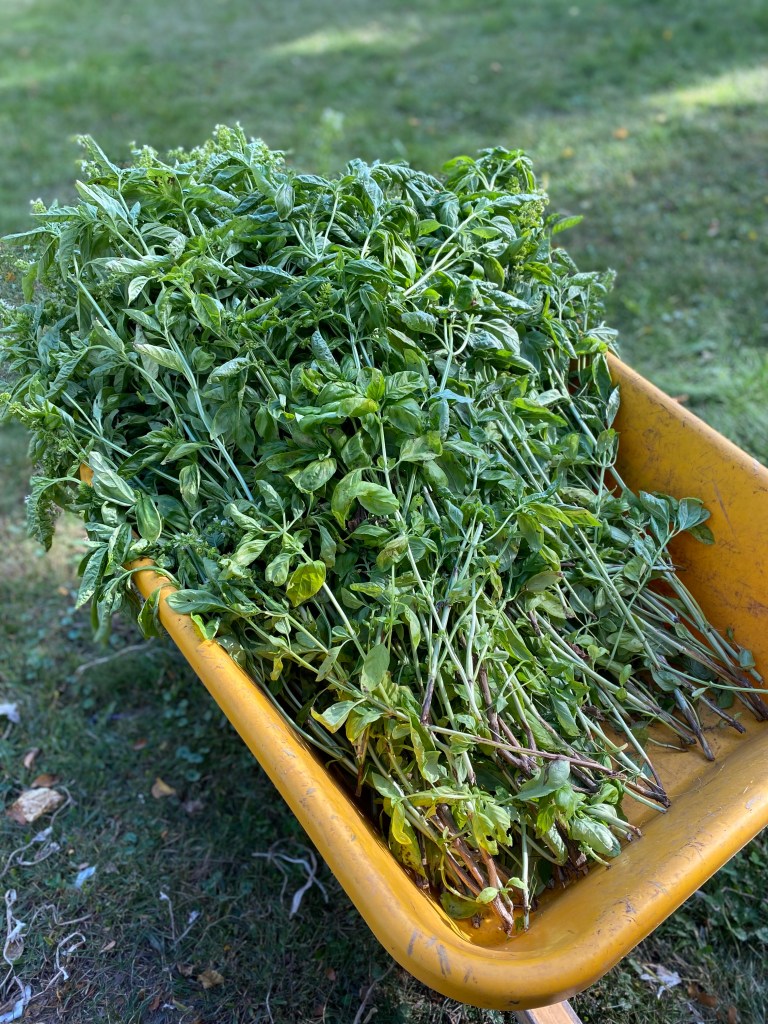
Besides all of the above, we also harvested a wheelbarrow’s worth of basil! We brought it up to the house, and the kids and I sat around on the side porch, listening to music, and pulling leaves off the stems while Erik got the grill going. Later that evening, I took all of the leaves, chopped them up in the food processor with some water, and froze the mixture in ice cube trays. Today I’ll put the frozen basil cubes in a freezer bag. These will be used all winter long in soups and pasta sauces.
The only other task that needed to be accomplished last week was processing the white onions that had been curing in the barn over the last few weeks. Erik’s parents, Lynn and David, stopped by for an overnight visit this past Thursday and were kind enough to help me clean and ready them for storage in the cooler. We had a nice time catching up and enjoying the picture-perfect fall weather. Thanks, Lynn and David!

Recipes
Carrot, Squash, and Rutabaga Soup // Uses Carrots, Onions, Parsley, Rutabagas, Winter Squash // Vegetarian
Fruity Rutabaga // Uses Rutabagas // Vegetarian
Quinoa Vegetable Soup // Uses Carrots, Garlic, White onions, Winter Squash, sub fresh Tomatoes for canned, sub Spinach for kale // Vegetarian
Roasted Butternut Squash Risotto // Uses Butternut Squash (sub any other winter squash), Garlic // Vegetarian
Roasted Roots with Turmeric Tahini Sauce // Uses Carrots, Rutabagas (also Parsnips which should be in your boxes next week if you want to bookmark this recipe for then) // Vegetarian
Rutabaga Fries // Uses Rutabagas // Vegetarian
Week 16: September 19, 2022
Here we are, just three days away from the fall equinox. The leaves on the trees are starting to turn color. The yummy giant puffball mushrooms, which you can eat, are popping up in the woods, and the deer are out in full force. Every critter imaginable seems to be rushing to put on some fat as quickly as possible. Besides the gophers eating what they can, I think there may be a rogue bunny in the field eating all of the carrot tops. And for some reason, the squirrels appear to find the siding on our garage particularly delectable.

It’s hard to blame them… I am also starting to crave warm comfort foods like soup, pie, and bread. September is a great food month when all of the summer crops meet up with the fall crops and cooks can get pretty creative in the kitchen. This may be one reason it is my favorite time of the year! (Giant puffball photo from Eattheplanet.org)
What’s in My Box this Week?
Arugula (Small Shares Only) – Arugula doesn’t last much longer than a couple of days, so try and use it right away. Store it in the fridge in a plastic bag.
Brussels Sprouts (Small Shares who didn’t receive them last week) – Store in a bowl or open container in the fridge. Do not trim or discard outer leaves before storage. Brussels sprouts should last up to a month this way. The outer leaves might get a little shriveled but you typically remove them anyway.
Cherry Tomatoes – This week’s cherry tomatoes will be a mix of orange Sungolds and red Peacevines. Cherry tomatoes can over-ripen pretty quickly, so it can be a good idea to store them in the fridge if you’re not going to eat them right away.
Chives – Store in a small jar with about an inch of water in the fridge. Make sure to put the stem side in the water, not the tender leaf tops. You can also keep them in the fridge in a plastic bag.
Garlic – Keep in a dark, dry, well-ventilated place at a cool room temperature. It can keep for several months if stored appropriately. Warm temperatures will encourage the cured garlic to sprout which will reduce the quality of it.
Mizuna (Large Shares Only) – To store, keep dry, unwashed greens in a plastic bag in the fridge for up to a week. Wash right before using.
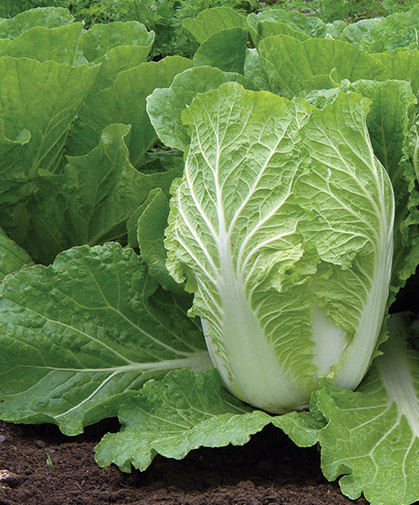
Napa Cabbage (Large Shares and MAYBE Some Small Shares) – Napa cabbage is a member of the brassica family (along with broccoli, cauliflower, turnips, Brussels sprouts, etc.) that grows best in cool weather. It has an oblong shape and leaves that are more tender than those of regular cabbage. The taste is a little sweeter and milder than regular cabbage while the texture is a bit softer, and while it is easier to cook down than regular cabbage, it’s also delicious raw. (Photo from Johnny’s Selected Seeds)
For maximum storage, remove any wilted or browning outside leaves, place in a plastic bag and store in the fridge.
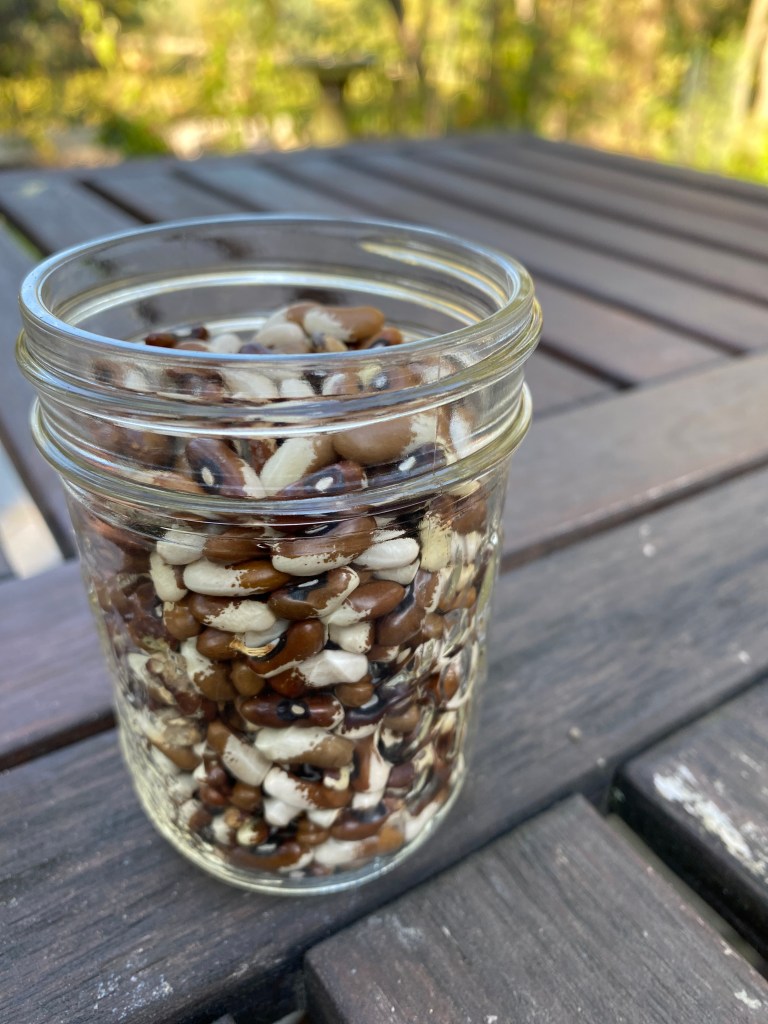
Painted Pony Dry Beans – Remember those fresh green beans you received earlier in the season? I let some of them continue growing and they have dried and can now be used as delicious soup beans. I figured with the colder weather coming, some of you might want to make some hearty soups. Just substitute these for pretty much any other kind of bean in your favorite recipe.
Potimarron Squash (Large Shares Only) – Store winter squash in a cool, dry place and try to use within a week or two. Do not store in the fridge. This will cause it to spoil much more quickly.
Red Maria Potatoes – Red Maria is a late-season potato with extra-sweet moist flesh that is perfect for boiling, mashing, roasting, or being made into potato salad. It retains its moisture when baked and stores well for many weeks. The potatoes you’re getting this week are freshly harvested. Their skin is really delicate; thus, I’m not going to wash them before giving them to you.
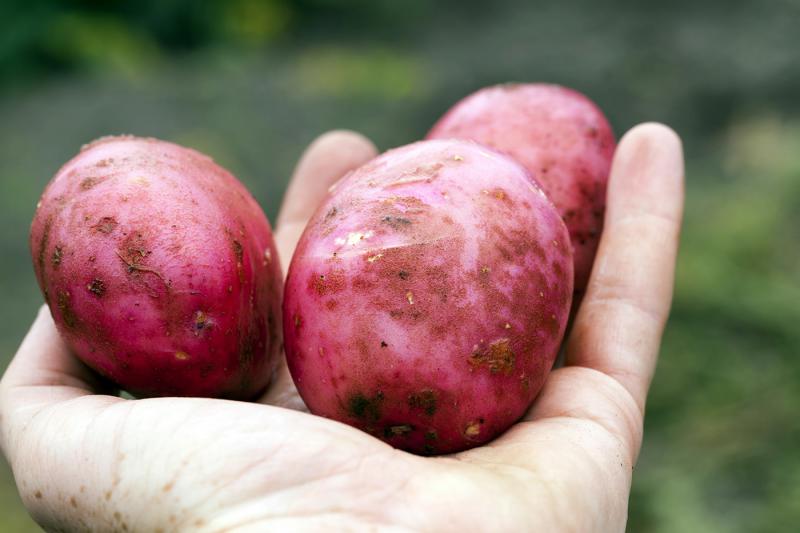
Keep unwashed potatoes in a cool, dark, dry place, such as a loosely closed paper bag in a cupboard. They will keep for two weeks at room temperature. Light turns them green, and proximity to onions causes them to sprout. Don’t put them in the refrigerator, as low temperatures convert the starch to sugars. (Photo: RSOOL / ADOBE STOCK PHOTO)
Red and/or Green Sweet Peppers – Refrigerate peppers unwashed in a sealed plastic bag in the crisper drawer for one to two weeks.
Scallions – Store in the veggie drawer of your refrigerator and try to use within a week. If you use these after a week, you can peel off any dry and/or “slimy” outer layers of the onion.
Slicer Tomatoes – Store at room temperature for up to a week. Do not refrigerate.
Watermelon (Small Shares Only) – I’m not sure that these will be as red or as sweet as those earlier in the season because watermelon thrive best in heat, but they appear to be ready for harvest, so let’s give it a try. To store, refrigerate right away as watermelons don’t continue to ripen once picked. Cut melon should be covered in plastic wrap, and chunks or slices should be kept in an airtight container. Eat melons within a week.
Notes from the Field
Whenever I’ve talked to friends and family lately, they’ve said something along the lines of: “So, the farm must be done for the year, right?” Little do they know! While things are definitely slowing down (as I’ve wrote in recent newsletters), I could keep the farm up and running well into the beginning of November and, if I really wanted to push it, December. I have cleaned up leeks with snow falling around me and I have harvested spinach at Christmastime before. I don’t think that will be the case this year, but there is still work to be done for another month or two, even after the CSA season concludes.
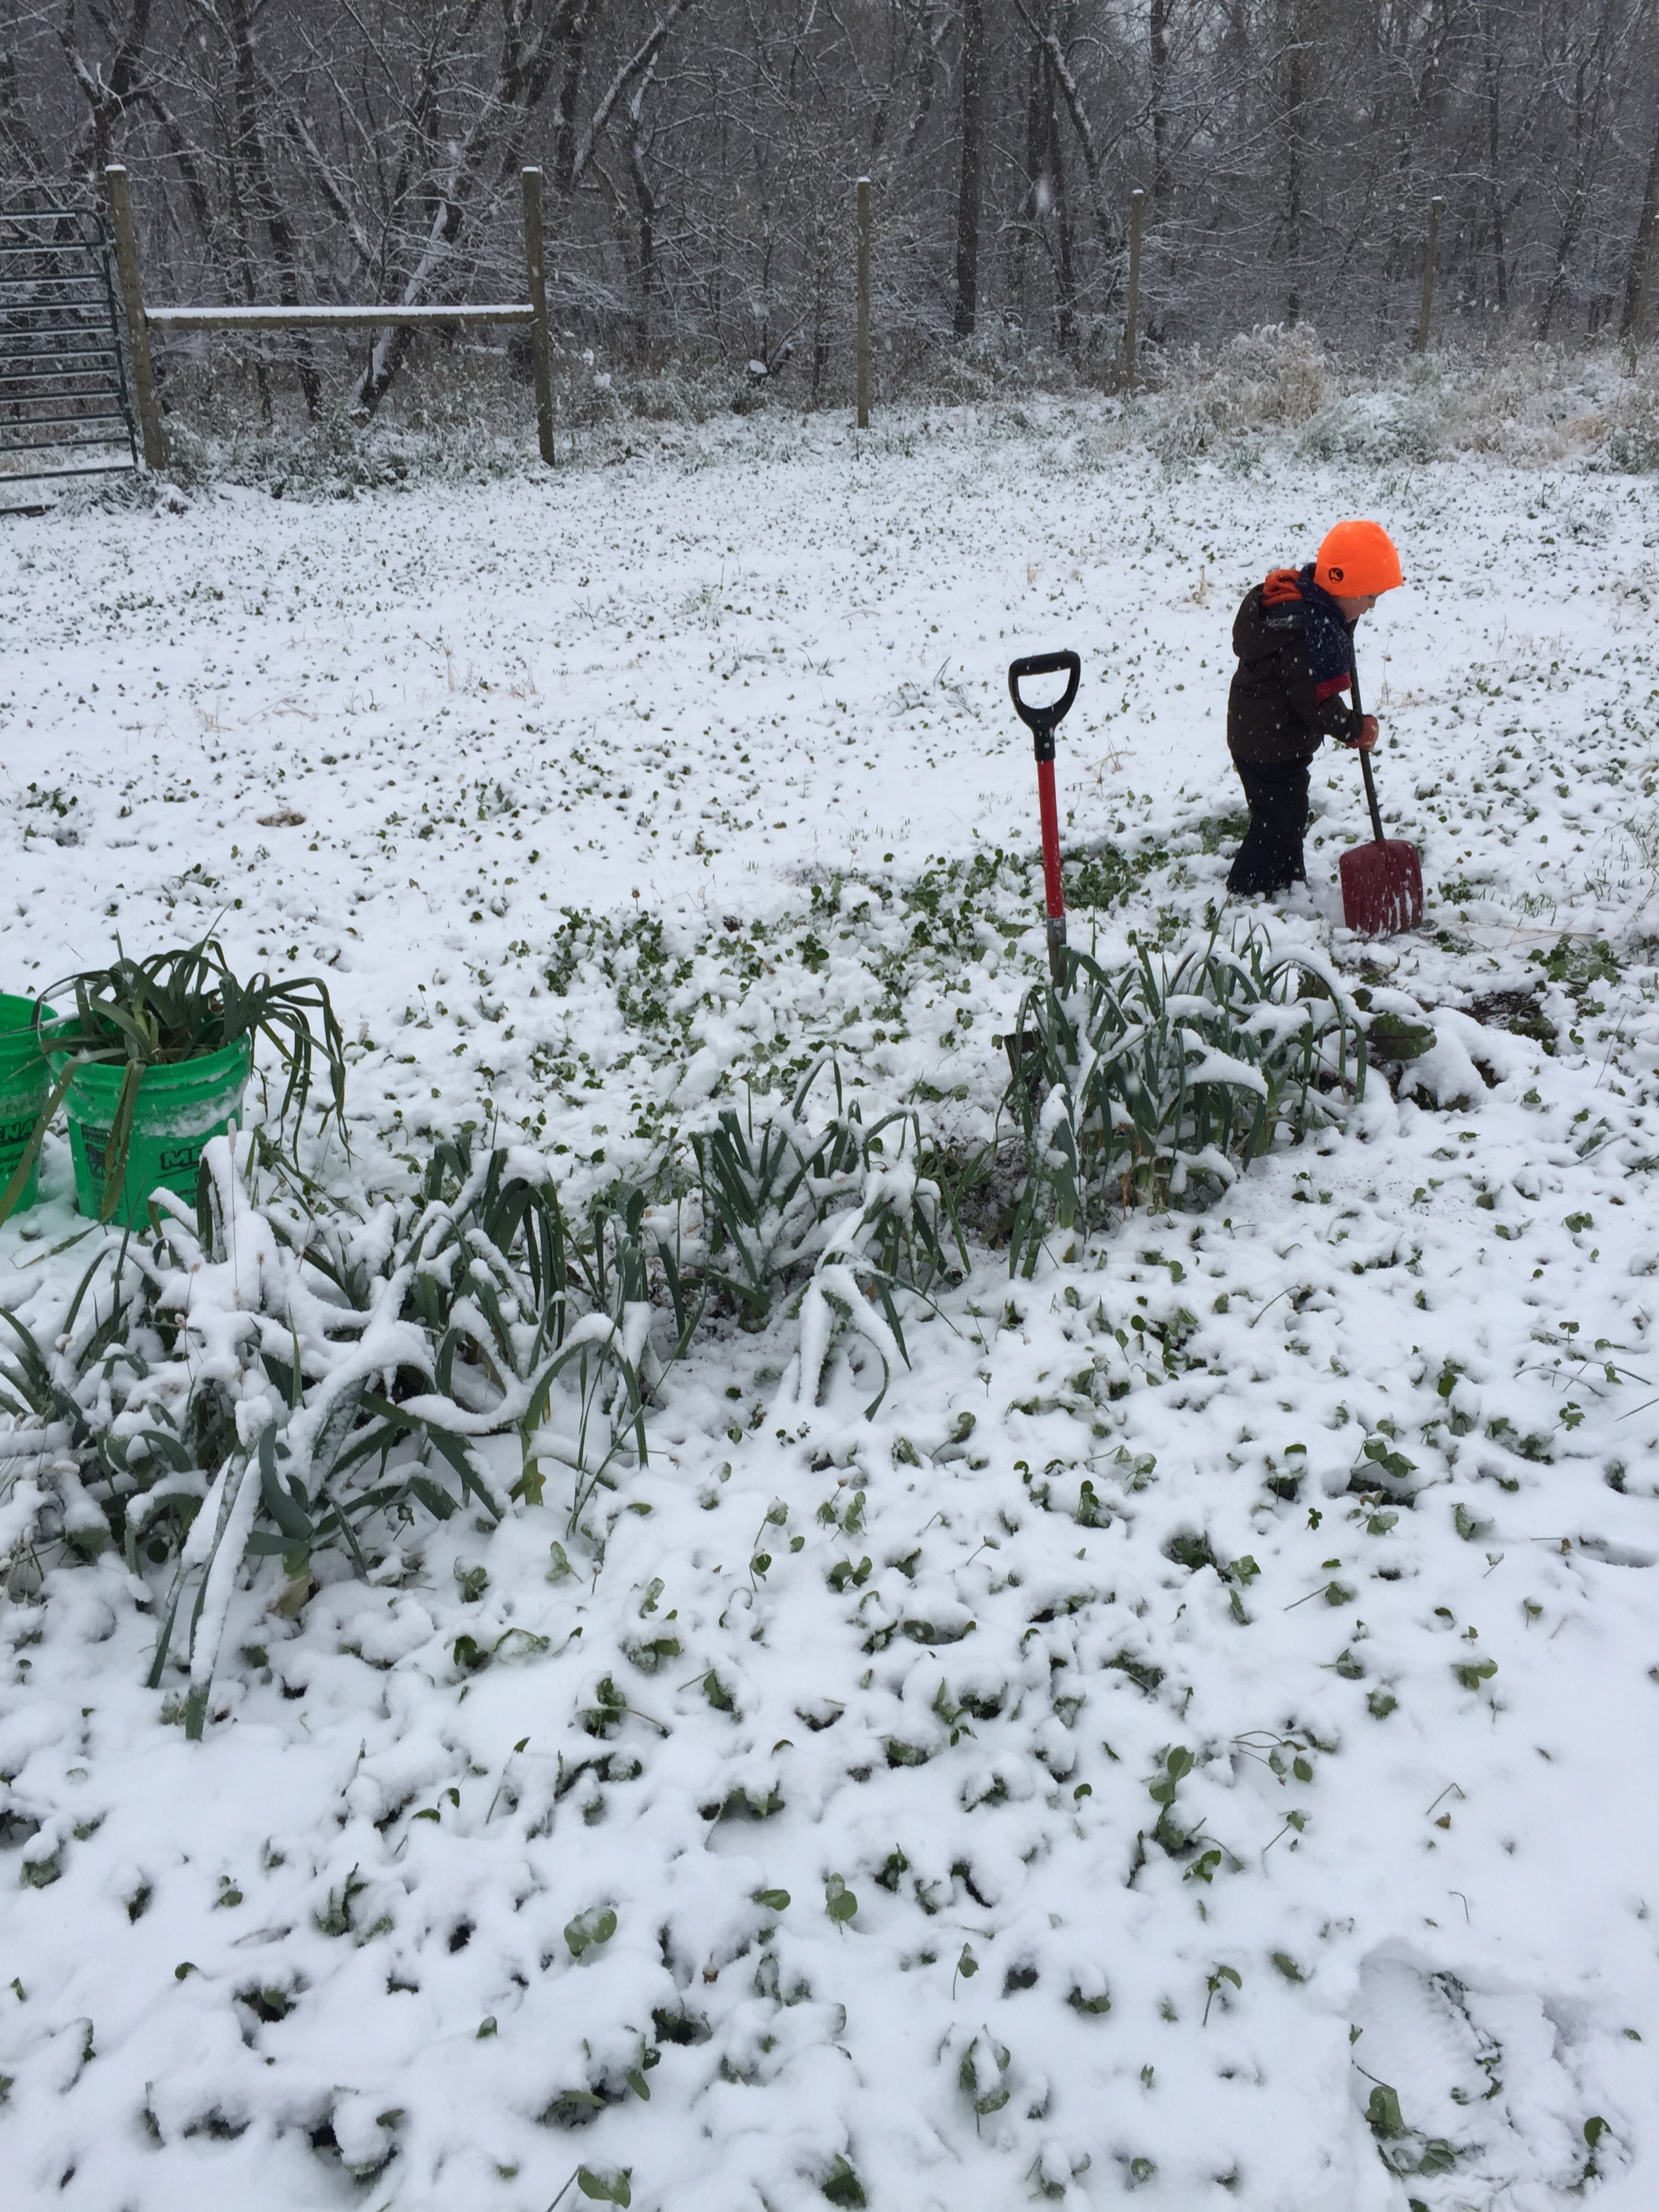

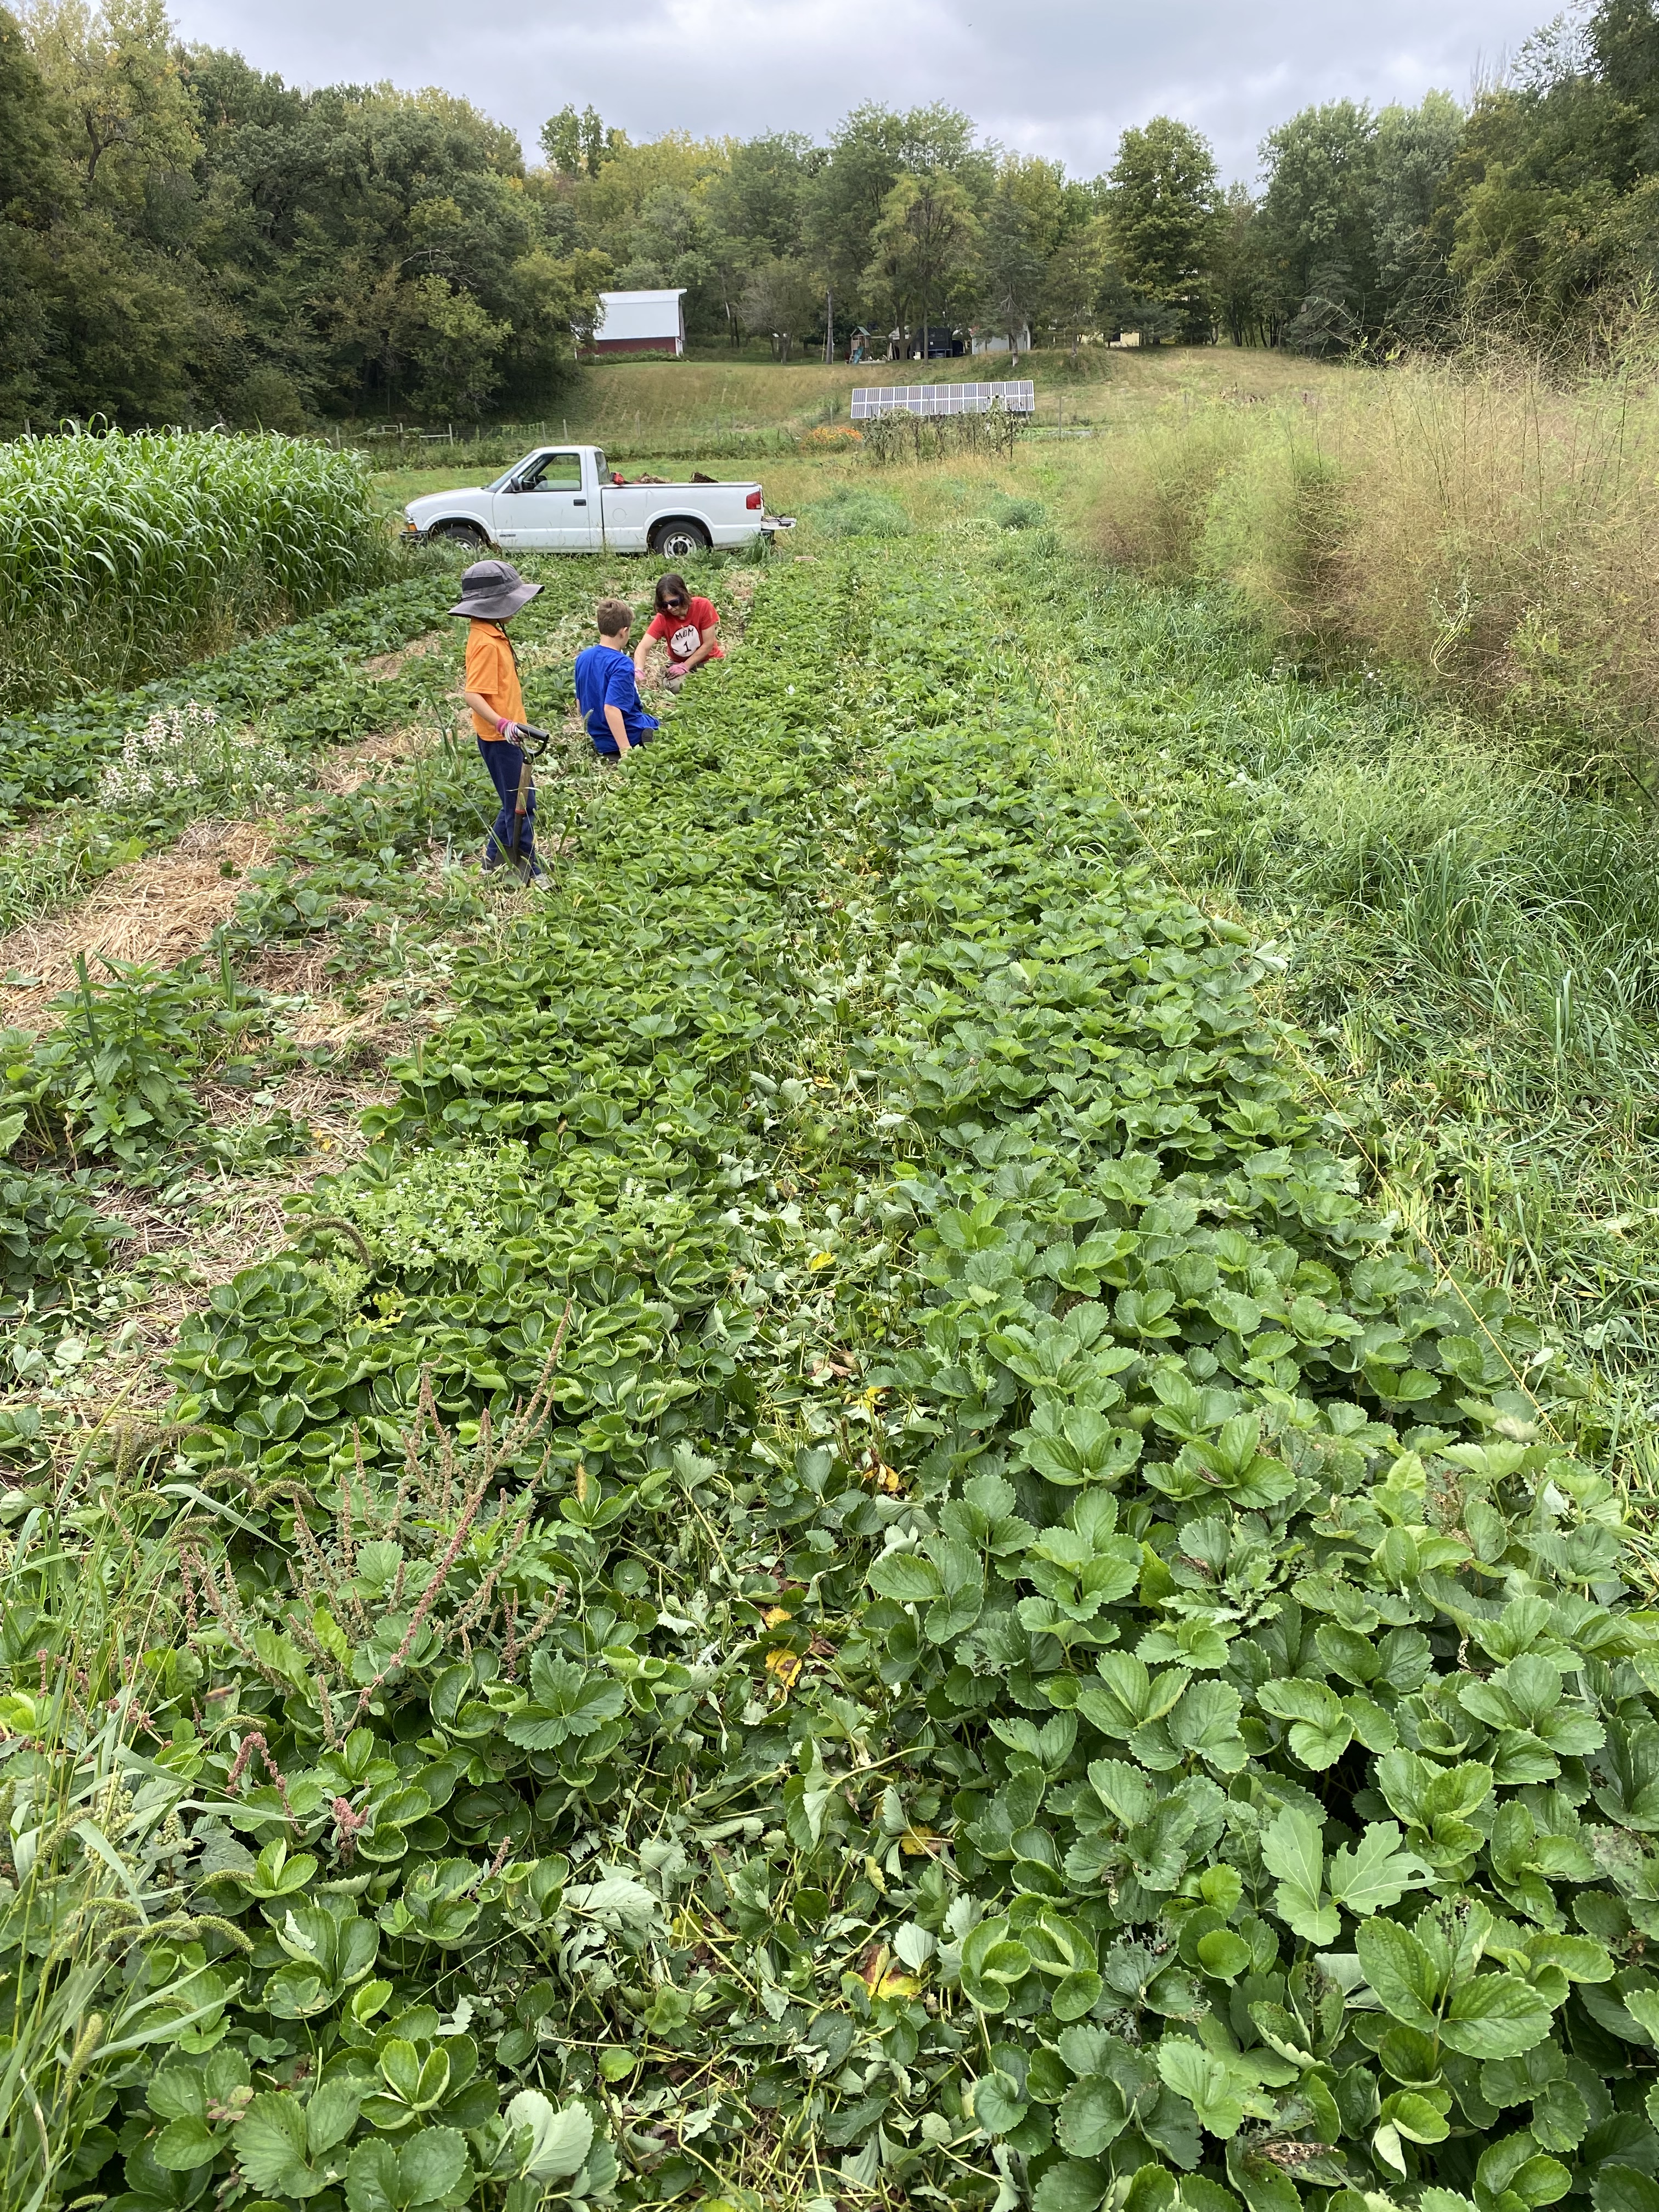
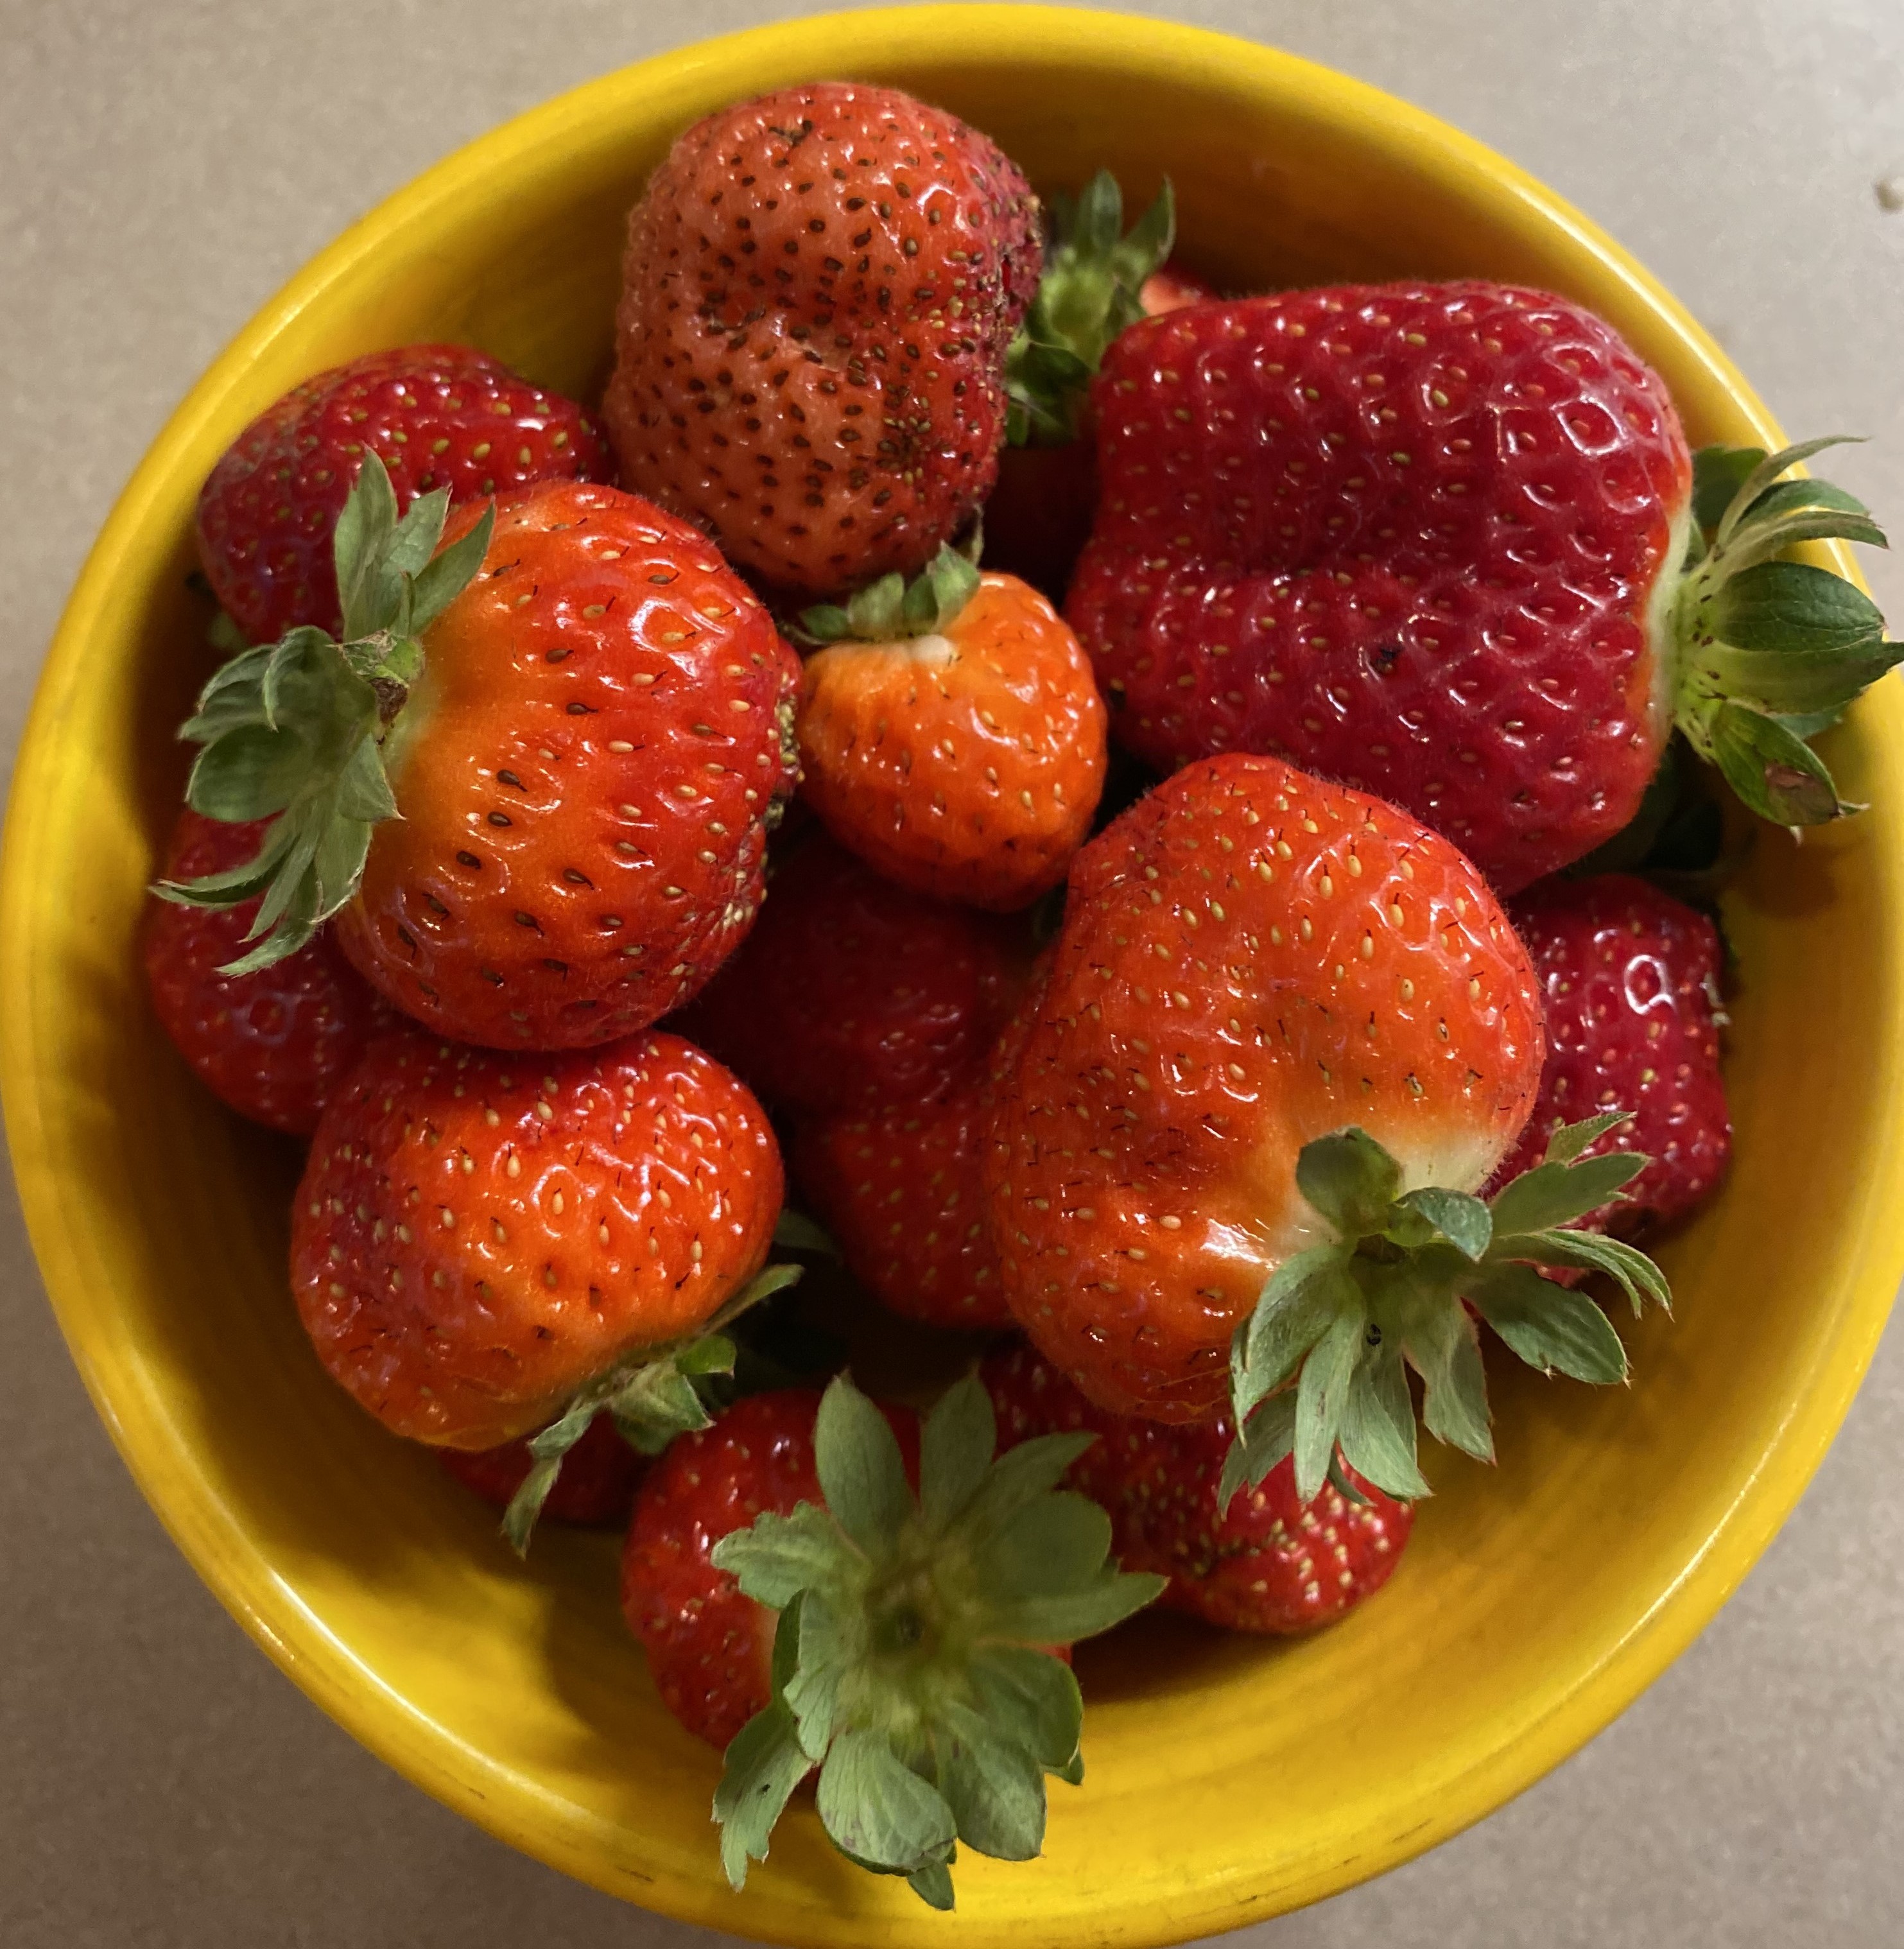
We accomplished one of our fall tasks yesterday when the whole family pitched in to clean up the strawberry patch one last time before winter. The runners had taken over all of the paths, so we had to cut them out in order to re-establish and narrow the rows. Skinny rows allow better sunlight penetration into the crop canopy, better disease control due to improved air circulation, and better fruit quality. Also, yield is higher on row edges. It’s a little annoying to spend so much time on the strawberries when we really didn’t get to harvest any this year, but farming is about optimism as much as it is about anything else. The thought that we might have a bumper crop next year motivates us to keep it up. And, while the everbearing varieties haven’t produced what I hoped they would this fall (I wanted to grow enough for the CSA), we still got this small bowlful to snack on which is something quite special in September!
Other than that, I pulled out the turnips, seeded some more sorghum sudangrass, and pulled many of the hoses out of the field for the season. I did have to water again, for the second week in a row. I am hoping for some decent rain this week. We could use it.

Finally, I did a bunch of harvesting and sold and donated several boxes of produce to the St. Charles Area Community Foundation for their annual Farm-to-Table fundraising dinner that was held this past Saturday. This event features food grown and raised by area farmers with proceeds benefiting many different groups and activities in the St. Charles area. This is our second year helping out and the menu looked amazing. We hope they had great success!
Recipes
17 Crispy, Crunchy Napa Cabbage Recipes
Cabbage and Snow Pea Rice Bowl with Warm Coconut Peanut Sauce // Uses Napa Cabbage, Scallions
Adapted from Bon Appetit magazine by The Leek & The Carrot
Takes 1 hour
Serves 8 to 12 (even more if eaten as a side dish only)
4-1/2 cups water
2 cups brown rice
1 teaspoon Kosher salt
1 head cabbage, cleaned and thinly sliced (I slice the white stem and green leafy portion together)
1/2 pound snow peas, ends removed and sliced
1 bunch radish, greens removed, cut in half and thinly sliced
1 bunch scallions, sliced (you can use all of the scallion, whites, pale green and dark green portions)
Warm Peanut Sauce:
1/2 cup creamy peanut butter
3/4 cup coconut milk
2 tablespoons brown sugar
2 tablespoon soy sauce or tamari
Juice from 1 lime (or 2 tablespoons lime juice)
1 tablespoon fish sauce
1/2 teaspoon red pepper flakes
Kosher salt
- Bring water to a boil in a large saucepan on the stove top over high heat. Once boiling, add rice and salt and reduce heat to low. Cover and cook for 50 minutes (or less, depending on your type of rice; read the package directions).
- While the rice cooks, prepare your veggies. In a (seriously really) large bowl, toss napa cabbage, snow peas, radishes, and scallions together.
- When the rice has about 10 minutes left to cook, begin the sauce. Combine peanut butter, coconut milk, brown sugar, soy sauce or tamari, lime juice, fish sauce and red pepper flakes in a large saucepan. Whisk together until smooth. Place on stove and turn heat to medium. Whisk until smooth and hot. If it seems too thick, add a bit of water and whisk it in. You will want the dressing to be warm to wilt the greens.
- Serve in a bowl with the ratio of about a 1/2 cup of rice to 2 cups of veggies. Pour about 1/4 cup of peanut sauce over the greens and toss gently to coat.
Easy Curried Red Potatoes // Uses Parsley, Red Potatoes, Scallions (Called Spring Onions in recipe) // Vegetarian
Grilled Napa Cabbage Wedges with Carrot-Ginger Dressing // Uses Carrots (if you have some leftover from last week), Napa Cabbage, Scallions // Vegetarian
Kimchi // Uses Carrots (if you have some leftover from last week), Napa Cabbage // Vegetarian
Painted Pony Bean Soup // Uses Carrots (if you have some leftover from last week), Garlic, Painted Pony Beans, Peppers
Roasted Red Potatoes // Uses Parsley, Red Maria Potatoes, Red Peppers, Scallions // Vegetarian
Week 15: September 12, 2022
We have arrived at our last month of CSA and things are slowly starting to wind down on the farm. I have to wait longer and longer to get out into the field each day as the plants stay wet well into the morning and there just isn’t as much to do. No weeds are growing anymore. The grass hardly needs mowing. Now it is more of a waiting game to see when the fall crops will be ready for harvest. This year is the first year I’ve had to figure out fall succession plantings and how to seed crops well into the summer to ensure the availability of a wide variety of veggies in October. It has been a steep learning curve determining when to seed based on cooler temperatures and decreasing daylight hours. The jury is still out on how well I did, but I am taking copious notes to help guide me next year, and I will ask for your input again at the end of the season.
What’s in My Box this Week?
Beets – Refrigerate in a plastic bag in the crisper drawer of your fridge for best storage. Cut the leaves off and they will easily keep for six to eight weeks this way. If you have to store them loose, they should still last a month. After that they will begin to get a bit softer but will remain usable for two to three months.
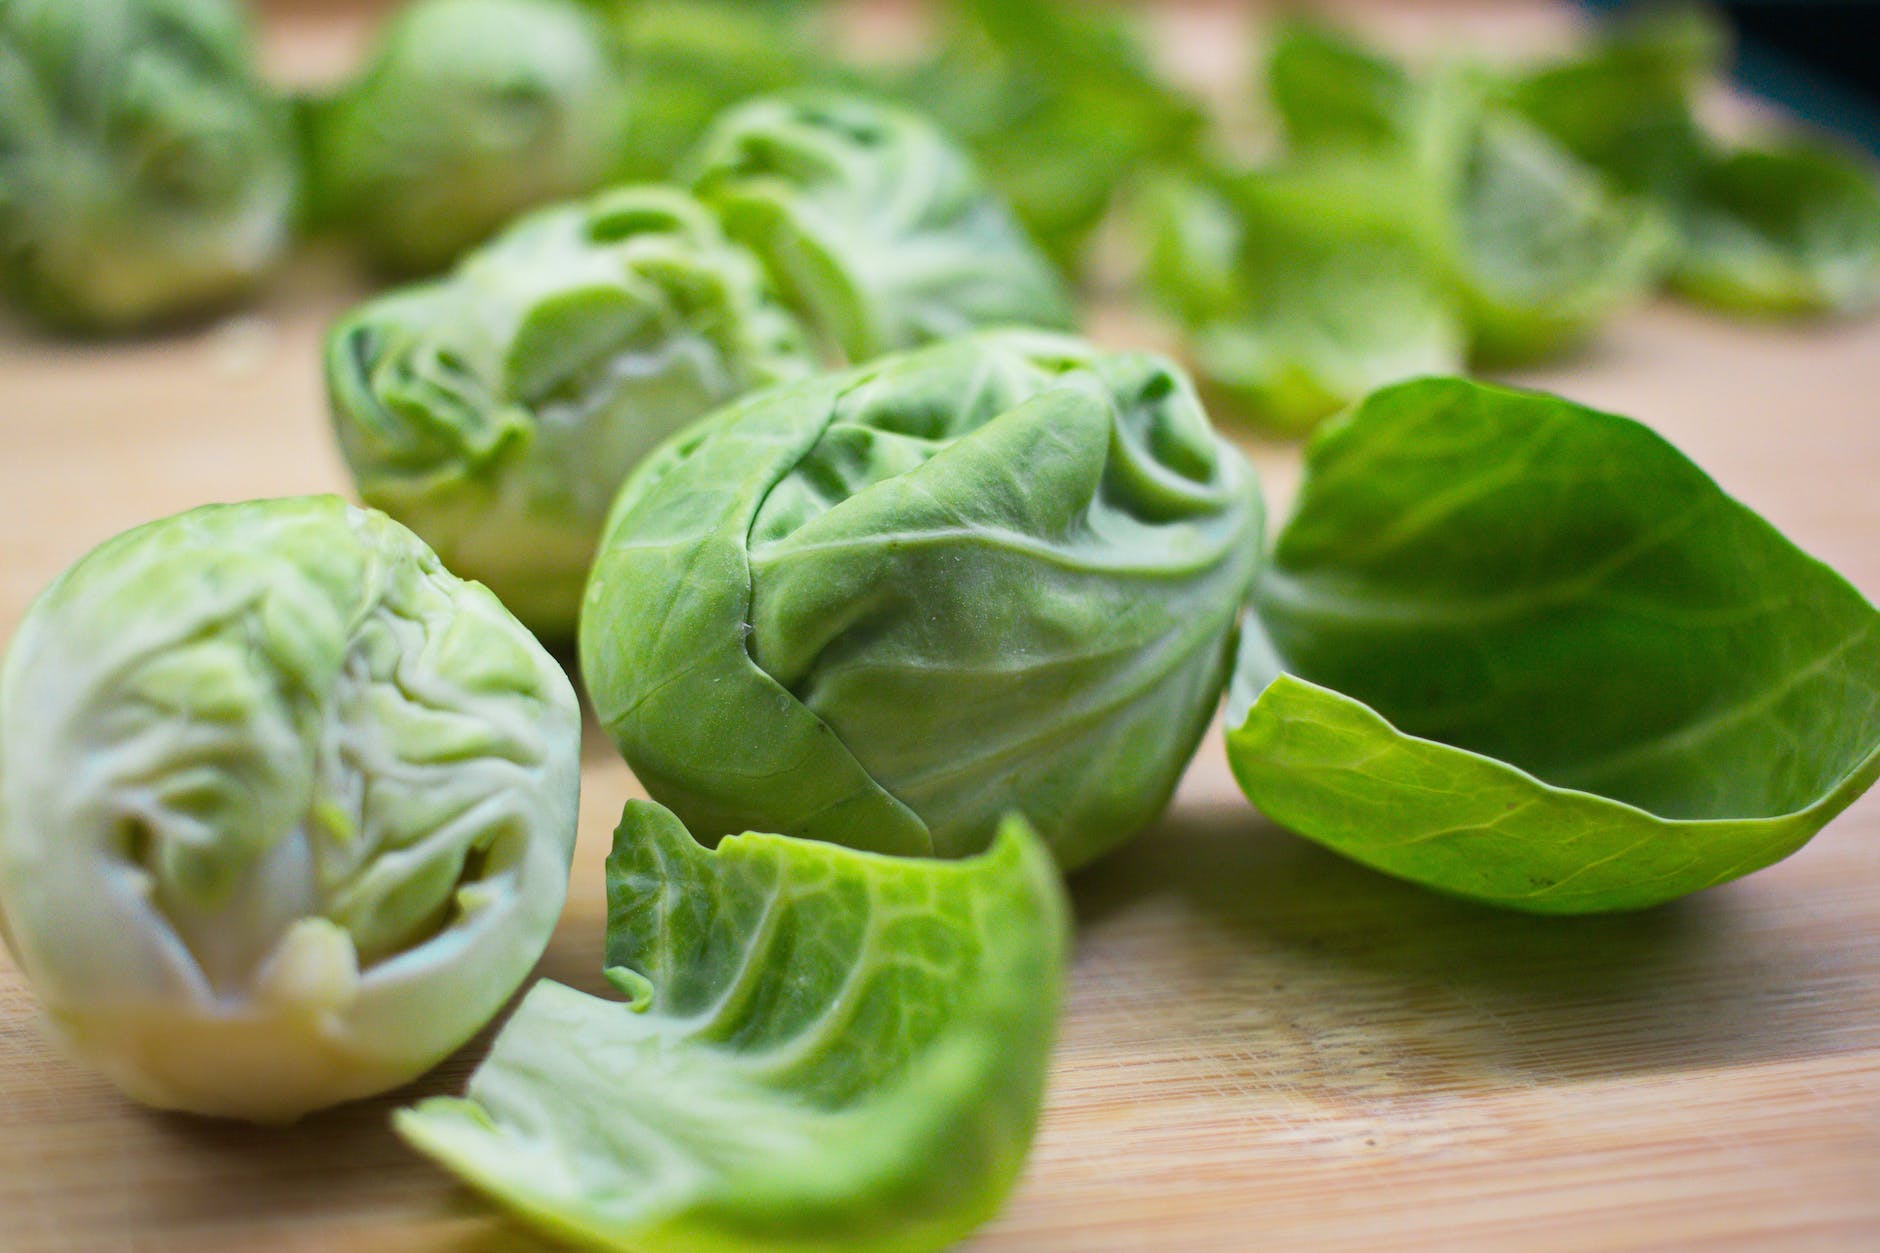
Brussels Sprouts (Large Shares and Small Shares who don’t receive a potimarron squash this week) – Store in a bowl or open container in the fridge. Do not trim or discard outer leaves before storage. Brussels sprouts should last up to a month this way. The outer leaves might get a little shriveled but you typically remove them anyway.
Cherry Tomatoes – This week’s cherry tomatoes will be a mix of orange Sungolds and red Peacevines. Cherry tomatoes can over-ripen pretty quickly, so it can be a good idea to store them in the fridge if you’re not going to eat them right away.
Garlic – Keep in a dark, dry, well-ventilated place at a cool room temperature. It can keep for several months if stored appropriately. Warm temperatures will encourage the cured garlic to sprout which will reduce the quality of it.
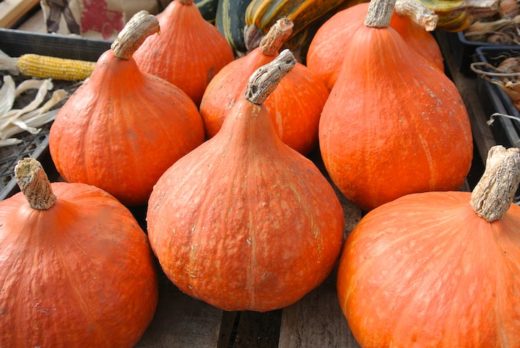
Potimarron Squash (Large Shares and Small Shares who don’t receive Brussels sprouts this week) – This is a beautiful small, reddish-orange winter squash that originated in France. Its name derives from the French for pumpkin (potiron) and chestnut (marron) because it has a chestnut-like flavor. (Photo from Adaptive Seeds)
Store winter squash in a cool, dry place and try to use within a week or two. Do not store in the fridge. This will cause it to spoil much more quickly.
Red Russian Kale – Wash the greens only right before using. To store, place in a plastic bag with most of the air removed and put in the fridge. It is best used within a few days.
Red Sweet Peppers – Refrigerate peppers unwashed in a sealed plastic bag in the crisper drawer for one to two weeks.
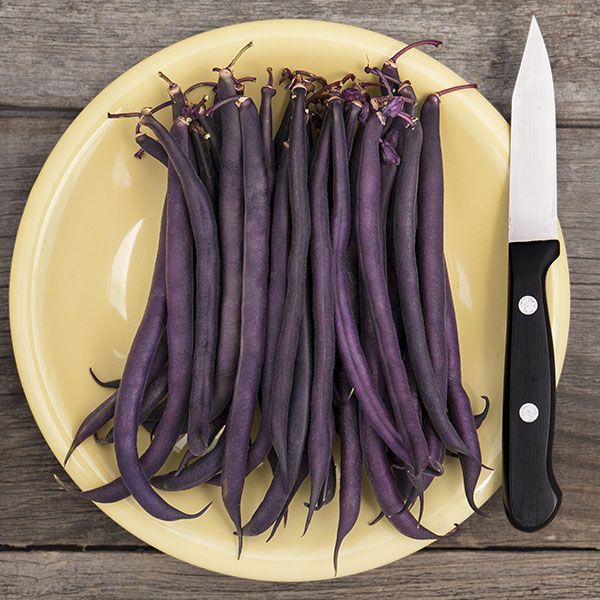
Royal Burgundy Beans (Large Shares and MAYBE Some Small Shares) – Treat these as you would fresh green beans. They actually turn green when you cook them. Refrigerate in a plastic bag and use within a week. (Photo from High Mowing Seeds)
Sage – To store, wrap the sage leaves in paper towels and put them in a plastic bag in the refrigerator. Make sure to use the leaves within four to five days. Fresh leaves that are covered in olive oil can be stored for much longer in the refrigerator, about three weeks.
Slicer Tomatoes – Store at room temperature for up to a week. Do not refrigerate.
White Onions – Keep in a dark, dry, well-ventilated place at a cool room temperature.
Notes from the Field
This past week was pretty productive on the farm. I was able to spend some more time cleaning up the field and getting it ready for winter. I dug around 40 lbs. of carrots that I washed, packaged, and placed in the storage cooler where they will keep for months and months.
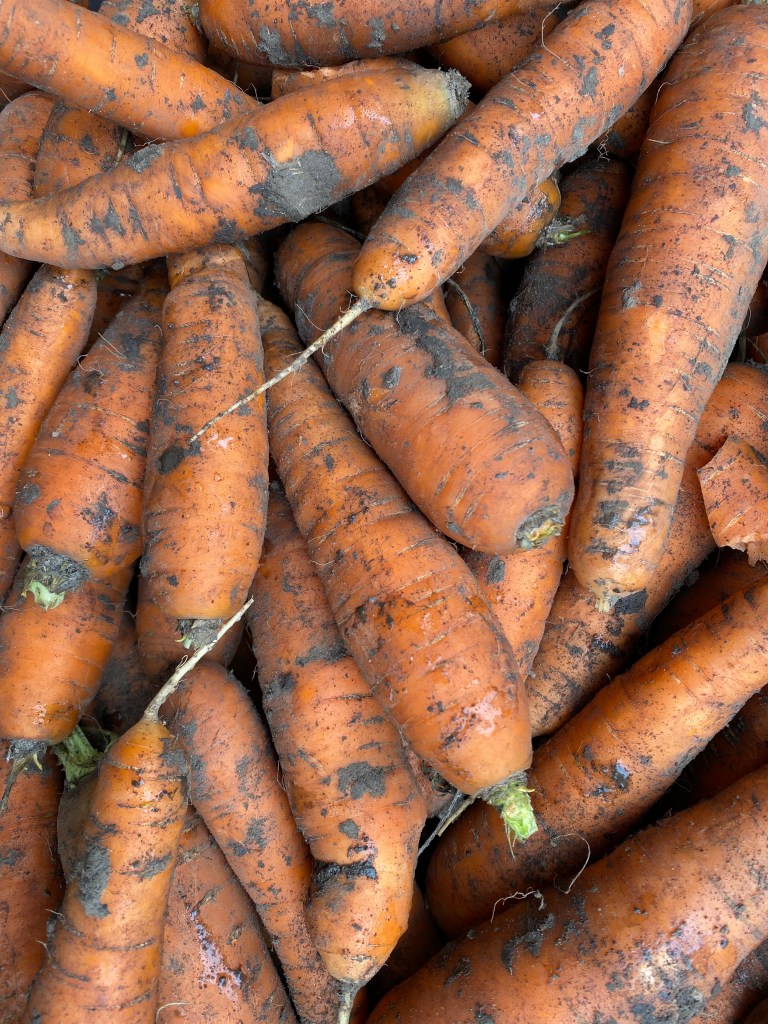
I finally found the key to easily digging carrots in heavier soils – do it when it hasn’t rained for two weeks. I only broke off about 10 carrots out of a couple hundred because the soil was dry and friable. This is an all-time best, for sure. If only I had thought to dig the Daikons then, too…
After pulling out veggies and cleaning up some beds, I seeded them with a cover crop called sorghum sudangrass. One of the main principles of regenerative agriculture is keeping the soil covered as much as possible for as long as possible, preferably with “living roots.” This can be a tricky in a northern climate because farmers are usually growing well into mid- to late-fall and waiting to seed a cover crop until then means there’s simply not enough time for seeds to germinate and the cover to grow. Also, there are very few cover crops that can grow in such cool temperatures.
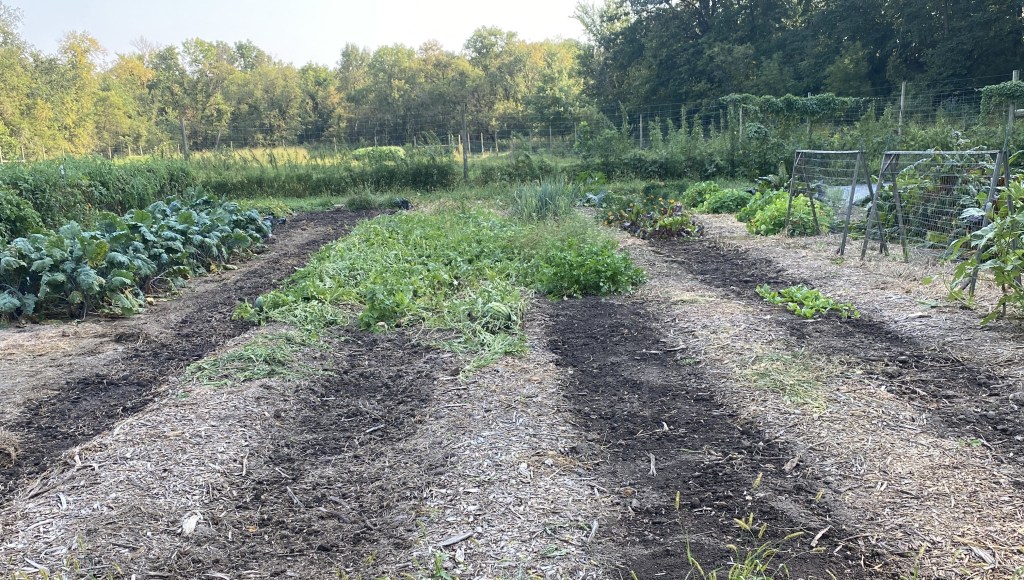
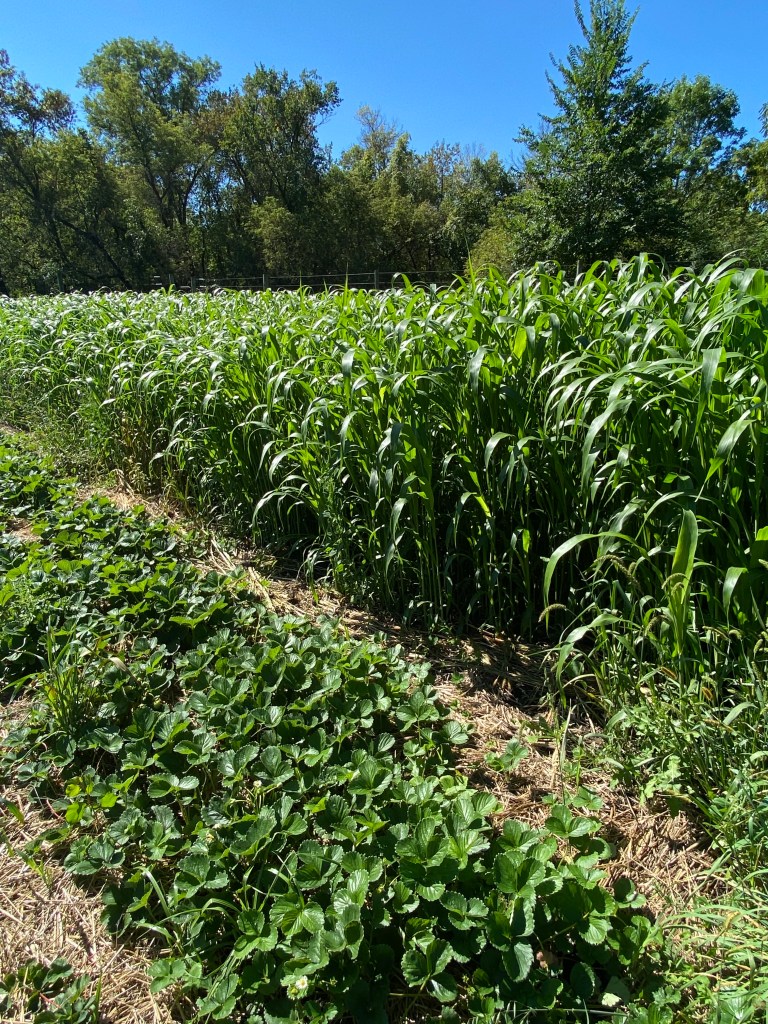
Sorghum sudangrass is actually a warm-season grass which grows best in the heat of summer, so it’s a bit of an experiment for me to seed it this late. I wanted to try it though because soil temperatures are still warm-ish and because it’s doing an outstanding job suppressing weeds down by the strawberries where we planted it earlier this summer. It’s an excellent soil builder because it produces so much biomass (leaves, stems, and roots that decay and feed the soil microorganisms). Also, if you mow it at the right time, it sends its roots down twice as far as it would otherwise and helps reduce compaction which is something we struggle with here. Finally, it will die back over the winter and leave a nice stand of mulch that I can plant directly into next year. I was very glad to get it in a day before it rained. I am curious to see if and how quickly it might grow now.
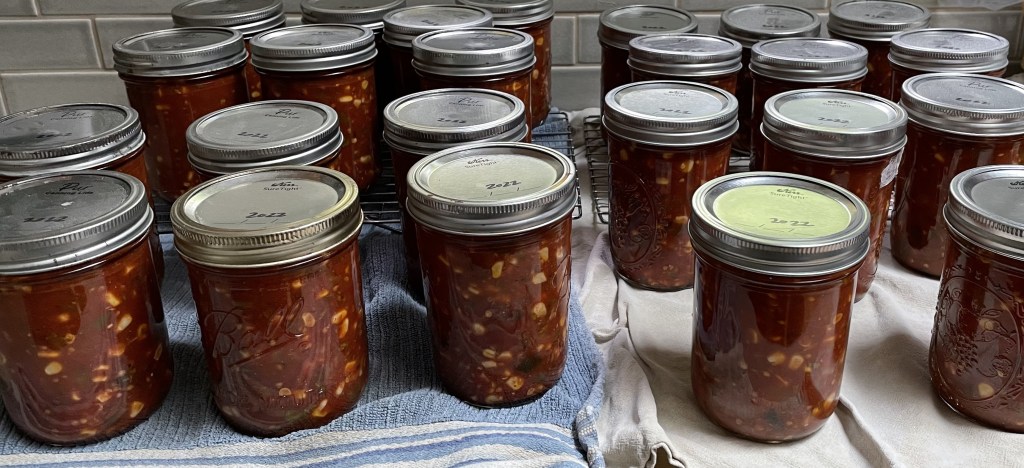
Other than that, most of last week’s farm work consisted of turning various crops into various goodies. Erik and I spent nearly all of Sunday smoking poblano peppers on the grill and roasting many, many pounds of tomatoes, jalapenos, onions, and sweet corn that the boys sat out on the porch and shucked. The result was 34 pints of smoky, delicious salsa that will remind us of summer all winter long.
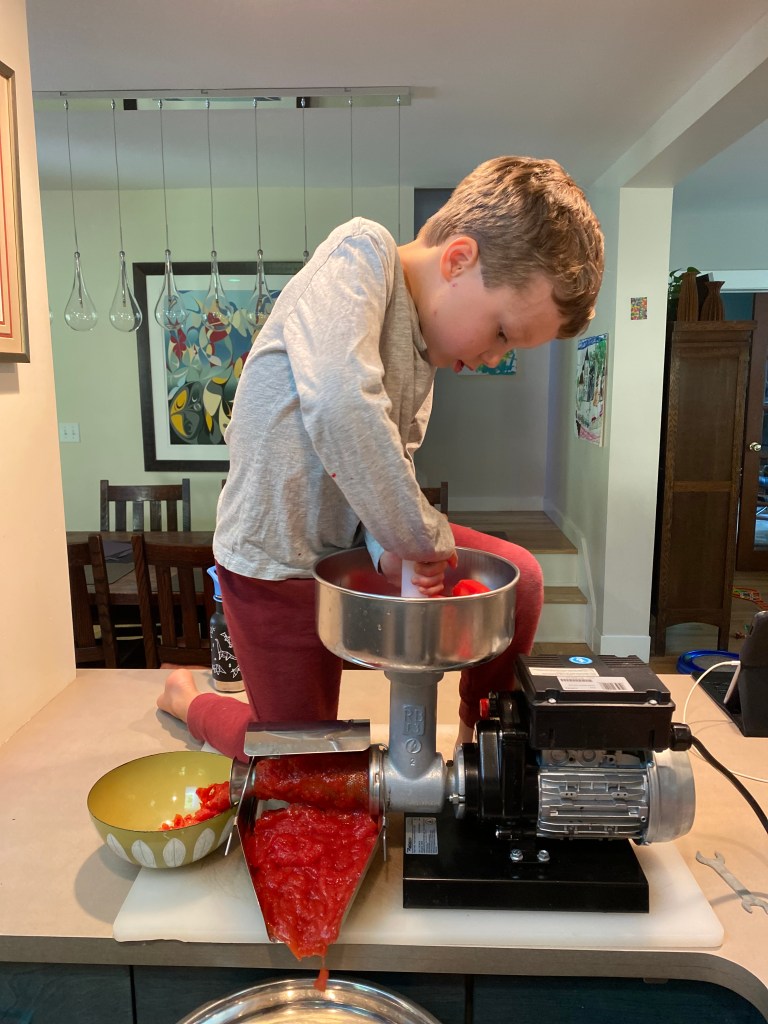
Next, Luka helped me process paste tomatoes into sauce, some of which I will use tonight when I make eggplant parmesan. I also shredded and froze the last of the zucchini and summer squash for future loaves of bread, but not before making a couple of fresh loaves which were devoured within a couple of days. It is hard to keep up with growing boys and their growing appetites!
Recipes
Beet and Rye Panzanella // Uses Beets // Vegetarian
Crisp Gnocchi with Brussels Sprouts, Brown Butter, and Sage // Uses Brussels sprouts, Sage //Vegetarian
Kung Pao Brussels Sprouts // Uses Brussels sprouts // Vegetarian
Perfect Roasted Brussels Sprouts // Uses Brussels sprouts // Vegetarian
Roasted Potimarron Thai Soup // Uses Garlic, Potimarron, Onion // Vegan
Roasted Winter Squash with Sage // Sub Potimarron Squash for Butternut Squash, Uses Sage // Vegetarian
Spicy Brussels Sprouts with Peanuts and Apples // Uses Brussels sprouts
Recipe from The Leek & The Carrots
Serves 2 to 4 for dinner
Takes 30 minutes
1 pound Brussels sprouts, trimmed and thinly sliced
1 tablespoon toasted sesame oil
1 tablespoon rice wine vinegar
1 tablespoon tamari
1 tablespoon fish sauce
1 tablespoon maple syrup
1/2 teaspoon red pepper flakes
1/2 cup dry-roasted peanuts
1-2 tart apples, cored and diced
- Place sliced Brussels sprouts in a large bowl.
- In a small bowl whisk together oil, vinegar, tamari, fish sauce, syrup and red pepper flakes. Add vinaigrette to Brussels and toss to combine.
- Serve with peanuts and apples.
Winter Squash Frittata with Sage // Sub Potimarron for Butternut Squash, Uses Sage, Sub White Onion for Yellow Onion // Vegetarian
Week 14: September 6, 2022
Have you ever heard of the “Ugly Food Movement?” If you haven’t, it’s basically an attempt by people concerned about environmental sustainability and agricultural economics to recover and use some portion of the approximately 40% of food that is wasted in the United States each year. According to the article I linked to above, about 10 million pounds of that 40% consists of food that has some sort of cosmetic problem, meaning it has minor damage that might impact its appearance, but rarely its taste.
Knowing this and reflecting upon it, I was surprised at how much I balked at giving you the scarred up turnips and daikons the last couple of weeks. I was especially given pause when I went to the Menominee Food Co-Op in Wisconsin this past weekend and found the turnips and daikons they had for sale looking pretty much like the ones we grew. In other words, despite all of my rhetoric about sustainability, I too have a marked preference for perfect produce. The only problem is that perfection is difficult to achieve for all crops at all times, especially in an organic system where one isn’t spraying to kill all of the critters that like a good veggie every now and again, too.

I think what this means for the CSA is that I may – from time to time – send you some produce that needs to be peeled more than normal or that has some insect damage as long as it’s fairly minimal and still wonderful to eat. I’ll ask you what you think about this in our end-of-the-year survey, but I wanted to mention it now. Fall can be a more difficult time to grow produce that hasn’t been damaged by weather or pests, and so I might find more cosmetically-challenged veggies in the field this time of year.
A friend of mine used to say that you could tell a fruit or veggie was delicious and good for you if the bugs found it first. Let’s go with that…
What’s in My Box this Week?
Artichokes (Large Shares that didn’t get them last week) – Most people have only ever eaten marinated artichoke hearts, so I’ve included a link with instructions for how to cook with fresh artichokes in the Recipe section below. When storing, leave the artichokes unwashed. Place the artichokes in a plastic bag and store in the coldest part of your refrigerator for up to one week. When you are ready to cook, gently rinse in cold water in a colander. Remove the stem and part of the top with a serrated-edge knife.
Basil – You’ve already received basil a few times, but I’m going to include a small amount again this week because basil is pretty key to making a yummy tomato sauce which I’m guessing some of you might do with the paste tomatoes in your box.
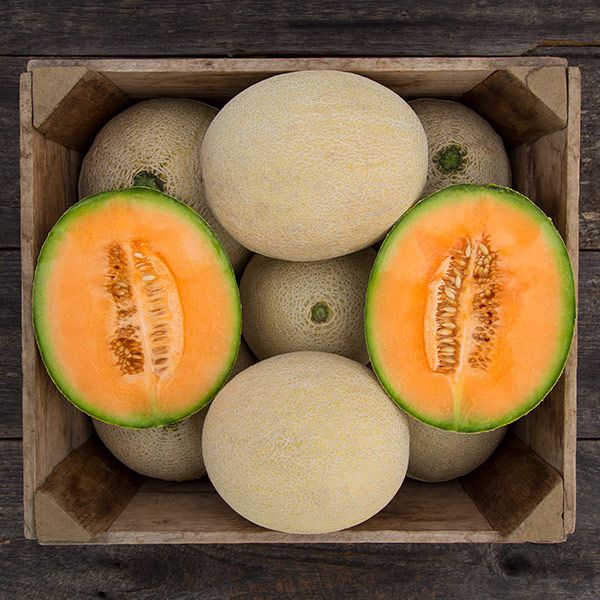
Cantaloupes – This week, I’m harvesting the cantaloupes pretty close to, but not quite at, ripeness. If there is any green on the rind, keep them on the counter until the green turns to a more beige color. Once ripe, place them in the fridge until you’re ready to use them or they may get overripe fairly quickly. Store leftover melon in the fridge wrapped with plastic wrap. The flesh will dry out if left exposed. Use quickly. (Photo: High Mowing Seeds)
Carrots – Remove the green tops as soon as you can, leaving about an inch of stems, and place the roots in a plastic bag in the crisper drawer of your refrigerator. They will last for several weeks. You can also store them in a bin of water to keep them crisp, changing out the water every few days. Save the tops in a plastic bag and use them in salads and other dishes.
Cherry Tomatoes – This week’s cherry tomatoes will be a mix of orange Sungolds and red Peacevines. Cherry tomatoes can over-ripen pretty quickly, so it can be a good idea to store them in the fridge if you’re not going to eat them right away.
Garlic – Keep in a dark, dry, well-ventilated place at a cool room temperature. It can keep for several months if stored appropriately. Warm temperatures will encourage the cured garlic to sprout which will reduce the quality of it.
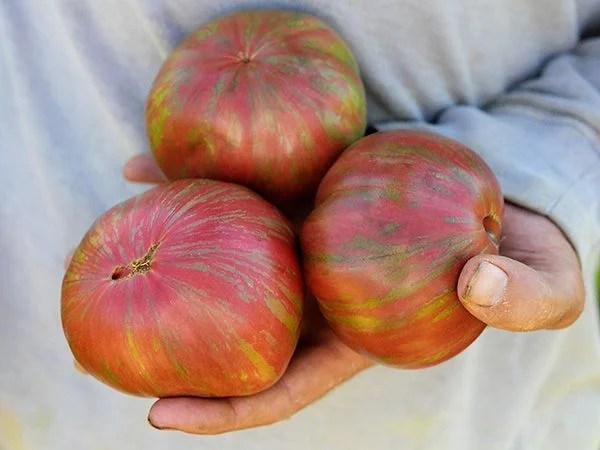
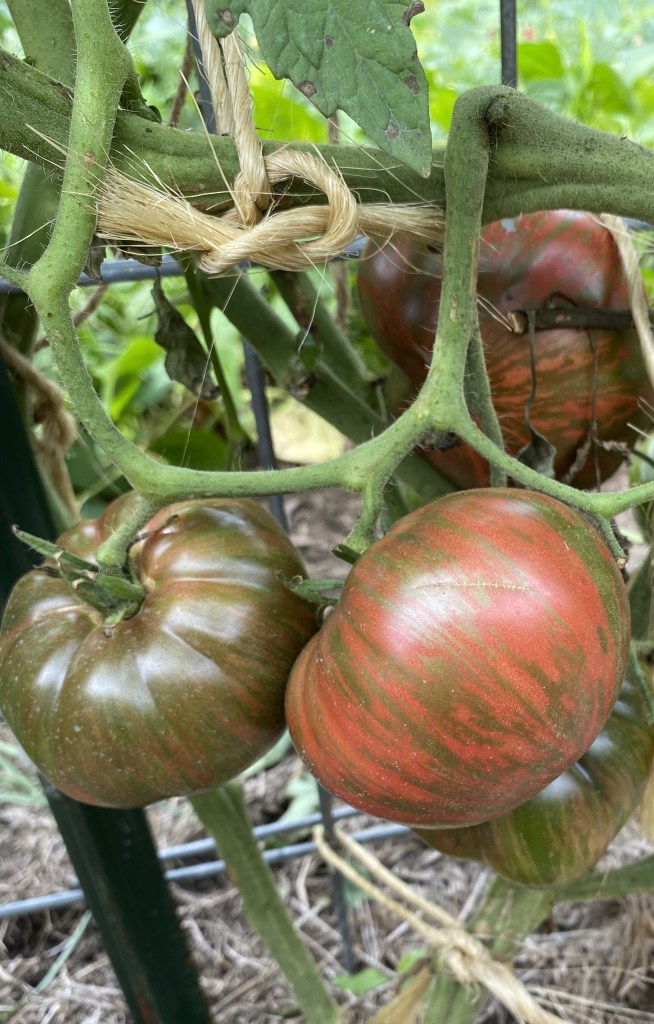
Heirloom Tomatoes – This week you will get Berkeley Tie Die, Cherokee Purple, and/or Black Krim tomatoes. Store at room temperature for up to a week. Do not refrigerate.
Jalapeno Peppers – Refrigerate peppers unwashed in a sealed plastic bag in the crisper drawer for one to two weeks.
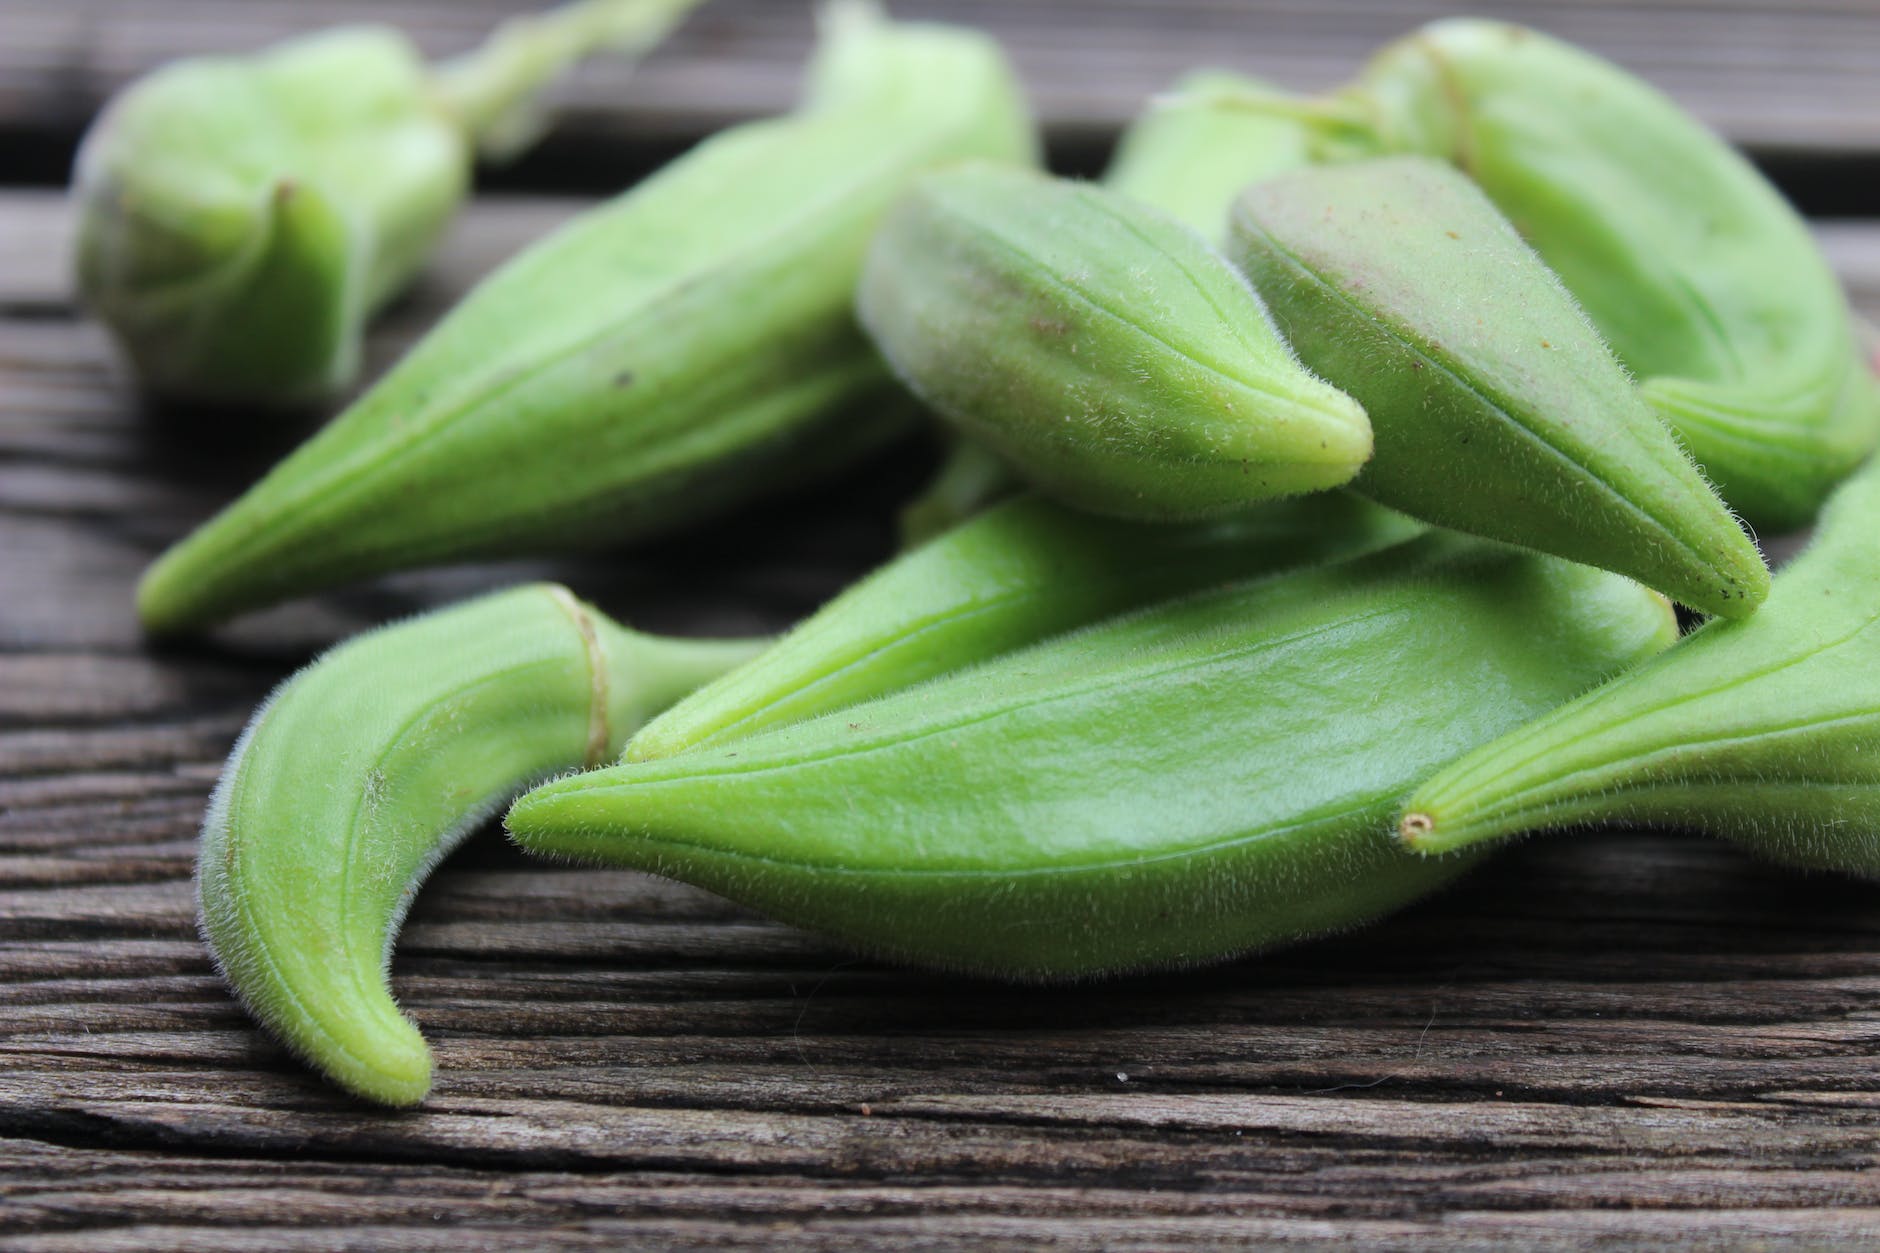
Okra (Large Shares Only) – Wrap in a paper towel and place inside a paper bag, and store in the vegetable drawer. It is best to use it within a day or two. Do not wash fresh okra until you are ready to use it.
Parsley – Store in the fridge in a small glass with about an inch of water, stem side down (like flowers in a vase) for best storage.
Paste Tomatoes – Paste tomatoes are primarily used for making sauces, although you can also slice them and use them fresh as well. This week you’re getting San Marzano paste tomatoes. These originated in southern Italy and are the tomatoes used in making traditional Neapolitan pizza. For those pizza aficionados out there, you may remember that Naples was the birthplace of pizza and so sauce made from San Marzano tomatoes is about as authentic as you can get, at least in terms of pizza-making. They are also delicious cooked down into a pasta sauce. Store at room temperature for up to a week. Do not refrigerate.

Potatoes – The variety this week is called Peter Wilcox. We were put on to these potatoes by the chef at Forager Brewery who asked us to grow them for him because his name was also Peter Wilcox! We’re glad we did as these have become one of our favorite potato varieties. They are earthy-flavored and delicious roasted, boiled, sliced, or fried. The potatoes you’re getting this week are freshly harvested. Their skin is really delicate; thus, I’m not going to wash them before giving them to you. (Photo: High Mowing Seeds)
Red and Green Sweet Peppers – Refrigerate peppers unwashed in a sealed plastic bag in the crisper drawer for one to two weeks.
Slicer Tomatoes – Store at room temperature for up to a week. Do not refrigerate.
Tomatillos (Small Shares Only) – Store in the crisper drawer of your fridge. They should last at least a week.
White Onions – Keep in a dark, dry, well-ventilated place at a cool room temperature.
Notes from the Field
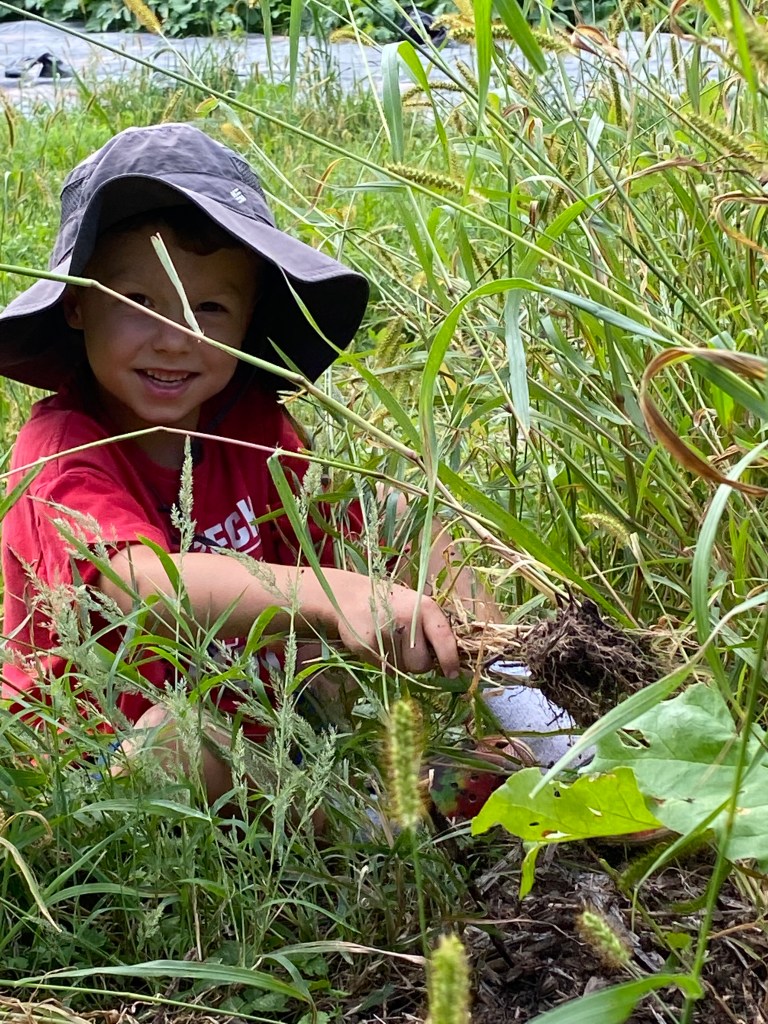
You know how none of your kids are supposed to be more favored than the others? Generally I don’t have a favorite, but I couldn’t help but feel a special affinity for Luka this past weekend when he asked if we could go weed the garden “for fun.” I had planned to take the holiday off, but hey – when you get an offer of help like that, you have to take it! Plus, the weather this past weekend made working in the garden a true pleasure. We tackled the herb garden which is in full bloom and quite beautiful right now. Luka kept brushing against the mint, sage, and thyme, thoroughly enjoying their released scents and insisting repeatedly that I “come over here and smell this, Mom!”

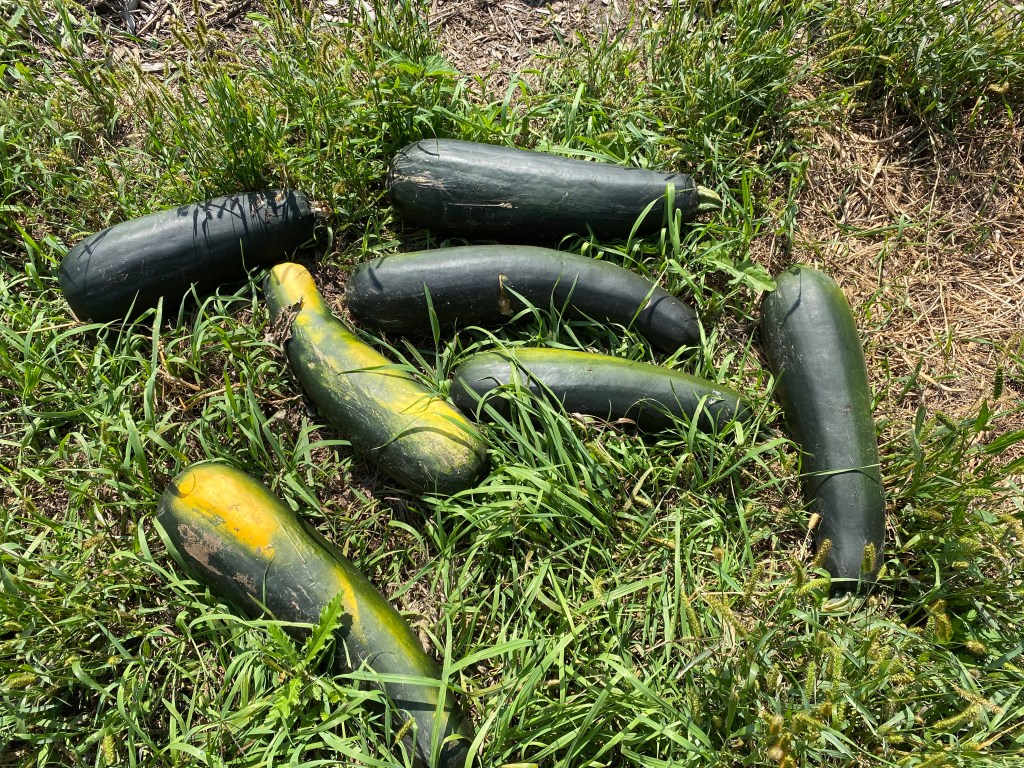
Last week I also finished pulling out some more crops that are finished for the year. I composted all of the summer squash and all but one of the zucchini plants. Simon requested that I leave one to grow so that we can see just how big the zucchinis on it can grow. So far, the answer is very, very big. Almost freakishly big. We will see how big the ones get that are still on the vine, but check out these monsters that I harvested:
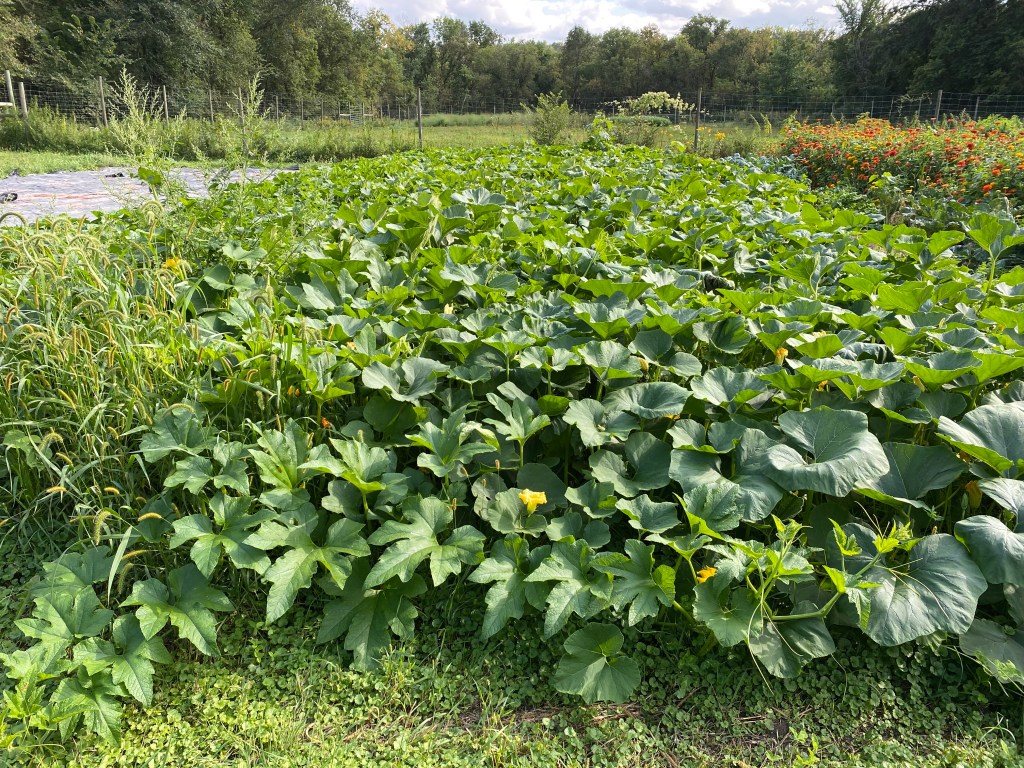
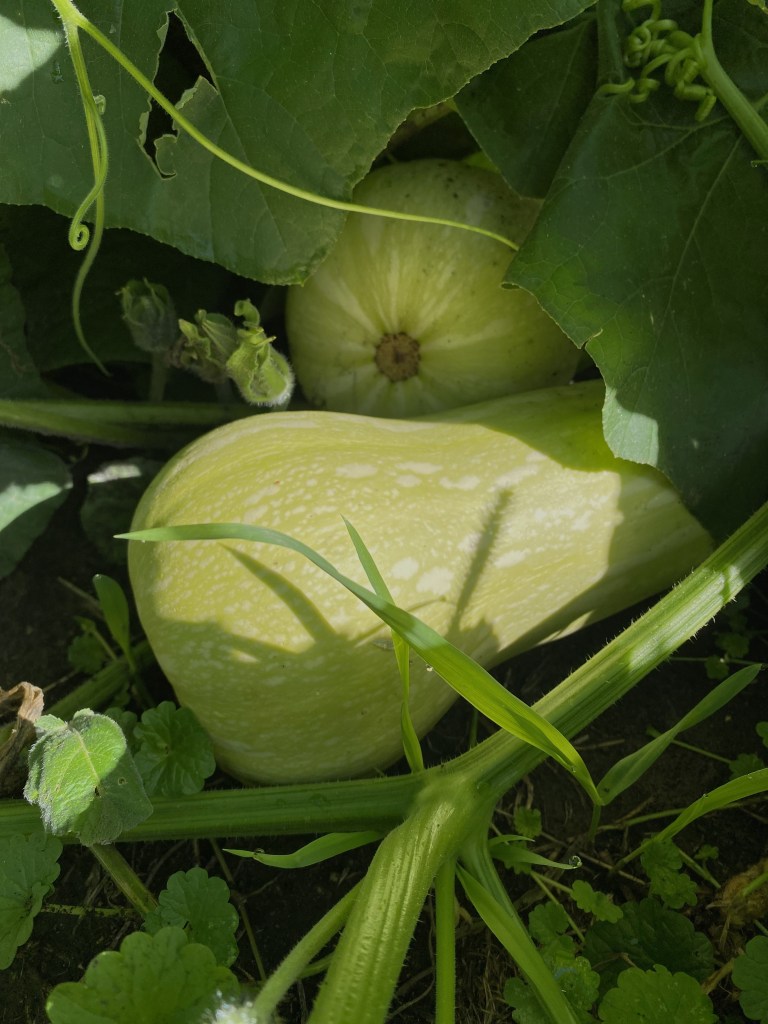
I also learned that it is a good idea to prune back your pumpkin and winter squash vines, something I hadn’t known to do before. Pruning encourages less fruit production, but quicker ripening and better-sized fruits. It also helps maintain walkways in the field. Our pumpkin vines were getting so aggressive that they were overtaking all of the other fall crops, so I took some time to cut them back some. They have never grown so well or so vigorously before or I might have done discovered I should do this before. I have no idea how I’m going to find all of the ripened winter squash in the pumpkin patch! Would you believe that there are only around 24 plants in this entire plot?!
The other thing that I had to deal with last week were the gophers that were tunneling under and eating the roots of my Napa cabbages. Normally I am okay to co-exist with the gophers as ecologically-speaking they can actually be somewhat helpful on a farm. When they dig their tunnels, they bring up nutrient-rich soils from down below and make them available to the more shallowly-rooted annual vegetables. They also aerate the soil, allowing more air and water to reach plant roots. Thus, I don’t mind if I lose a plant here or there to them, but they were on track to decimate all of the cabbages, so I had to take action. (You can see the row of cabbages that they killed on the right side of the photo below. They killed several more after this picture was taken.)
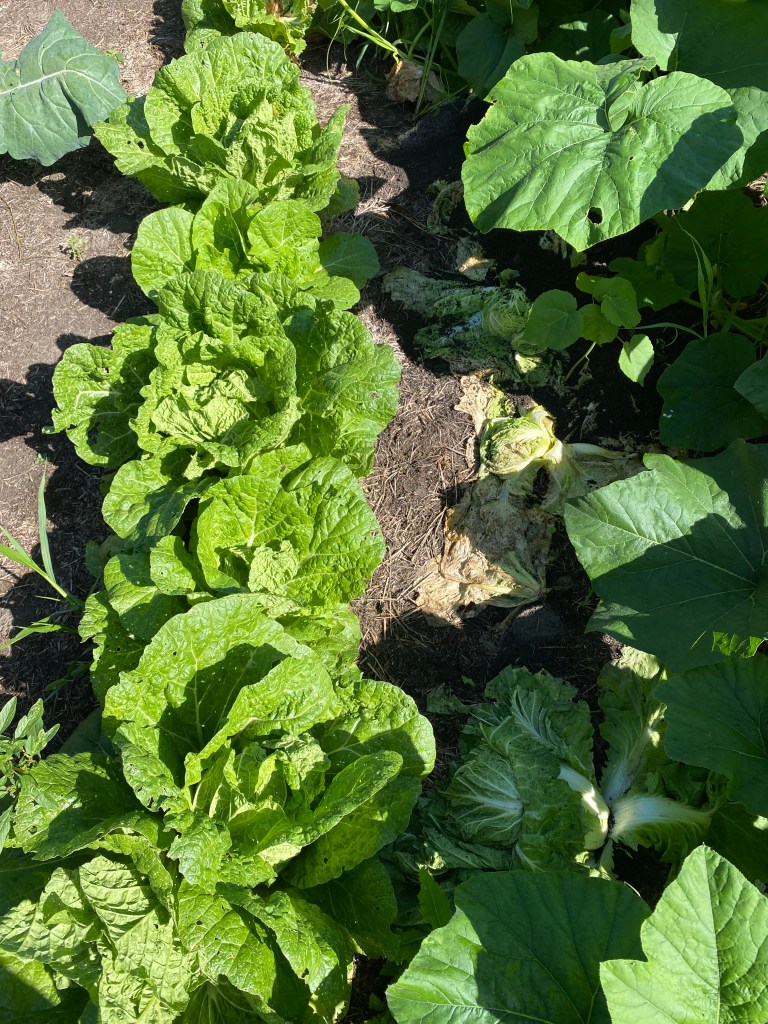
So, I dug out their tunnels, threw some raw garlic into them, and installed a sonic repellent stake which is supposed to drive them crazy enough that they pack up and move. I will see how it works. Fingers crossed! I would really like you to get at least one Napa cabbage this year!
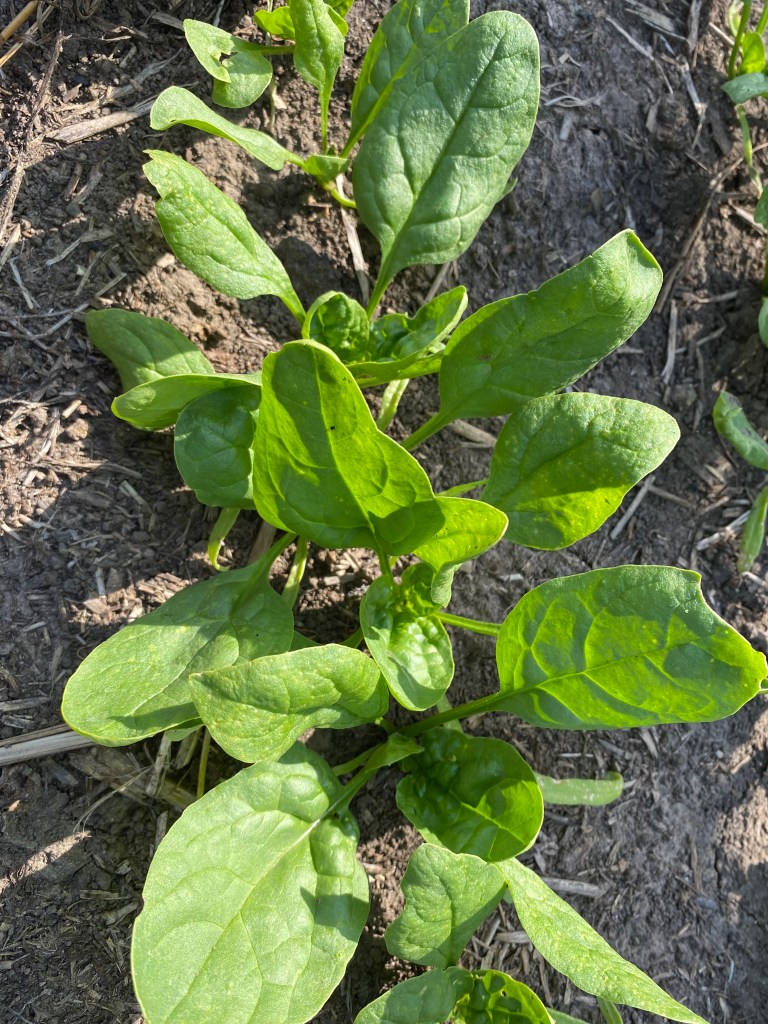
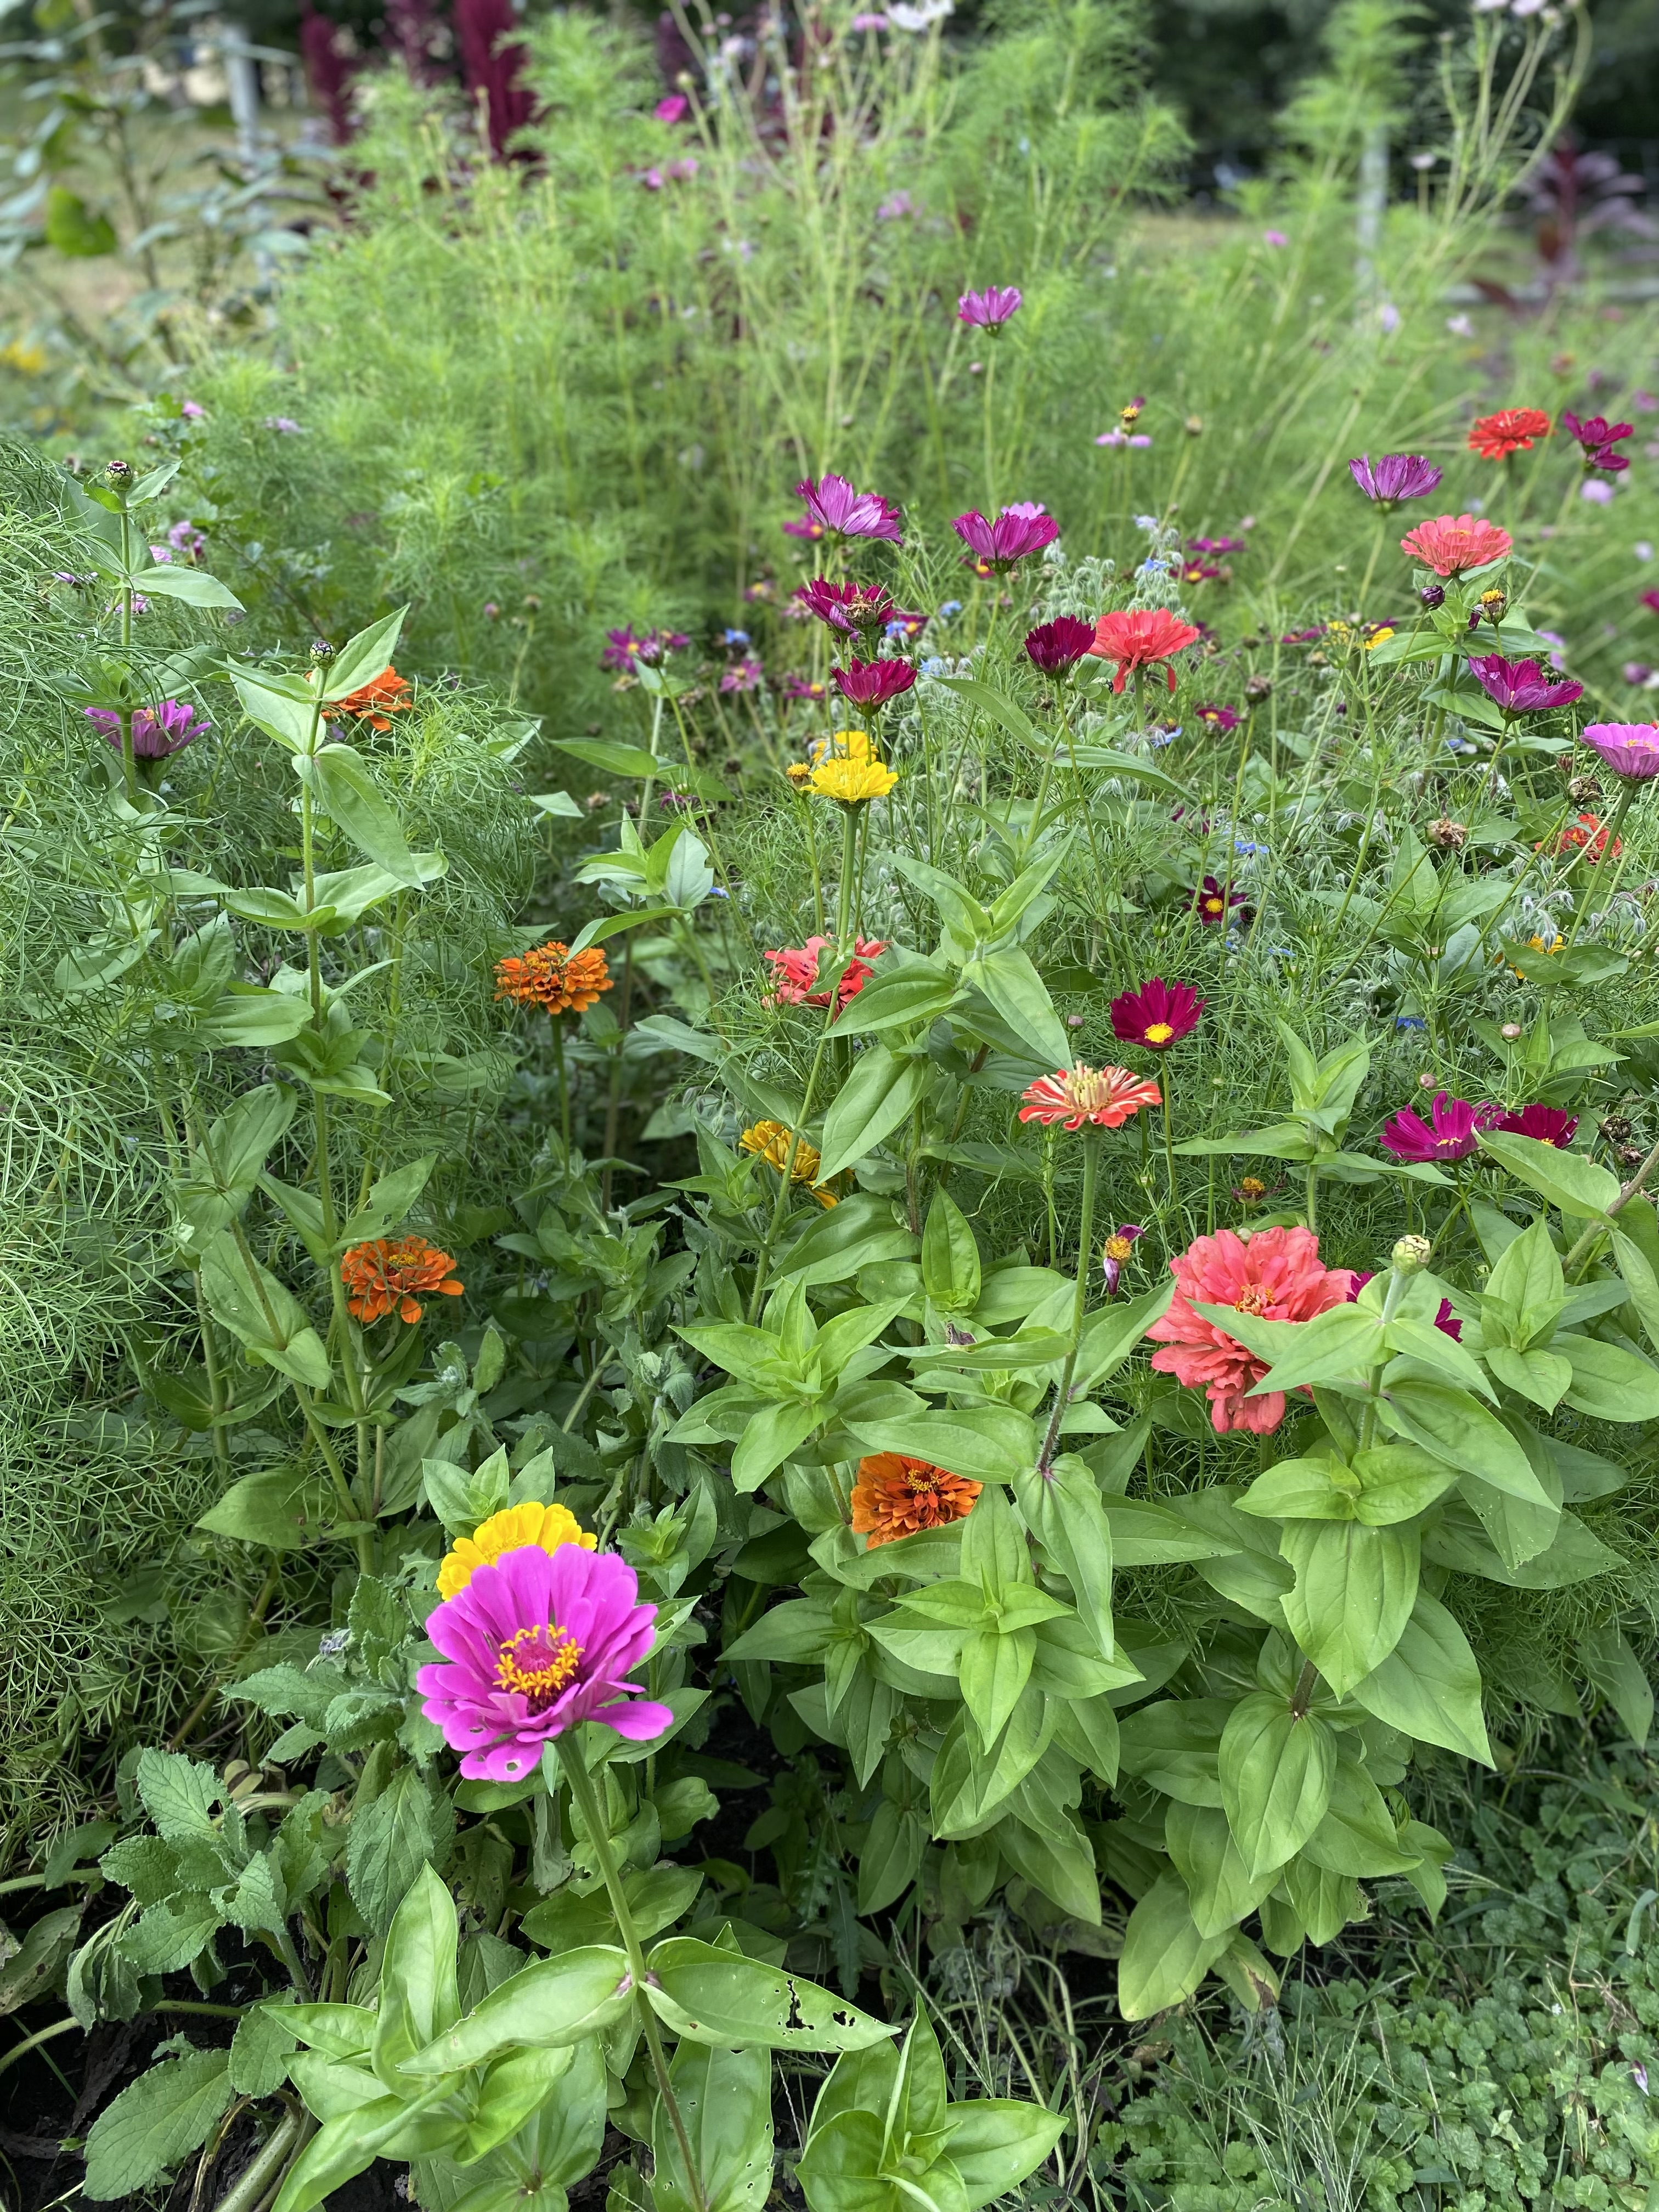
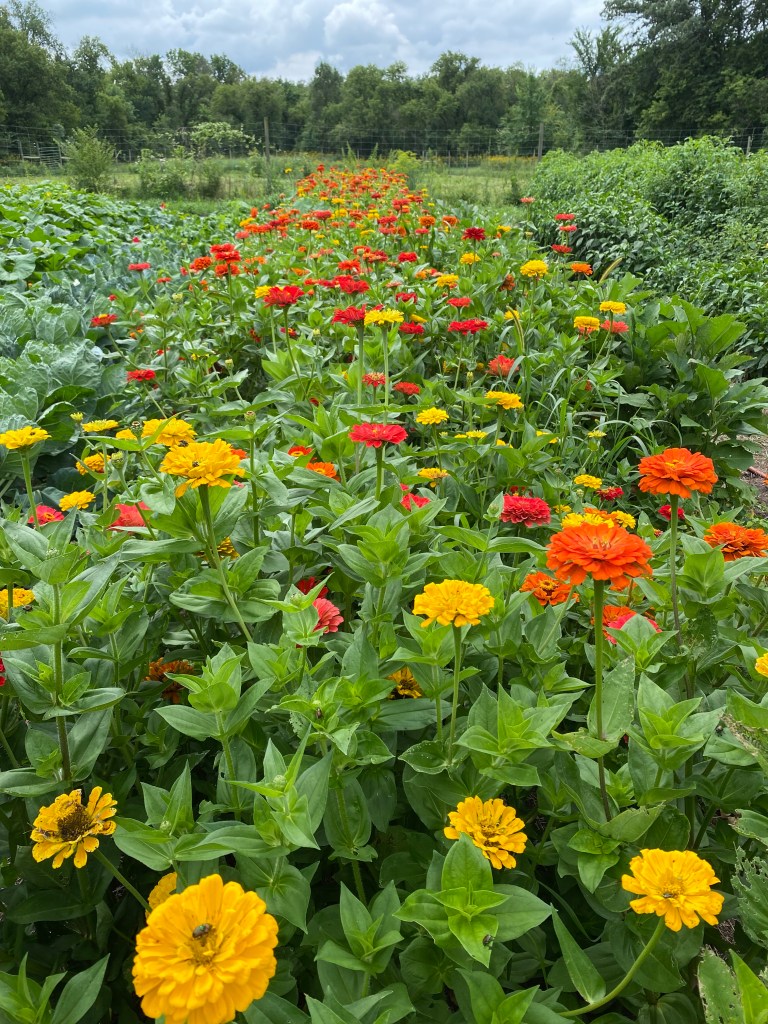
Here are a few other photos from the farm this week, showing the fall crops growing well. See what you have to look forward to!

Recipes
Classic Marinara Sauce // Uses Basil, Garlic, San Marzano Tomatoes (sub fresh for canned) // Vegetarian
Corn Okra Creole // Uses Green Peppers, Okra, Tomatoes // Vegetarian
Martha Rose Shulman’s Roasted Okra // Uses Okra // Vegetarian
Okra with Tomatoes // Uses Garlic, Okra, Onions, Tomatoes // Vegetarian
Pan Fried Okra // Uses Okra // Vegetarian
San Marzano Tomato Sauce // Uses Basil, Garlic, San Marzano Tomatoes // Vegetarian
Southern Fried Okra // Uses Okra // Vegetarian
Week 13: August 29, 2022
The first day of school is always a little bittersweet for me. This morning we took our usual “First Day of School” photo of Simon under the Japanese lilac tree in the front yard and then I shed a few tears as Erik drove him off to the bus stop and to the 8th grade. Soon, things will be quieter around here than they have been in months, and while things won’t be nearly as entertaining as they have been, I will also relish some alone time. It will allow me a chance to catch up on some long-neglected farm paperwork and to start turning my attention more fully to fall tasks. I also have a stash of books and research articles about organic farming that I am looking forward to delving into. That’s one thing I enjoy about regenerative farming: there’s always something to learn and always someone to learn from.
What’s in My Box this Week?
Artichokes (Some Large Shares Only) – Most people have only ever eaten marinated artichoke hearts, so I’ve included a link with instructions for how to cook with fresh artichokes in the Recipe section below. When storing, leave the artichokes unwashed. Place the artichokes in a plastic bag and store in the coldest part of your refrigerator for up to one week. When you are ready to cook, gently rinse in cold water in a colander. Remove the stem and part of the top with a serrated-edge knife.
Cantaloupes – The grasshoppers are going crazy in the field, feeding on the rinds of all of the melons. I may harvest the cantaloupes a little earlier than I usually would in order to minimize the damage and ensure that I have these fruits for you. This means that they won’t be quite ready to eat when you get them, but cantaloupes continue to ripen after they’ve been harvested, so if you just set them on counter for a little while, they should be ready to eat within several days.
Once you have ripe cantaloupes, store them in the fridge. Store leftover melon in the fridge wrapped with plastic wrap. The flesh will dry out if left exposed. Use quickly.
Cherry Tomatoes – This week’s variety of cherry tomato is still Sungold. Cherry tomatoes can over-ripen pretty quickly, so it can be a good idea to store them in the fridge if you’re not going to eat them right away.
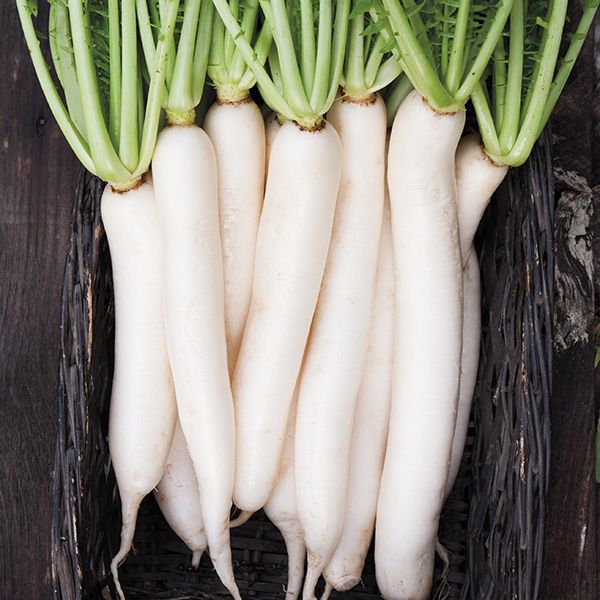
Daikon – Daikon are sometimes called winter radishes, but although radishes and daikon are in the same plant family, Daikon aren’t actually radishes. Long, tubular root vegetables that white and crunchy with a mild flavor and only a slight peppery bite, Daikons are common in traditional Japanese food and other Asian cuisines. (Photo: High Mowing Seeds)
Each root can weigh between two and six pounds and they can penetrate deeply into the ground, making them difficult to dig out. In fact, some of the Daikon roots you receive might be broken off at some point; the soil in our field gets a little compacted some distance down (I’m working on fixing that…) and so sometimes when we dig them out, they break off. They are still perfectly good to eat, however much of the root we’re able to harvest.
To store, refrigerate in a plastic bag in the crisper drawer of your fridge for best storage. They will easily keep for six to eight weeks this way. If you have to store them loose, they should still last a month. After that they will begin to get a bit softer but will remain usable for two to three months.
Eggplant – Once again, everyone will get either a handful of Asian (Pingtung) eggplants this or an Italian eggplant (fat and dark purple) this week. Eggplant is very perishable, so use it quickly or at least within the week. To store in the fridge, wrap it unwashed in a paper towel (not plastic) and keep in your crisper. You can also store it unrefrigerated at a cool room temperature.
Garlic – Now that all of our garlic has been cured, the best way to store it is to keep it in a dark, dry, well-ventilated place at a cool room temperature. It can keep for several months if stored appropriately. Warm temperatures will encourage the cured garlic to sprout which will reduce the quality of it.

Heirloom Tomatoes – This week you will get Berkeley Tie Die, Cherokee Purple, and/or Black Krim tomatoes. Cherokee Purple tomatoes are believed to trace back over 100 years to the Cherokee tribe. They are the most popular of the “black” tomatoes because of their outstanding flavor and texture. Black Krims are originally from the Crimean peninsula in the Black Sea; they turn almost black with sufficient sunlight and heat and have an excellent full flavor. Store at room temperature for up to a week. Do not refrigerate.
Red Cabbage (Most Shares – if you don’t get one this week, you’ll get it over the next couple of weeks) – Cabbage can store for three weeks to two months and it doesn’t require much special care to have it last this long. Just keep it in the crisper of your fridge and remove the two outer leaves before eating. (These leaves are used to help store the cabbage.)
Red Sweet Peppers – Refrigerate peppers unwashed in a sealed plastic bag in the crisper drawer for one to two weeks.
Slicer Tomatoes – Store at room temperature for up to a week. Do not refrigerate.
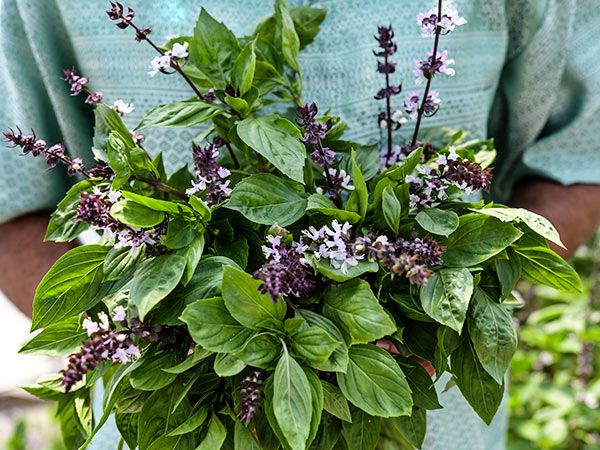
Thai Basil – Thai basil is native to Southeast Asia and is savory, spicy, and anise-like, adding a distinct pungency to dishes that helps to round them out. It is common in Thai curries, salads, and stir-fries. In Vietnam it is used as just one of the many garnishes with pho. (Photo: Baker Creek Seeds)
Watermelon (Large Shares and Standard Shares who haven’t gotten one yet) – To store, refrigerate right away as watermelons don’t continue to ripen once picked. Cut melon should be covered in plastic wrap, and chunks or slices should be kept in an airtight container. Eat melons within a week.
White Curly Kale – Place kale unwashed, wrapped in a sealed plastic bag in the crisper drawer of the refrigerator. Best used very fresh, but may last for a week.
Yellow Onions – Store in a cool dark place. These onions are freshly harvested and haven’t gone through the curing process that we typically use when preparing onions for longer storage, so while they won’t last as long as those you might buy at a store, but they will be good for a week or two.
Notes from the Field
As you know from my Week 12 newsletter, we mostly took a break from fieldwork last week, and this week will be more of the same as we start up our new fall schedule and get things situated for school again.
Still, we did manage to finish a major task when we spent last Tuesday and Wednesday cleaning up the cured garlic. Our friend and neighbor (and the kids’ former babysitter and summer helper around the house), Lauren, spent her last two days before returning to college sitting in the barn with us, catching up, and helping to process the garlic.
While we were working, we realized that Lauren was Simon’s age when we first moved here, and now she is starting her senior year in college. It is in no small part thanks to Lauren watching the kids when they were younger and taking care of the house on my workdays that the farm is still in existence. We keep trying to find a “new” Lauren, but no one can ever take her place.

That’s one thing about the farm that has been both unexpected and beautiful: we’ve had several people work or volunteer here over the years and they have come to feel as if they are part of our big farm family. I have learned that organic farming is not simply about the relationships among the plants and myself. It’s also about the relationships between everything that lives on the land, and about all the people who have helped nurture those relationships, either by lending a hand or by eating what we’ve grown.
One of the relationships we’ve established over the last couple of years is with the Rochester Outreach Center, a local non-profit that collects food for families in need. In the winter, when I plan out how much to grow for the following year, I include extra that I intend to go to area food banks. (We also donate to the Oronoco Food Shelf and Channel 1 from time to time.) So far this year, we’ve been able to donate almost 400 lbs. of produce worth about $1,100. We are so happy to be able to share our veggies with those in our community who might otherwise have difficulty finding and affording fresh, organic produce.
Here are some of Simon’s photos from last week:


Recipes
Big Heart Artichoke and Parmesan Soup // Uses Artichokes, Garlic, (Thyme and Yukon Gold Potatoes if you have some leftover from last week) // Vegetarian
Buddha Bowl // Uses Kale, Red Cabbage, Watermelon Radishes // Vegetarian
Chicken and Mushroom Sauced Noodle with Thai Basil // Uses Thai Basil
Daikon Au Gratin // Uses Daikon // Vegetarian
Daikon Radish Kimchi // Uses Daikon // Vegetarian
Grilled Artichokes // Includes Artichokes, Garlic // Vegetarian
How to Cook and Eat an Artichoke
Roasted Daikon Radish, Carrots, and Peppers // Uses Daikon, Red Bell Peppers // Vegetarian
Spinach, Feta, Watermelon Radish Quiche // Uses Garlic, Watermelon Radishes // Vegetarian
Stir Fried Chicken with Eggplant and Thai Basil // Uses Eggplant, Garlic, Thai Basil
Recipe by Martha Rose Shulman
Serves 4
Ingredients
- 1pound eggplant, preferably long Japanese or Chinese eggplants, diced
- Salt to taste
- 3 large garlic cloves, peeled, halved, green shoots removed
- 2 serrano chiles, stemmed and minced
- 1 tablespoon minced ginger
- 1 tablespoon fish sauce
- 2 teaspoons soy sauce
- 1 teaspoon sugar
- Freshly ground black pepper to taste
- 2 tablespoons peanut or vegetable oil
- ¾pound boneless, skinless free-range chicken breasts, rinsed and dried, cut into small dice or minced
- 1 cup Thai basil leaves, roughly chopped
Preparation
- Salt the eggplant generously and leave in a colander to sweat for 15 to 30 minutes, while you prepare the remaining ingredients. Rinse and drain on a clean kitchen towel.
- Place the garlic in a mortar with ¼ teaspoon salt and mash to a paste. Add the ginger and chiles, and continue to mash with the garlic. In another small bowl, mix together the fish sauce, soy sauce, sugar and pepper. Set aside.
- Heat a large, heavy skillet or wok over high heat, until a drop of water evaporates immediately upon contact. Add 1 tablespoon oil, turn the heat down to medium-high, and add the garlic paste. Stir-fry for 30 seconds, and add the chicken. Stir-fry for three to four minutes, until the chicken is cooked through and no traces of pink remain. Transfer from the pan or wok to a plate or bowl.
- Add the remaining tablespoon of oil to the pan. Add the eggplant. Cook, stirring, until the eggplant is lightly browned and almost cooked through, about 10 minutes. Stir the chicken back into the pan, and add the fish and soy sauce mixture. Add ¼ cup water, cover the wok or pan, turn the heat down to medium and steam for five minutes. Uncover, and stir in the basil leaves. Stir for 30 seconds to a minute, remove from the heat and serve with rice.
Summer Gazpacho // Uses Garlic, Sweet Peppers, Tomatoes, Cucumber (if you have one leftover from last week). Also, add Cantaloupe or Watermelon to really make this sing // Vegetarian
Thai Basil, Cucumber, and Cantaloupe Salad // Uses Cantaloupe, Cucumber (if leftover from last week, Thai Basil (I bet watermelon could sub for cantaloupe, too) // Vegetarian
Thai Panang Curry with Vegetables // Uses Garlic, Red Sweet Pepper, Thai Basil, Yellow Onion // Vegetarian
The Most Amazing Roasted Artichokes // Uses Artichokes, Garlic // Vegetarian
Vegan Fresh Artichoke Dip with Lemon and Garlic // Uses Artichokes, Garlic (can sub regular mayo and cheese if you don’t prefer the vegan versions) // Vegan
Vietnamese Pickled Carrots and Daikon // Uses Daikon // Vegetarian
Watermelon Radish, Orange, and Goat Cheese Salad // Uses Watermelon Radishes // Vegetarian
Week 12: August 22, 2022
Weeks 11 and 12 of the CSA season coincide with the kids’ last weeks of summer vacation and also with my annual (re-)realization that time flies by much too quickly. It is usually at this point in the year that I put the farm on the back burner for a couple of weeks, doing just enough to keep it running smoothly and spending most of my time with the boys. If I have done my job well up to this point, this usually works. All of the planning and planting and tending before now allows the family a little bit of a break. The kids – especially Simon – have been absolutely instrumental in helping me get the CSA up and running this year, and so we are going to take some time off to enjoy just being on the farm and being with each other.
What’s in My Box this Week?
Cherry Tomatoes (Standard Shares who haven’t received them yet) – This week’s variety of cherry tomato is still Sungold. Cherry tomatoes can over-ripen pretty quickly, so it can be a good idea to store them in the fridge if you’re not going to eat them right away.
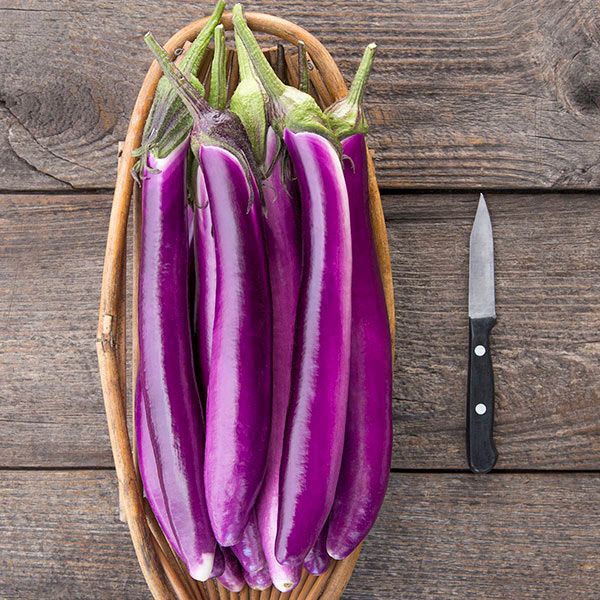
Eggplant – Everyone will get either a handful of Asian (Pingtung) eggplants this or an Italian eggplant (fat and dark purple) this week. Eggplant is very perishable, so use it quickly or at least within the week. To store in the fridge, wrap it unwashed in a paper towel (not plastic) and keep in your crisper. You can also store it unrefrigerated at a cool room temperature. (Photo from High Mowing Seeds)
English Cucumbers – This will be our last week for cucumbers. Place in a sealed plastic bag in the crisper drawer of the refrigerator for up to a week.
Garlic – The garlic you’re getting this week is still fresh, so place it in a plastic bag in the fridge and use within two weeks.
Heirloom Tomatoes – This week you will likely get one or two Pink Berkeley Tie Dye tomatoes. (Obviously developed by some hippy farmers!) These tomatoes have a very sweet, rich, dark tomato flavor. There still aren’t many ready yet, so you’ll probably only get one or two this week. Store at room temperature for up to a week. Do not refrigerate.
Parsley – Store in the fridge in a small glass with about an inch of water, stem side down (like flowers in a vase) for best storage.
Poblano Peppers (Standard Shares Only; Large Shares, too, if there are enough) – Refrigerate peppers unwashed in a sealed plastic bag in the crisper drawer for one to two weeks. You can also dehydrate peppers for long-term. See Week 9 newsletter for more information about poblanos and recipes.
Potatoes – The variety this week is again Yukon Gold. These yellow potatoes have a dense, buttery texture ideal for baking, boiling, soups and frying. The potatoes you’re getting this week are “new potatoes”, meaning they are freshly harvested and have not been cured. Their skin is really delicate; thus, I’m not going to wash them before giving them to you.
Purple Top Turnips – I’m going to try and include as many turnip greens as I can since you can cook with these, too. Once you get your box, remove the turnip greens right away and wrap them in a barely damp paper towel and put them in a plastic bag in the fridge for best life. Store roots loose in the crisper drawer of your refrigerator. You can also store them in an open plastic bag to best retain moisture. Greens will last a few days. Turnips will last weeks. (Photo from High Mowing Seeds)
Rainbow Chard – Wash the chard only right before using. To store, place in a plastic bag with most of the air removed and put in the fridge. It is best used within a few days.
Red Peppers (Large Shares Only – MAYBE!) – There aren’t a lot of ripening peppers out in the field quite yet, but some are starting to get there. If we have some ready on Wednesday, we’ll include one or two in your share. Same storage instructions as with the poblanos.
Scallions – Store in the veggie drawer of your refrigerator and try to use within a week. If you use these after a week, you can peel off any dry and/or “slimy” outer layers of the onion.
Slicing Tomatoes – Store at room temperature for up to a week. Do not refrigerate.
Thyme (Large Shares Only) – Roll sprigs in a damp paper towel and place them in a resealable plastic bag. Alternatively, you can stand the sprigs up like a bouquet of flowers in a drinking glass or jar with about an inch of water inside.
Watermelon (Some Standard Shares) – I think I should have another couple of watermelons ready this week. Watermelons don’t ripen all at once, so everyone will get one, but it will probably be over the course of a few weeks. To store, refrigerate right away as watermelons don’t continue to ripen once picked. Cut melon should be covered in plastic wrap, and chunks or slices should be kept in an airtight container. Eat melons within a week.
Notes from the Field
Lately, it has been pretty quiet down in the field. I awoke one morning last week to this view of the farm. Sitting down in one of the red Adirondack chairs that overlook the field, before the rest of the family woke up and our day got going, I took a few moments to admire the scenery. Is it me, or does Minnesota have some truly wonderful cloud formations?

We weren’t the only ones to slow down a bit last week. It seems that Mother Nature also decided to take a break; the cloudy days and cool weather slowed down some growth and fruit ripening, but our plants have been working so hard for so long, I think they deserve a rest as well.
The only crops that I am starting to feel anxious about are the cherry and heirloom tomatoes. I feel like we should have had more of those by now, and I’m just not sure they will catch up as much as I want them to. I think part of the issue has to do with the septoria leaf spot disease I talked about earlier in the year. Heirloom tomatoes aren’t as tough as all of the hybrid tomatoes that are out there. Hybrids have been bred to resist cracking, be uniform in shape and color, and resist many diseases. Heirlooms are more unpredictable: you never know what size tomato you’ll get, even off of the same plant. Many easily crack and they are more susceptible to disease. We grow them though because they are more delicious. Also, they are open-pollinated which means you can save their seeds and pass them down throughout the generations with no need to buy seed in the future. (If you do this, you also end up coming up with a tomato which has evolved over time to better fit the microclimate of your farm.)
Long story short: when I look at the plants, it’s clear that the heirlooms are taking more of a beating from the disease than the hybrids. I know that heirlooms are the most anticipated of the tomatoes, so I’m not giving up hope yet, but I do want you to know that 2022 might be a less-than-ideal year for them.
This upcoming week we will take down the garlic that has been curing over the last three weeks and prepare it for sale via the Sustainable Farming Association’s Garlic Growers Directory. (If you know of anyone who wants to buy some garlic, please point them our way!) We will also water some new seedlings with diluted fish emulsion to give them a small boost of nitrogen and other micronutrients to help them get going. This is, by far, the stinkiest job on the farm and one we all try to pawn off on each other. I think I will be nice and do it on my own this time…
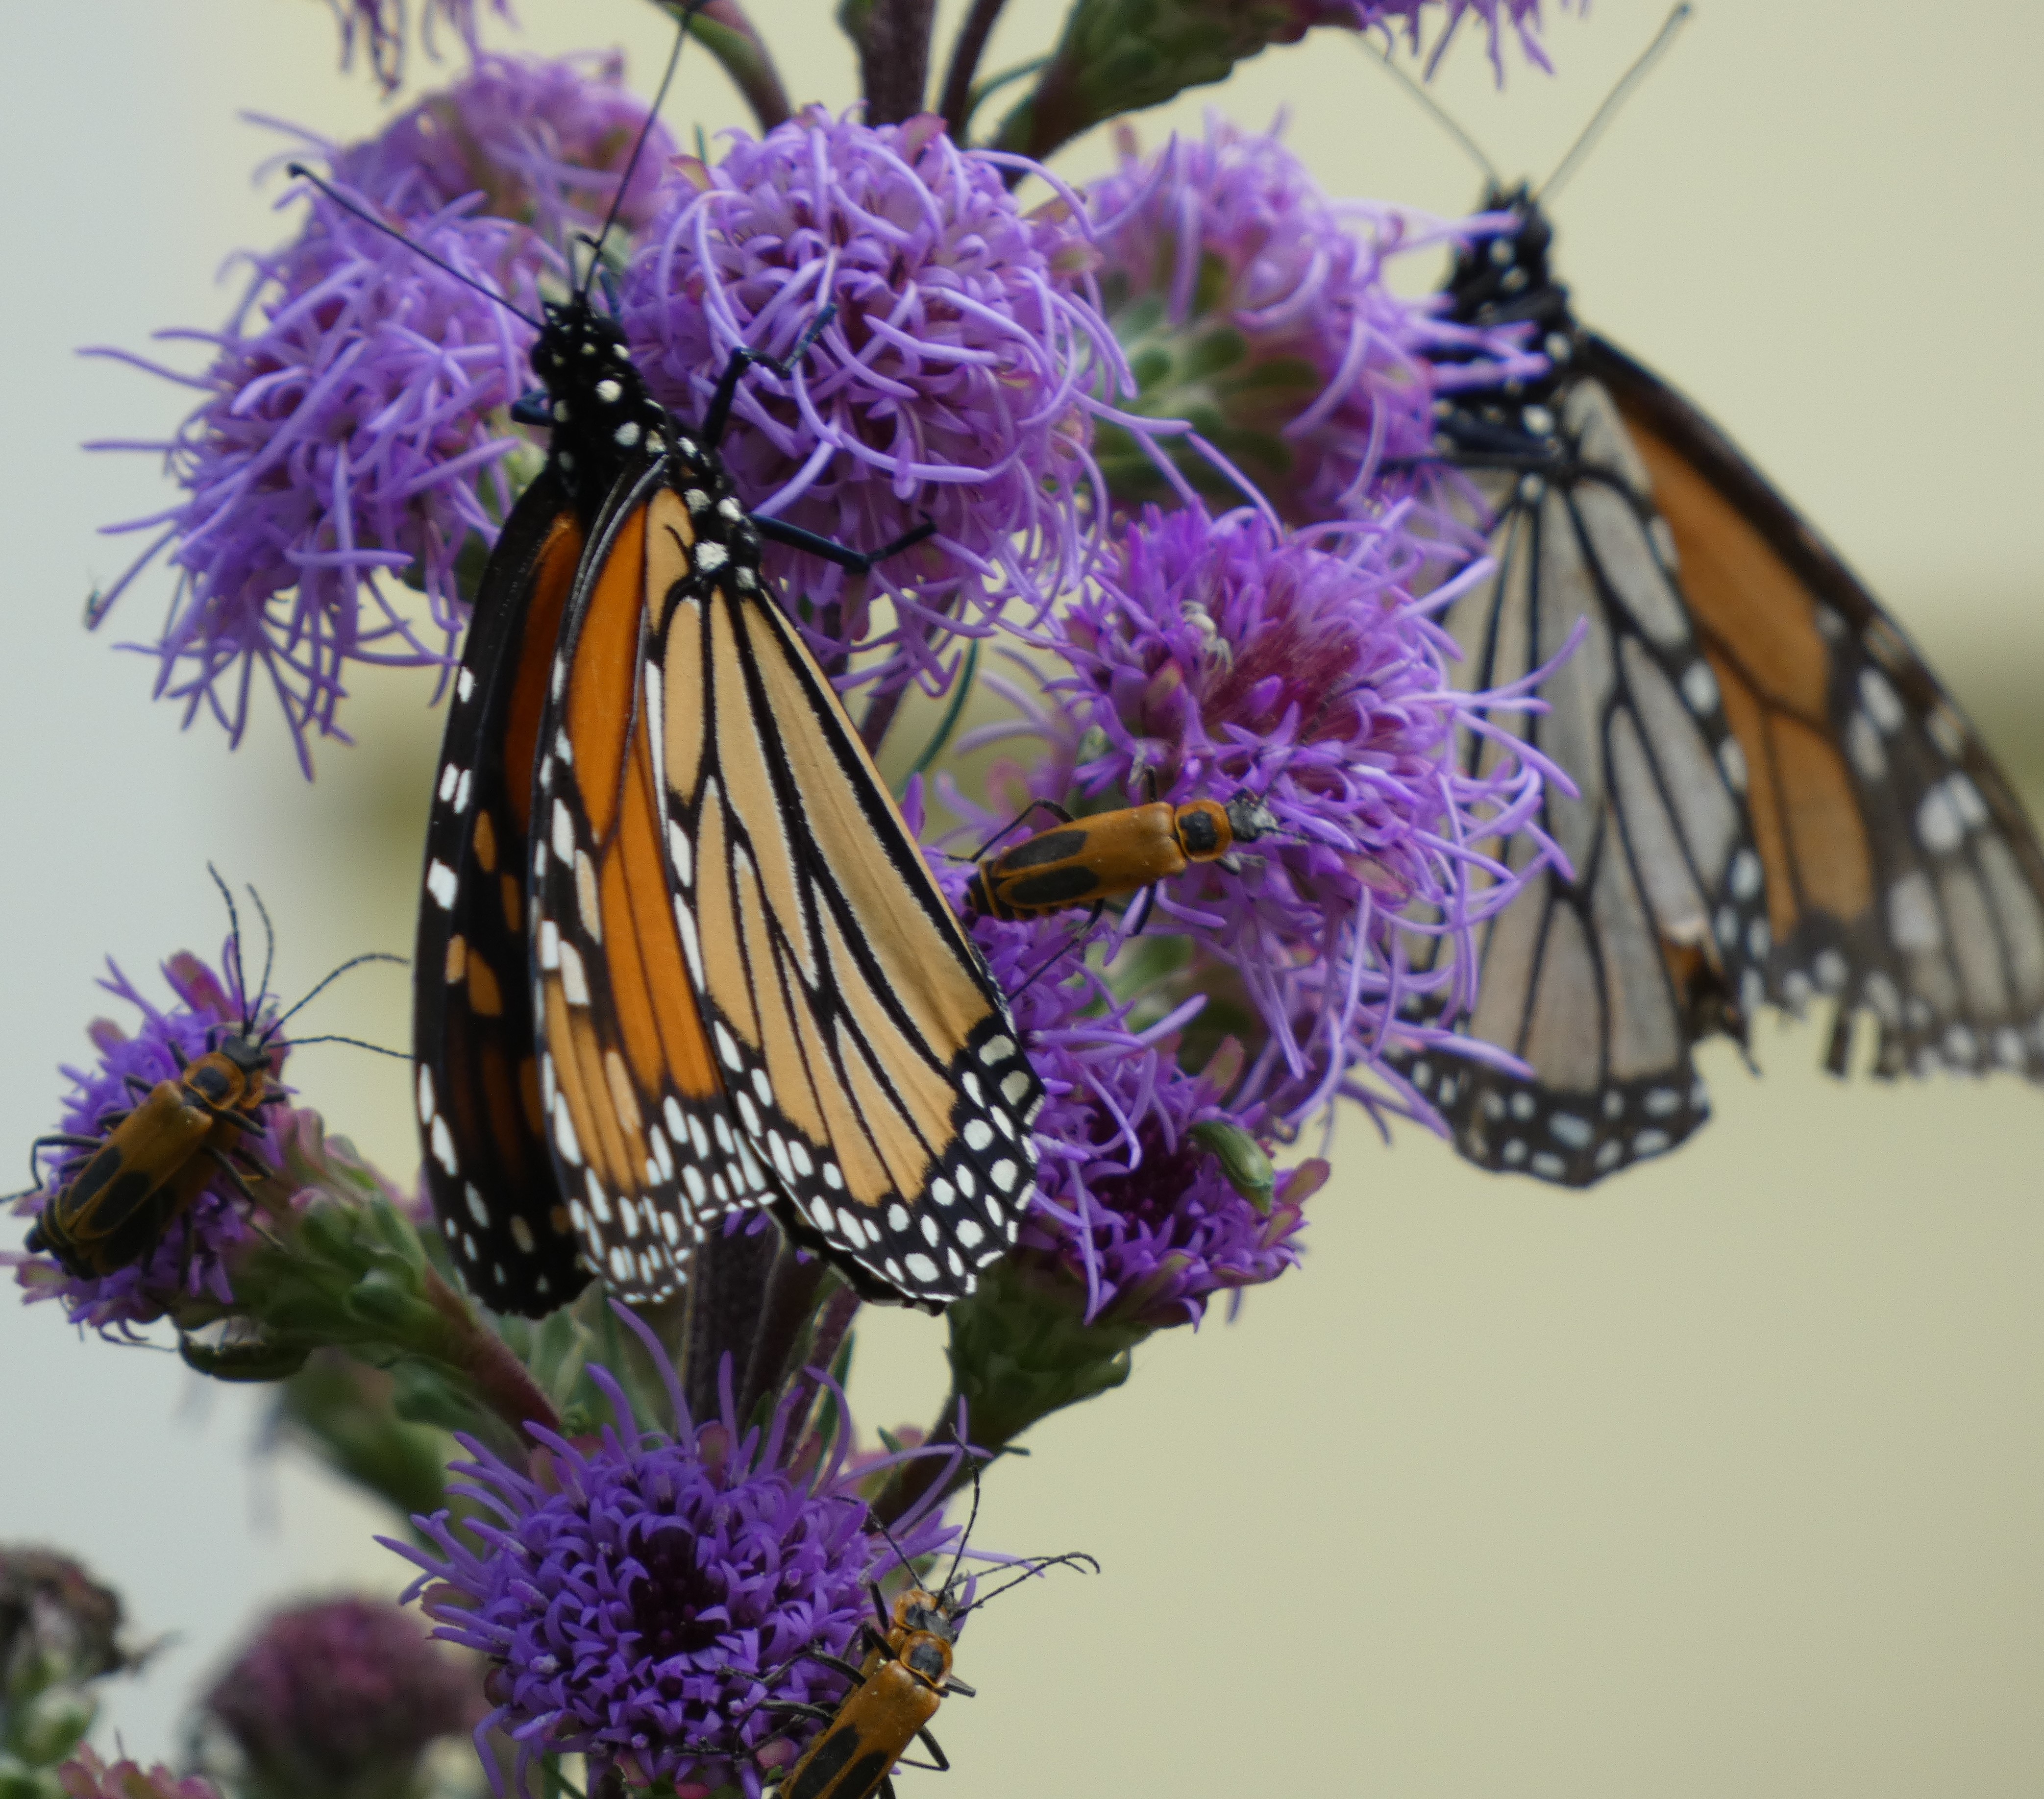
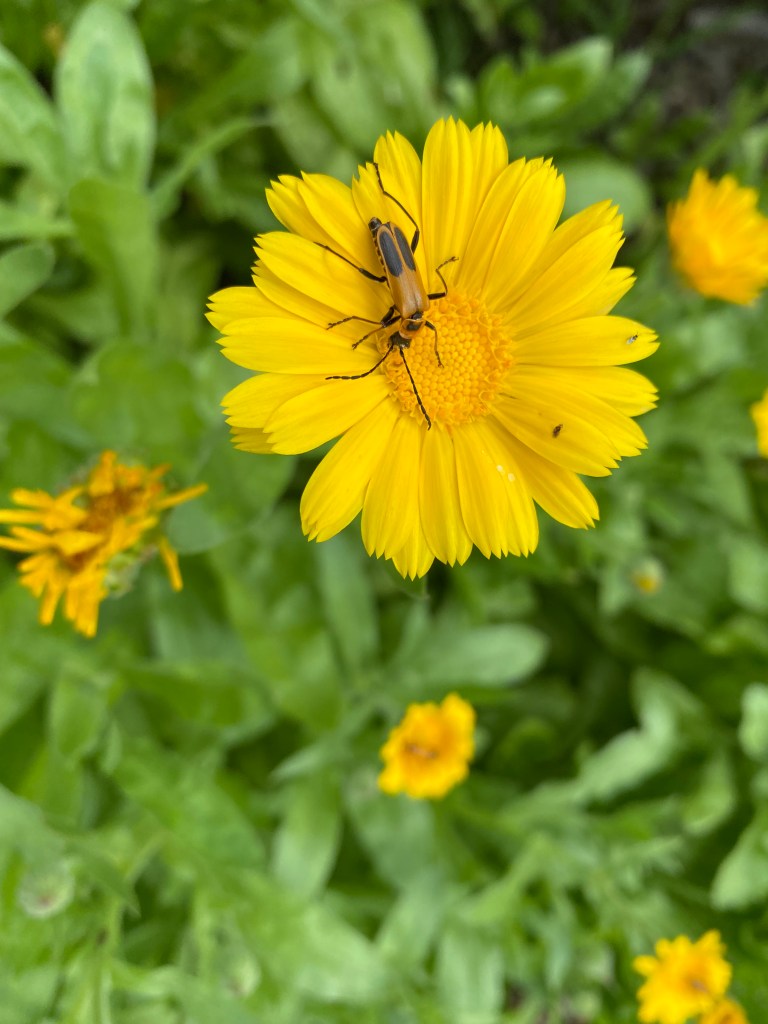
Here are some of Simon’s “Pollinators of the Week” photos:


Recipes
Asian Eggplant Stir Fry // Uses Asian Eggplant, Garlic, (Green Peppers and White Onions if you have some from last week) // Vegetarian
Braised Beef with Onion, Carrots, and Turnips // Uses Garlic, Parsley, Turnips, (Carrots and Onions if you have some from last week)
Grilled Turnips with Garlic // Uses Garlic, Parsley, Turnips // Vegetarian
Mapo Eggplant // Uses Asian Eggplant (can sub Italian), Garlic, Scallions
Miso Honey-Glazed Turnips // Uses Turnips
Roasted Poblano and Heirloom Tomato Salsa // Uses Garlic, Heirloom Tomatoes, Poblano Peppers, (White Onions if you have some from last week) // Vegetarian
Salt-Roasted Turnips with Goat Cheese and Greens // Uses Turnip, Can probably use Rainbow Chard, too // Vegetarian
Smoky Sautéed Asian Eggplant // Uses Asian Eggplant, Garlic, Tomatoes, Sub Scallions for Onion // Vegetarian
Week 11: August 15, 2022
August is a funny time on the farm. It’s the month when my favorite veggies – the ones I’ve been waiting for since winter – are finally ripe and ready to harvest, and it’s also the month where I start to get a little tired of deciding what to do with all of the produce that is coming out of the field. Besides planting enough veggies for you, I plant enough for our family, both to eat fresh and to preserve for later on the year. A lot of work goes into planning and growing all of that food, and so I find myself feeling obligated to use it all up. Thus, the kitchen counters and refrigerators are crowded with pickling crocks, canning jars, and lots of produce needing to be processed. Looking at it all can make me feel a bit overwhelmed from time to time.

CSA members can also feel this way – that they need to use everything that comes in their box each week – and when life intervenes and they can’t, some experience what we CSA farmers call “veggie guilt.” Knowing this, and realizing that this is the time of the season when your boxes are full to the brim, I just wanted to take a minute to let you (and me!) off the hook.
The reality is that sometimes we all just have a busy week that makes it a whole lot easier to go out to dinner or warm up a frozen burrito in the microwave than to cook. Sometimes we’re just not in the mood to be in the kitchen. Sometimes that means that not all of the produce will get used, and that’s okay. That’s life.
I can’t tell you how many times I have discovered an old zucchini or cucumber or herb in the back of the fridge that I just couldn’t get to in time. I throw it in the compost pile and don’t worry about it. I also frequently decide that there is just no way I’m going to be able to cook with everything that I have, so I gather some of it up and give it away to friends, family, and neighbors.
Being part of a CSA can be really challenging in that for most members, it presents an entirely new way of shopping and cooking. Few of us grew up eating seasonally and so the CSA learning curve can be steep, especially during the first year. Thus, I want you all to give yourselves credit for what you have been able to do so far and to give yourselves a break when you can’t do it all. Even if you end up throwing some produce out, you’re still doing a lot of good helping to support local, organic agriculture. A few unused veggies here or there doesn’t change that at all!
What’s in My Box this Week?

Carrots – Remove the green tops as soon as you can, leaving about an inch of stems, and place the roots in a plastic bag in the crisper drawer of your refrigerator. They will last for several weeks. You can also store them in a bin of water to keep them crisp, changing out the water every few days. Save the tops in a plastic bag and use them in salads and other dishes.
Cherry Tomatoes (Large Shares and Probably Most Standard Shares, too – if you don’t get them this week, you’ll get them next) – This week’s variety of cherry tomato is Sungold. Cherry tomatoes can over-ripen pretty quickly, so it can be a good idea to store them in the fridge if you’re not going to eat them right away.
Eggplant – Everyone will get Italian eggplant (fat and dark purple) this week. Eggplant is very perishable, so use it quickly or at least within the week. To store in the fridge, wrap it unwashed in a paper towel (not plastic) and keep in your crisper. You can also store it unrefrigerated at a cool room temperature.
English Cucumbers – Place in a sealed plastic bag in the crisper drawer of the refrigerator for up to a week.
Garlic – The garlic you’re getting this week is still fresh, so place it in a plastic bag in the fridge and use within two weeks.
Green Peppers – Refrigerate peppers unwashed in a sealed plastic bag in the crisper drawer for one to two weeks. You can also dehydrate peppers for long-term.
Heirloom Tomatoes – There aren’t many ready yet, so you’ll probably only get one this week, but in my opinion, one good heirloom tomato is worth about a dozen slicing tomatoes any day. Store at room temperature for up to a week. Do not refrigerate and enjoy!
Jalapeno Peppers – Same storage instructions as for Green Peppers.
Parsley (Large Shares Only) – Store in the fridge in a small glass with about an inch of water, stem side down (like flowers in a vase) for best storage.
Potatoes – This variety is Yukon Gold. These yellow potatoes have a dense, buttery texture ideal for baking, boiling, soups and frying. The potatoes you’re getting this week are “new potatoes”, meaning they are freshly harvested and have not been cured. Their skin is really delicate; thus, I’m not going to wash them before giving them to you.
New potatoes also have a bit more water in the them than those which have been cured to be placed into longer term storage. That being said, they can be stored just like regular potatoes, but they will not last as long at room temperature. Try to use within a couple of weeks or keep in the fridge for longer term storage.
Slicing Tomatoes – Store at room temperature for up to a week. Do not refrigerate.
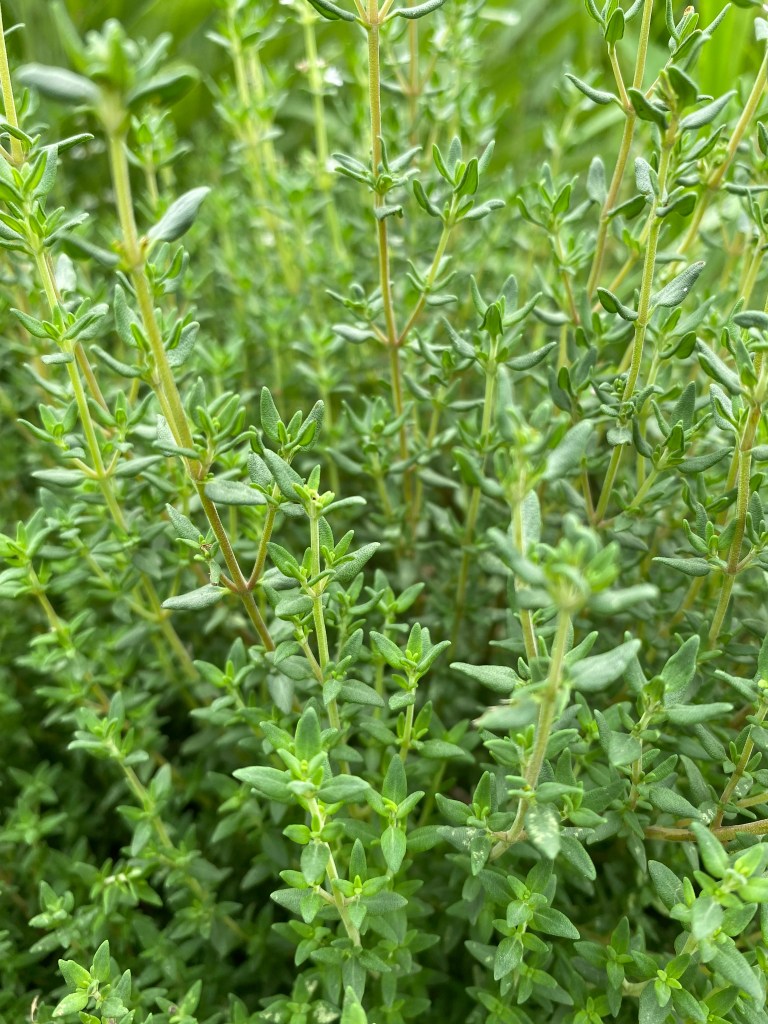
Thyme (Standard Shares Only) – Roll sprigs in a damp paper towel and place them in a resealable plastic bag. Alternatively, you can stand the sprigs up like a bouquet of flowers in a drinking glass or jar with about an inch of water inside.
Tomatillos – Store in the crisper drawer of your fridge. They should last at least a week.
Watermelon (Large Shares Only) – I think I should have a couple of watermelons ready this week, but I am notoriously awful at knowing when watermelons are ready to harvest. They give you little signs to indicate ripeness (yellow spot on the rind where the fruit has sat on the ground, vine tendril closest to the fruit dies back, melon sounds hollow when you thump it), but it’s still more of an art than a science to know when it’s time to be picked. I have considered how many days its been since germination and I harvested one to try a couple of weeks ago (tasted good, but color wasn’t very vibrant), so I think we’re good to go, but I will make a final determination on Wednesday morning.
Watermelons don’t ripen all at once, so everyone will get one, but it will probably be over the course of a few weeks.
To store, refrigerate right away as watermelons don’t continue to ripen once picked. Cut melon should be covered in plastic wrap, and chunks or slices should be kept in an airtight container. Eat melons within a week.
White Onions – Store in a cool dark place. Use any that feel soft first. These onions are freshly harvested and haven’t gone through the curing process that we typically use when preparing onions for longer storage, so they won’t last as long as those you might buy at a store, but they will be good for a week or two.
Notes from the Field
This week marks a turning point on the farm: I seeded the very last crops for the entire year when I planted cilantro, spinach, Tatsoi, and arugula for the fall. I also spent time pulling out plants that have already provided what they can – broccoli, cauliflowers, Bok choy, and others. The goldenrod and asters are starting to bloom along the field edges. School starts in two weeks. There is a distinct feeling in the air that the season is about to turn.
The other clue that things are changing is that we are now harvesting and curing crops that we can share and enjoy well into the winter. Veggies like carrots, onions, and potatoes can keep for months and months if you choose the right varieties and keep them stored under the right conditions. We were actually eating last year’s potatoes as late as this past June. (Don’t worry! Yours will always be fresher than that!)
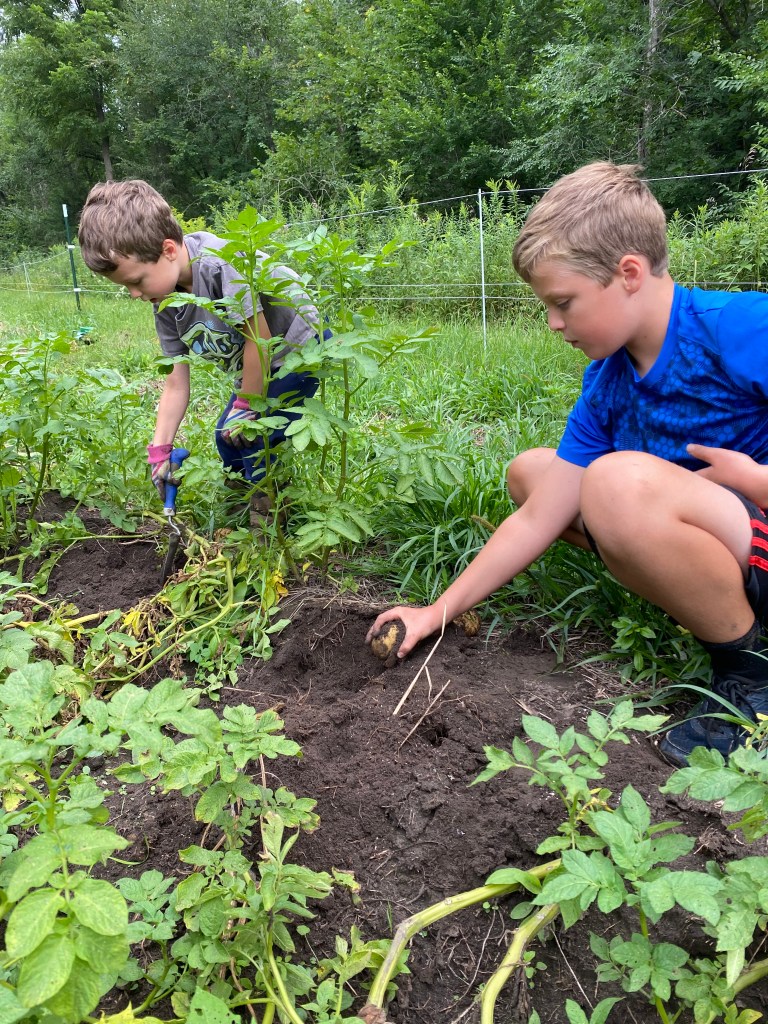
Harvesting potatoes is always one of our family’s favorite farm chores. It’s fun to dig down into the soil and see what you unearth. It’s rather like unwrapping a present, and it’s especially fun when you find the giant ones or the ones with funny shapes.

The other thing I’ve noticed this week is just how busy all of the insects are out in the field. (By now, you know that we’re just a tad bit interested in bugs.) Every time I take a step anywhere, I hear “click! click! click!” as dozens of grasshoppers jump away from me. The pollinators seem to be working harder and faster than ever, collecting nectar and pollen at a record pace. When I harvest cucumbers, the buzzing of bees is so loud, you can hear it from a couple of rows over. Simon managed to capture all sorts of good photos of our pollinators in action this week.


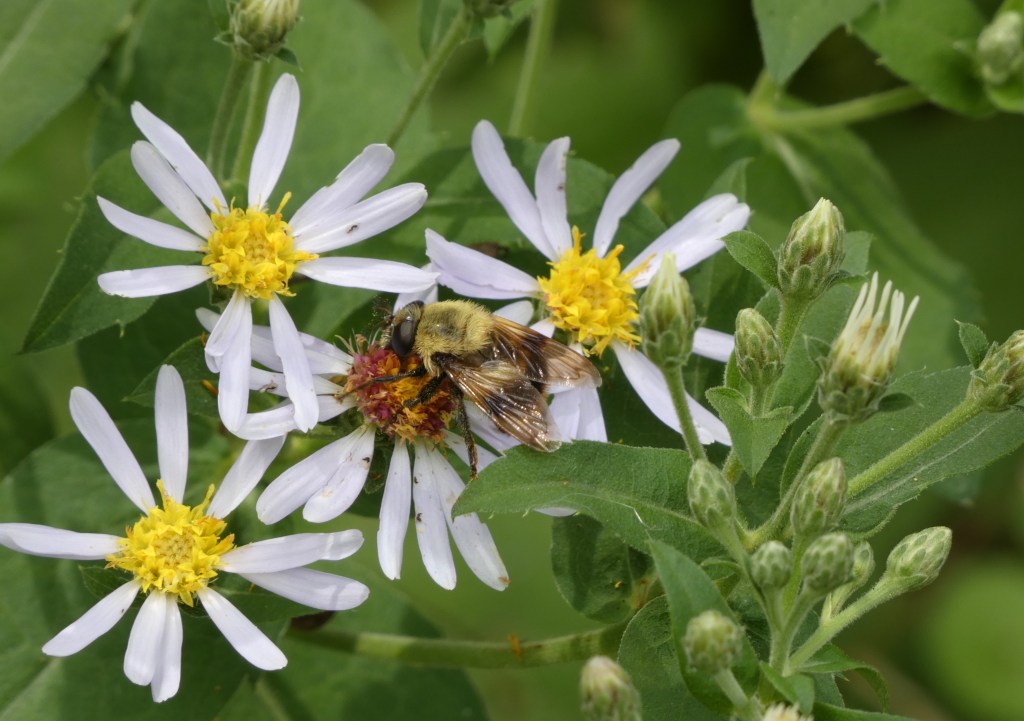

bumblebee on aster; milkweed tussock moth caterpillar and aphids
(Okay. Aphids are actually pests, but they look neat behind this caterpillar.)
Recipes
Crispy Smashed Potatoes with Onions and Parsley // Uses Onions, Parsley, Potatoes // Vegetarian
Roasted Potato Salad with Kale // Uses Kale (if leftover from last week), Parsley, Potatoes, Yellow Onion
Recipe from Raleigh’s Hilltop Farm
2 lbs. unpeeled potatoes, cut into large chunks
2 tablespoons olive oil
Seasonings, as desired
3 stalks kale, stem removed and roughly chopped
3/4 cup mayonnaise
3/4 cup plain yogurt
1/2 teaspoon Dijon mustard
1 teaspoon dried parsley (can also sub fresh)
3 to 4 slices thick-cut bacon, cooked, drained and chopped
1/2 yellow onion, diced
1. Preheat oven 350 degrees. Toss potatoes with olive oil and 1-2 tablespoons seasoning of your choice (my mom uses a mix of season salt, garlic salt and pepper). Roast potatoes for 35 minutes in a preheated oven until edges begin to brown and potatoes are tender.
2. Add kale to pan, toss to coat with oil and seasonings, and roast 10 minutes longer. In a small bowl, combine mayo, yogurt, mustard and parsley. Add bacon and onion.
3. Allow potatoes and kale to cool slightly. Toss with dressing, stir to coat. Adjust seasonings as needed/desired.
Spicy Watermelon Margaritas // Uses Jalapeno, Watermelon // Vegetarian
Thyme-Roasted Chicken with Potatoes // Uses Potatoes, Thyme, Throw in some Carrots, too
Watermelon and Cucumber Salad // Uses Watermelon (and Cukes if you have some left over from last week) // Vegetarian
Watermelon Mint Sorbet // Uses Watermelon // Vegetarian
Week 10: August 8, 2022
This week’s newsletter is going to be short and sweet. The kids and I took off to my home state of Michigan early this past Thursday morning and just returned last night, so not much work got done in the field last week. Erik held down the fort for me while I was away (thankfully!), harvesting when he could in between the rain that fell off and on for much of the weekend. It was starting to get dry out there, so the rain is also much appreciated. This week I will be busy cleaning up the field, pulling out some crops that are starting to wane, weeding, and otherwise getting it back into shape.
What’s in My Box this Week?
Basil – Store with the stems in a glass of water on your counter out of direct sunlight. Do not store in the fridge as it will blacken immediately and wilt after that.
Carrots – Remove the green tops as soon as you can, leaving about an inch of stems, and place the roots in a plastic bag in the crisper drawer of your refrigerator. They will last for several weeks. You can also store them in a bin of water to keep them crisp, changing out the water every few days. Save the tops in a plastic bag and use them in salads and other dishes.
Cherry Tomatoes (Large Shares Only) – This week’s variety of cherry tomato is Sungold and there is good reason for that name. These beautiful golden orange tomatoes are sweet and tangy; we just can’t help grabbing some when we’re working in the field, and popping them into our mouths, all warm and juicy from the sun. Cherry tomatoes can over-ripen pretty quickly, so it can be a good idea to store them in the fridge if you’re not going to eat them right away.
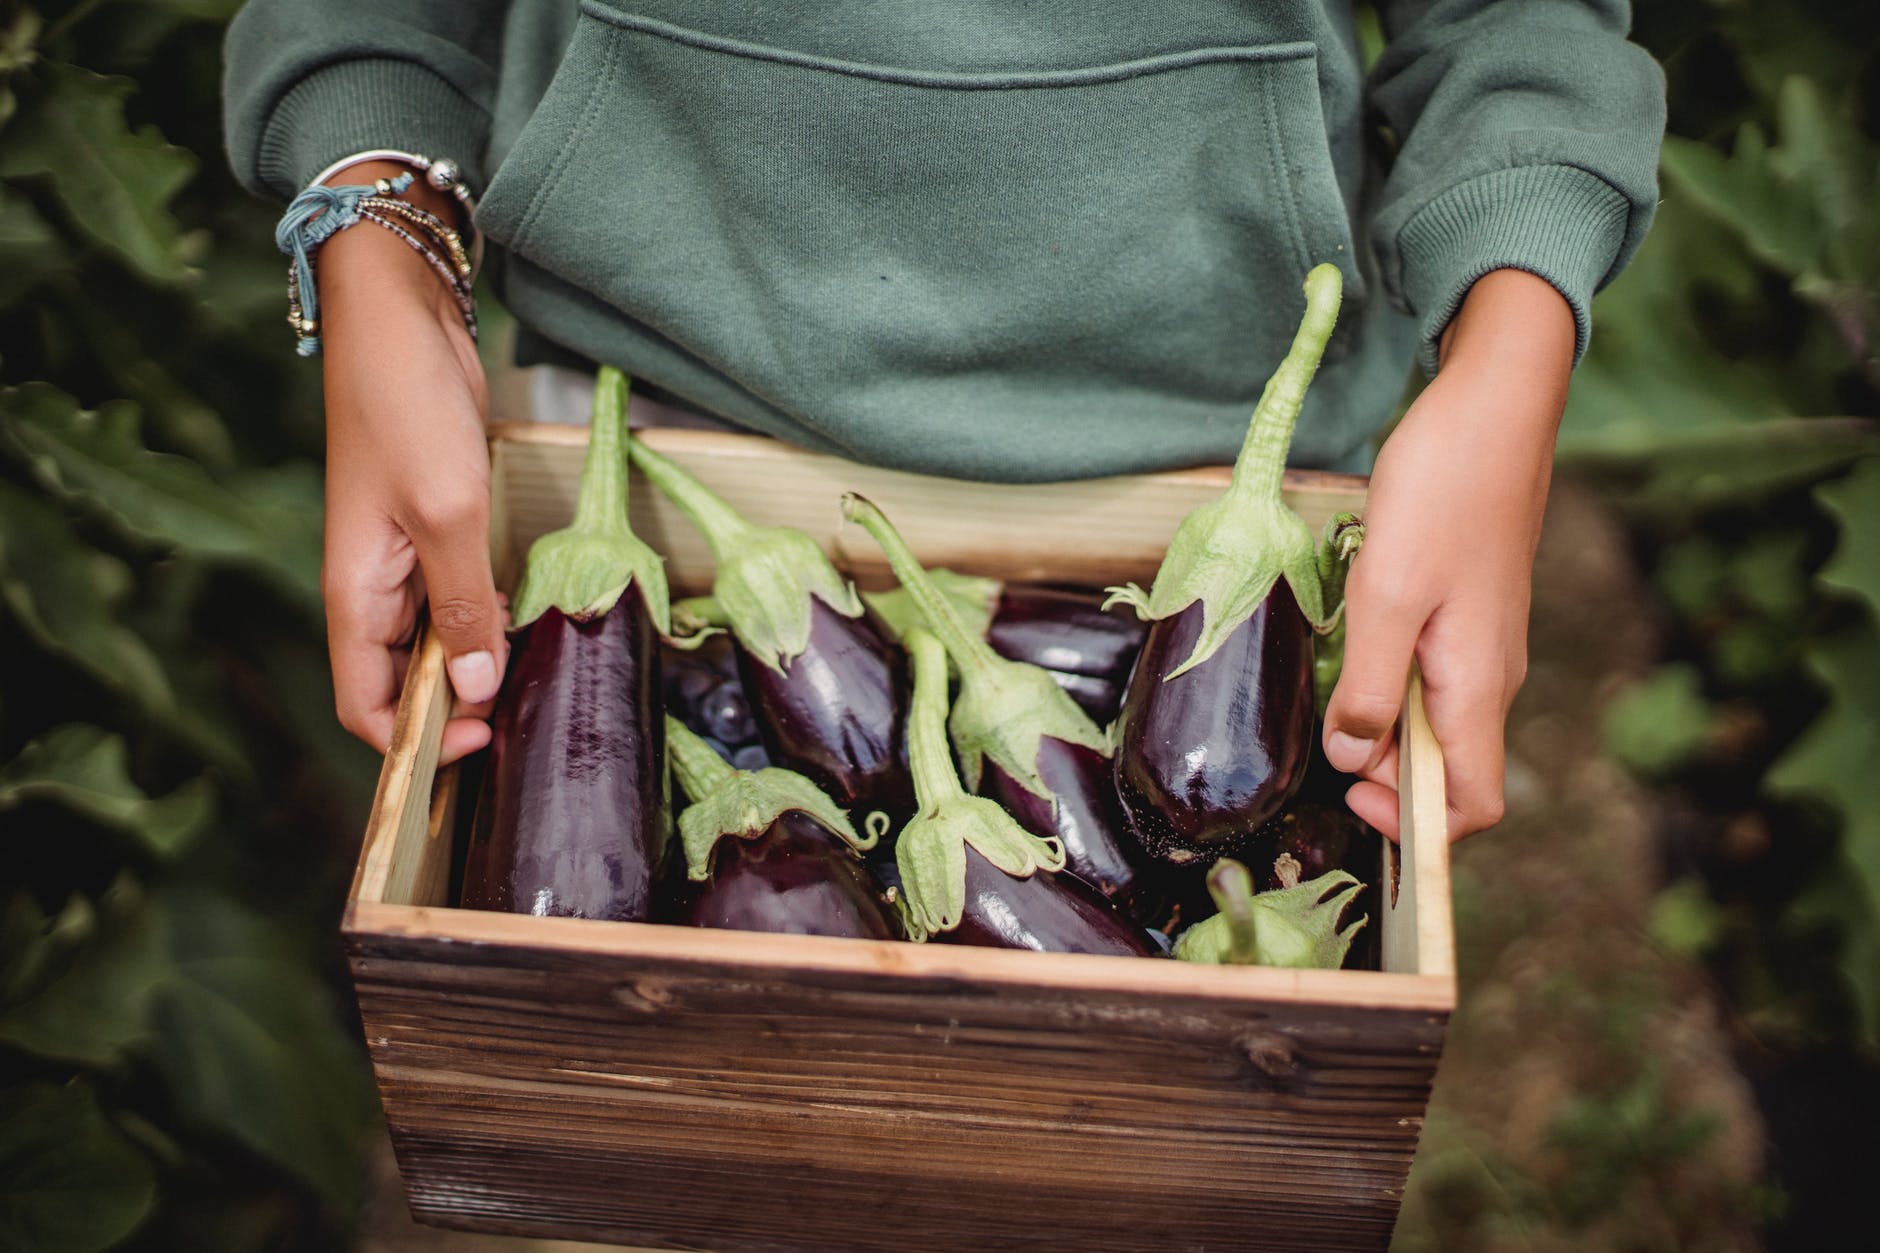
Eggplant – Most people will get an Italian eggplant (fat and dark purple) this week, but one or two members might get Asian eggplants (long, skinny, light purple) instead. They can all be used the same way. Eggplant is very perishable, so use it quickly or at least within the week. I’ve heard some people recommend that it not be stored in the fridge to prevent it from getting soggy too quickly, but I usually do. Just wrap it unwashed in a paper towel (not plastic) and keep in your crisper. You can also store it unrefrigerated at a cool room temperature.
English Cucumbers – Place in a sealed plastic bag in the crisper drawer of the refrigerator for up to a week.
Garlic – The garlic you’re getting this week is still fresh, so place it in a plastic bag in the fridge and use within two weeks.
Green Peppers – Refrigerate peppers unwashed in a sealed plastic bag in the crisper drawer for one to two weeks. You can also dehydrate peppers for long-term.
Jalapeno Peppers – Same storage instructions as for Green Peppers.

Red Cabbage – Cabbage can store for three weeks to two months and it doesn’t require much special care to have it last this long. Just keep it in the crisper of your fridge and remove the two outer leaves before eating. (These leaves are used to help store the cabbage.)
Scallions (Standard Shares Only) – Store in the veggie drawer of your refrigerator and try to use within a week. If you use these after a week, you can peel off any dry and/or “slimy” outer layers of the onion.
Summer Savory – I find that most people have never heard of this herb, but it’s nice having it in the garden this time of year because its peppery taste pairs well with many summer dishes. Summer savory is native to southeastern Europe and is in the mint family. It’s sometimes used as a substitute for, or in conjunction with, rosemary and thyme, probably because it’s related to them. It has medicinal properties and was once used in love potions as an aphrodisiac. (You’ve been warned!).
Slicing Tomatoes – Store at room temperature for up to a week. Do not refrigerate.

Tomatillos (Large Shares Only) – Store in the crisper drawer of your fridge. They should last at least a week.
White Curly Kale – Place kale unwashed, wrapped in a sealed plastic bag in the crisper drawer of the refrigerator. Best used very fresh, but may last for a week.
Yellow Crookneck Squash – I debated giving you squash and zucchini again this week, but now that the eggplant, peppers, and tomatoes are ready, I thought that I should because so many yummy summer recipes call for those veggies along with summer squash/zucchini. Store them in the crisper drawer of your fridge, but try to use within a week as they will quickly get soggy. You can use these interchangeably with zucchini in recipes.
Yellow Onions (Large Shares Only) – Store in a cool dark place. Use any that feel soft first. These onions are freshly harvested and haven’t gone through the curing process that we typically use when preparing onions for longer storage, so they won’t last as long as those you might buy at a store, but they will be good for a week or two.
Zucchini – Same storage instructions as Yellow Crookneck Squash.
Notes from the Field
As I wrote above, not much happened on the farm this past week because of our trip, but we did manage to get one big task done the day before we left. As I mentioned in last week’s newsletter, we recently harvested all of the garlic and so we needed to get it tied together in bundles and hung up in the barn to cure. When you cure garlic (and onions for that matter), you dry it down so that the bulbs can be stored and used long-term. Fresh garlic that has not been cured is very tasty, but it will only last a couple of weeks at most, and we want garlic for as long as possible throughout the year. Thus, we hang it up for three weeks, provide plenty of air flow in the room where it is curing, and then take it down, clean it up, and stick it in the storage cooler to keep. Some of that garlic is then used to plant next year’s crop in October and the rest can be used well into the spring.
We were in a bit of a panic to get all the bulbs processed before our trip, but luckily Sam and Genevieve came to the rescue again (they had helped out with the native planting last month) and helped us get it done in a day. It makes leaving the farm in the summer (never a simple feat!) a little bit easier when big tasks like that are out of the way.
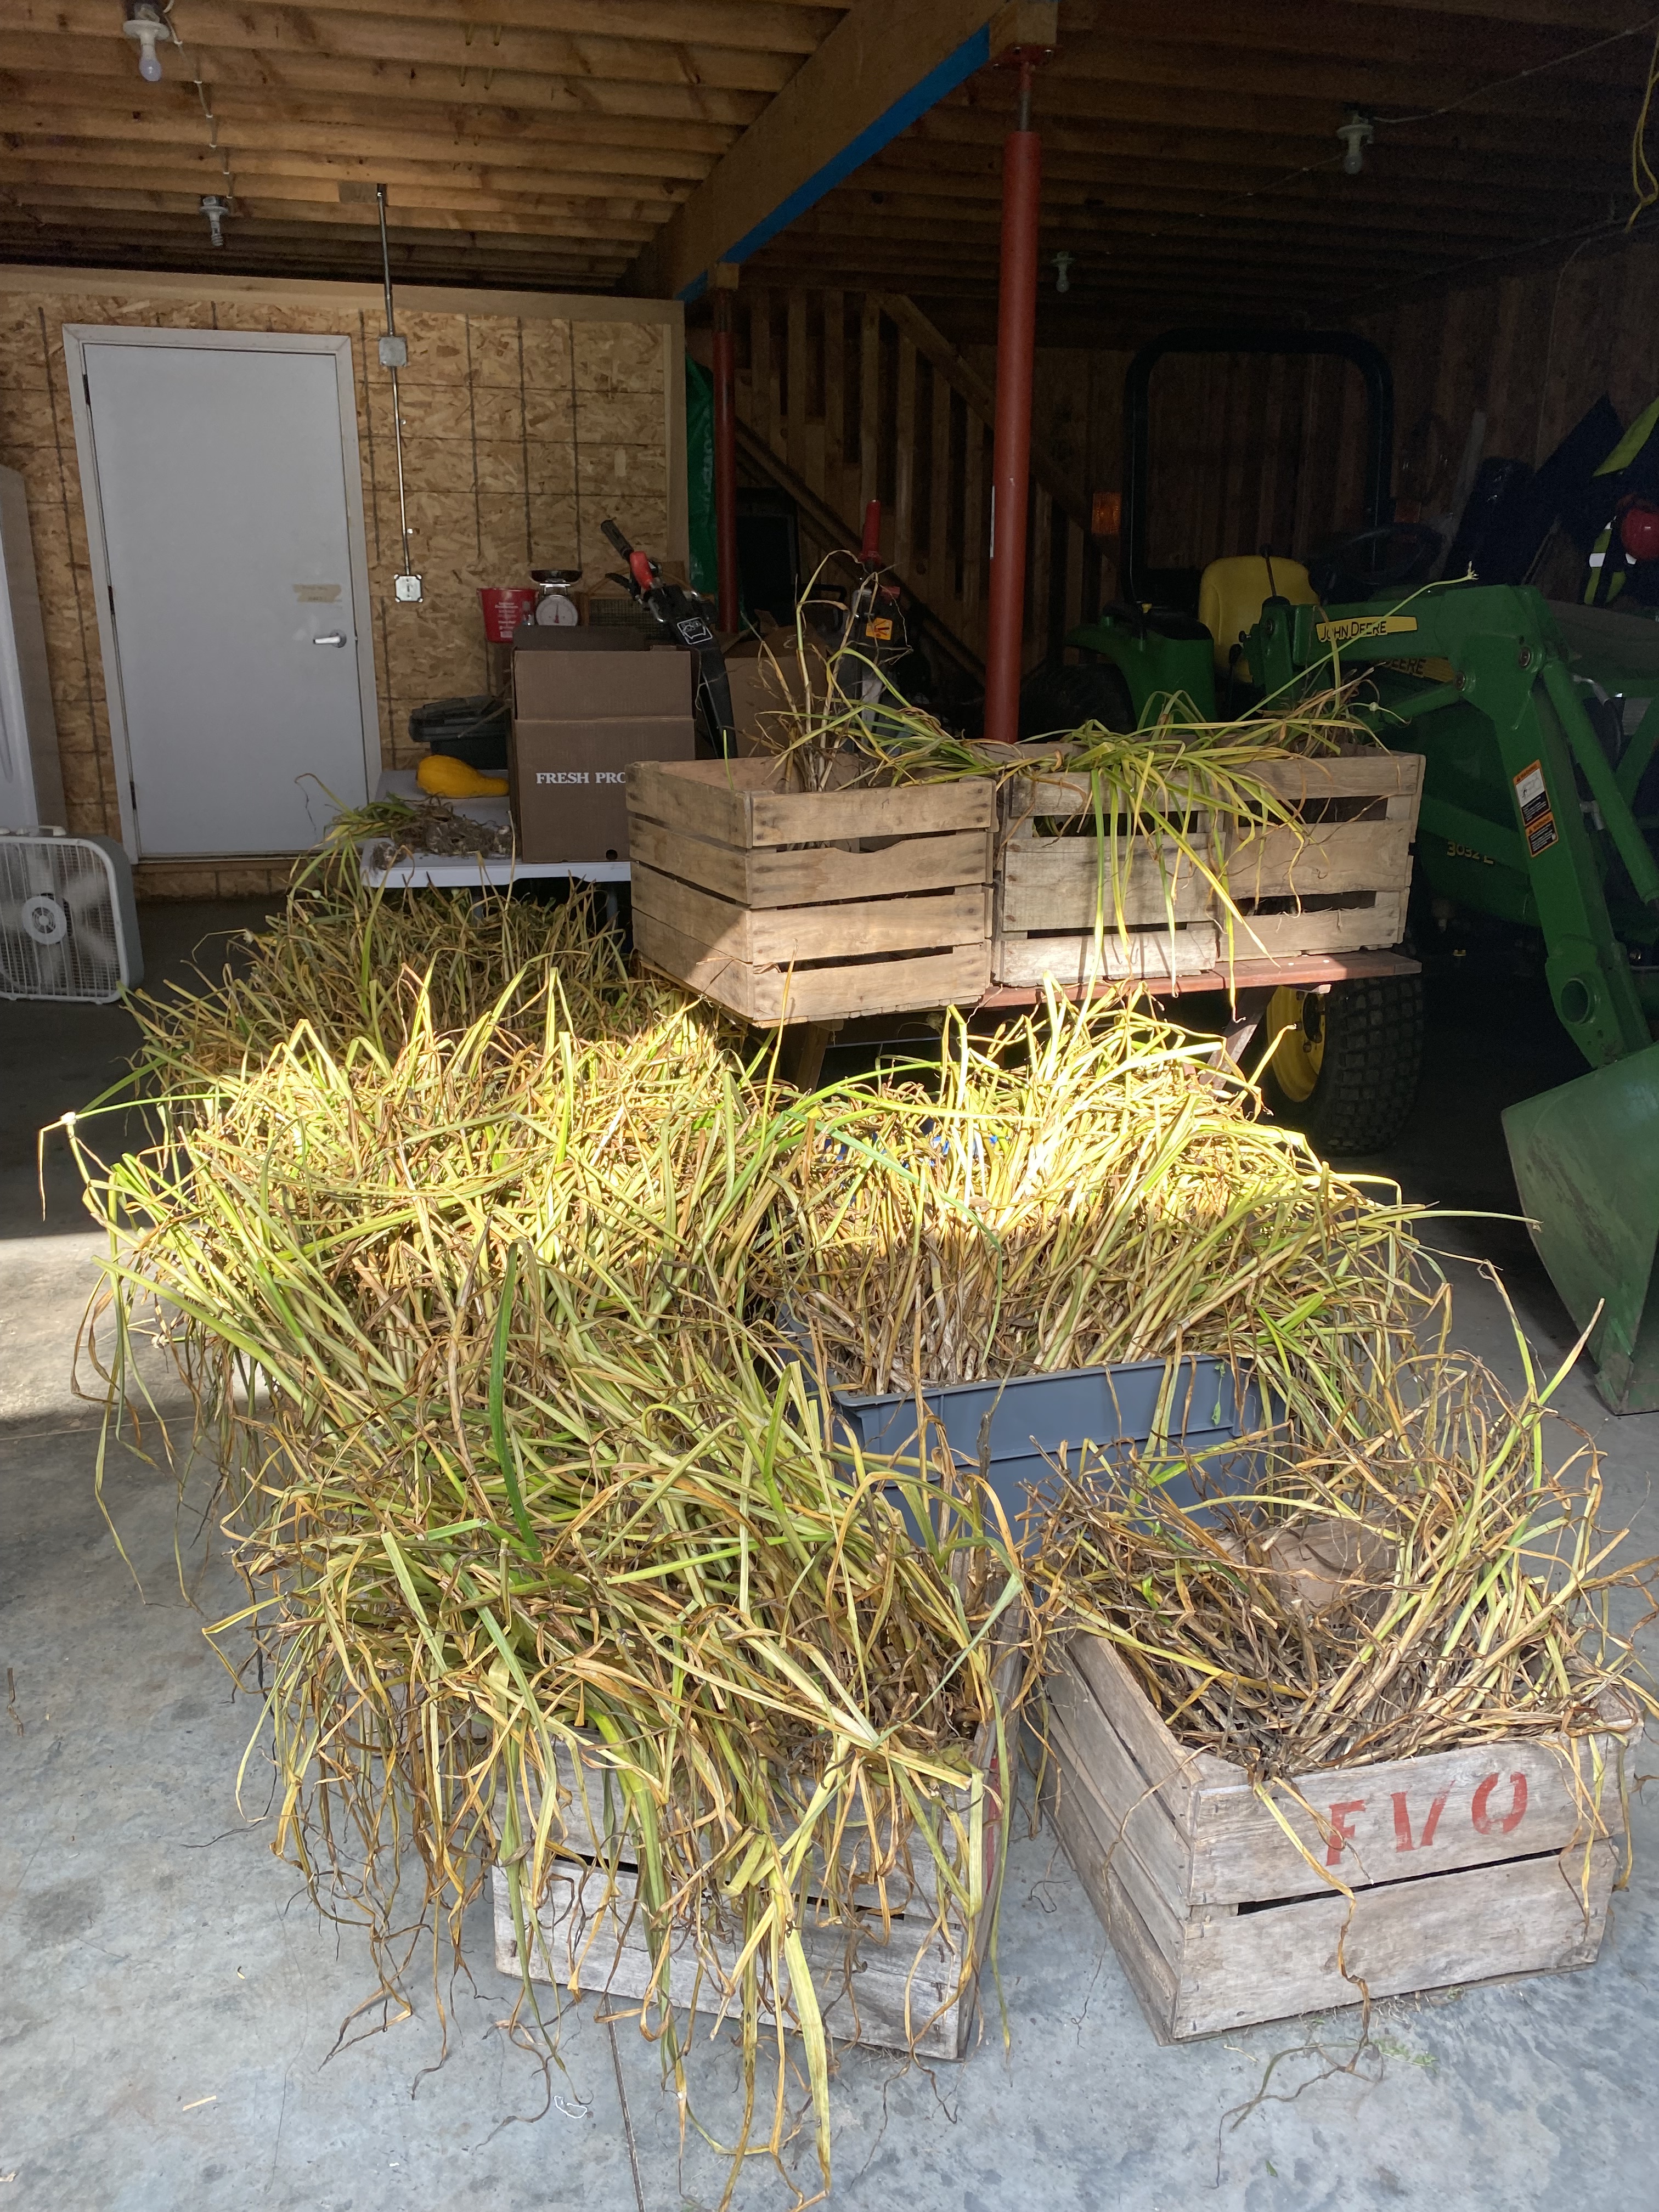
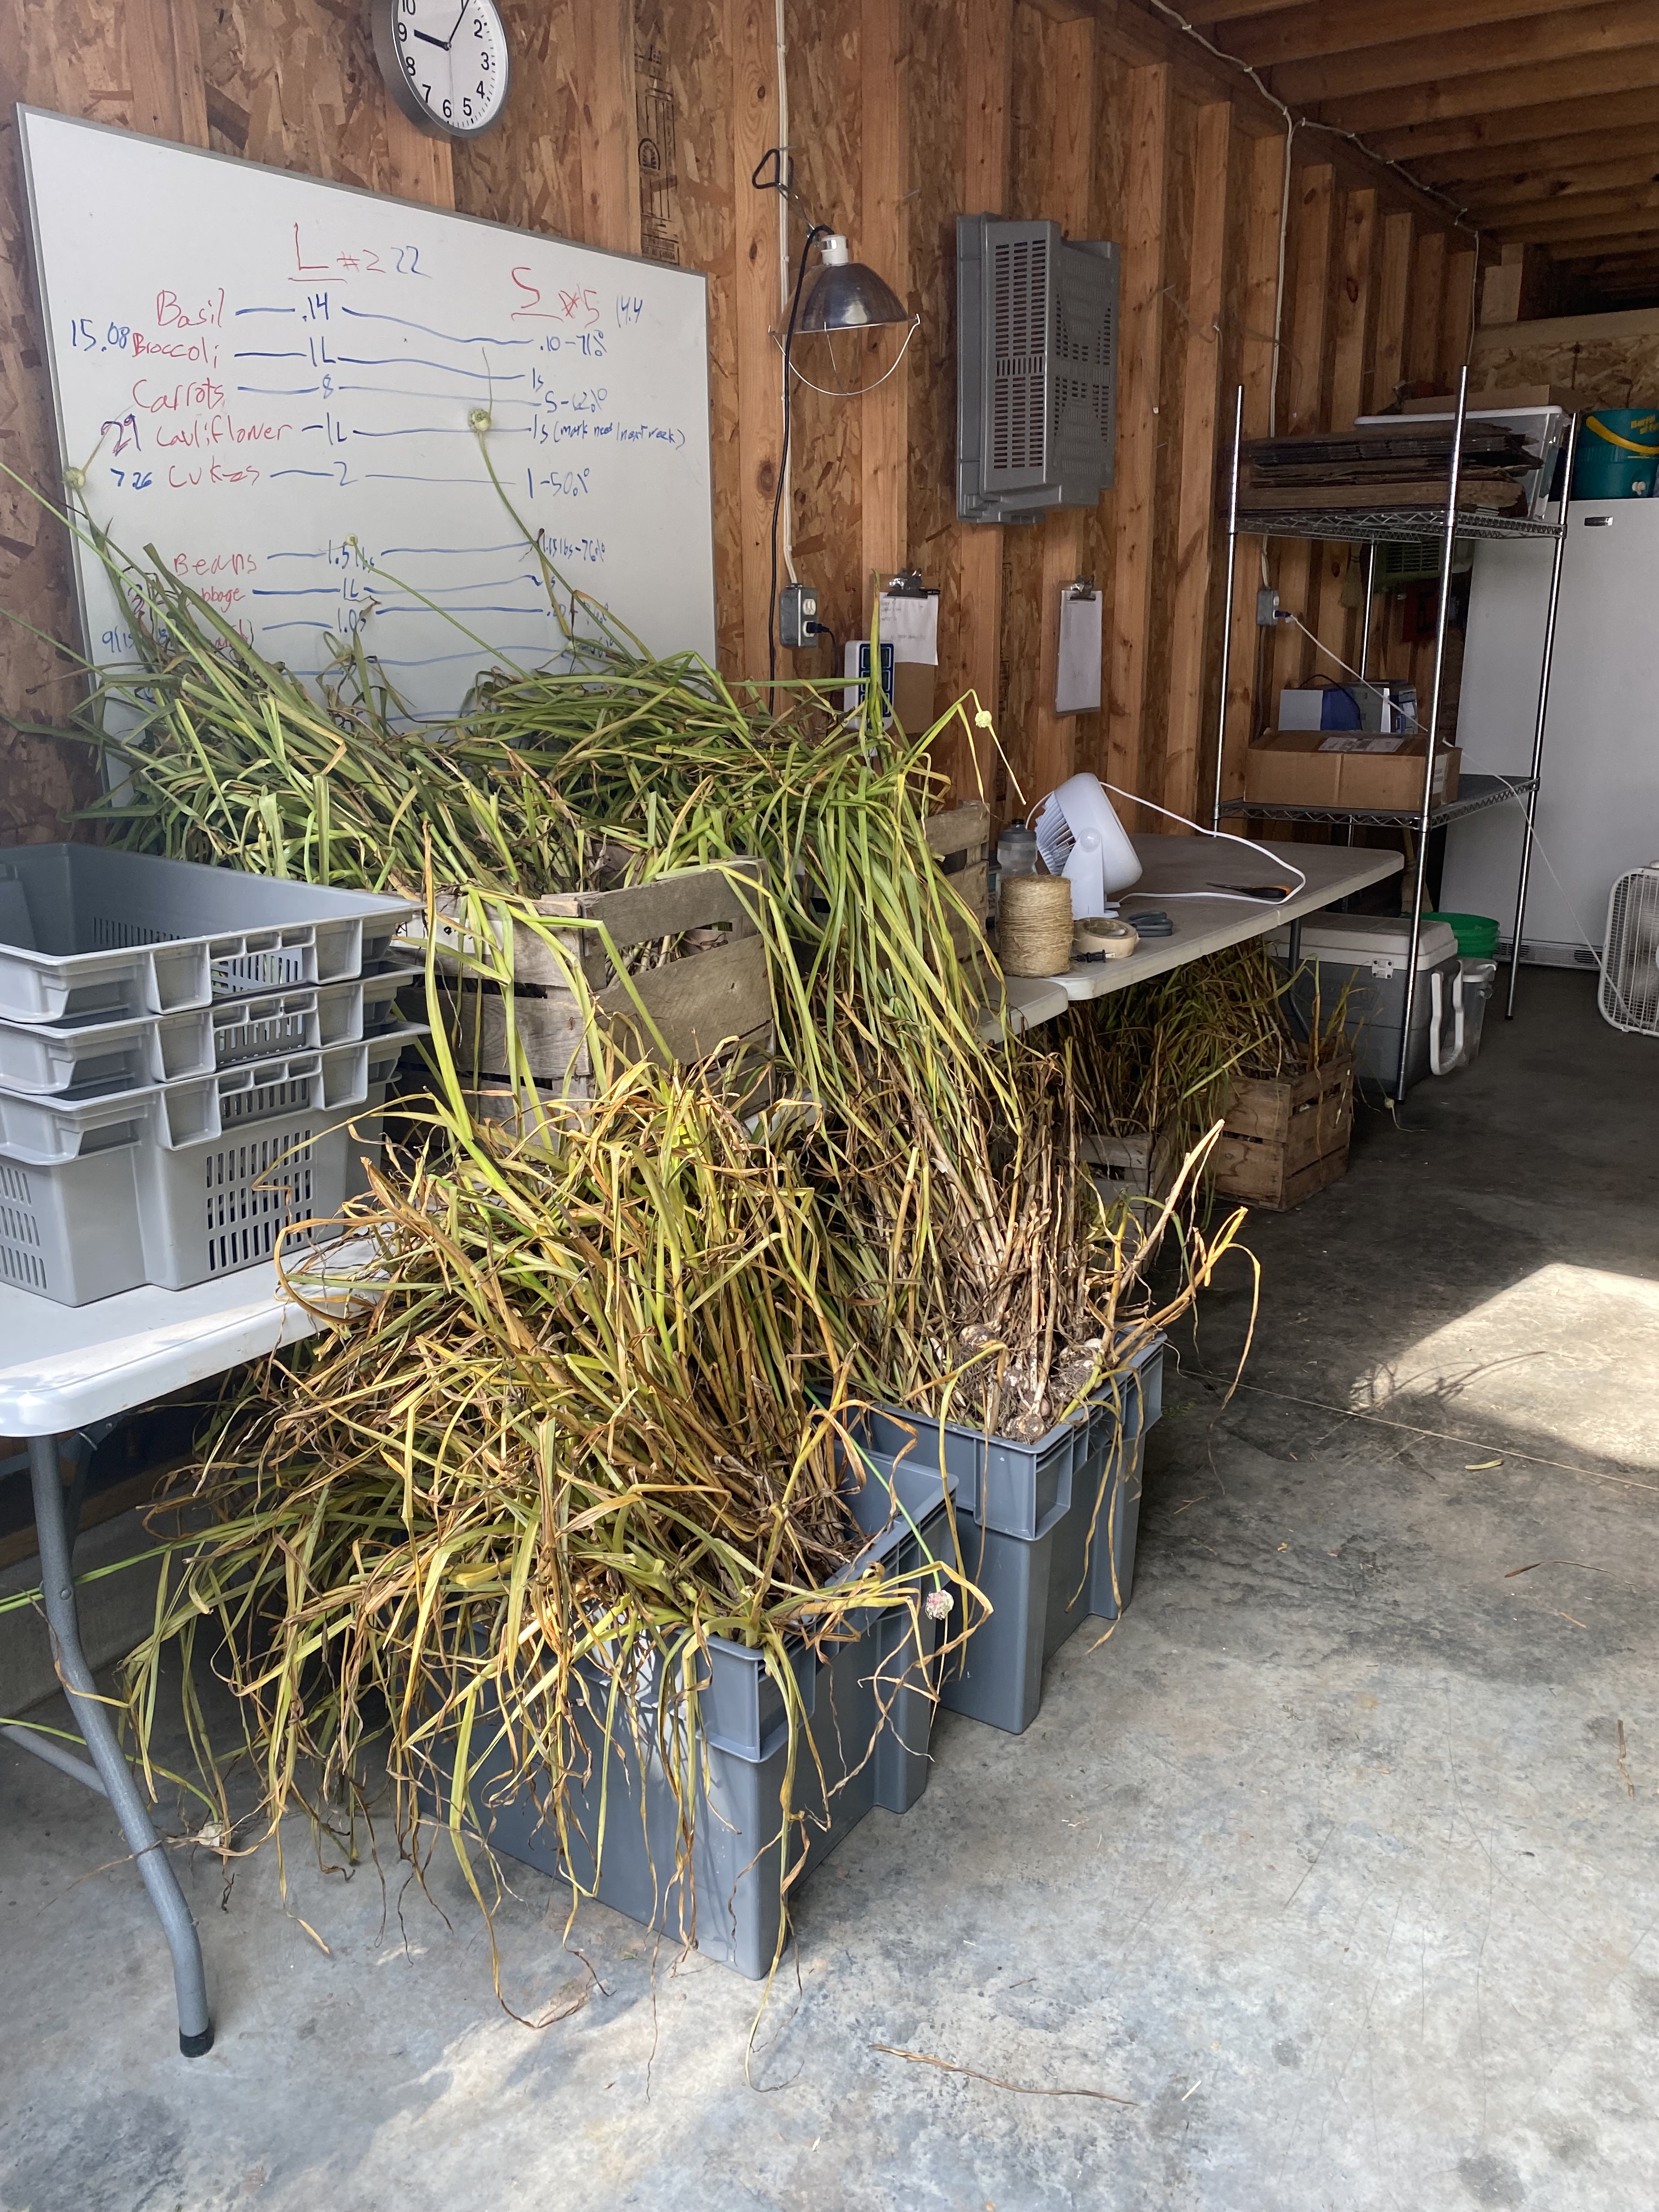
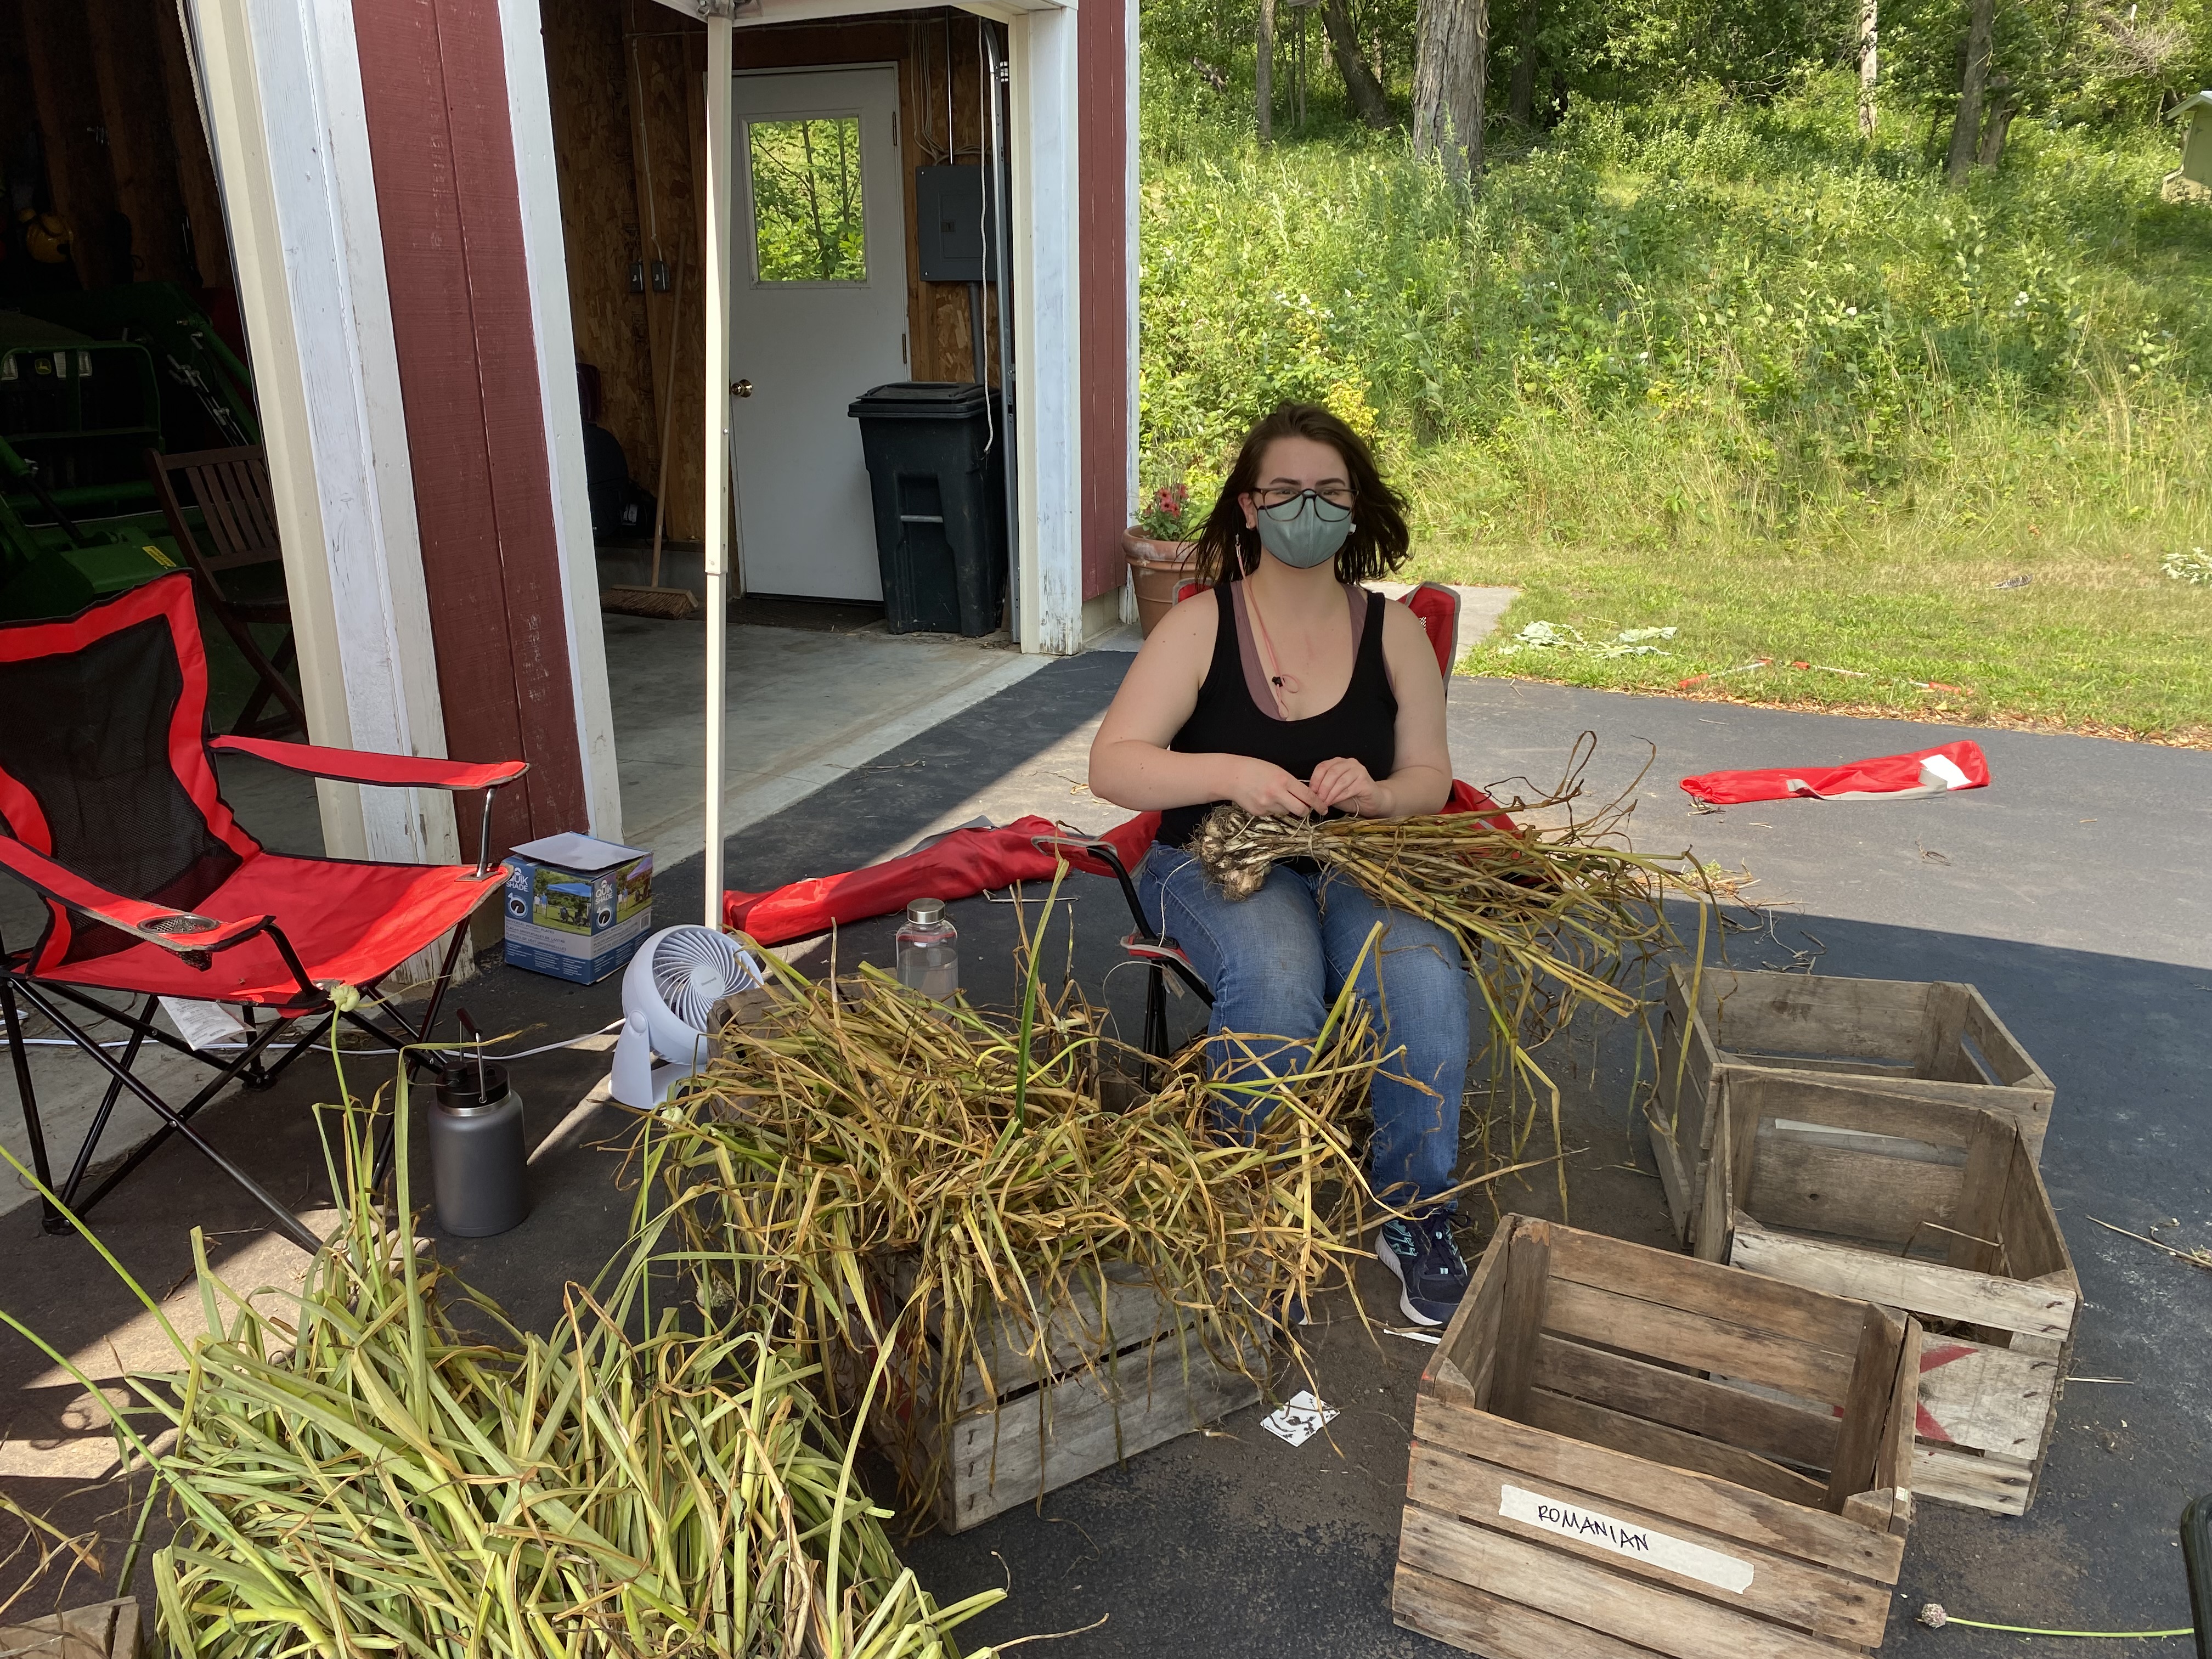

Recipes
Baked Tostadas with Tomatillo Black Bean Salsa // Uses Garlic, Jalapenos, Tomatillos, Sub Scallions or Onion for Shallots // Vegetarian
Eggplant Parmesan // Uses Basil, Eggplant, Garlic, Yellow Onion // Vegetarian
Eggplant Salad Toasts // Uses Eggplant, Garlic, Scallions // Vegetarian
Hummus with Tomatoes and Cucumbers // Uses Cherry (Sub Slicer) Tomatoes, Cucumbers // Vegetarian
Ratatouille // Uses Basil, Eggplant, Garlic, Green Peppers (recipe calls for red, orange or yellow, but I find green work just as well), Summer Squash, Tomatoes, Yellow Onion, Zucchini // Vegetarian
Salsa Verde // Uses Garlic, Jalapenos, Tomatillos, Sub Yellow Onions for White Onions // Vegetarian
Summer Savory Garlic Salt (use to season veggies, eggs, pasta, etc.) // Uses Garlic, Summer Savory // Vegetarian
Summer Savory and Garlic Green Beans // Uses Green Beans (if you have some leftover from last week), Garlic, Summer Savory // Vegetarian
Summer Savory Sausage Rolls // Uses Garlic, Summer Savory, Sub Onions or Scallions for Shallots
Wine-Braised Eggplant and Tomato Pasta // Uses Eggplant, Garlic // Vegetarian
Zucchini Grilled Cheese // Uses Zucchini (Can Also Sub Summer Squash) // Vegetarian
Week 9: August 1, 2022
I can’t believe I just typed “August” in the heading up there. This summer is certainly flying by for us. We are already halfway through our CSA season! It seems like just yesterday I was giving you a single bunch of asparagus for your share and now your boxes are so full that we can barely get them closed. Simon always helps me pack your boxes, and he figures out the math, too – how many pounds of each veggie everyone should get based on our off-season planning and what we were actually able to pull out of the field that morning. Last week we were both amazed by the bounty the farm provided. As Jericho Sanchez, a dairy farmer in New Mexico, once said, “It feels good at the end of the day to know that you have created a product that other people are going to enjoy.” (Of course, we humans only did part of that work, but still…)
What’s in My Box this Week?

Basil – Store with the stems in a glass of water on your counter out of direct sunlight. Do not store in the fridge as it will blacken immediately and wilt after that.
Beets – I know. I know. I said you wouldn’t get any more beets until the fall, but I seeded the second succession too early and they’re ready now. (Lesson learned.) Just remember that there are several ways you can preserve beets: you can pickle them (see Recipe section below) and freeze them as well. For fresh eating, you can use both the roots and the leaves of beets. If your beets still have greens attached, cut them off, leaving an inch of stem. Store the beet roots unwashed in a plastic bag in the crisper bin of your refrigerator. They will keep for several weeks. For the greens, keep them dry and unwashed until ready to use in a sealed plastic bag in the fridge for up to a week.
Broccoli – Wrap broccoli loosely in a plastic bag and keep it in the crisper drawer of your refrigerator. The colder, the better. Store for a week.
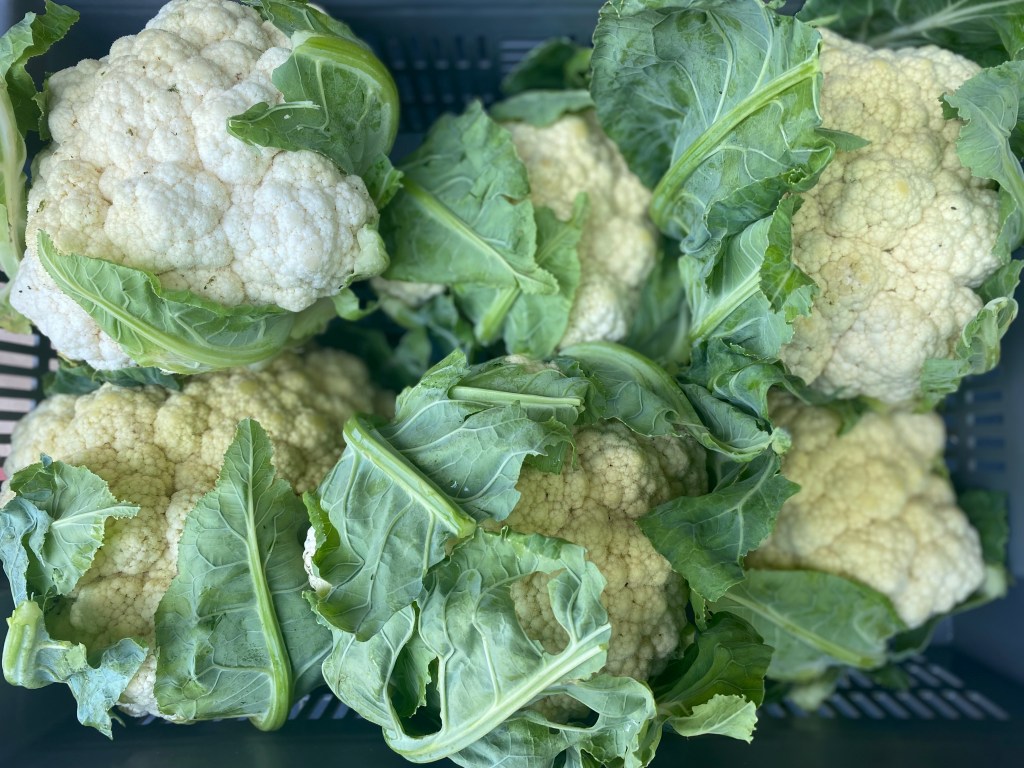
Cauliflower (Small Shares that didn’t get it last week) – Wrap dry, unwashed cauliflower loosely in plastic and store it in the refrigerator for up to a week.
Dill – For short-term storage, stand upright in a container with an inch of water. If you won’t use it within a couple of days, place the dill in a plastic bag and place in the fridge for up to two weeks.
English Cucumbers – These are the long skinny kind used for fresh eating. Place them in a sealed plastic bag in the crisper drawer of the refrigerator for up to a week.
Garlic – We harvested the garlic this past weekend. The bulbs are a bit smaller than I would like them to be, but the cloves on each bulb are of good size which is all that really matters, at least to me when I’m cooking. The garlic that you will get this week is super fresh, so it will be fairly spicy. To store fresh garlic, place it in a plastic bag in the fridge and use within two weeks.
Green Beans – Refrigerate in a plastic bag and use within a week.
Jalapeno Peppers – Hot peppers keep well in the crisper drawer of the fridge. Refrigerate peppers unwashed in a sealed plastic bag in the crisper drawer for one to two weeks. You can also dehydrate peppers for long-term.
Pickling Cucumbers – These cukes are much shorter and plumper than the English versions you’ll receive this week. While you don’t have to use them for pickles (you can just eat them as you would any other cucumber), they make great homemade pickles that will keep in your fridge for months, no canning involved. I included some recipes below for making quick and easy pickles. One pound of pickling cucumbers makes about a quart of pickles. To store, place them in a sealed plastic bag in the crisper drawer of the refrigerator for up to a week.
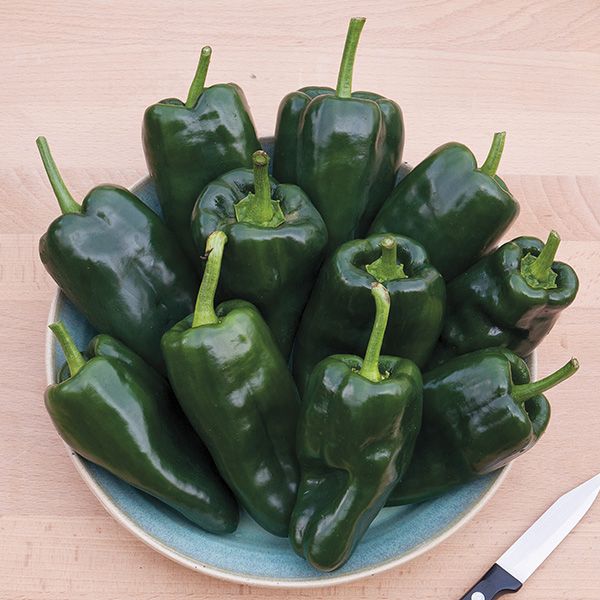
Poblano Peppers (Large Shares Only) – Poblano peppers are a mild variety of chile pepper that are about as large as a bell pepper, but skinnier and with a pointed tip. They originated in the Mexican state of Puebla (thus, their name) and are used in many Mexican dishes, like chile relleno, chiles en nogada, and rajas con crema. (Photo from High Mowing Seeds.)
If poblanos are left on the plant until they ripen to red and are then dried, they are known as ancho chili peppers. They are best when peeled and seeded which is more easily done after cooking them (see Recipe section below). Same storage instructions as for jalapeno peppers.
Tomatoes (Large Shares Only) – Store at room temperature for up to a week. Do not refrigerate.
White Onions – Store in a cool dark place. Use any that feel soft first. These onions are freshly harvested and haven’t gone through the curing process that we typically use when preparing onions for longer storage, so they won’t last as long as those you might buy at a store, but they will be good for a week or two.
Yellow Crookneck Squash – Store them in the crisper drawer of your fridge, but try to use within a week as they will quickly get soggy. You can use these interchangeably with zucchini in recipes.
Zucchini – Same storage and instructions as for Yellow Crookneck Squash above.
Notes from the Field
“Home grown tomatoes, home grown tomatoes
What would life be like without homegrown tomatoes
Only two things that money can’t buy
That’s true love and home grown tomatoes.”
John Denver, ‘Home Grown Tomatoes’ (from a song written by Guy Clark)
Is there any vegetable that people look most forward to each summer more than the tomato? This time of the season, I always start to get excited for I know that, should all go well, tomatoes will be be ready any day now and we will soon be feasting on them on a near-nightly basis. This year, I planted slicing tomatoes, paste tomatoes, cherry tomatoes, and several varieties of heirloom tomatoes (Brandywine, Cherokee Purple, Green Zebra, Kellogg’s Breakfast, and Nebraska Wedding). We harvested the first three ripe ones last week and are waiting to have enough to share with all of you.

In order to ensure that we will have tomatoes given the disease pressures that I mentioned in last week’s newsletter, I spent around twelve hours cutting off all of the diseased leaves and branches on the tomato plants last week to help prevent any further spread of it. I removed all of the branches from the bottom foot of the plants to create more distance between the plant’s leaves and the soil (the pathogen infects the leaves when raindrops hit the soil where it lives and splashes it up onto the plant) and made sure that all of the branches were tied up to keep them well off the ground. I took a look at the plants over the weekend and I didn’t see nearly as much evidence of disease on the remaining foliage, so I’m hoping I got to it early enough to ensure a decent tomato crop; I can’t imagine a summer without lots and lots of tomatoes. In my world, that would come close to tragedy!
Other than emergency tomato care, the week was pretty quiet in the field. We seeded some more daikon radish and green lettuce for the fall, and Simon thinned out the fall carrot crop. Both kids helped with Japanese beetle scouting and the whole family worked together to bring in the entire garlic harvest.

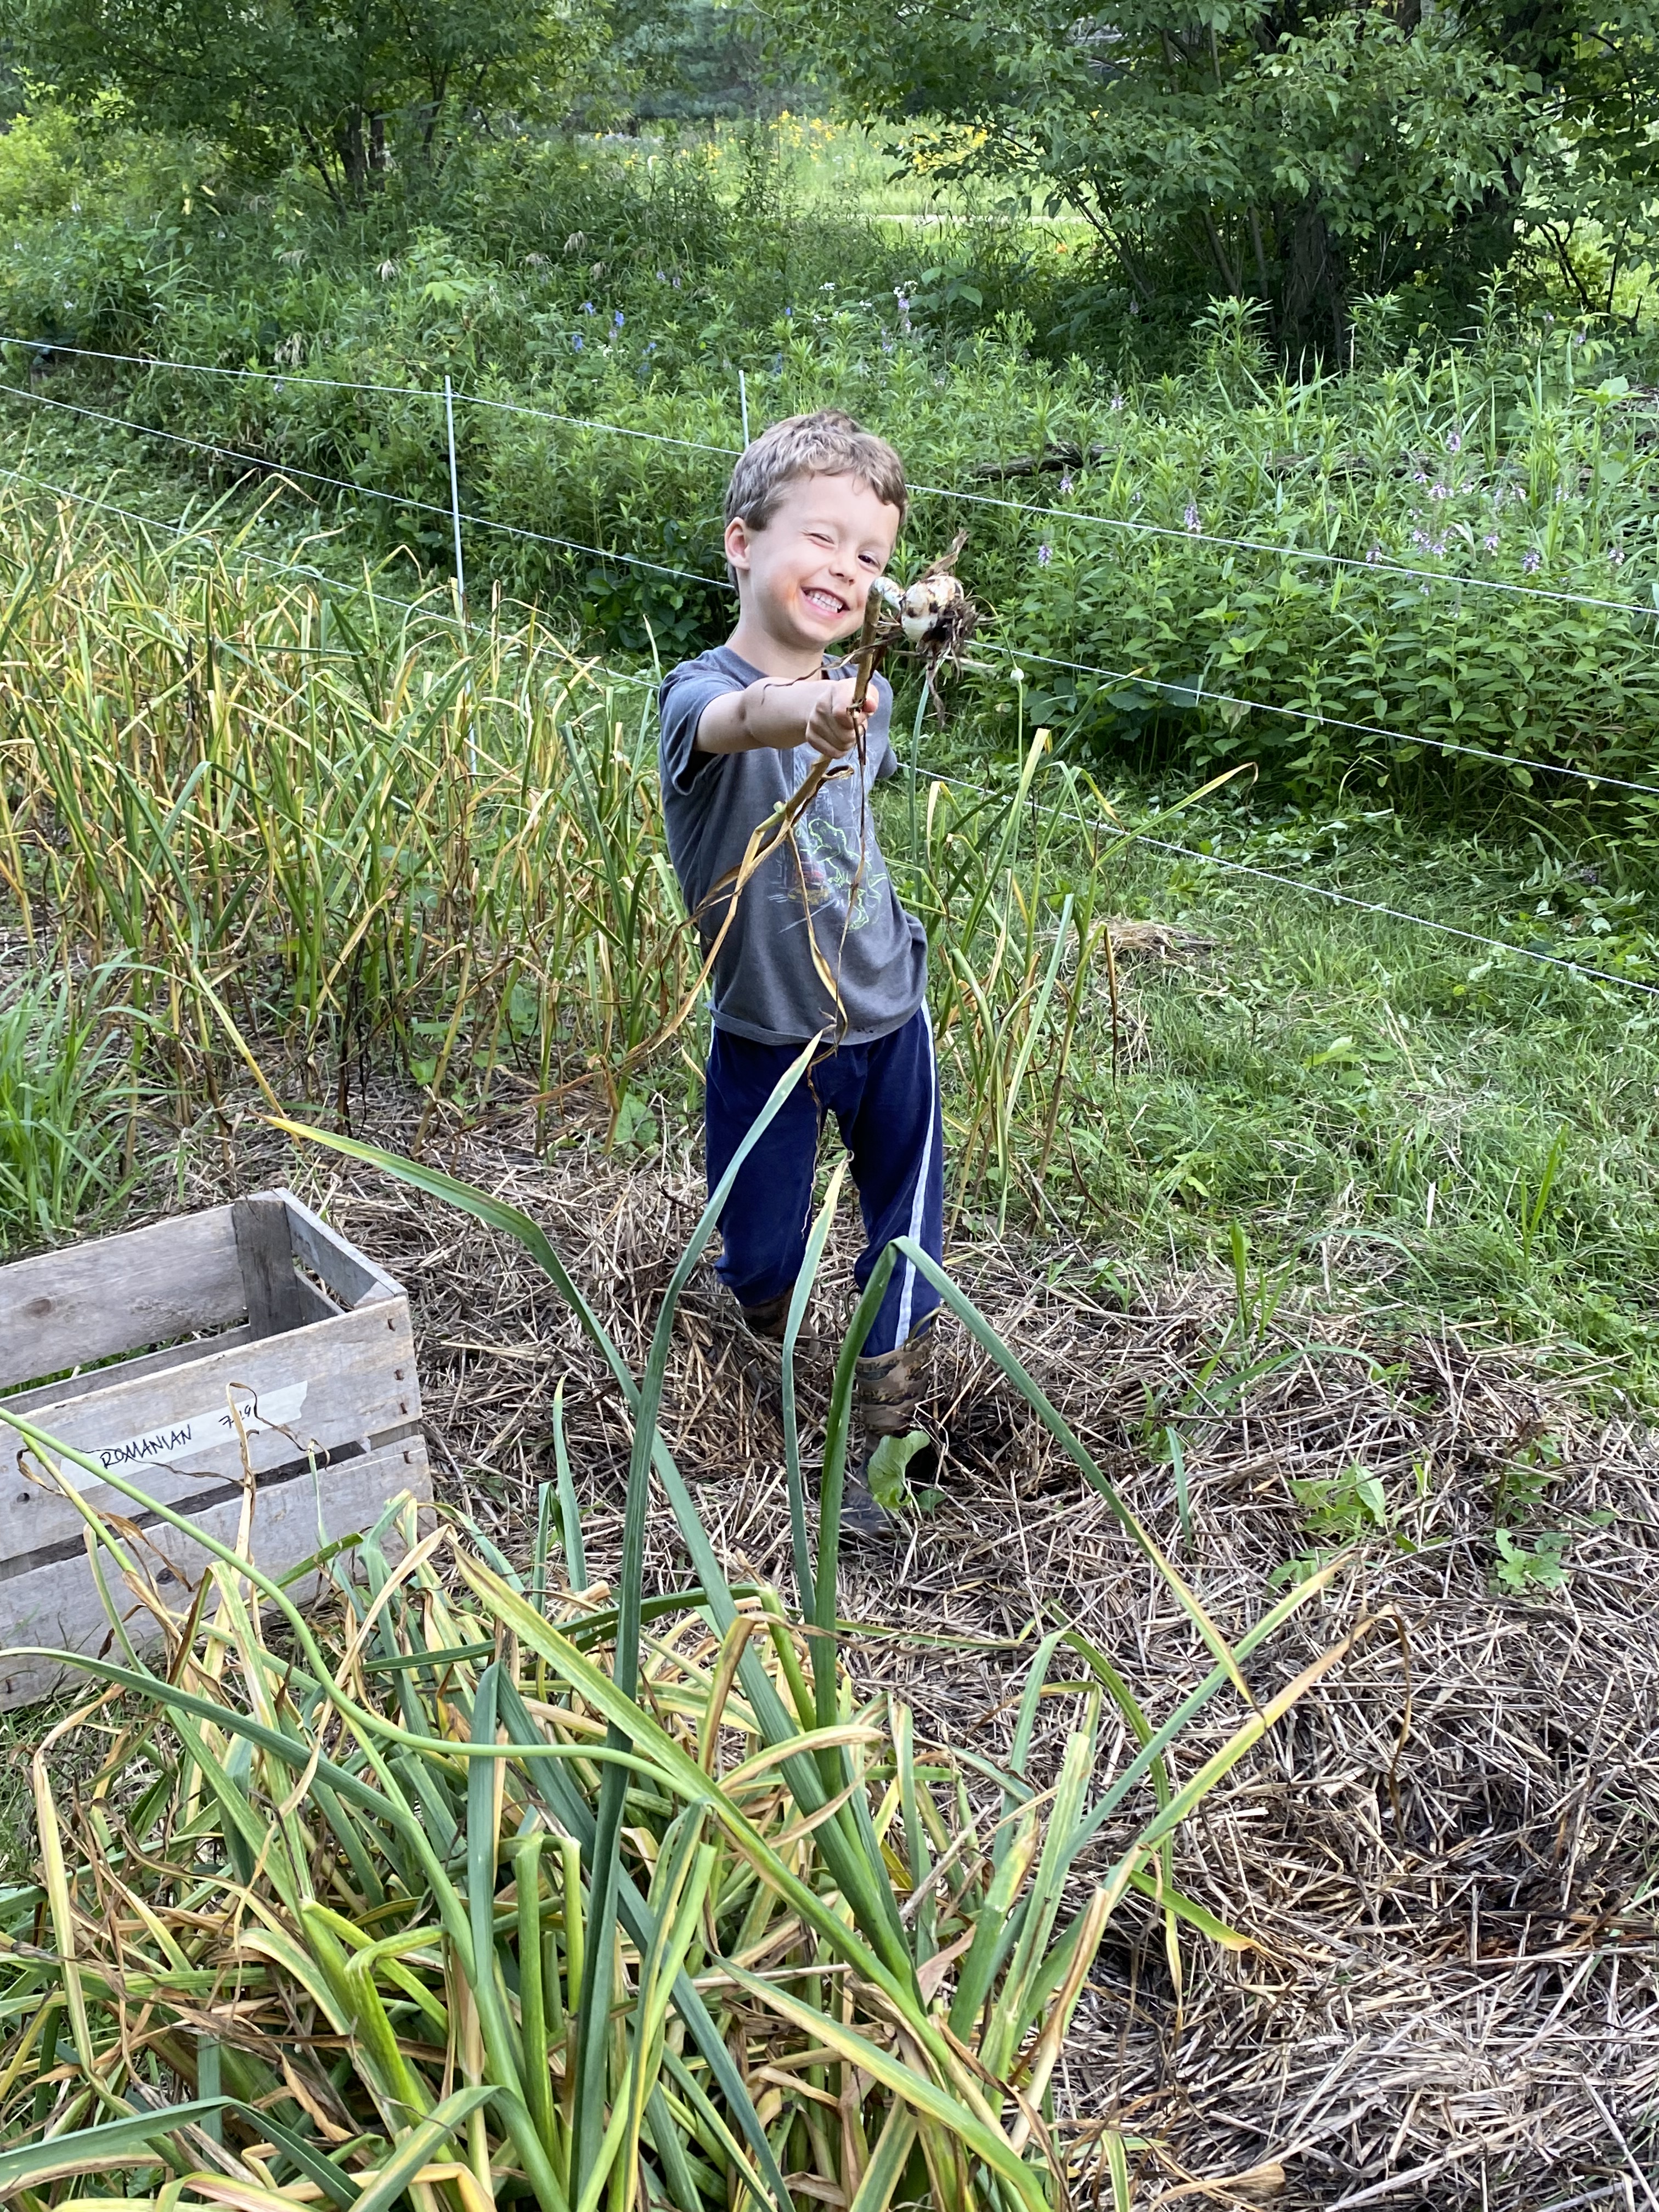

This week, I will renew the strawberries which involves cutting all the plants back to two inches, removing runners that have gone a little too far outside of their designated rows, and feed them with some nitrogen in the form or organic corn gluten. Renewal is done for several reasons: it reduces leaf disease and insect pest pressure and encourages runner and daughter plant production within the rows. It also stimulates new leaf growth; next year’s fruiting buds are formed in the fall and renovating shortly after the last harvest supports bud initiation and increased yield the following year. Even though we didn’t really have a strawberry harvest because of the flood this year, it’s still a good idea to do this work.
On another note, we have been coming across some veggies that look pretty silly as we harvest or prepare beds for new crops. Usually these look funny because we’ve let them grow for way too long, and sometimes they grow this way as a result of something the plant did. Either way, I thought I’d share some photos of these because they’re pretty weird-looking and/or abnormally huge and it’s fun to find these in the field from time to time. (From the top: overripe French breakfast radishes, one overripe carrot that split open, an enormous zucchini, a super tall lettuce plant, two overripe cucumbers that fused together, garlic with two stalks instead of the usual one.)
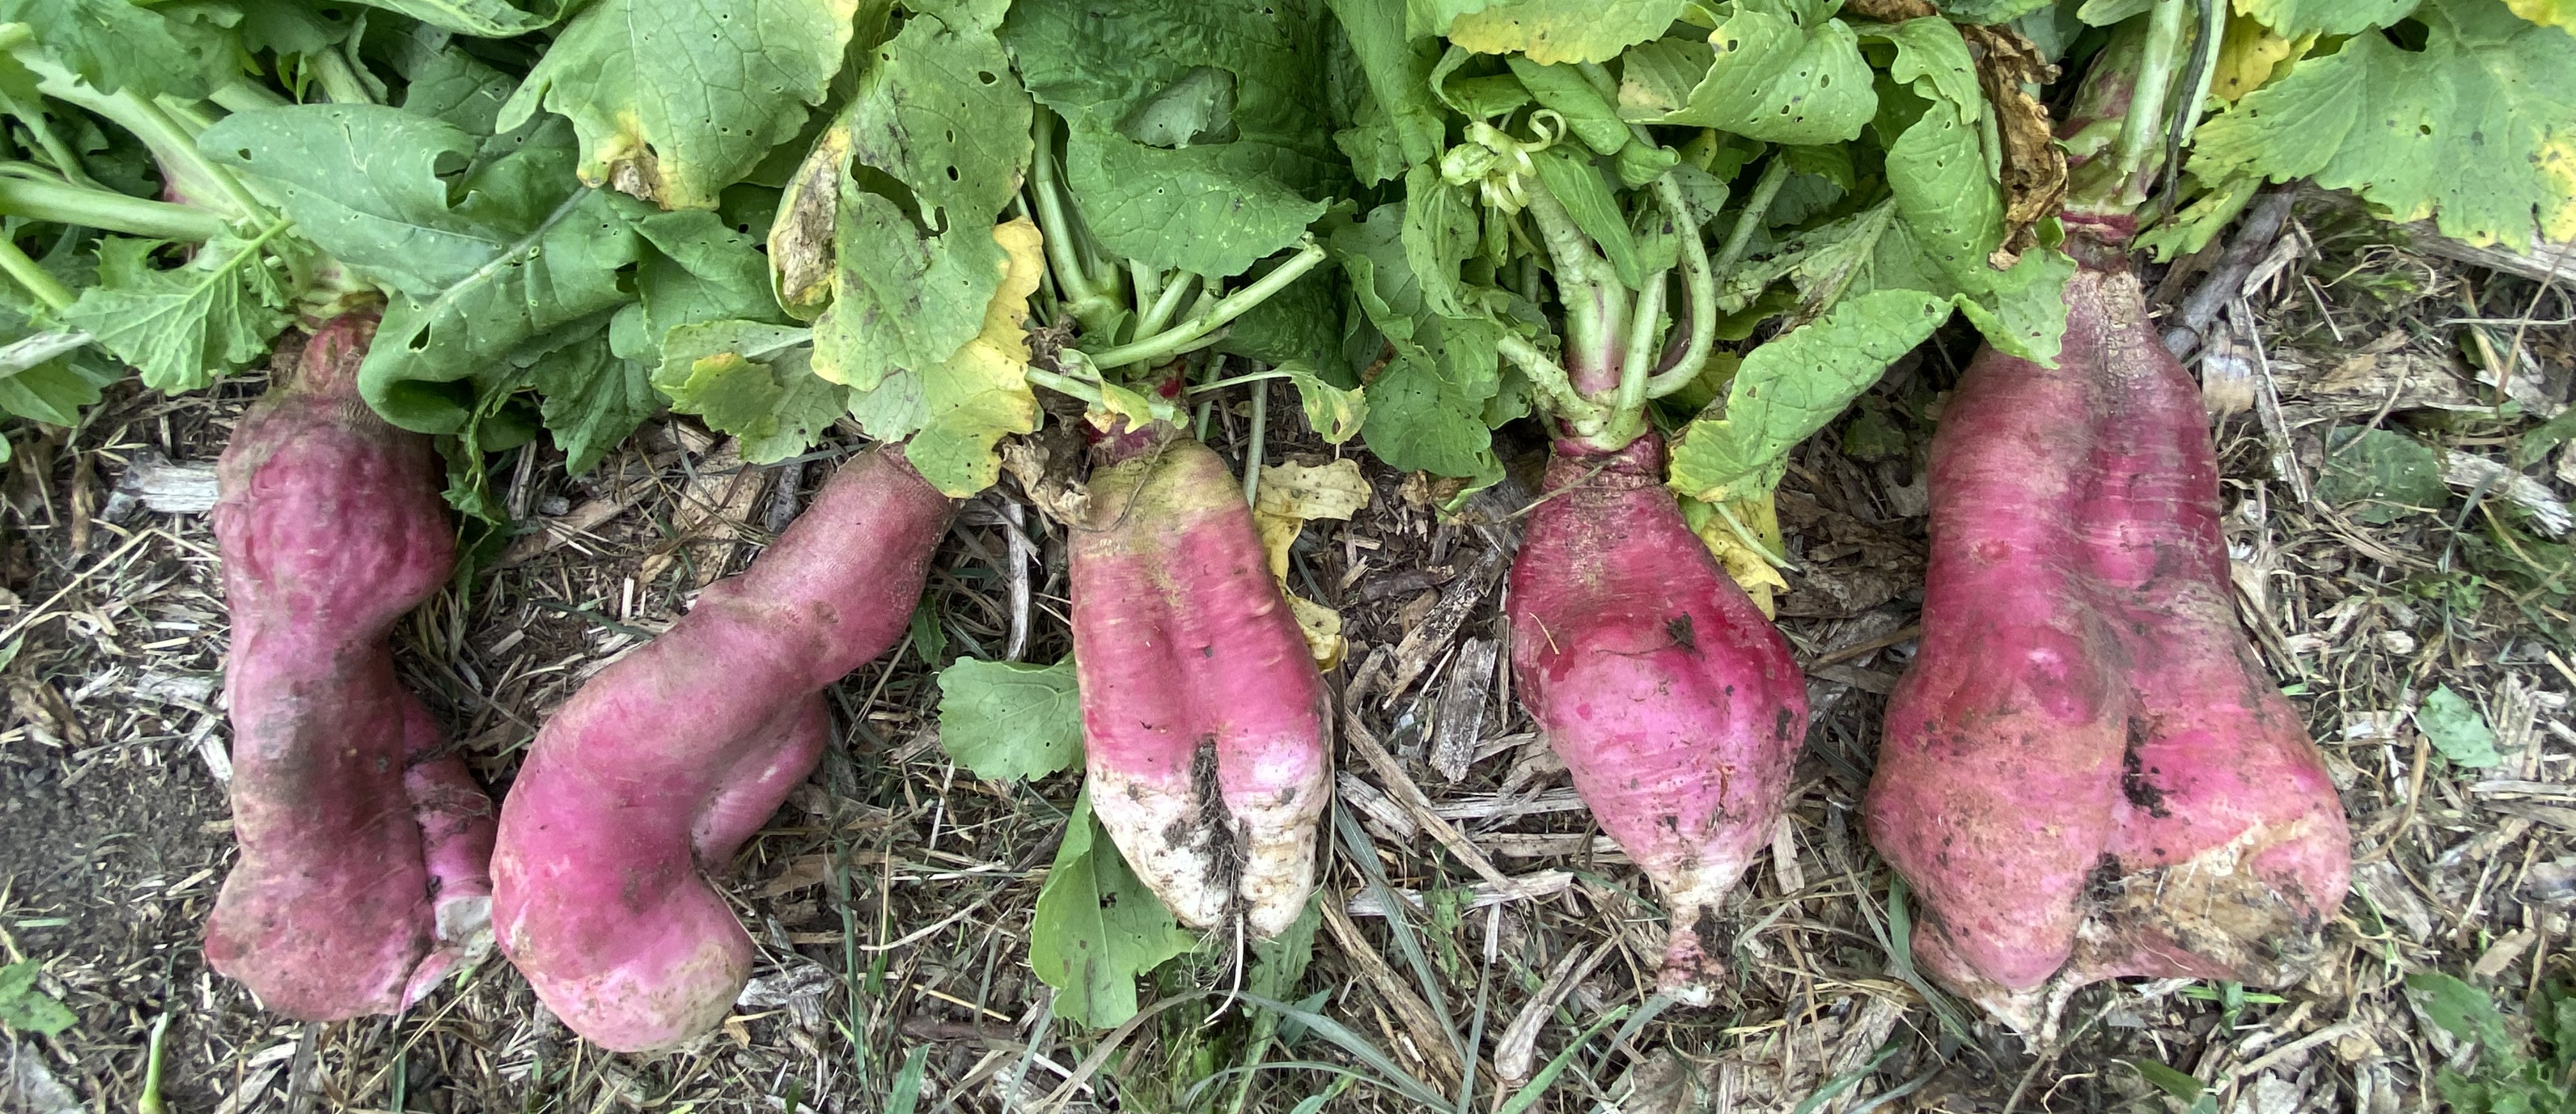
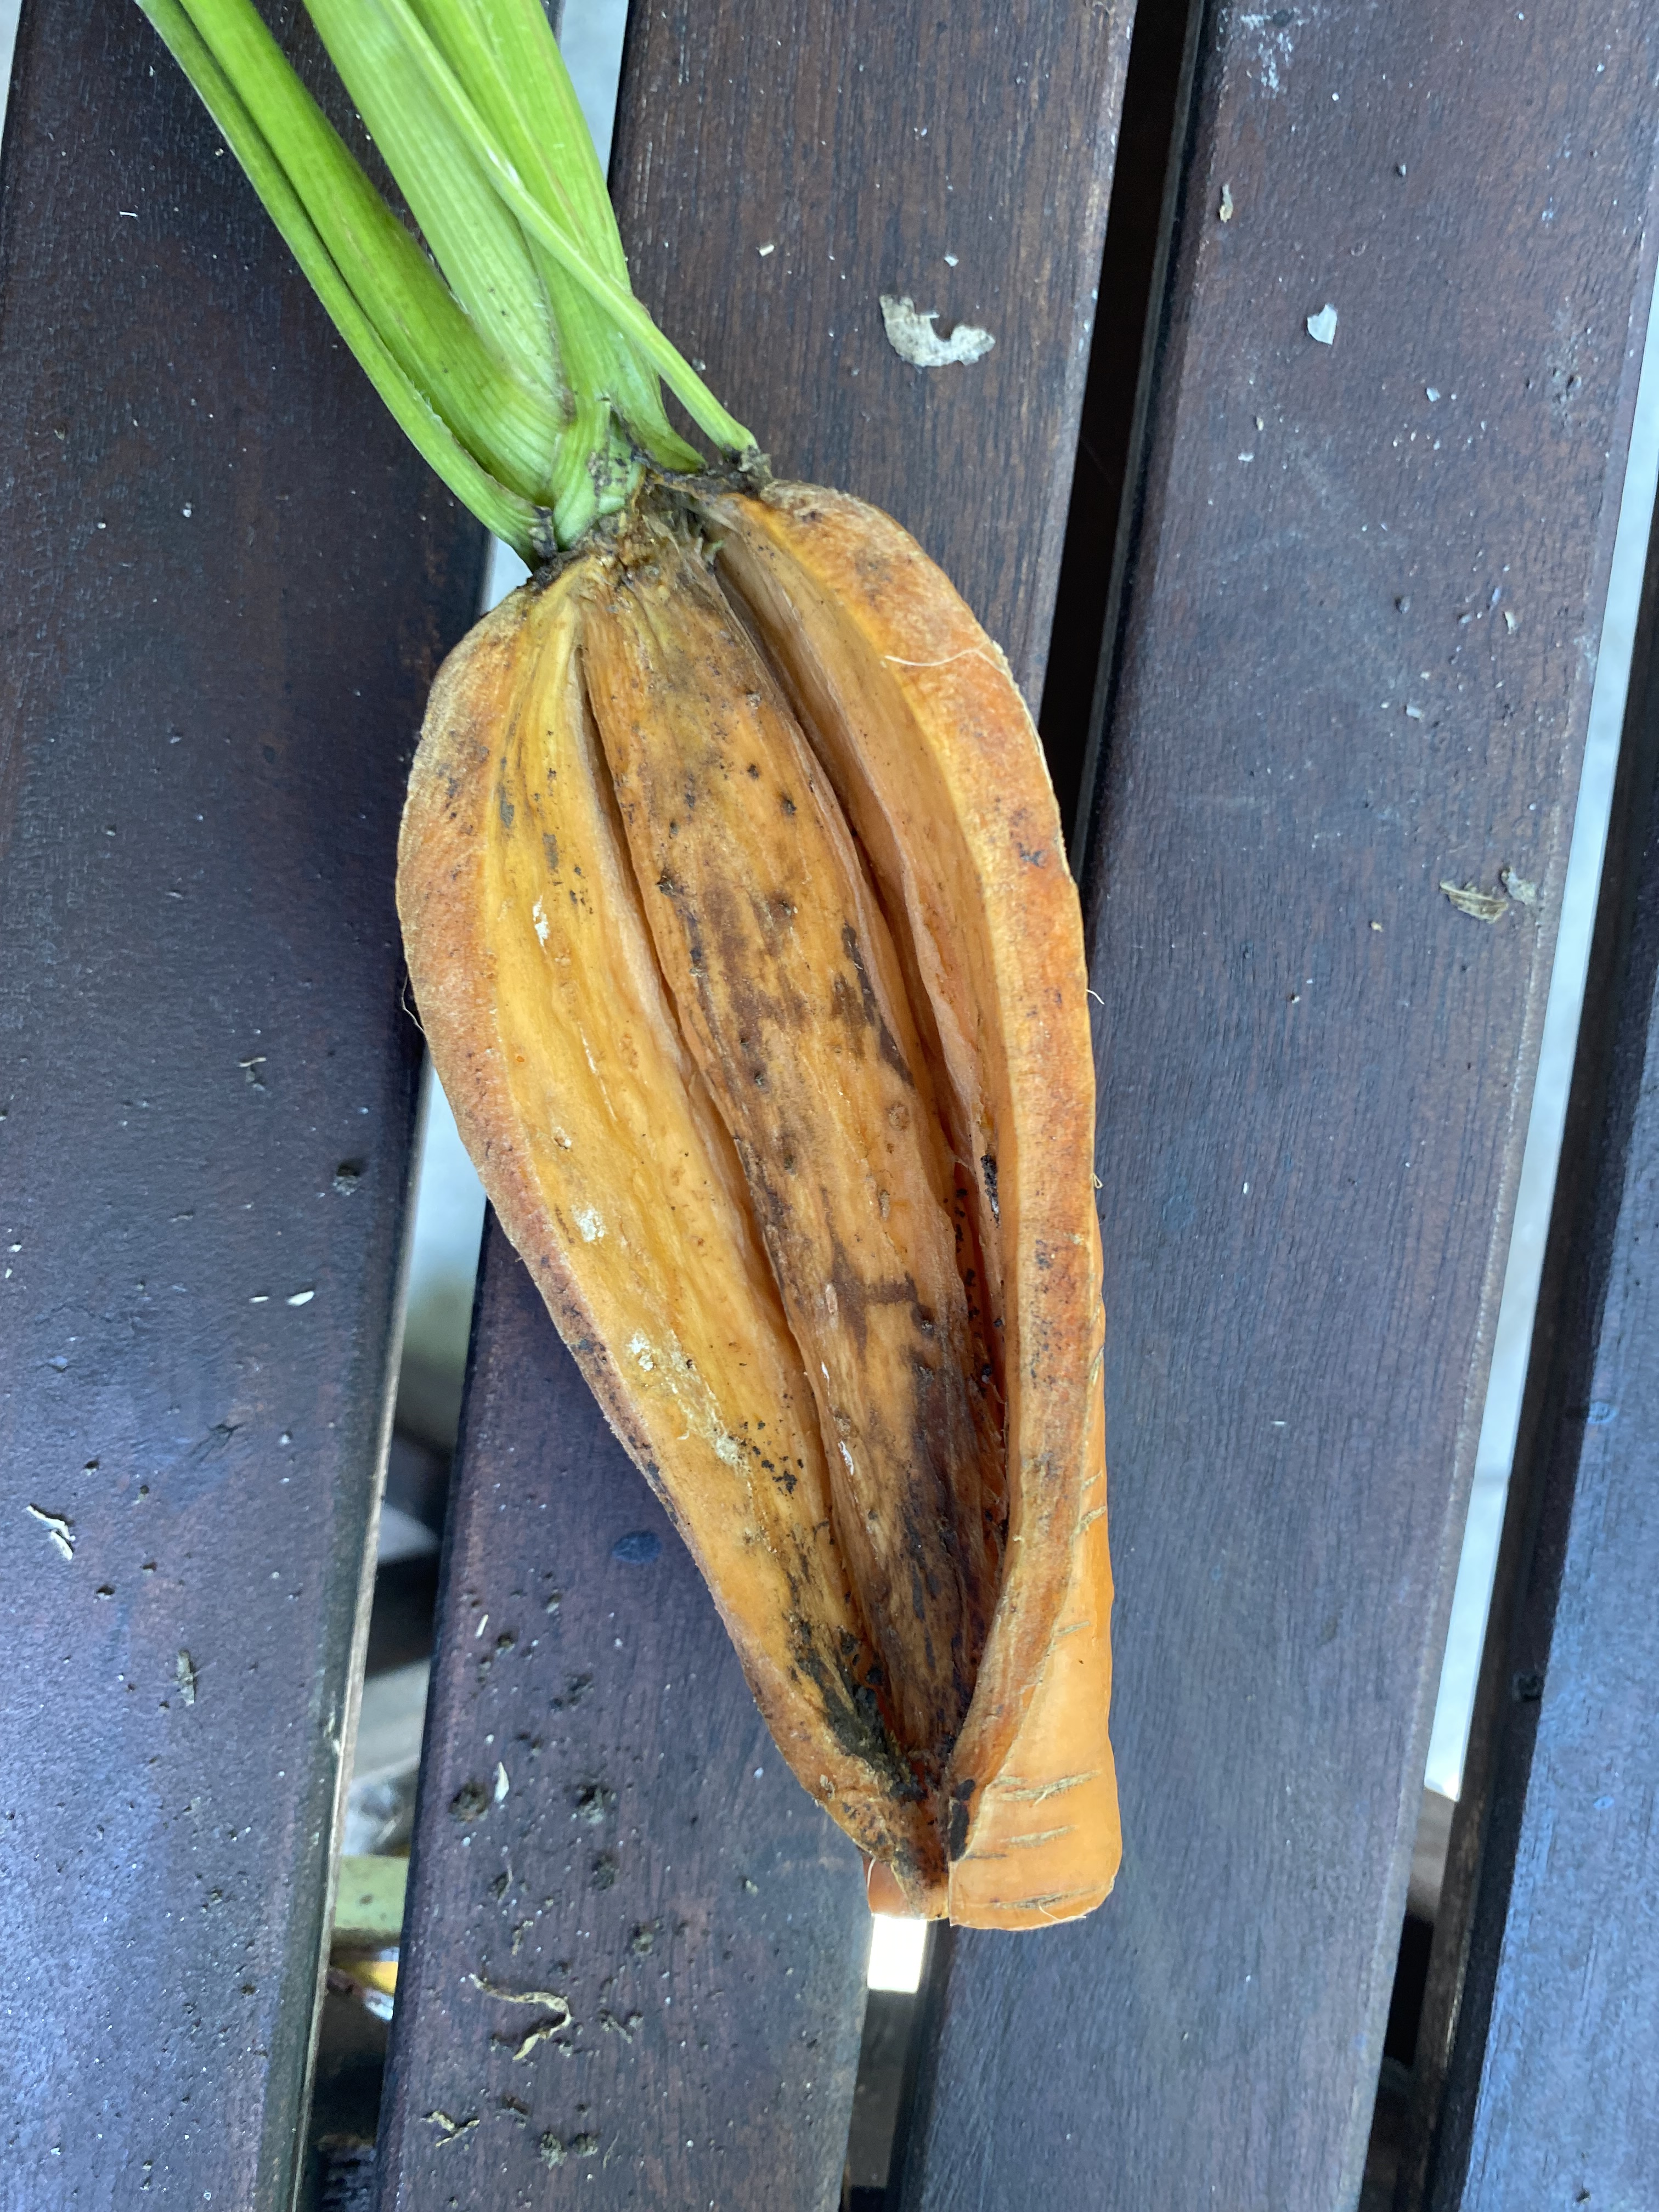
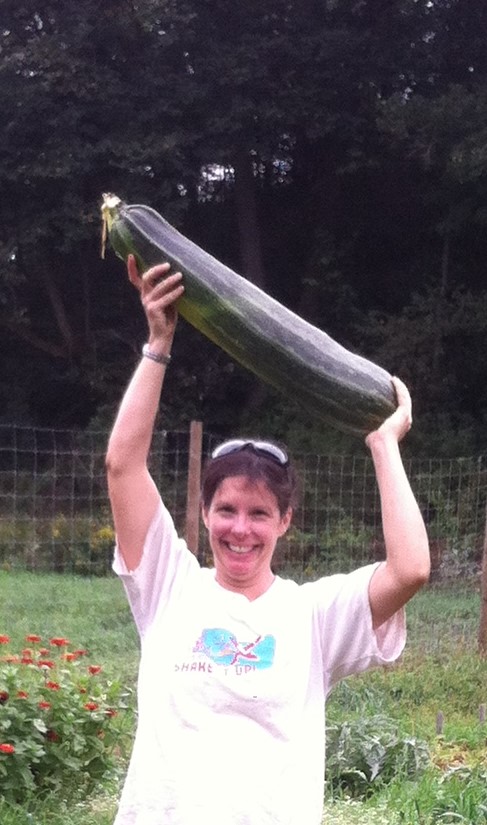

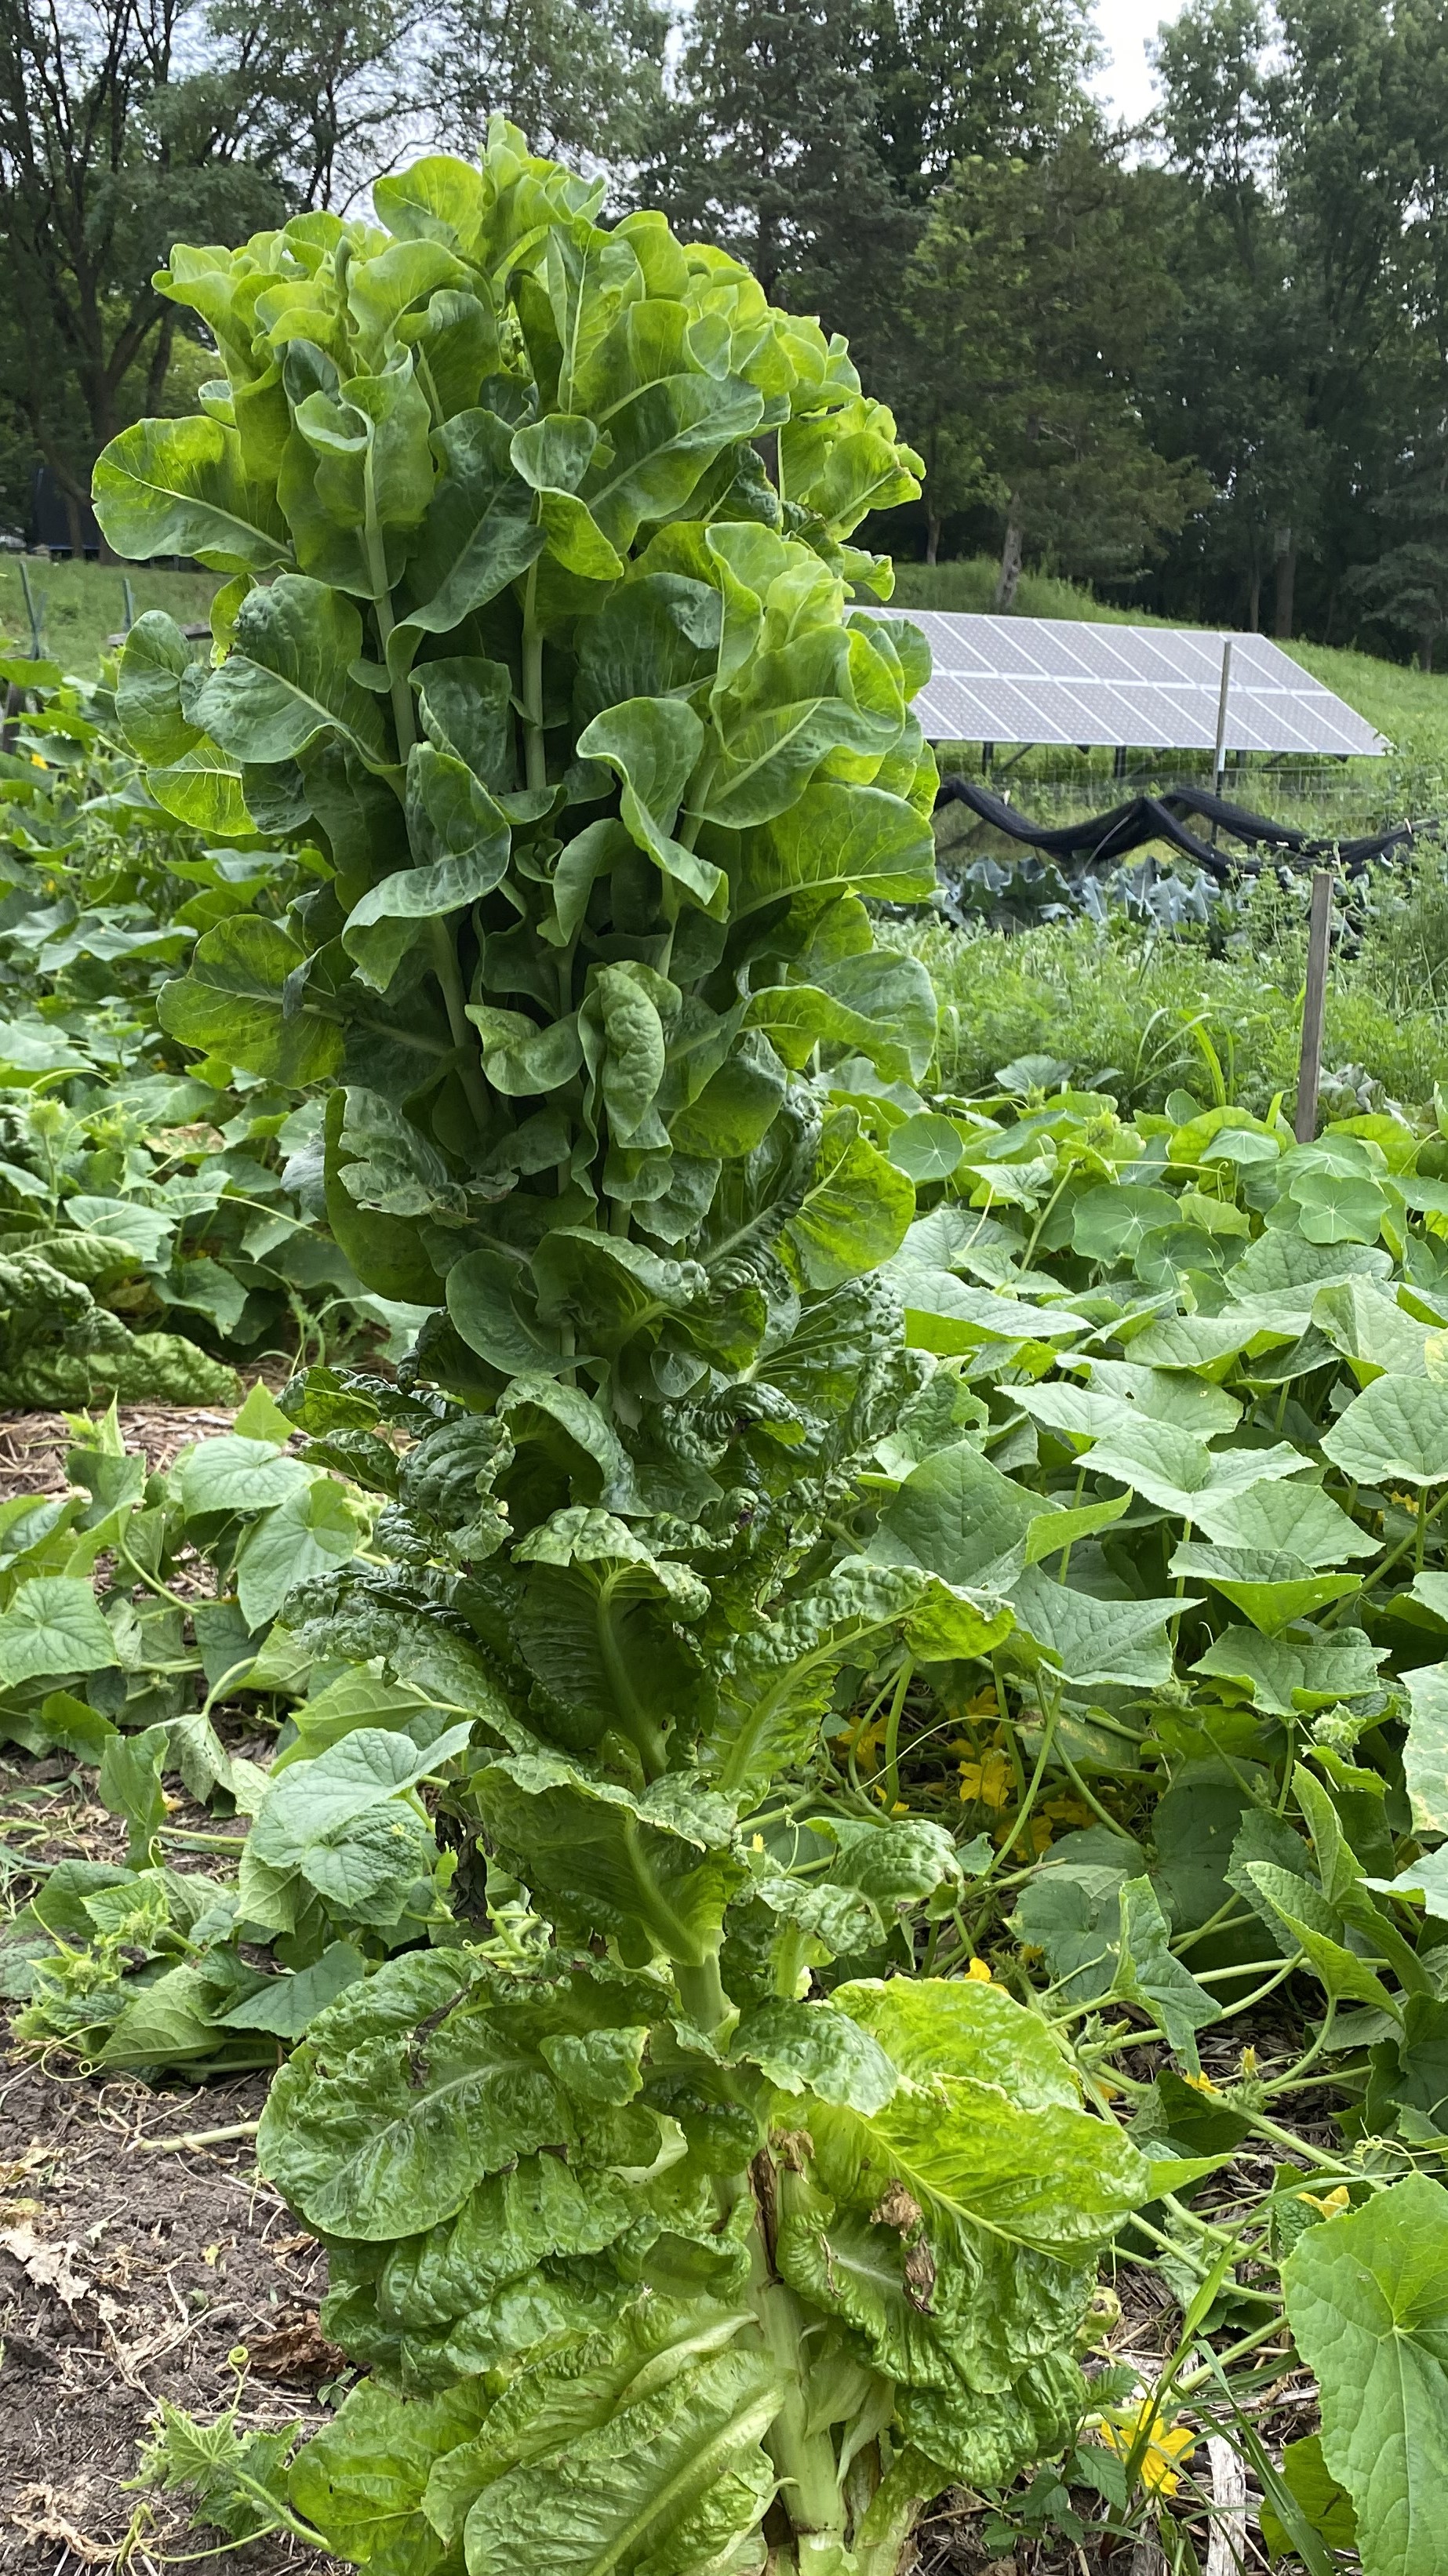
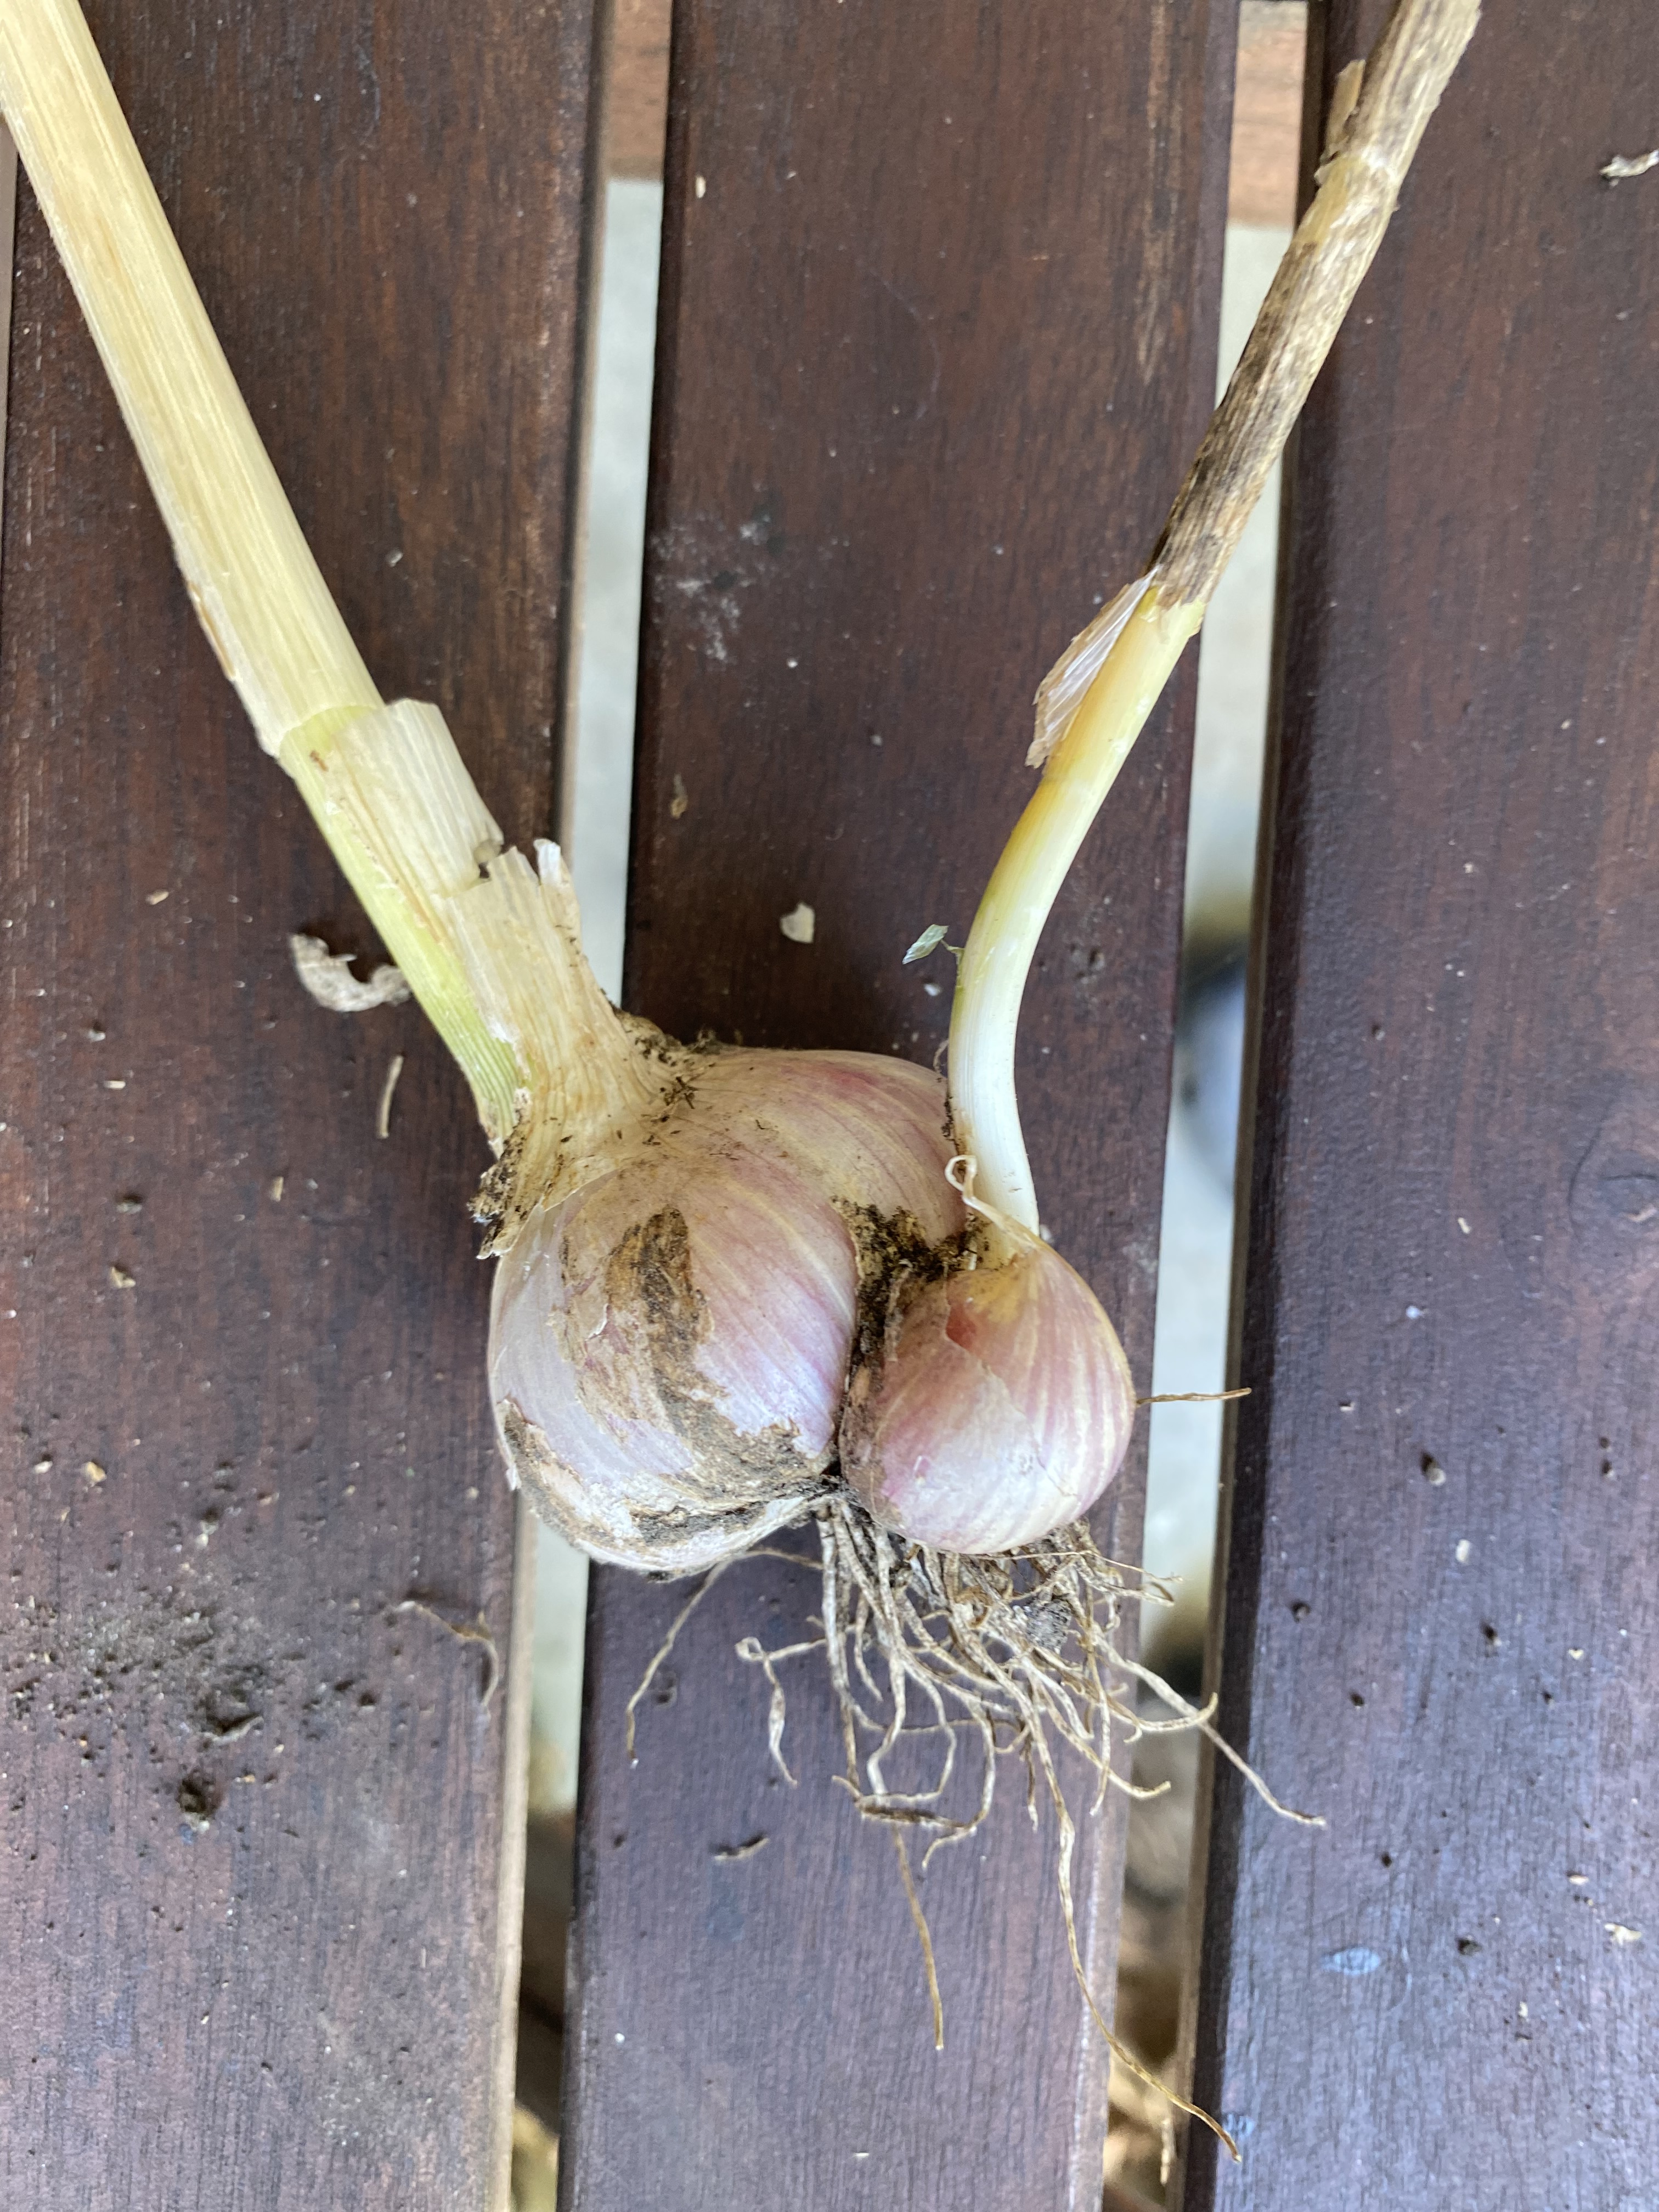
Recipes
Bread and Butter Pickles // Uses Pickling Cucumbers // Vegetarian
Easy Homemade Cucumber Pickles // Uses Dill, Pickling Cucumbers // Vegetarian
Here’s another Easiest Fridge Dill Pickles recipe // Uses Dill, Pickling Cucumbers // Vegetarian
Refrigerator Pickled Beets // Uses Beets // Vegetarian
Roasted Poblano and Heirloom Tomato Salsa // Uses Garlic, Poblanos, White Onions // Vegetarian
Roasted Poblano, Sweet Corn, and Potato Soup // Uses Garlic, Poblanos
Several Ways to Roast Poblano Peppers
Smoked Stuffed Poblano Peppers // Uses Poblanos
Spicy Pesto and Cheese Stuffed Zucchini Involtini // Uses Basil, Zucchini (or sub Summer Squash)
Spicy Poblano, Black Bean, and Quinoa Enchiladas // Uses Garlic, Jalapenos, Onions, Poblanos; could also add some shredded zucchini or summer squash into the mix // Vegetarian
Zucchini Grilled Cheese // Uses Zucchini (can also use Summer Squash instead) // Vegetarian
Week 8: July 25, 2022
There comes a time each summer when the work on a farmstead shifts from planting to harvesting and preserving and that is usually around the end of July. There are still plenty of things to do in the field, but rather than harvesting just once or twice a week, some crops require near daily picking now and some become so plentiful that even the most ardent of veggie lovers can’t possibly eat them all at once. This means turning those crops into things that we can eat later in the year and more time in the kitchen making jams and pickles and freezing breads and veggies that I’ll add to soups and other dishes when the snow is on the ground. If you find yourself with more veggies than you can use or just want to have some saved for winter, too, make sure you refer to the A to Z Storage Guide I shared with you at the beginning of the season.
What’s in My Box this Week?
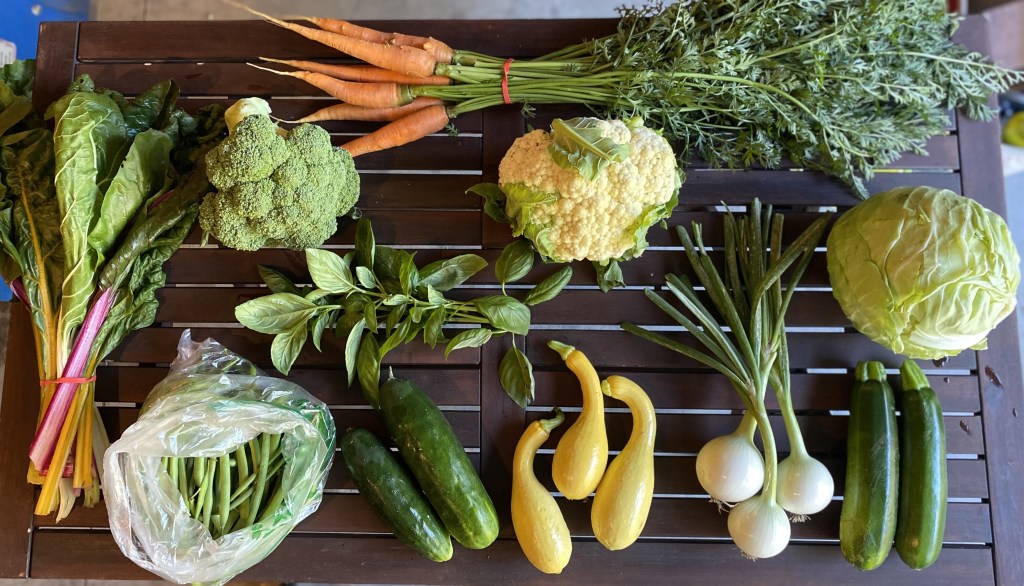
Basil – Store with the stems in a glass of water on your counter out of direct sunlight. Do not store in the fridge as it will blacken immediately and wilt after that.
Broccoli – Wrap broccoli loosely in a plastic bag and keep it in the crisper drawer of your refrigerator. The colder, the better. Store for a week.

Carrots – Remove the green tops as soon as you can, leaving about an inch of stems, and place the roots in a plastic bag in the crisper drawer of your refrigerator. They will last for several weeks. You can also store them in a bin of water to keep them crisp, changing out the water every few days. Save the tops in a plastic bag and use them in salads and other dishes (see recipe section below).
Cauliflower (Large Shares and Some Small Shares – if you don’t get one this week, you’ll get it next) – Wrap dry, unwashed cauliflower loosely in plastic and store it in the refrigerator for up to a week.
Cucumbers – Place cucumbers in a sealed plastic bag in the crisper drawer of the refrigerator for up to a week.
Green Beans – This is a variety of beans called Painted Pony that we first grew last year and found very tasty. This bean can be eaten fresh, like what you’re getting this week or, if left to grow longer, you can harvest and dry the seeds inside, using them to make a delicious bean soup. Refrigerate in a plastic bag and use within a week.

Green Cabbage – Cabbage can store for three weeks to two months and it doesn’t require much special care to have it last this long. Just keep it in the crisper of your fridge and remove the two outer leaves before eating. (These leaves are used to help store the cabbage.)
Rainbow Chard – Wash the chard only right before using. To store, place in a plastic bag with most of the air removed and put in the fridge. It is best used within a few days.
White Onions – Store in a cool dark place. Use any that feel soft first. These onions are freshly harvested and haven’t gone through the curing process that we typically use when preparing onions for longer storage, so they won’t last as long as those you might buy at a store, but they will be good for a week or two.
Yellow Crookneck Squash – Store them in the crisper drawer of your fridge, but try to use within a week as they will quickly get soggy. You can use these interchangeably with zucchini in recipes.
Zucchini – Same storage and instructions as for Yellow Crookneck Squash above.
Notes from the Field
I once had a farmer tell me that farming is like no other profession in that – if you farm your entire adult life – you get about forty tries to learn from your mistakes (one every year since you can’t easily do-over a seeding or other farm task). Add to that the unpredictability of the weather and each year can be about as different from the one before as you can get. This situation can make farming both frustrating and rewarding at the same time. It also helps one learn humility as just when you think you have it all figured out, something new happens and throws you a curveball.
This year, that curveball is hot and humid weather for days on end punctuated by severe storms that have dumped hail and large amounts of rain onto the fields in very short periods of time. According to Minnesota Public Radio’s Updraft blog, the thirty days prior to July 20 were the sixth hottest on record. They were also incredibly humid. As someone who has worked primarily out of doors over the past eight years, I can tell you without a shadow of a doubt that climate change is real and it is making farming more and more difficult as time goes on.

What does such hot and humid weather mean for crops? Right now it means that we are seeing a number of soil-borne diseases that thrive under these types of conditions. The cucumbers have something called Alternaria leaf blight, the tomatoes have septoria leaf spot, the eggplants have something yet to be determined, and the brassicas have another disease that can destroy entire plants if left unchecked. There are no organic sprays to combat these diseases, so the way I am controlling them is by picking off any leaves that exhibit symptoms and sending them to the dump. Next year, I will heat-treat my seed (the pathogen can come in via seed), choose varieties that are resistant to these diseases (if they exist), and rotate where I plant the crops as some of these diseases can overwinter in the soil for two to three years. For those veggies which survive, they are perfectly safe, delicious, and nutritious to eat. However, these problems will diminish how many vegetables we get. The plants can’t photosynthesize as much with leaves that are dying or dead, so they have less energy to produce veggies. This is certainly happening with the cucumbers and will likely happen with the tomatoes, too.
High heat, especially when it remains hot at night, causes a variety of other problems as well, including flower and pollen deformation, changes to the ratio of male to female flowers in cucurbits (cucumbers and melons), and poor pollination due to decreased pollinator activity. High heat can also stall fruit maturation.
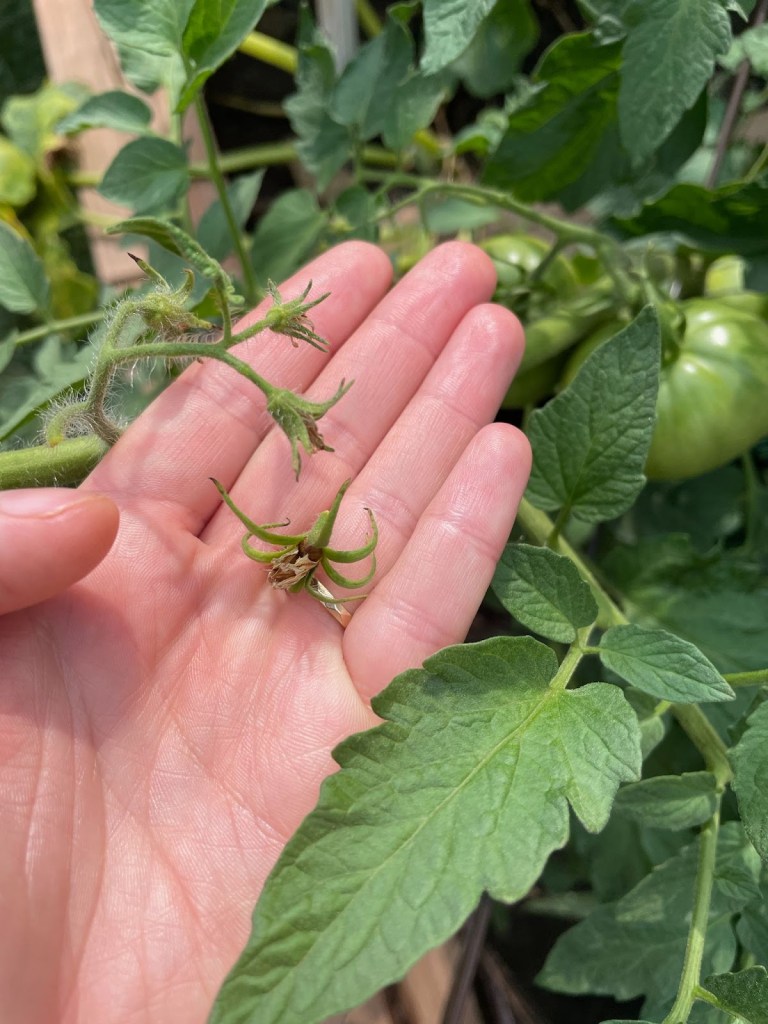
In other words, another reason you haven’t seen more peppers and cucumbers or any tomatoes at all yet is because it’s been too hot for them to do their thing. I am hoping that this week’s more seasonal temperatures will help get these veggies back on track, but the meteorologists are predicting another hotter than normal week at the beginning of August, so we’ll just have to wait and see. (Photo shows aborted flowers. Photo by: Marissa Schuh, University of Minnesota Extension)
Happily, most of the other crops are holding their own and doing well. We’re going to have a bumper crops of onions and tomatillos, and this is the first year that the voles haven’t chomped all of the beets and carrots. (Thank you to the snakes that are living in the field under the tarps. I found a big snake skin in the beet patch on Saturday!) We also do have some baby watermelons and cantaloupes on the vine, and the herbs are all growing beautifully. We started harvesting and using some basil this past week. If there is any scent better than that of fresh basil, I don’t know what it is!


Recipes
Broccoli Melts // Uses Broccoli // Vegetarian
Buffalo Cauliflower // Uses Cauliflower // Vegetarian
Charred Green Beans with Harissa Yogurt // Uses Green Beans // Vegetarian
Cucumber Lemonade // Uses Cucumbers // Vegetarian
Fresh Cabbage and Carrot Slaw // Uses Cabbage, Carrots, Green Onions (if you have some left over from last week) // Vegetarian
Ginger Glazed Carrots // Uses Carrots // Vegetarian
Green Bean Salad with Corn, Basil, and Black Olives // Uses Basil, Green Beans // Vegetarian
Roasted Carrot Soup with Tomatoes and Basil // Uses Carrots, Sub White Onion for Yellow Onion, Sub Fresh Basil for Dried Basil // Vegetarian
Roasted Cauliflower and Lentil Tacos // Uses Cauliflower, Onions // Vegetarian
Roasted Green Beans with Parmesan and Basil // Uses Basil, Green Beans // Vegetarian
Sausage-Stuffed Zucchini Boats // Uses Zucchini (can also use Summer Squash)
Simple Peach, Basil, and Ricotta Flatbread // Uses Basil // Vegetarian
Takeout-Style Sesame Noodles with Cucumbers // Uses Cucumbers // Vegetarian
Yellow Summer Squash Relish // Uses Summer Squash (can also use Zucchini), Onions // Vegetarian
Week 7: July 18, 2022
Friends, I am grateful that today is newsletter writing day. I was just out in the field for a couple of hours this morning and thank goodness I wrapped up all my field work before the temperatures really started soaring. Erik likes to remind me that I used to adore hot, sunny, ninety-degree days back when we were first married. Of course, this was when I worked inside at a computer most of the time and so those sorts of days were a nice change of pace. Now, I am thrilled when we have a cloudy day, and my preferred temperature is probably between sixty and seventy degrees. How things change!
What’s in My Box this Week?
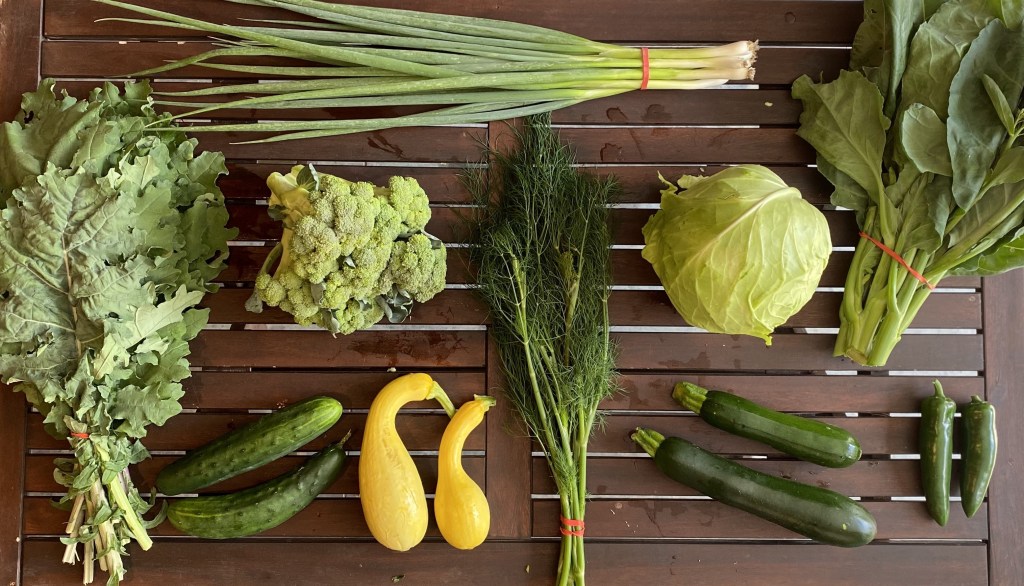
Broccoli – Wrap broccoli loosely in a plastic bag and keep it in the crisper drawer of your refrigerator. The colder, the better. Store for a week.
Cucumbers (Large Shares Only) – if you don’t get these this week, you will next) – Place cucumbers in a sealed plastic bag in the crisper drawer of the refrigerator for up to a week.
Dill – For short-term storage, stand upright in a container with an inch of water. If you won’t use it within a couple of days, place the dill in a plastic bag and place in the fridge for up to two weeks.
Green Cabbage – Cabbage can store for three weeks to two months and it doesn’t require much special care to have it last this long. Just keep it in the crisper of your fridge and remove the two outer leaves before eating. (These leaves are used to help store the cabbage.)
Jalapeno Peppers – If you don’t get these this week, you will next.) – Refrigerate peppers unwashed in a sealed plastic bag in the crisper drawer for one to two weeks. You can also dehydrate peppers for long-term.
Kailaan/Chinese Broccoli (Large Shares Only) – Store in a closed plastic bag in the fridge for up to a week.
Red Russian Kale – Place kale unwashed, wrapped in a sealed plastic bag in the crisper drawer of the refrigerator. Best used very fresh, but may last for a week.
Scallions – Store in the veggie drawer of your refrigerator and try to use within a week. If you use these after a week, you can peel off any dry and/or “slimy” outer layers of the onion.
Yellow Crookneck Squash – Store them in the crisper drawer of your fridge, but try to use within a week as they will quickly get soggy. You can use these interchangeably with zucchini in recipes.
Zucchini – Same storage and instructions as for Yellow Crookneck Squash above.
Notes from the Field
This past week was spent primarily getting things in tip top shape for the field day that we hosted here this past weekend. Erik spent a day pulling weeds from our edible hedgerow (and fixing the fence that those darned deer had once again broken through); I pulled invasive wild parsnip and plumeless thistle from all over the place; we mowed some walking paths; and the kids finished weeding the vegetable field. I have to say that the homestead hasn’t looked this good in a long time. So many flowers are now in bloom, and this week we are looking forward to reaping the rewards of all our hard work. Besides harvesting, there is hardly any field work to be done and we have several days of summer fun ahead!


The field day was a good success. We had lots of questions from folks – so many, in fact, that the program ran over by an hour. Karin Jokela from Xerces Society and Jorgen Rose from Practical Farmers of Iowa helped by sharing their expertise with the group (thank you!), and Erik and I enjoyed showing people around and hearing people’s reactions to the work we’ve done so far. I hadn’t been out to the prairie and savanna for several weeks, and it was great to see new native plants that hadn’t been there before popping up. I think this means that all our efforts at clearing invasives is starting to pay off. I hope that everyone who came will go home and plant pollinator habitat wherever they can!
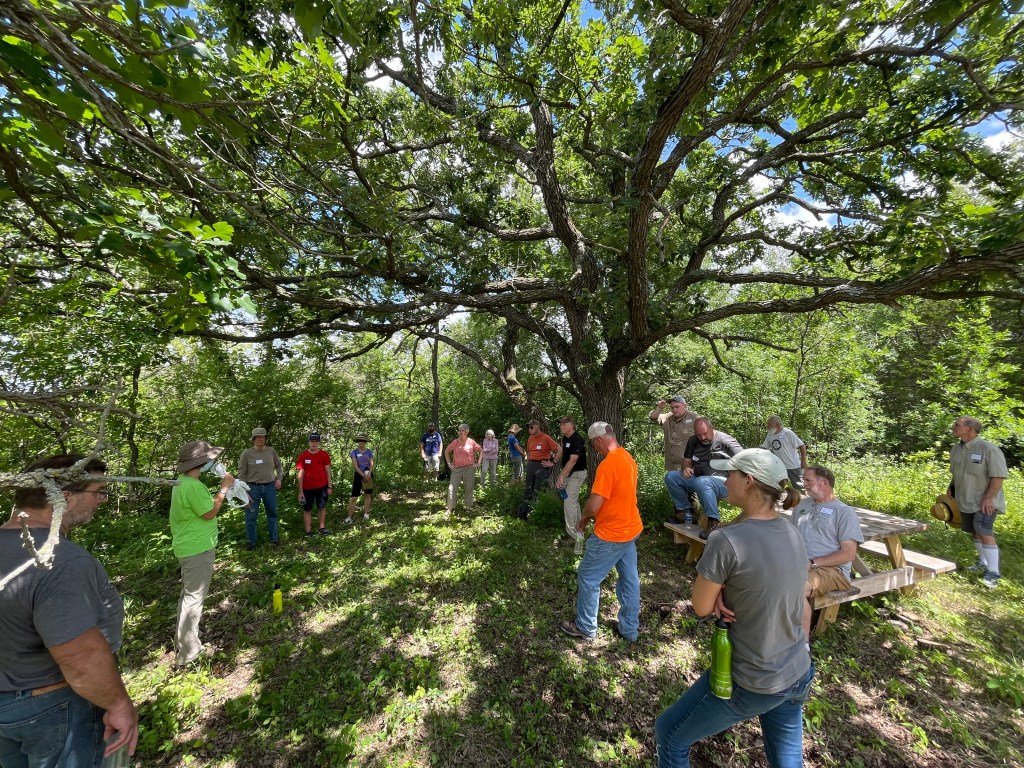
Other than that, I had to do some paperwork for the USDA. Every year, farms like ours that participate in USDA programs are required to report how many acres of each crop they plant by July 15th. The reporting system is really geared toward large-scale row crop farmers and so I often find myself amused when I’m crunching the numbers for the report. This is because you are required to report how many acres you’ve planted of each crop. In my case, I must convert square footage into acres and the acreage size of each of my crops is always super small. (My biggest field is 0.11 acres of asparagus!)
Here is a photo of the spreadsheet so you can see what I’m talking about.
The staff at USDA are always good sports about this, but I am sure their jobs are much easier when someone comes in and lists that they planted 1,000 acres of corn, end of report. Anyhow, when you add up all the space that I’m using to grow for the CSA alone, it comes out to around only one-third of an acre. It’s amazing how much food you can grow in such a small space!
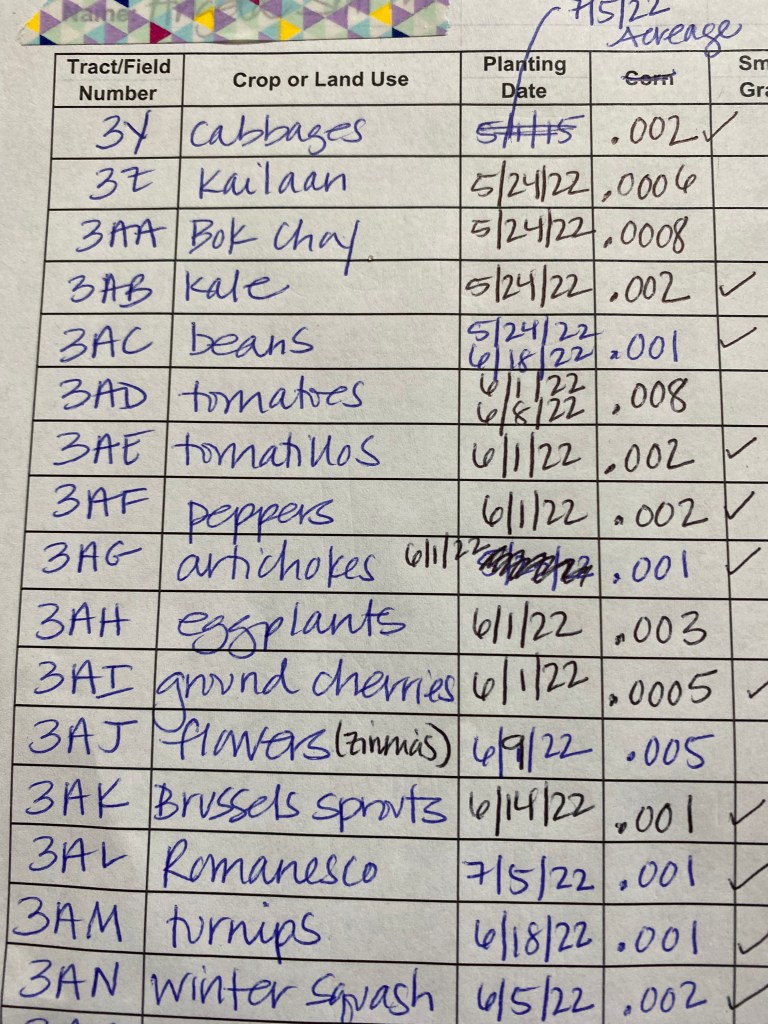
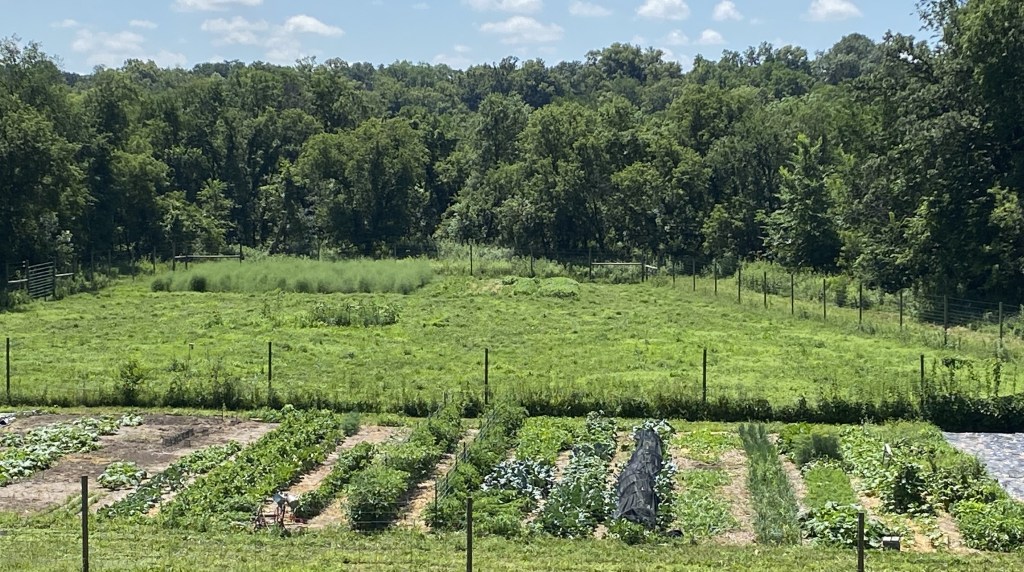
Recipes
Cabbage, Bacon, and Egg Noodles // Uses Green Cabbage
From Women’s Day cookbook (I usually double this recipe)
4 ounces medium-wide egg noodles
2 slices bacon, diced
1 tablespoon butter
1 tablespoon olive oil
1 medium-sized onion, sliced thin
1/2 teaspoon minced garlic
1/4 cup chicken or veggie broth
1/4 dry white wine or additional chicken/veggie broth
1/4 teaspoon salt
1/4 teaspoon ground black pepper
1 1/2 pounds (9 cups) shredded green cabbage
1 teaspoon poppy seeds
- Bring a large pot of water to a boil. Add the noodles and cook according to the package instructions. Drain well.
- Meanwhile, in a large skillet, cook the bacon over medium heat until crisp. Remove with a slotted spoon to paper towels. Wipe the skillet clean.
- In the same skillet, melt the butter over medium heat. Add the onion and cook, stirring often, for 6 to 7 minutes, or until the onion is softened. Add the garlic and cook, stirring often, for 1 minute.
- Add the broth, wine, salt, and pepper. Bring to a boil and boil for 1 minute.
- Add the cabbage. Stir over medium-heat for 3 to 5 minutes, or until crisp-tender.
- Stir in the bacon, then the noodles and poppy seeds. Cook just until the noodles are heated through. Serve right away.
Chickpea Salad with Carrots and Dill // Uses Dill // Vegetarian
Cousin Deb’s Cucumber Feta Dip // Uses Cucumbers, Dill // Vegetarian
1 cup (4 oz.) feta cheese, crumbled 2 tablespoons fresh lemon juice ¼ teaspoon freshly ground pepper 1 ½ cup cubed, seeded, peeled cucumber 1 cup finely chopped red onion 3 tablespoons chopped fresh mint 3 tablespoons chopped fresh dill
- Combine feta, lemon juice, and pepper. Partially mash with a fork. Add cucumber, onion, mint, and dill. Serve with pita chips.
Dill Flavored Butter // Uses Dill // Vegetarian
From Simply in Season cookbook
1/2 cup softened butter
1 shallot or 1/4 cup chives
1 clove minced garlic
2 tablespoons minced dill (or basil or parsley)
1 teaspoon lemon or lime juice (optional)
- Mix and form into a ball or fill a small bowl.
Herbed Summer Squash Pasta Bake // Uses Summer Squash or Sub Zucchini, Throw in a Jalapeno for some spice // Vegetarian
One-Pot African Peanut Stew // Uses Jalapenos, Sub Kale for Collards // Vegetarian
Quick Pickled Jalapeno Peppers // Uses Jalapenos // Vegetarian
Perfect Roasted Cabbage // Uses Green Cabbage // Vegetarian
Roast Salmon and Broccoli with Chile-Caper Vinaigrette // Uses Broccoli, Jalapenos
Sheet Pan Chicken Fajitas // Uses Jalapenos From Raleigh’s Hillside Farm
1 – 1.5 pound(s) boneless skinless chicken breast, cut into thin strips
1 onion, cut into thin half rings
2 or 3 yellow peppers, cut into thin strips
1 or 2 jalapeno peppers, diced small or cut into very thin half strips
Seasoning mix:
2 tablespoon vegetable or canola oil
2 teaspoon chili powder
2 teaspoon ground cumin
½ teaspoon salt
½ teaspoon freshly ground black pepper
For serving: tortillas, sour cream, tomato wedges, minced cilantro, salsa, avocado
- In a large bowl, mix together all seasoning mix ingredients, including oil. Feel free to add more if you prefer. Add all the strips of chicken, onion, peppers and jalapenos to the bowl and toss with tongs until everything is well coated. Spread out on a baking sheet sprayed with cooking spray.
- Bake, uncovered, at 400⁰ for 20-25 minutes or until chicken is no longer pink and veggies are crisp tender. Spoon into warmed tortillas and add desired toppings.
Thai Mango Cabbage Wraps with Crispy Tofu and Peanut Sauce // Uses Green Onions (Scallions), Green Cabbage, Jalapenos // Vegetarian
Week 6: July 11, 2022
Time flies! We are a third of the way through our CSA season already. I hope that you have all been enjoying eating your veggies as much as I have been enjoying growing them for you. Yesterday the kids and I spent some time weeding foxtail grass that had gotten way too tall and we discovered more nearly ripened fruits like jalapenos and cherry tomatoes hiding behind the weeds. Sometimes the best way to see what’s going on with things is to get down on your hands and knees and right up close to the plants.
What’s in My Box this Week?
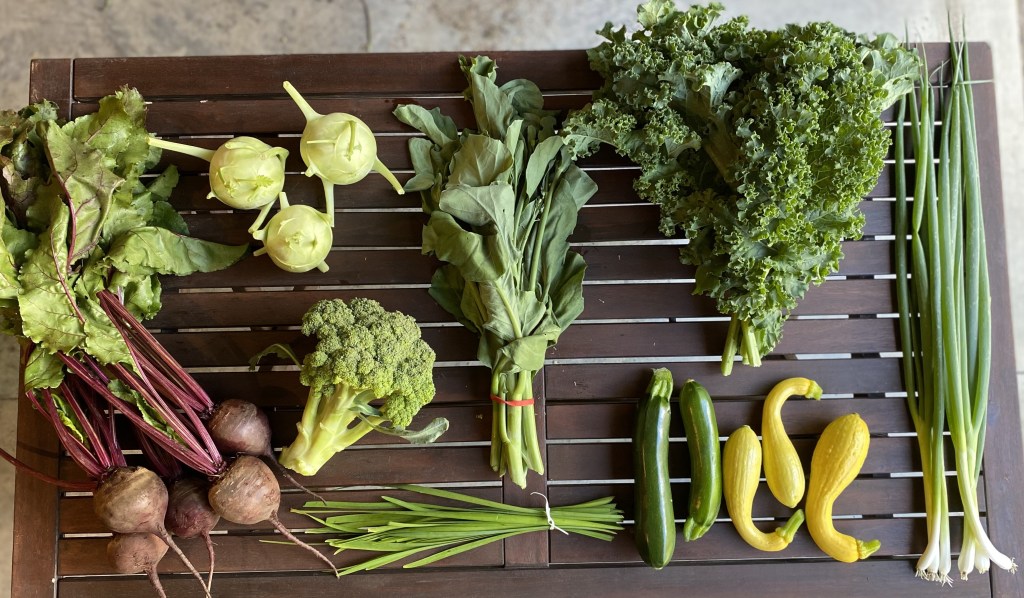
Beets – This will be our last week for beets until fall. You can use both the roots and the leaves of beets. If your beets still have greens attached, cut them off, leaving an inch of stem. Store the beet roots unwashed in a plastic bag in the crisper bin of your refrigerator. They will keep for several weeks. For the greens, keep them dry and unwashed until ready to use in a sealed plastic bag in the fridge for up to a week.
Broccoli – Store in the crisper drawer of the fridge. The colder the better for broccoli. Try to use within a few days.
Garlic Chives – These are also sometimes called Chinese chives as they are commonly used in both Chinese and Japanese cooking. As their name implies, they have a strong garlic flavor and make a great addition to salads and stir fries. They also pair well with eggs.
When you’re ready to use, trim off the ends of the garlic chives and wash thoroughly. For best results, add the chives near the end of the cooking process—otherwise, the flavor fades. Refrigerate in damp paper towels for up to a week.
Kailaan (Large Shares Only) – Also known as Chinese kale, Chinese broccoli, or gai lan. The stems, leaves, and florets of this vegetable are tender and sweet. Use the florets as you would broccoli, broccolini, or raab and enjoy the juicy stems as well.
Store in a closed plastic bag in the fridge for up to a week.
Kale (White Curly) – Keep in the crisper drawer of your fridge or loosely in a plastic bag to seal in the moisture. Use within a week.
Kohlrabi – Store kohlrabi bulb and leaves separately. The bulb will last for two weeks refrigerated in a plastic bag. Wrap in a plastic bag and keep in the crisper drawer of the refrigerator.
Scallions – Store in the veggie drawer of your refrigerator and try to use within a week. If you use these after a week, you can peel off any dry and/or “slimy” outer layers of the onion.
Zucchini and Yellow Crookneck Squash (Large and Some Small Shares; If you don’t get them this week, you will next) – Zucchini and summer squash spoil most quickly in very warm or very cool temperatures. Store them in the crisper drawer of your fridge, but try to use within a week as they will quickly get soggy. You can use these interchangeably in recipes.
Notes from the Field
This past week really flew by. I was able to finish a whole lot of tasks that I had started weeks ago, but just hadn’t found the time to complete since then. Finally, our side porch is no longer littered with dozens of seeding trays of plants for us to trip over which is really, really nice. I finished putting about 300 more native plants into the ground and also transplanted some broccoli. I thinned out the rutabaga, Daikon radishes, and turnips. I also seeded watermelon radishes and fennel and discovered some cool insect activity while I was at it. (Below the photos show a Tussock moth caterpillar, a wasp with a butterfly, and a little native bee on some bee balm.)


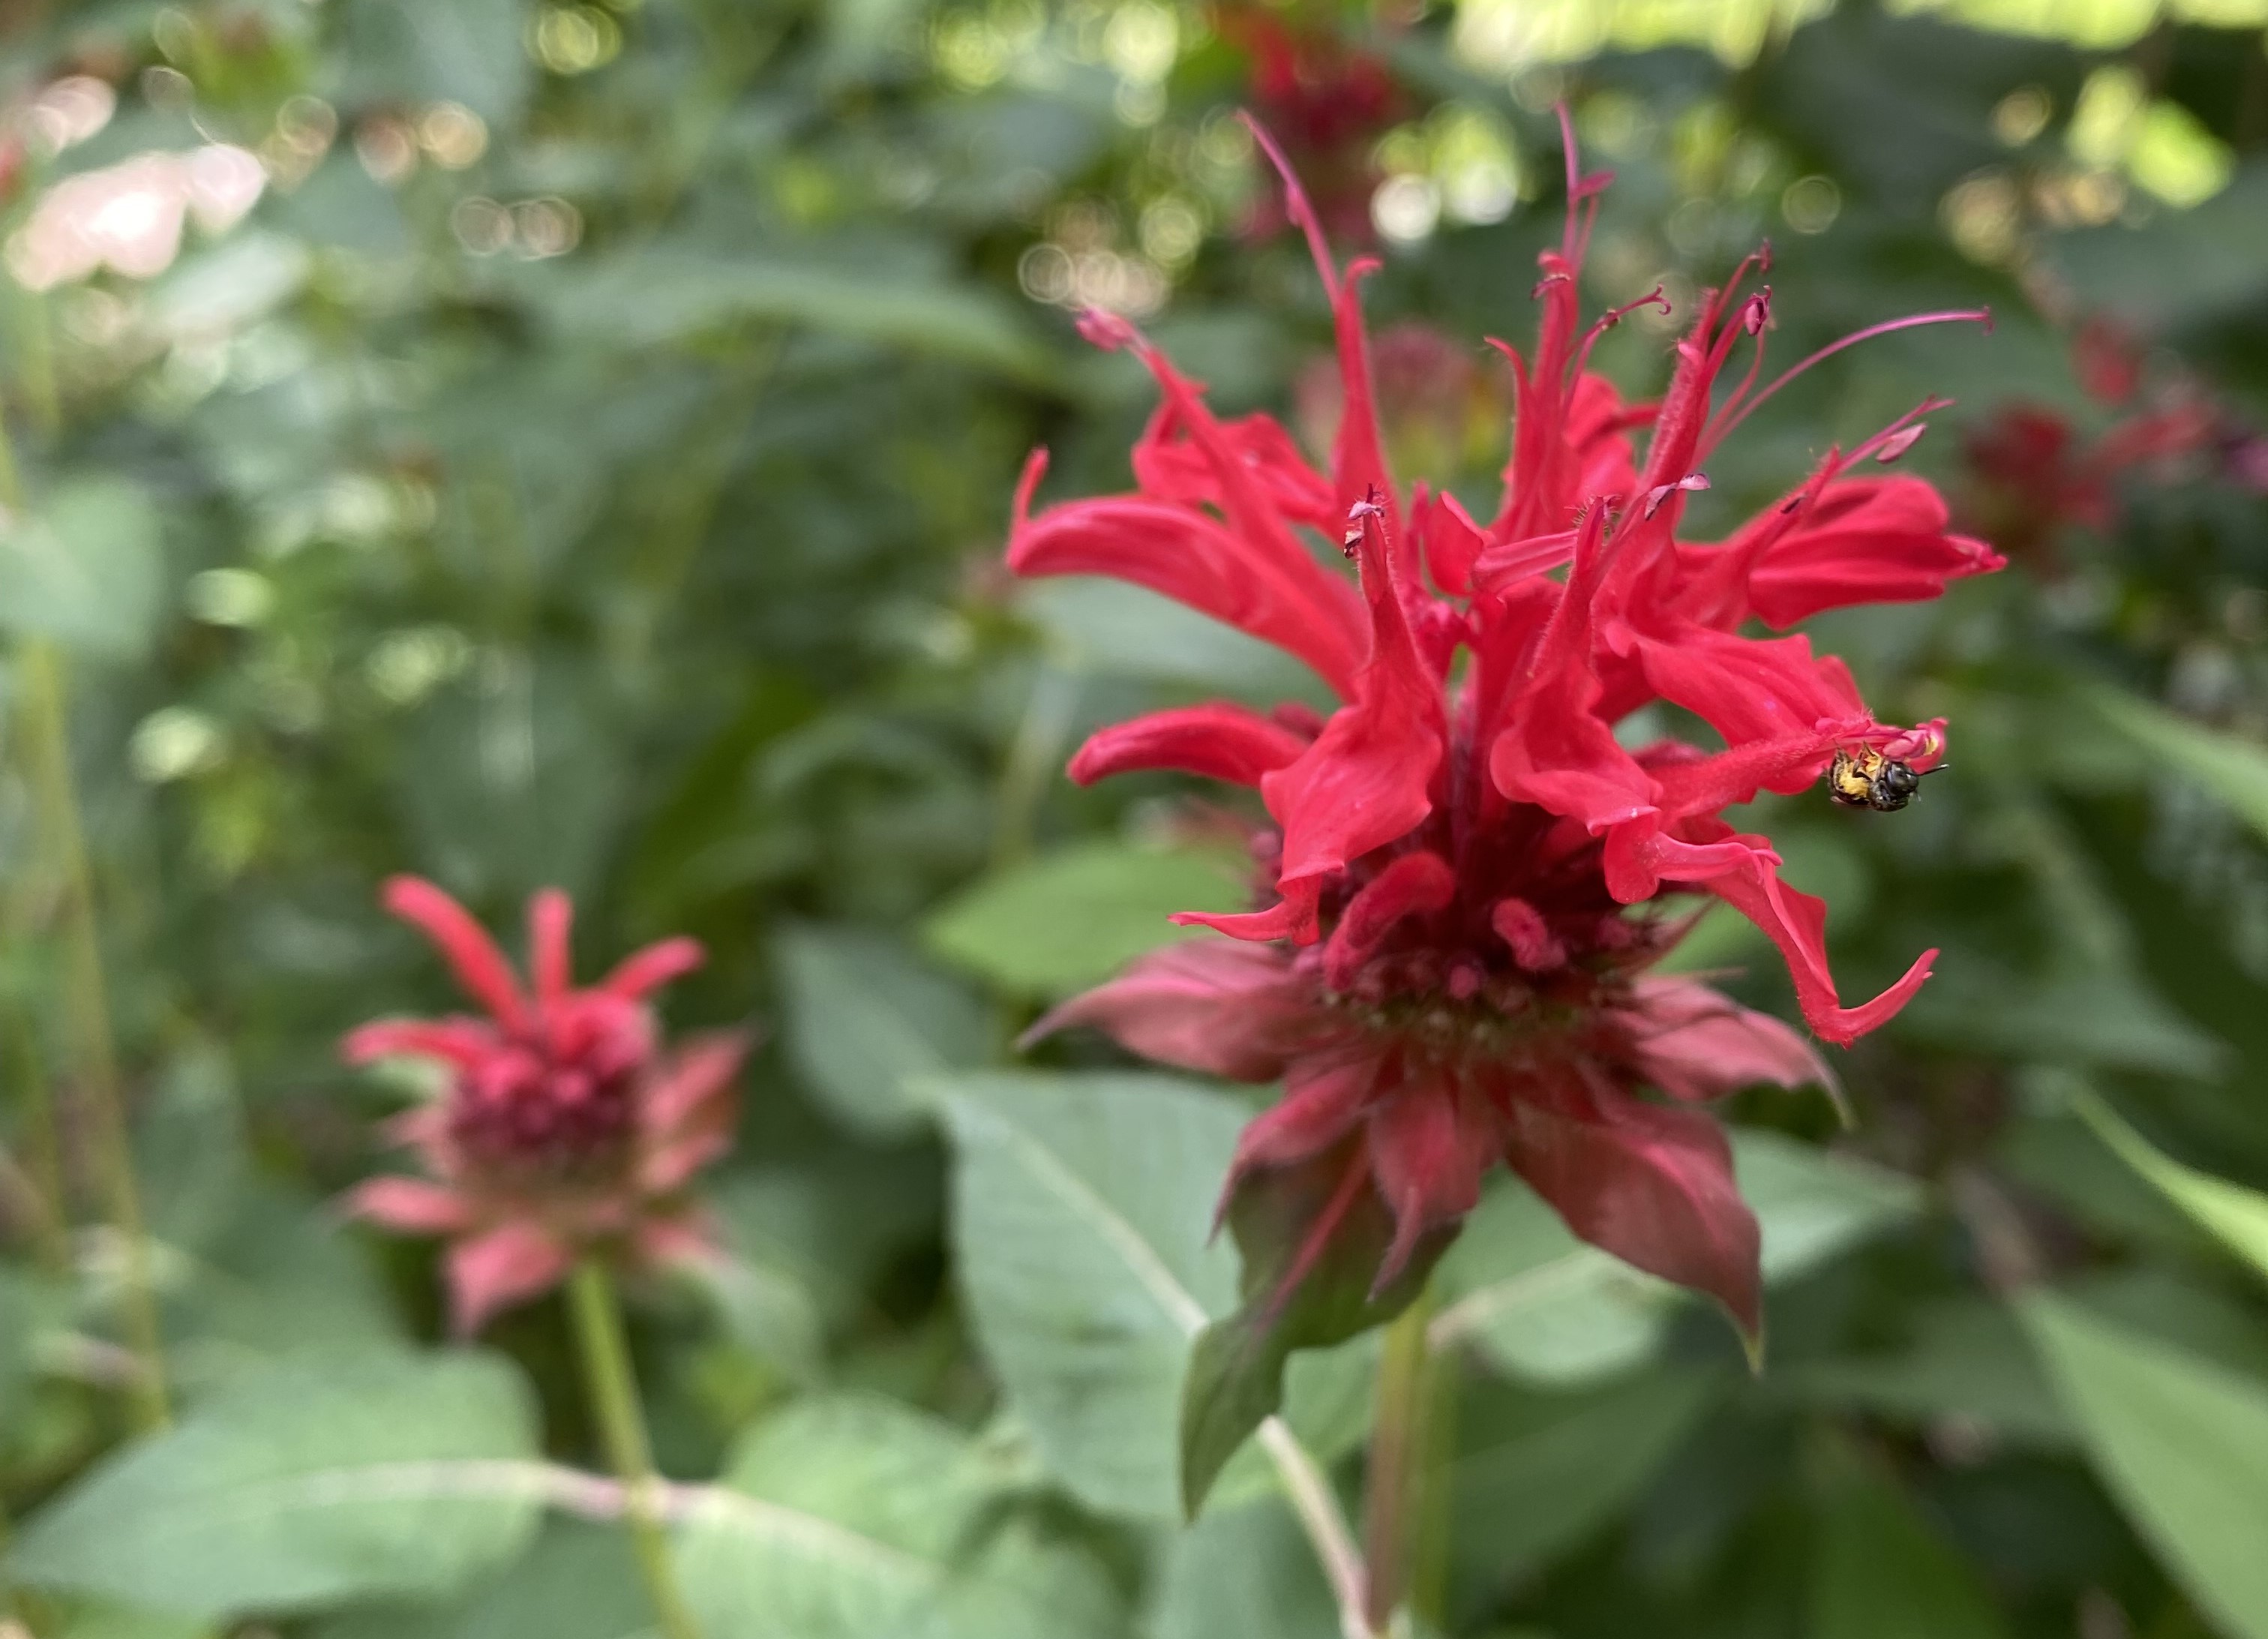
The kids and I also spent a lot of time weeding. I swear, the weeds were just teeny tiny not two weeks ago, but with all this rain and the warm temperatures, they’ve really taken off. I am deducing that our biggest weed problem – foxtail grass – is a warm-season grass given how much it’s grown lately. Luckily, our soil is nice and friable and the rain has made it very easy to yank weeds out. We are nearly done with that task for all of the beds and if past years are any indication, we won’t have to weed too much more going forward, except for the Canada thistle which I will leave for another newsletter.
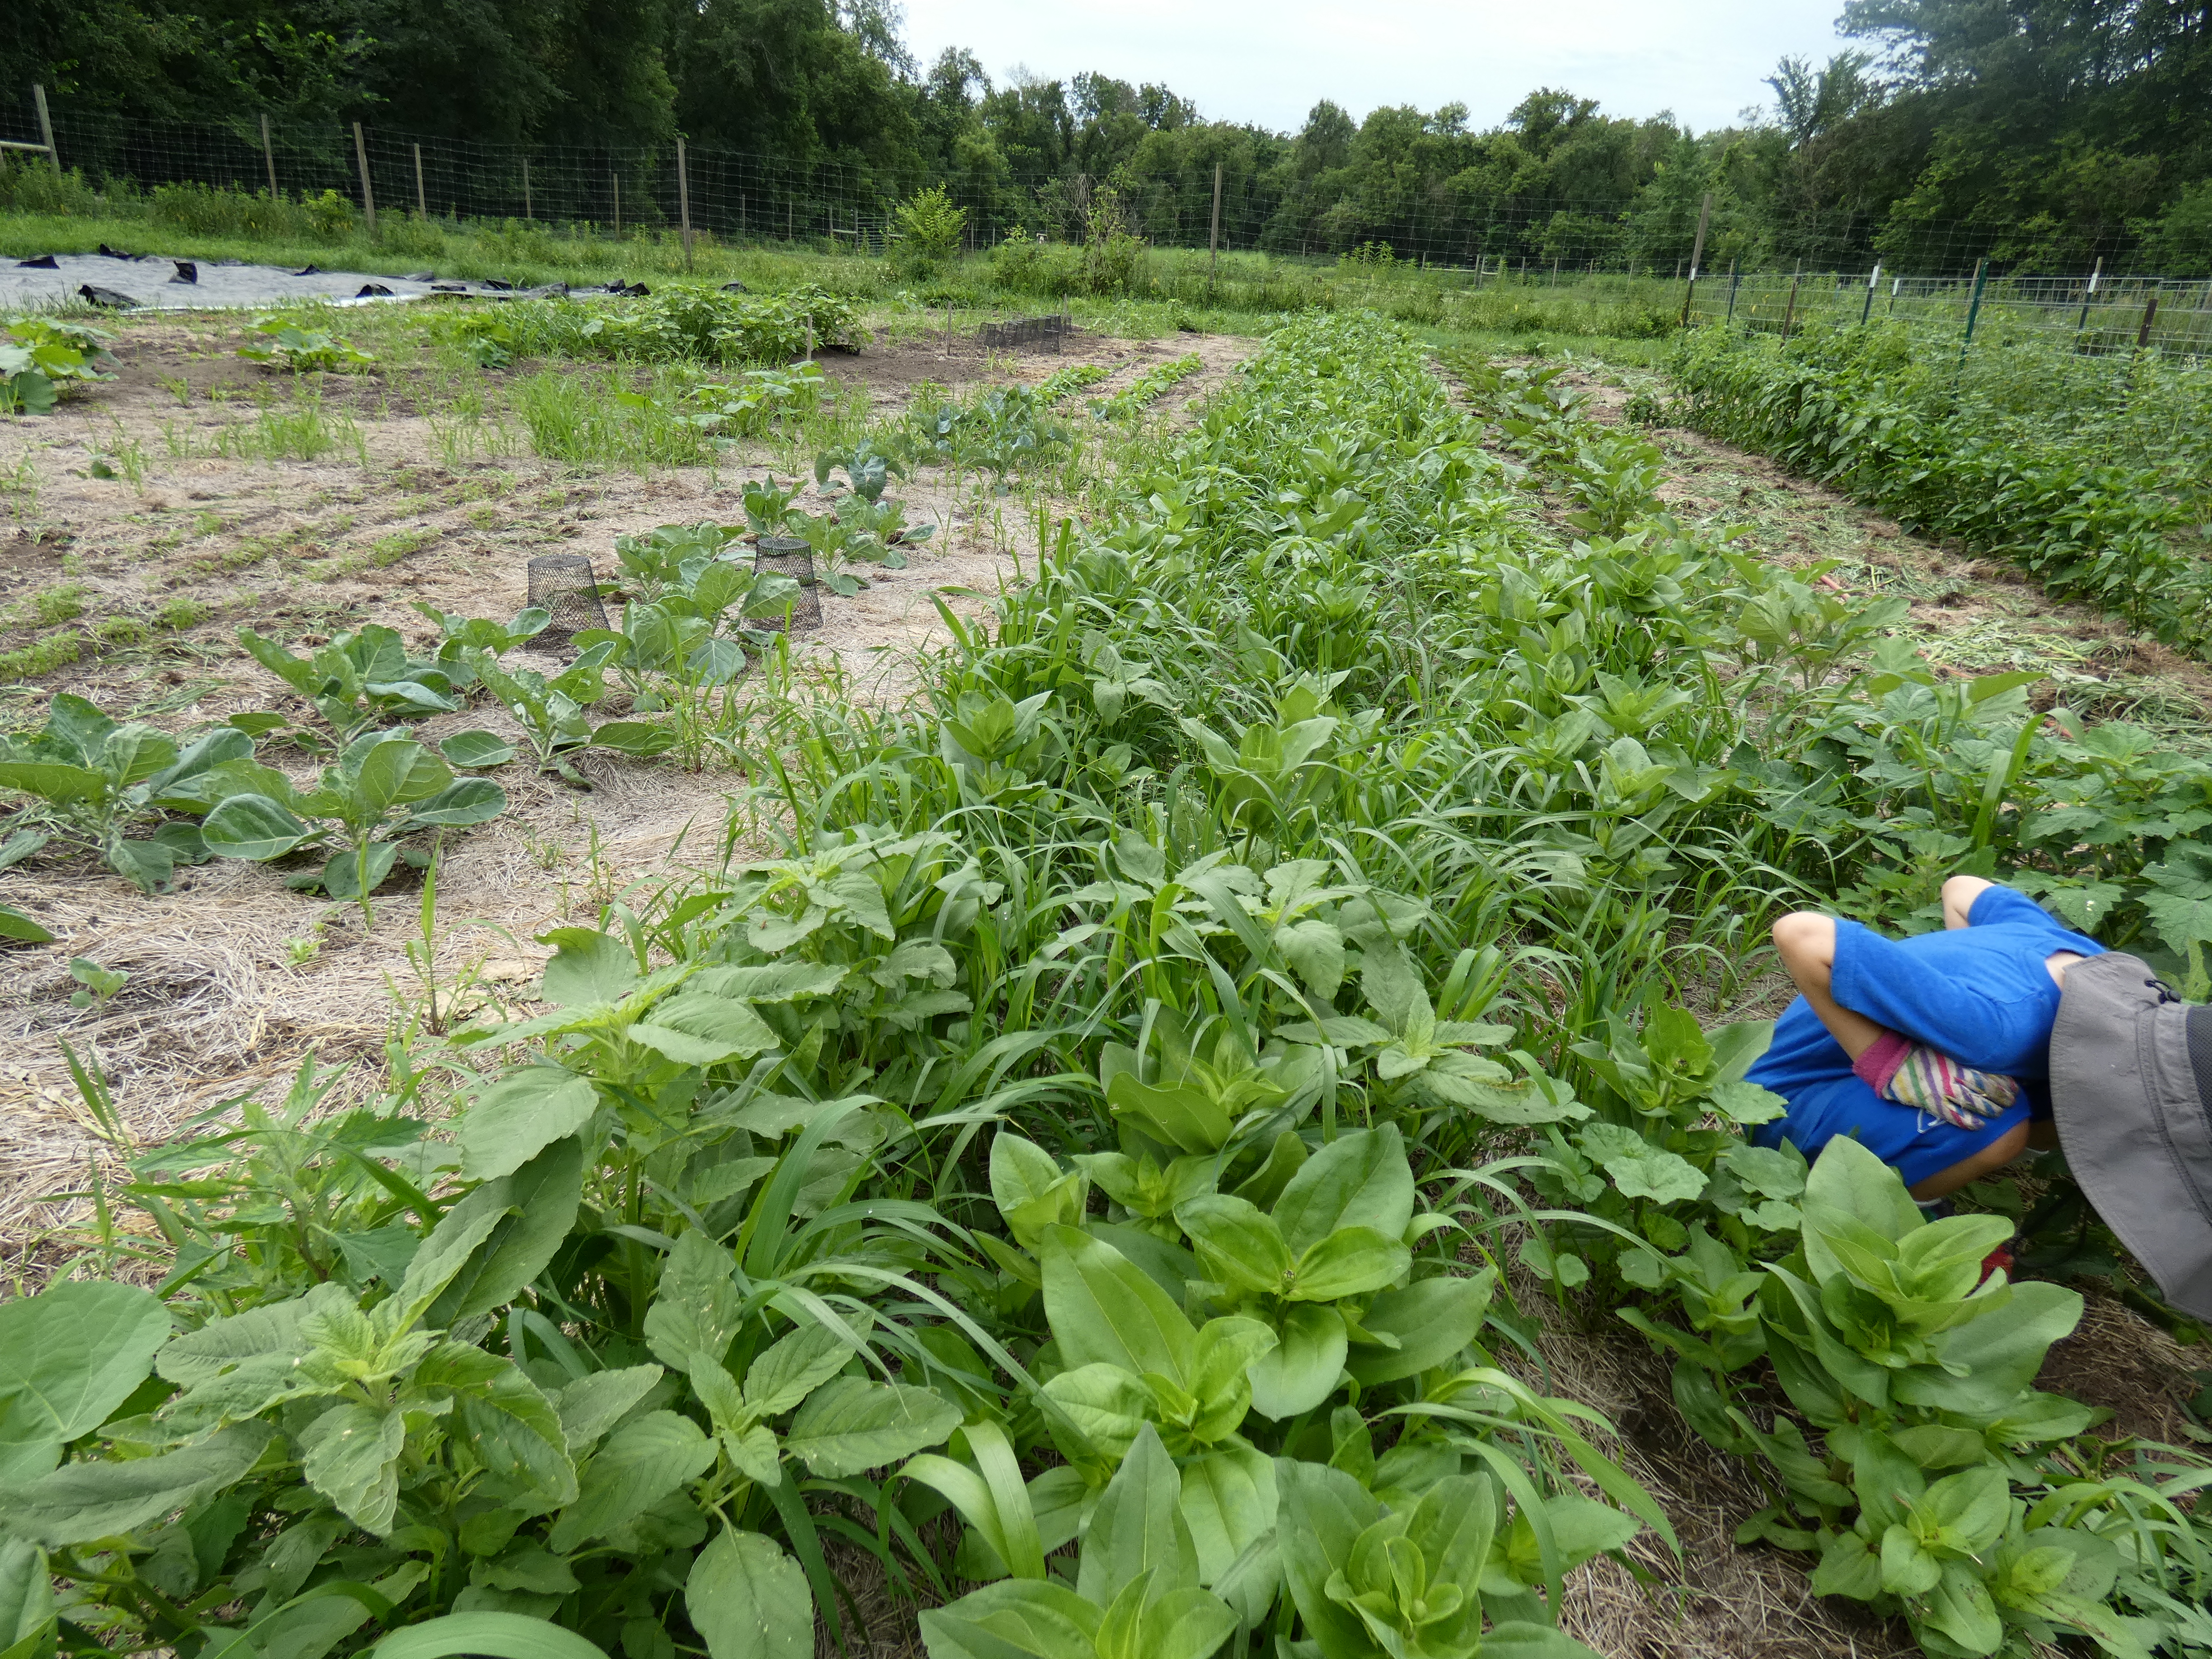
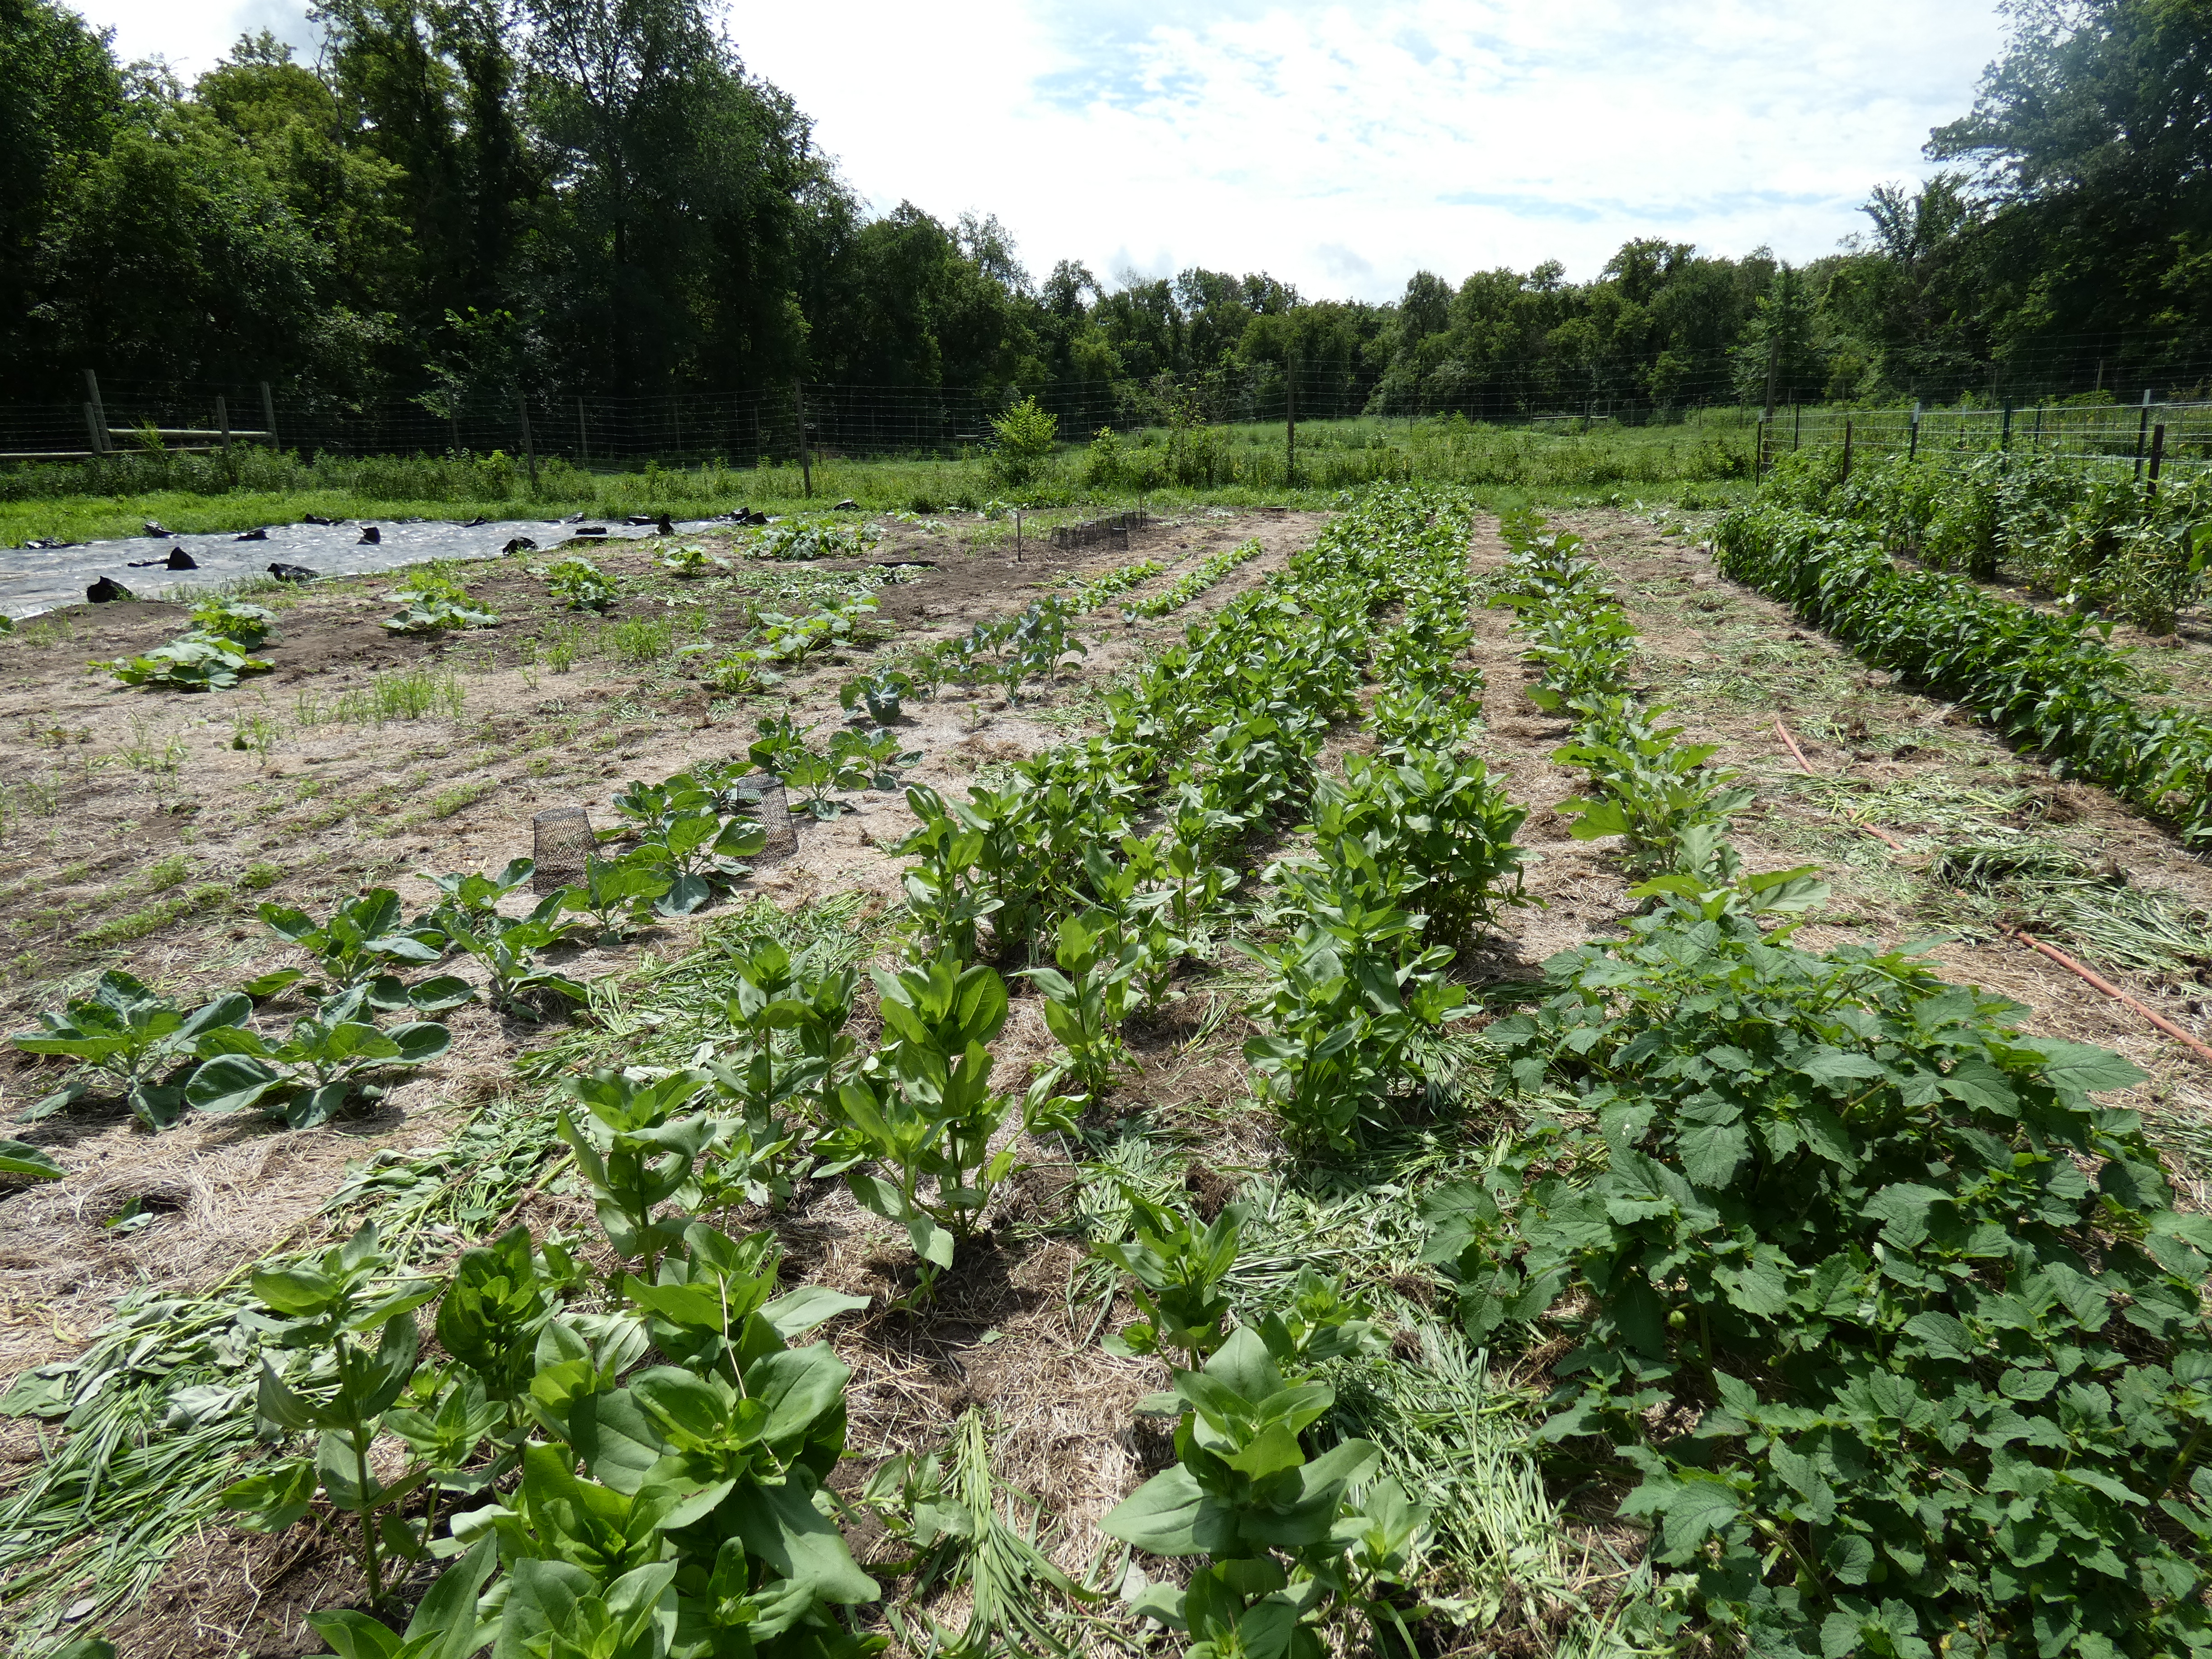
This week our biggest job will be to prep the farm for the field day we’re hosting this upcoming Saturday. (See Week 4 newsletter for details.) I need to clean up the edible hedgerow we planted so that people can actually see the shrubs (ha!), mow some walking paths, and order some food. It sounds like we’re going to have a pretty nice turnout and I’m excited to hear what people think of our efforts and to share what we’ve been learning along the way.
Recipes
Make sure to refer to the last two weeks’ newsletters for recipes that use kohlrabi and beets.
Broccoli and Anchovy Orecchiette // Use Either Broccoli or Kailaan, Can Throw Garlic Chives in Here, Too
Broccoli and Soba Noodle Salad // Uses Broccoli or Can Sub Kailaan, Green Onions // Vegetarian
Chinese Chives and Eggs Stir Fry // Uses Garlic Chives // Vegetarian
Gorgonzola, Broccoli, and Thyme Quiche // Uses Broccoli or Can Sub Kailaan // Vegetarian
Hot Sandwich Spread // Uses Zucchini or Summer Squash, Kale // Vegetarian From Raleigh’s Hillside Farm This is a sautéed combo of veggies you layer onto grilled cheese, paninis or any hot sandwich. Make a batch when you get your box and use it all week!
1 tablespoon butter or olive oil 1 onion, diced 1 bell pepper, diced 5 or 6 kale leaves, chard or other greens; ribs removed, diced 1 zucchini or summer squash, shredded – unpeeled Salt and pepper Could also add: shredded cabbage, herbs, jalapeno or poblano peppers
To make: In a skillet, using a tablespoon of butter or olive oil, saute’ onion and pepper two to three minutes. Add kale and shredded zucchini. Season with salt and pepper as well as garlic, parsley, or whatever other seasonings you want. Saute’ until greens are cooked down and moisture is gone. Store in a container in fridge until ready to use.
To use: Layer buttered bread, cheese, thick layer of veggie mixture, (slices of ham, or turkey – optional), another layer of cheese and final slice of buttered bread. Grill over medium heat until cheese is melted and bread is golden brown. Can also use in a panini instead of grilling. Also good on baked sliders.
Lemon Summer Squash Bread // Uses Summer Squash or Zucchini // Vegetarian
Mapo Tofu // Add Steamed Kailaan or Broccoli and White Rice, Throw Garlic Chives in Here, Too
Pasta with Beans and Greens // Use Either Kale or Kailaan // Vegetarian
Salted Chili and Chinese Chive Frittata // Uses Garlic Chives // Vegetarian
Vegetable Dumplings // Uses Garlic Chives // Vegetarian
Zucchini, Rice, and Cheese Gratin // Uses Zucchini, Can Sub Summer Squash // Vegetarian
Zucchini, Swiss Chard, and Chickpea Stew // Uses Zucchini and Summer Squash, Sub Kale for Chard // Vegetarian
Week 5, July 5, 2022: It’s All About those Scapes
There are both good things and challenging things about living out in the country. It’s nice to be able to see the stars at night; it’s about five degrees cooler out here than it is in the city since there is less pavement and more trees (very helpful on a day like today!); and it’s usually pretty peaceful and quiet. Some of the downsides are that no one will deliver take out to you; if you need butter or sugar, the nearest grocery store is fifteen minutes away; and most frustrating for me lately… our internet connection can be pretty awful. We still don’t have fiber optics out here and may not for another two or three years. (Yes! I said years!) This past week have been especially challenging as the internet has gone in and out at unpredictable times and has stayed out for hours and hours. I hope that all of this comes through okay!
What’s in My Box this Week?
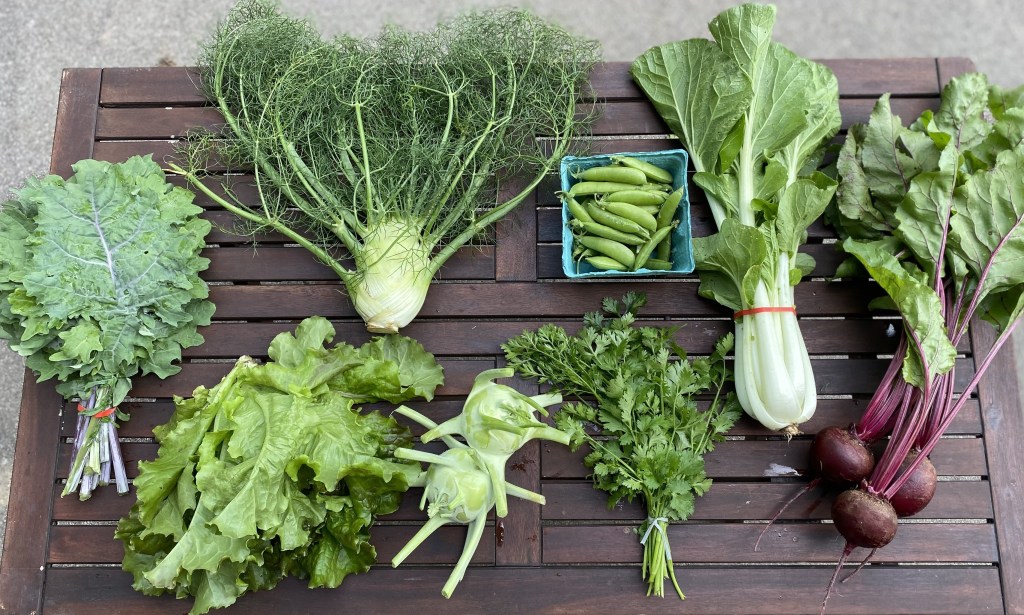
BOK CHOY – Store unwashed in the crisper drawer of your fridge. Use within a couple days for best texture. Greens will wilt relatively quickly. Stems will retain firmness a while longer.
BEETS – You can use both the roots and the leaves of beets. If your beets still have greens attached, cut them off, leaving an inch of stem. Store the beet roots unwashed in a plastic bag in the crisper bin of your refrigerator. They will keep for several weeks. For the greens, keep them dry and unwashed until ready to use in a sealed plastic bag in the fridge for up to a week.
CILANTRO – I thought I might give you garlic chives this week, but when I was in the field earlier today I saw that the next planting of cilantro is ready to harvest and I don’t want it to bolt, so you’ll get some more of this tasty herb this week. Stand upright in a container with an inch of water. Then cover the herbs loosely with a plastic bag and refrigerate for up to 2 weeks.
FENNEL – This is another new crop for me and I’ve only eaten it a couple of times, so we will be learning about this veggie together. Fennel is used in a lot of Italian cooking. The bulb is mild and can be used as an onion, but it also has a subtle anise flavor and anise is used in lots of common Italian foods like Italian sausage and pizza. We use anise seed when seasoning our homemade pizza sauce, and it adds a lot of flavor.

Unfortunately, the germination rate for the fennel seeds I started inside this spring was exactly zero. Fortunately, Easy Yoke Farm has some fennel they can sell me, so I am going to buy the bulbs in from them. I’m also going to experiment with starting some seeds out in the field this week, so maybe you will get some more fennel later in the season, if it works.
If you plan to use the fronds (delicate leaves), remove these before storage. Place the bulbs in a plastic bag in the fridge for up to two weeks. Wrap the leaves in a moist paper towel and store in the fridge for up to a week. Here is a tutorial from Lauren at Raleigh’s Hilltop Farm about how to cut it up.
KALE (Red Russian) – Keep in the crisper drawer of your fridge or loosely in a plastic bag to seal in the moisture. Use within a week.
KOHLRABI – A member of the brassica family (veggies like cabbage, broccoli, cauliflower, Brussels sprouts, and kale are all in this family), kohlrabi means “cabbage turnip” in German and that is pretty much spot on: it looks like a turnip once its skin is removed and tastes a lot like a cabbage. You can eat kohlrabi a bunch of different ways. You can just cut it into sticks and eat it raw with some veggie dip for a quick snack or use it raw salads. You can also do a quick pickling for a taco or grain bowl topping, and you can cook with it as well. Here is a tutorial showing three different ways to cut up a kohlrabi, depending on how you use it.
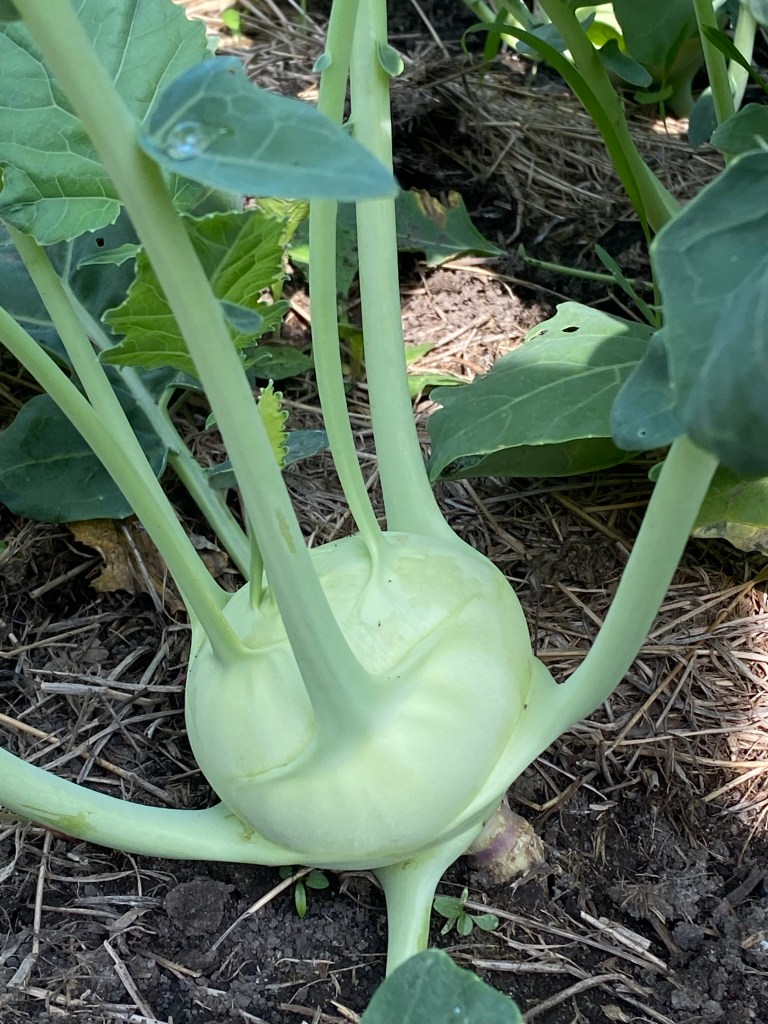
Store kohlrabi globe and leaves separately. The bulb will last for two weeks refrigerated in a plastic bag. Wrap leaves and stalks in a plastic bag and keep in the crisper drawer of the refrigerator.
LETTUCE – Store loosely in a plastic bag in the crisper drawer of your fridge. Keep unused leaves on the head. Ideally use within a week, but it will probably store for up to two weeks if needed.
SUGAR SNAP PEAS – As with last week, this week your peas will be coming from Easy Yoke Farm again. Peas are very perishable, and snap peas are best eaten fresh. Keep them in the fridge and eat within two to three days.
Notes from the Field
Things are plugging right along on the farm. We are well on our way to having lots of different veggies ready to share soon: the cabbages and broccoli are forming heads; the zucchini and summer squash are fruiting (little tiny ones right now, but they’ll be ready next week); the green beans are flowering; there are small tomatoes on almost every tomato plant; and the ground cherries and tomatillos are setting and ripening their fruits. You have a lot to look forward to!
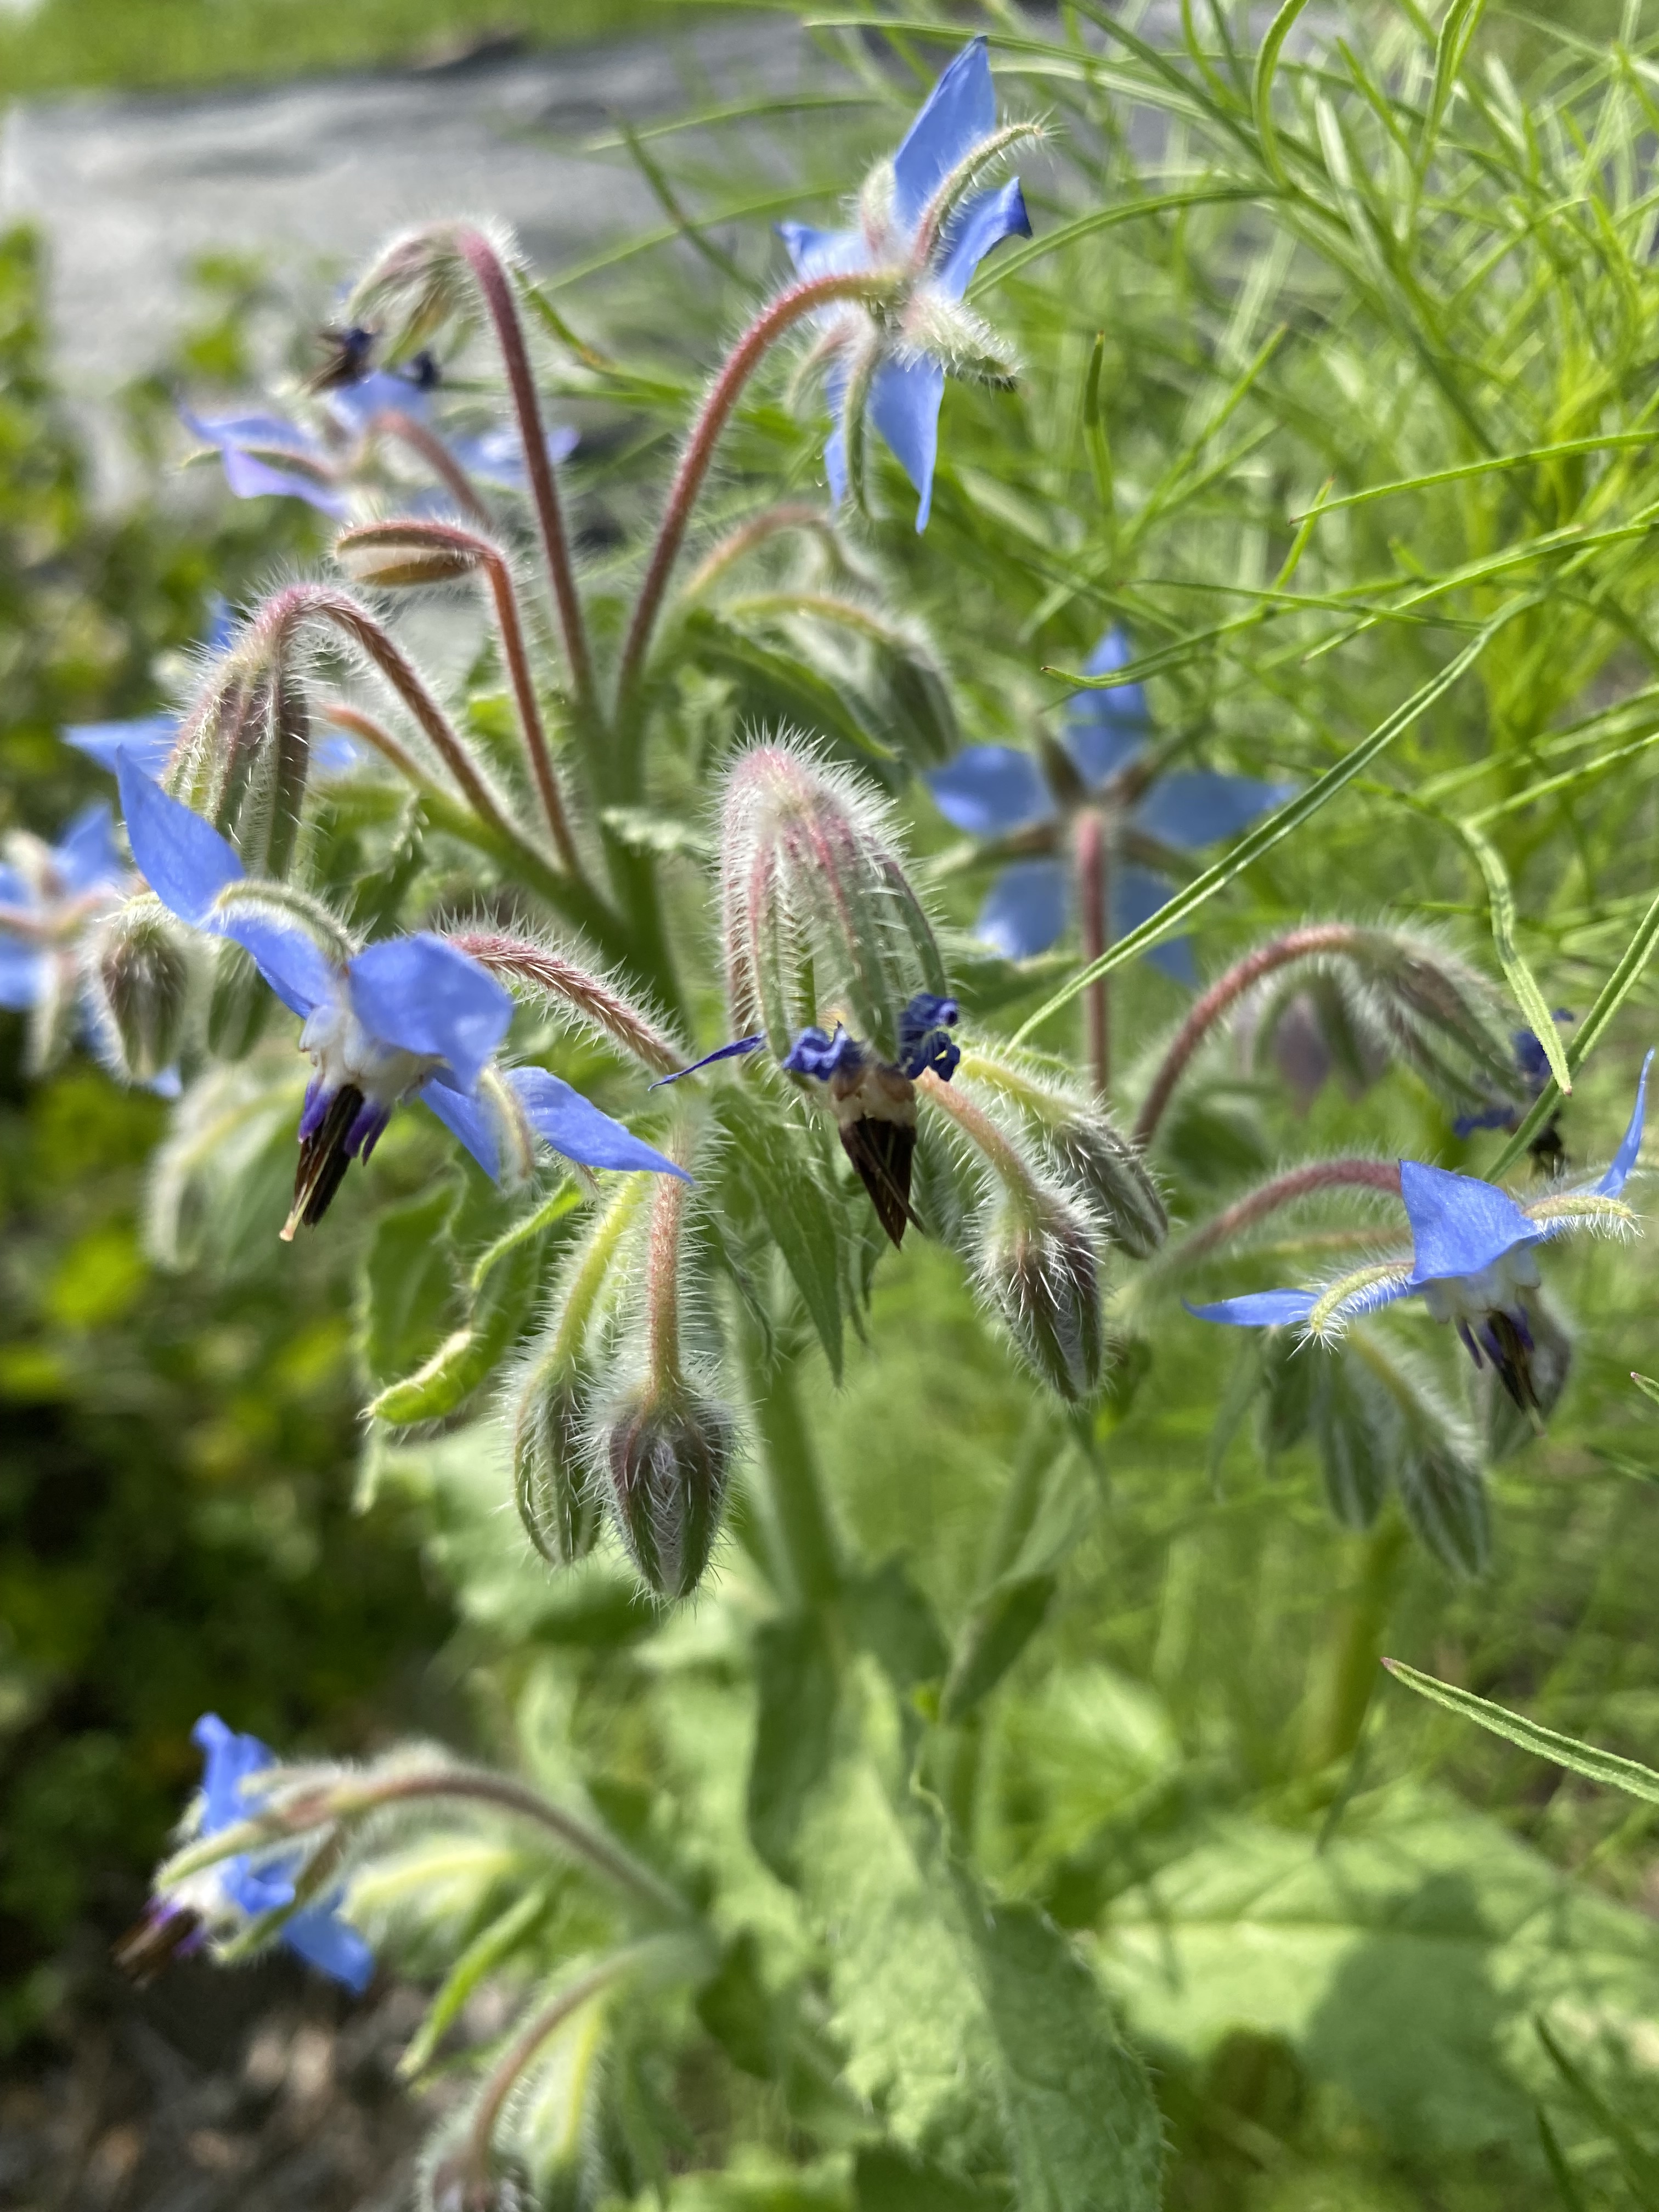
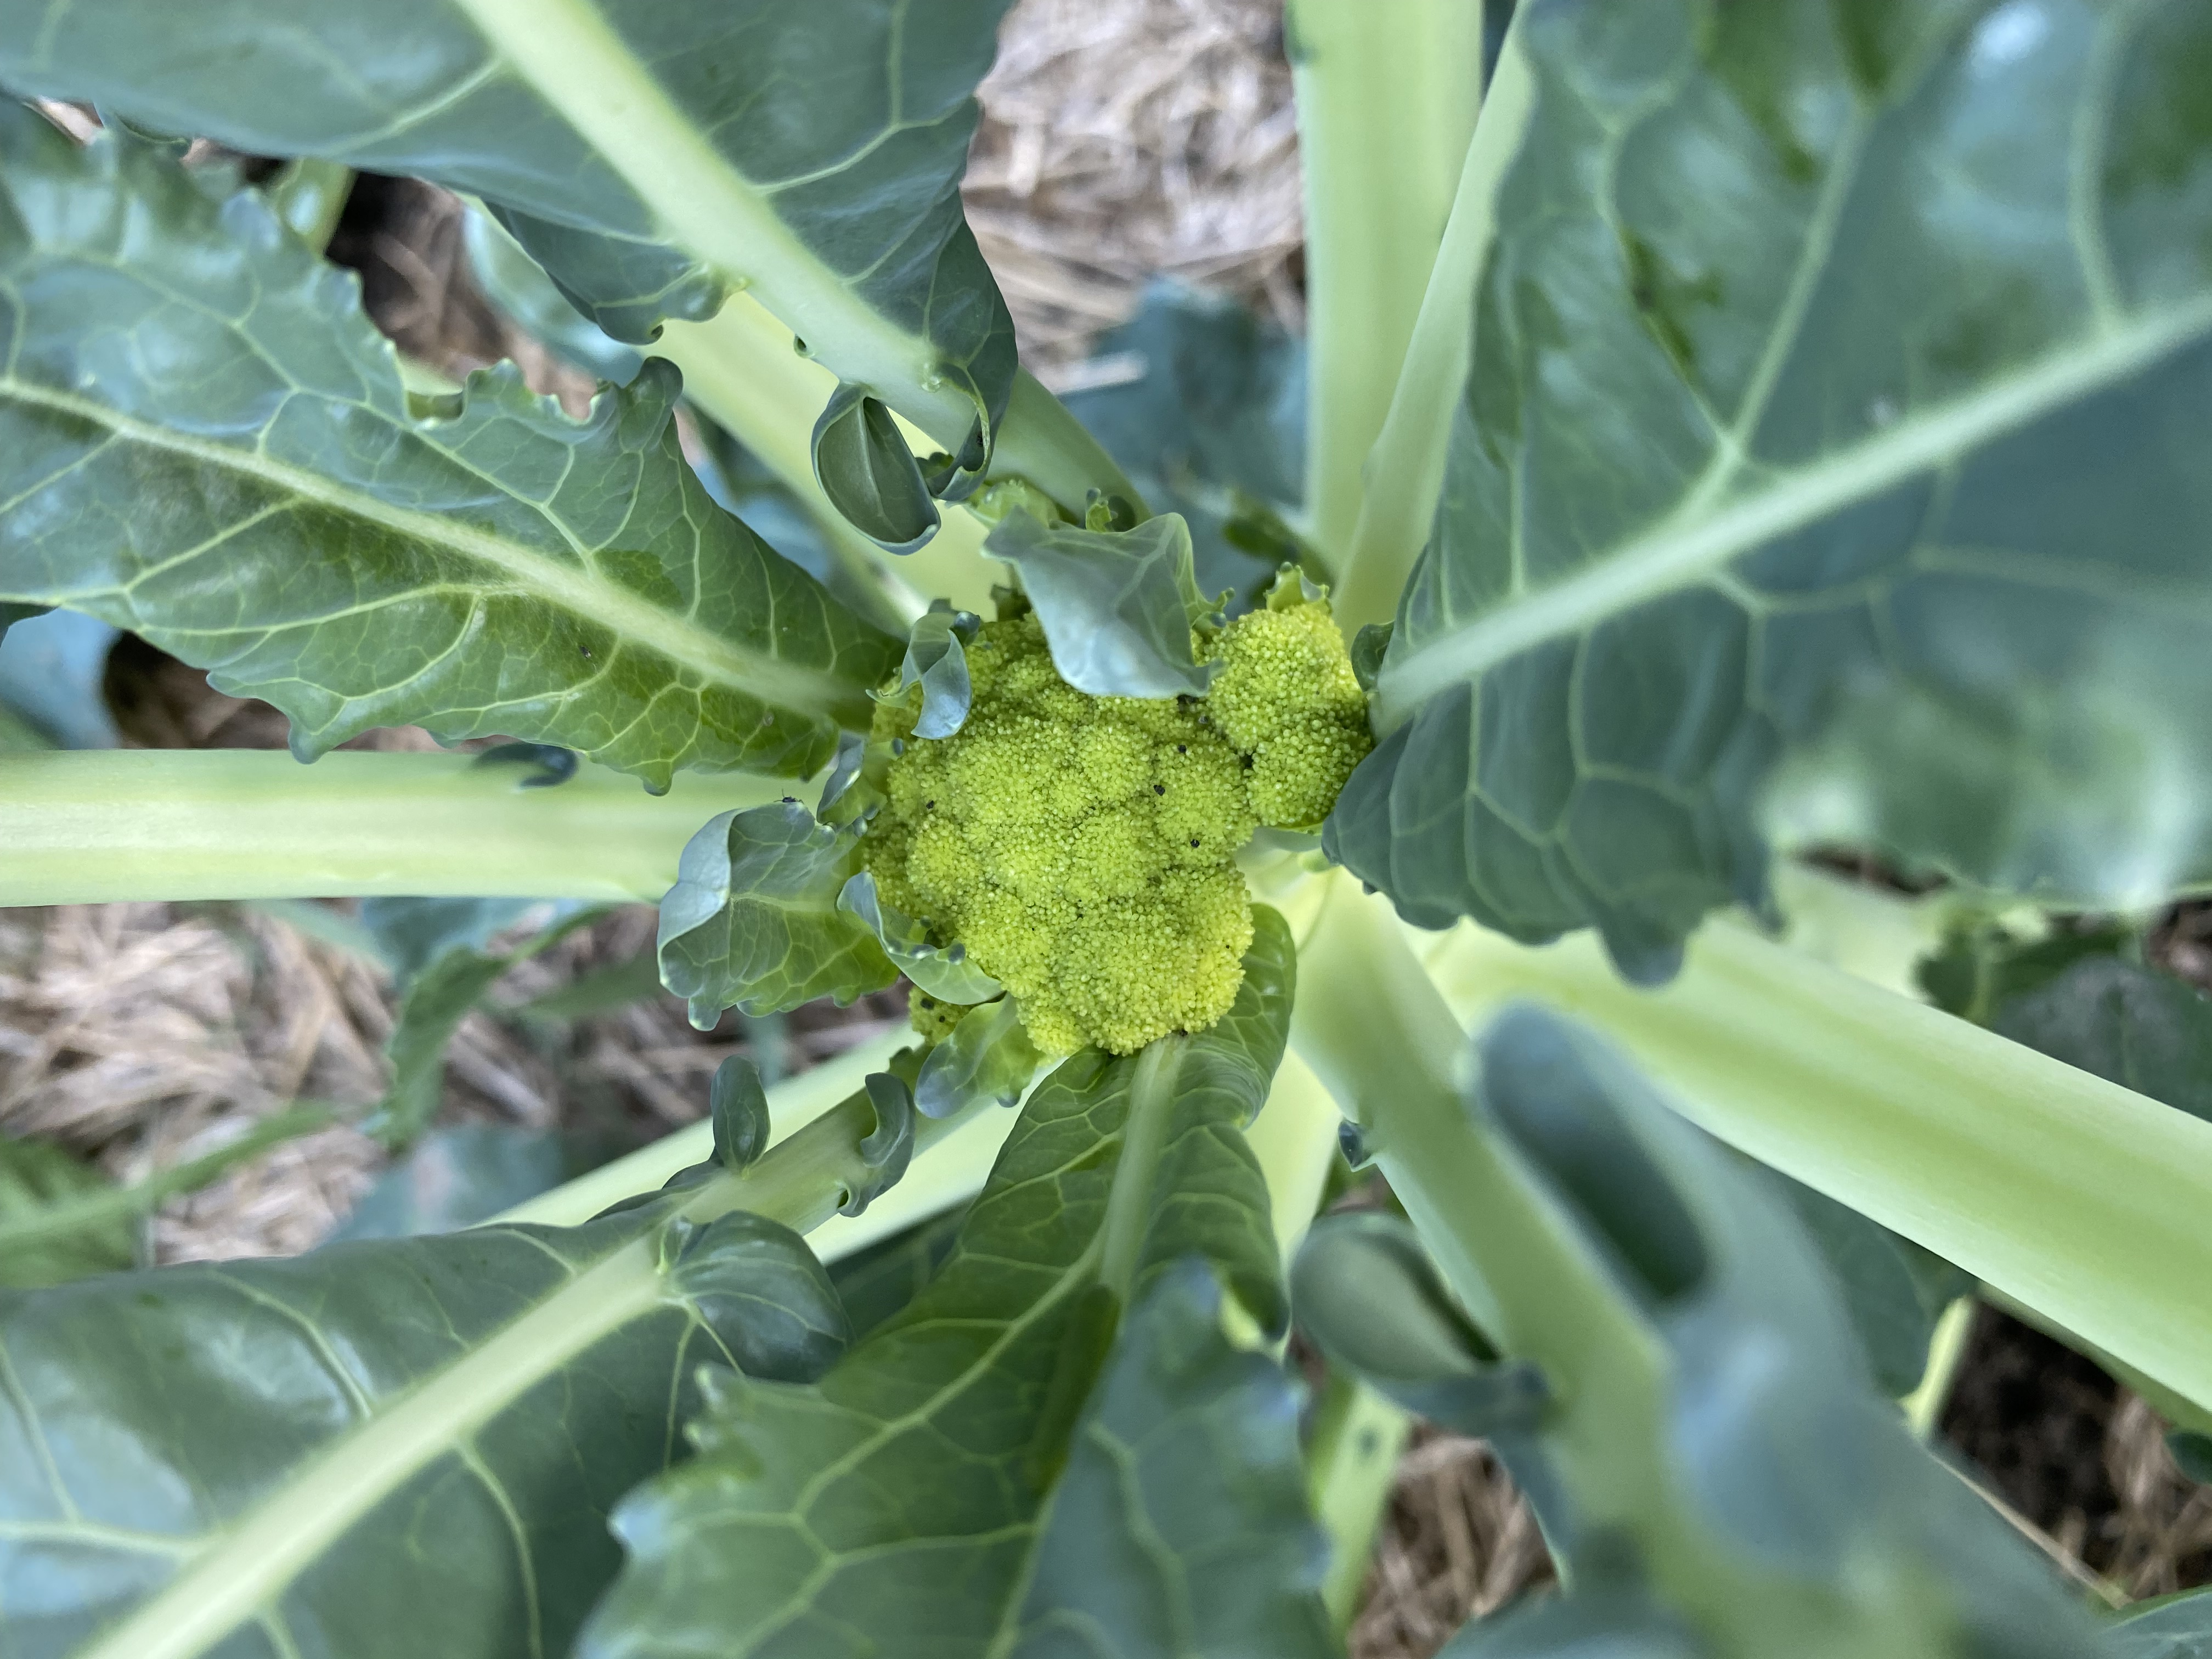
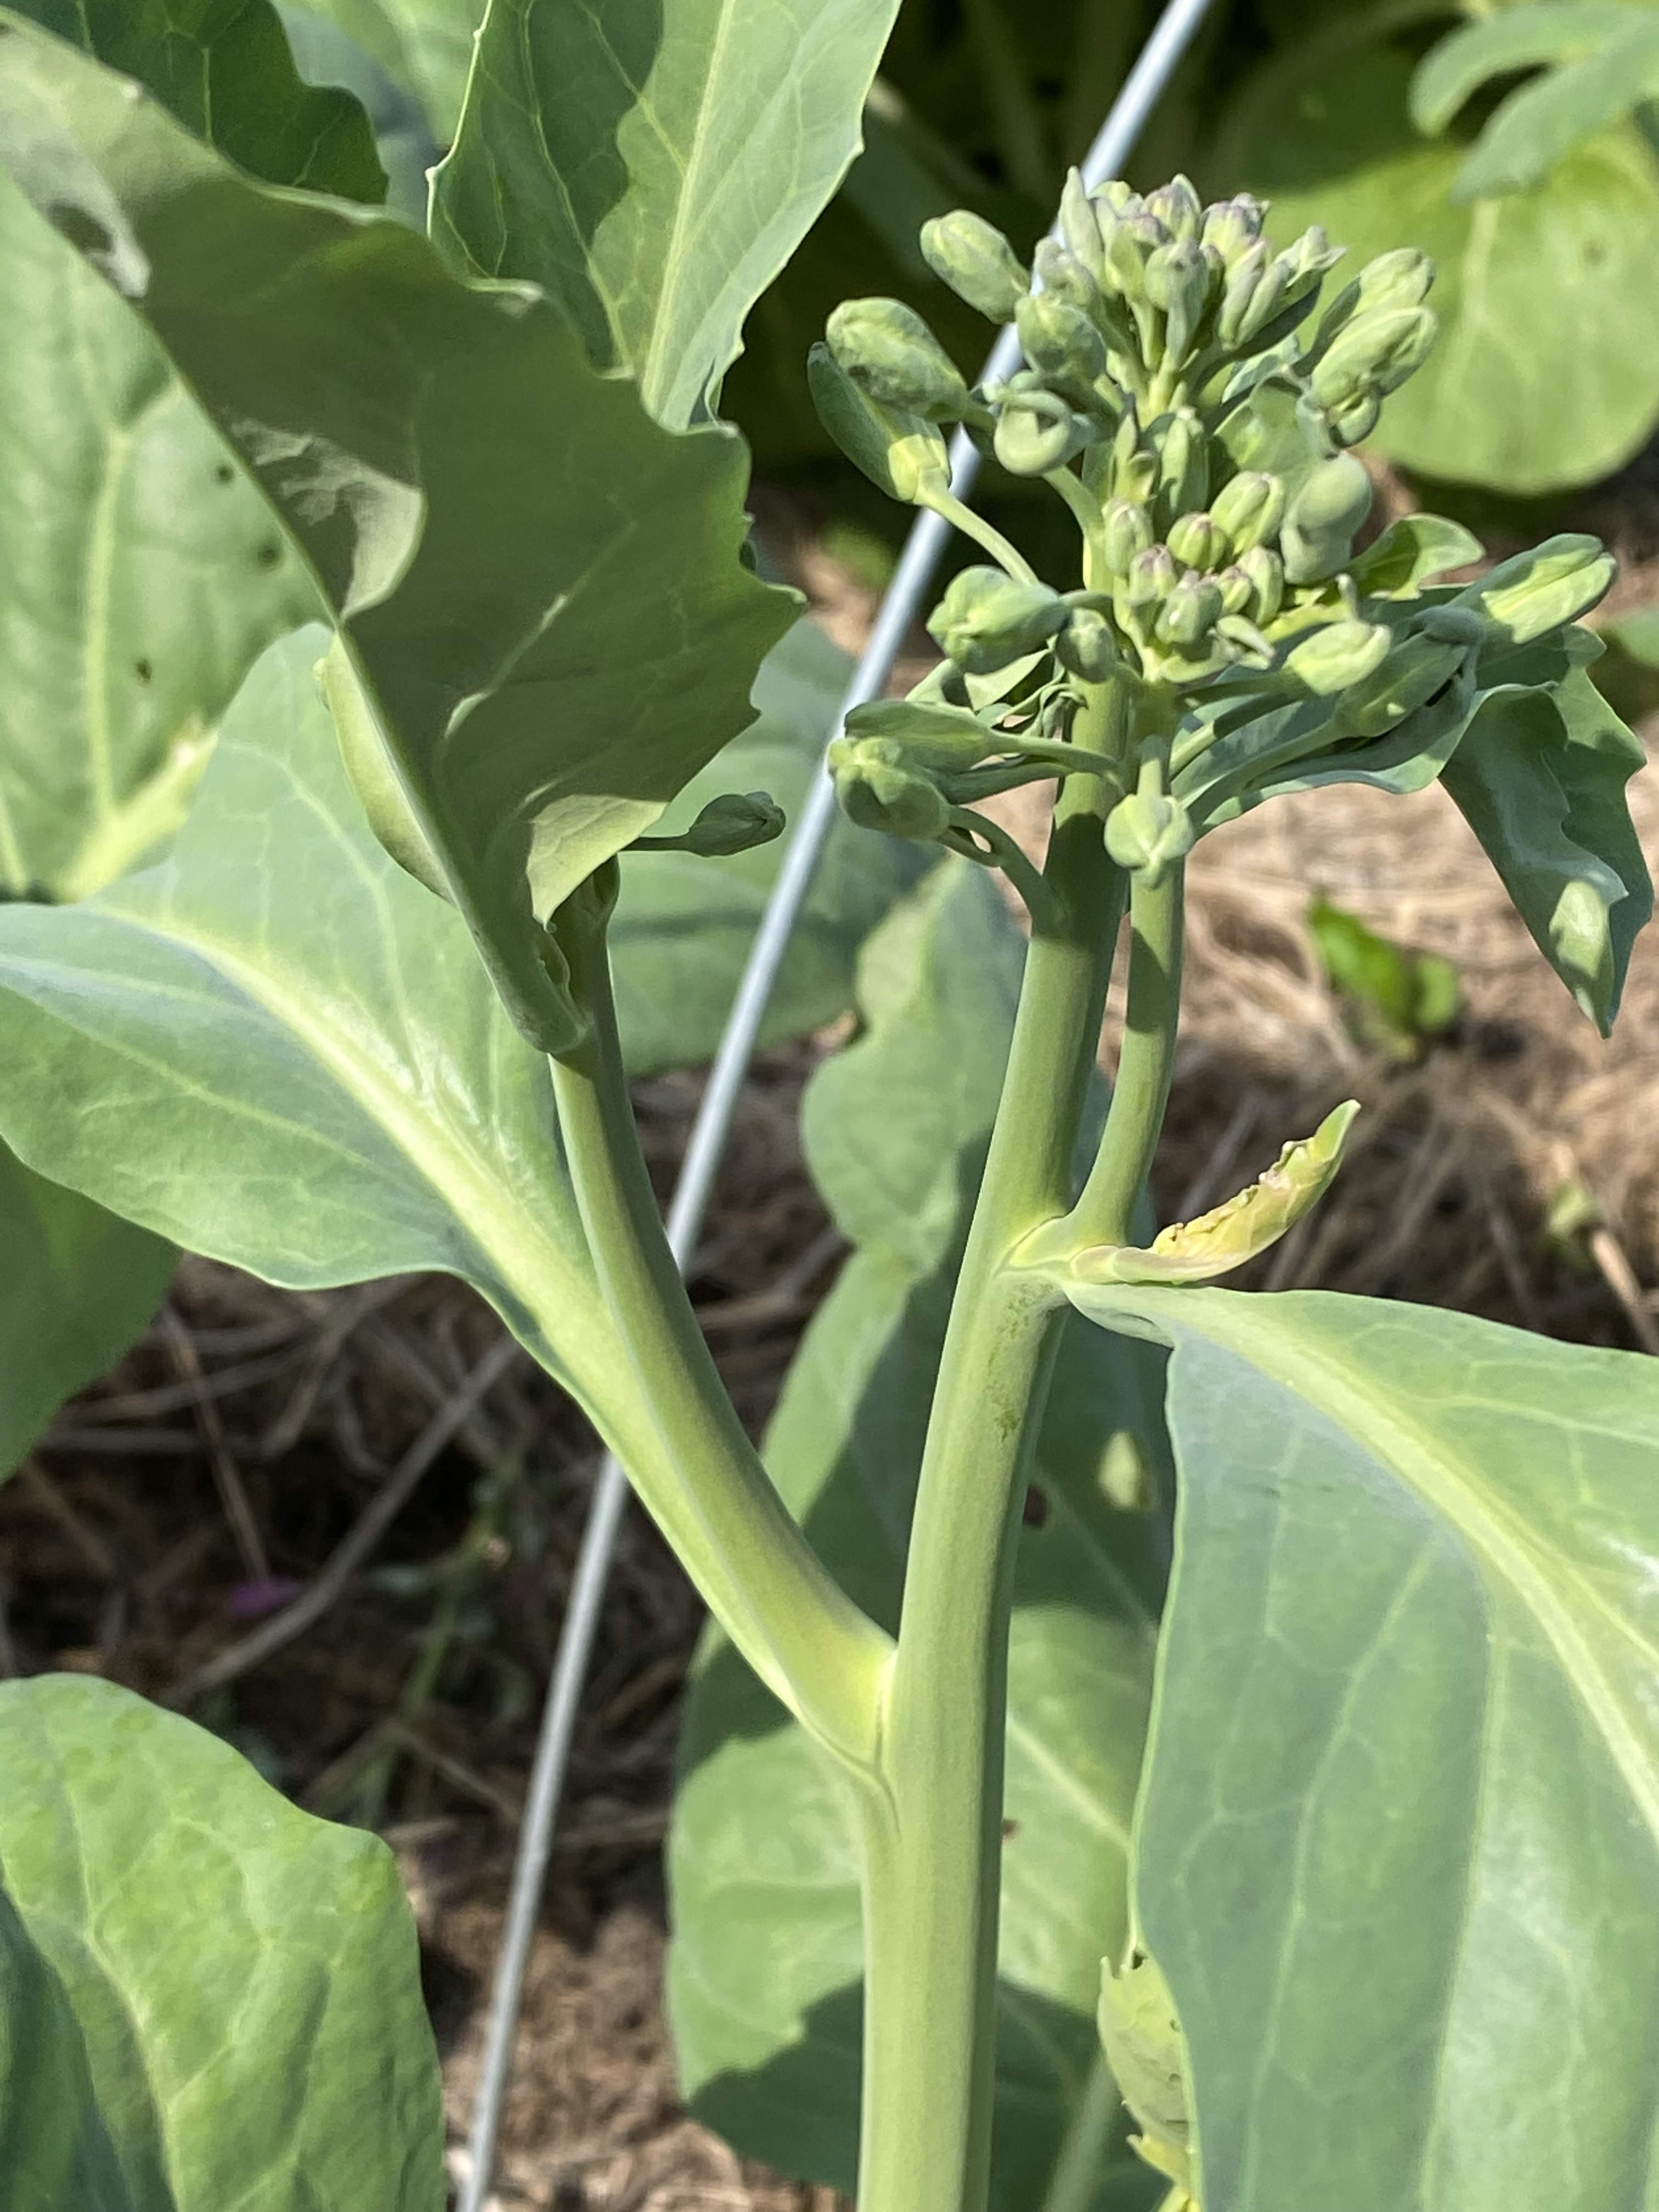
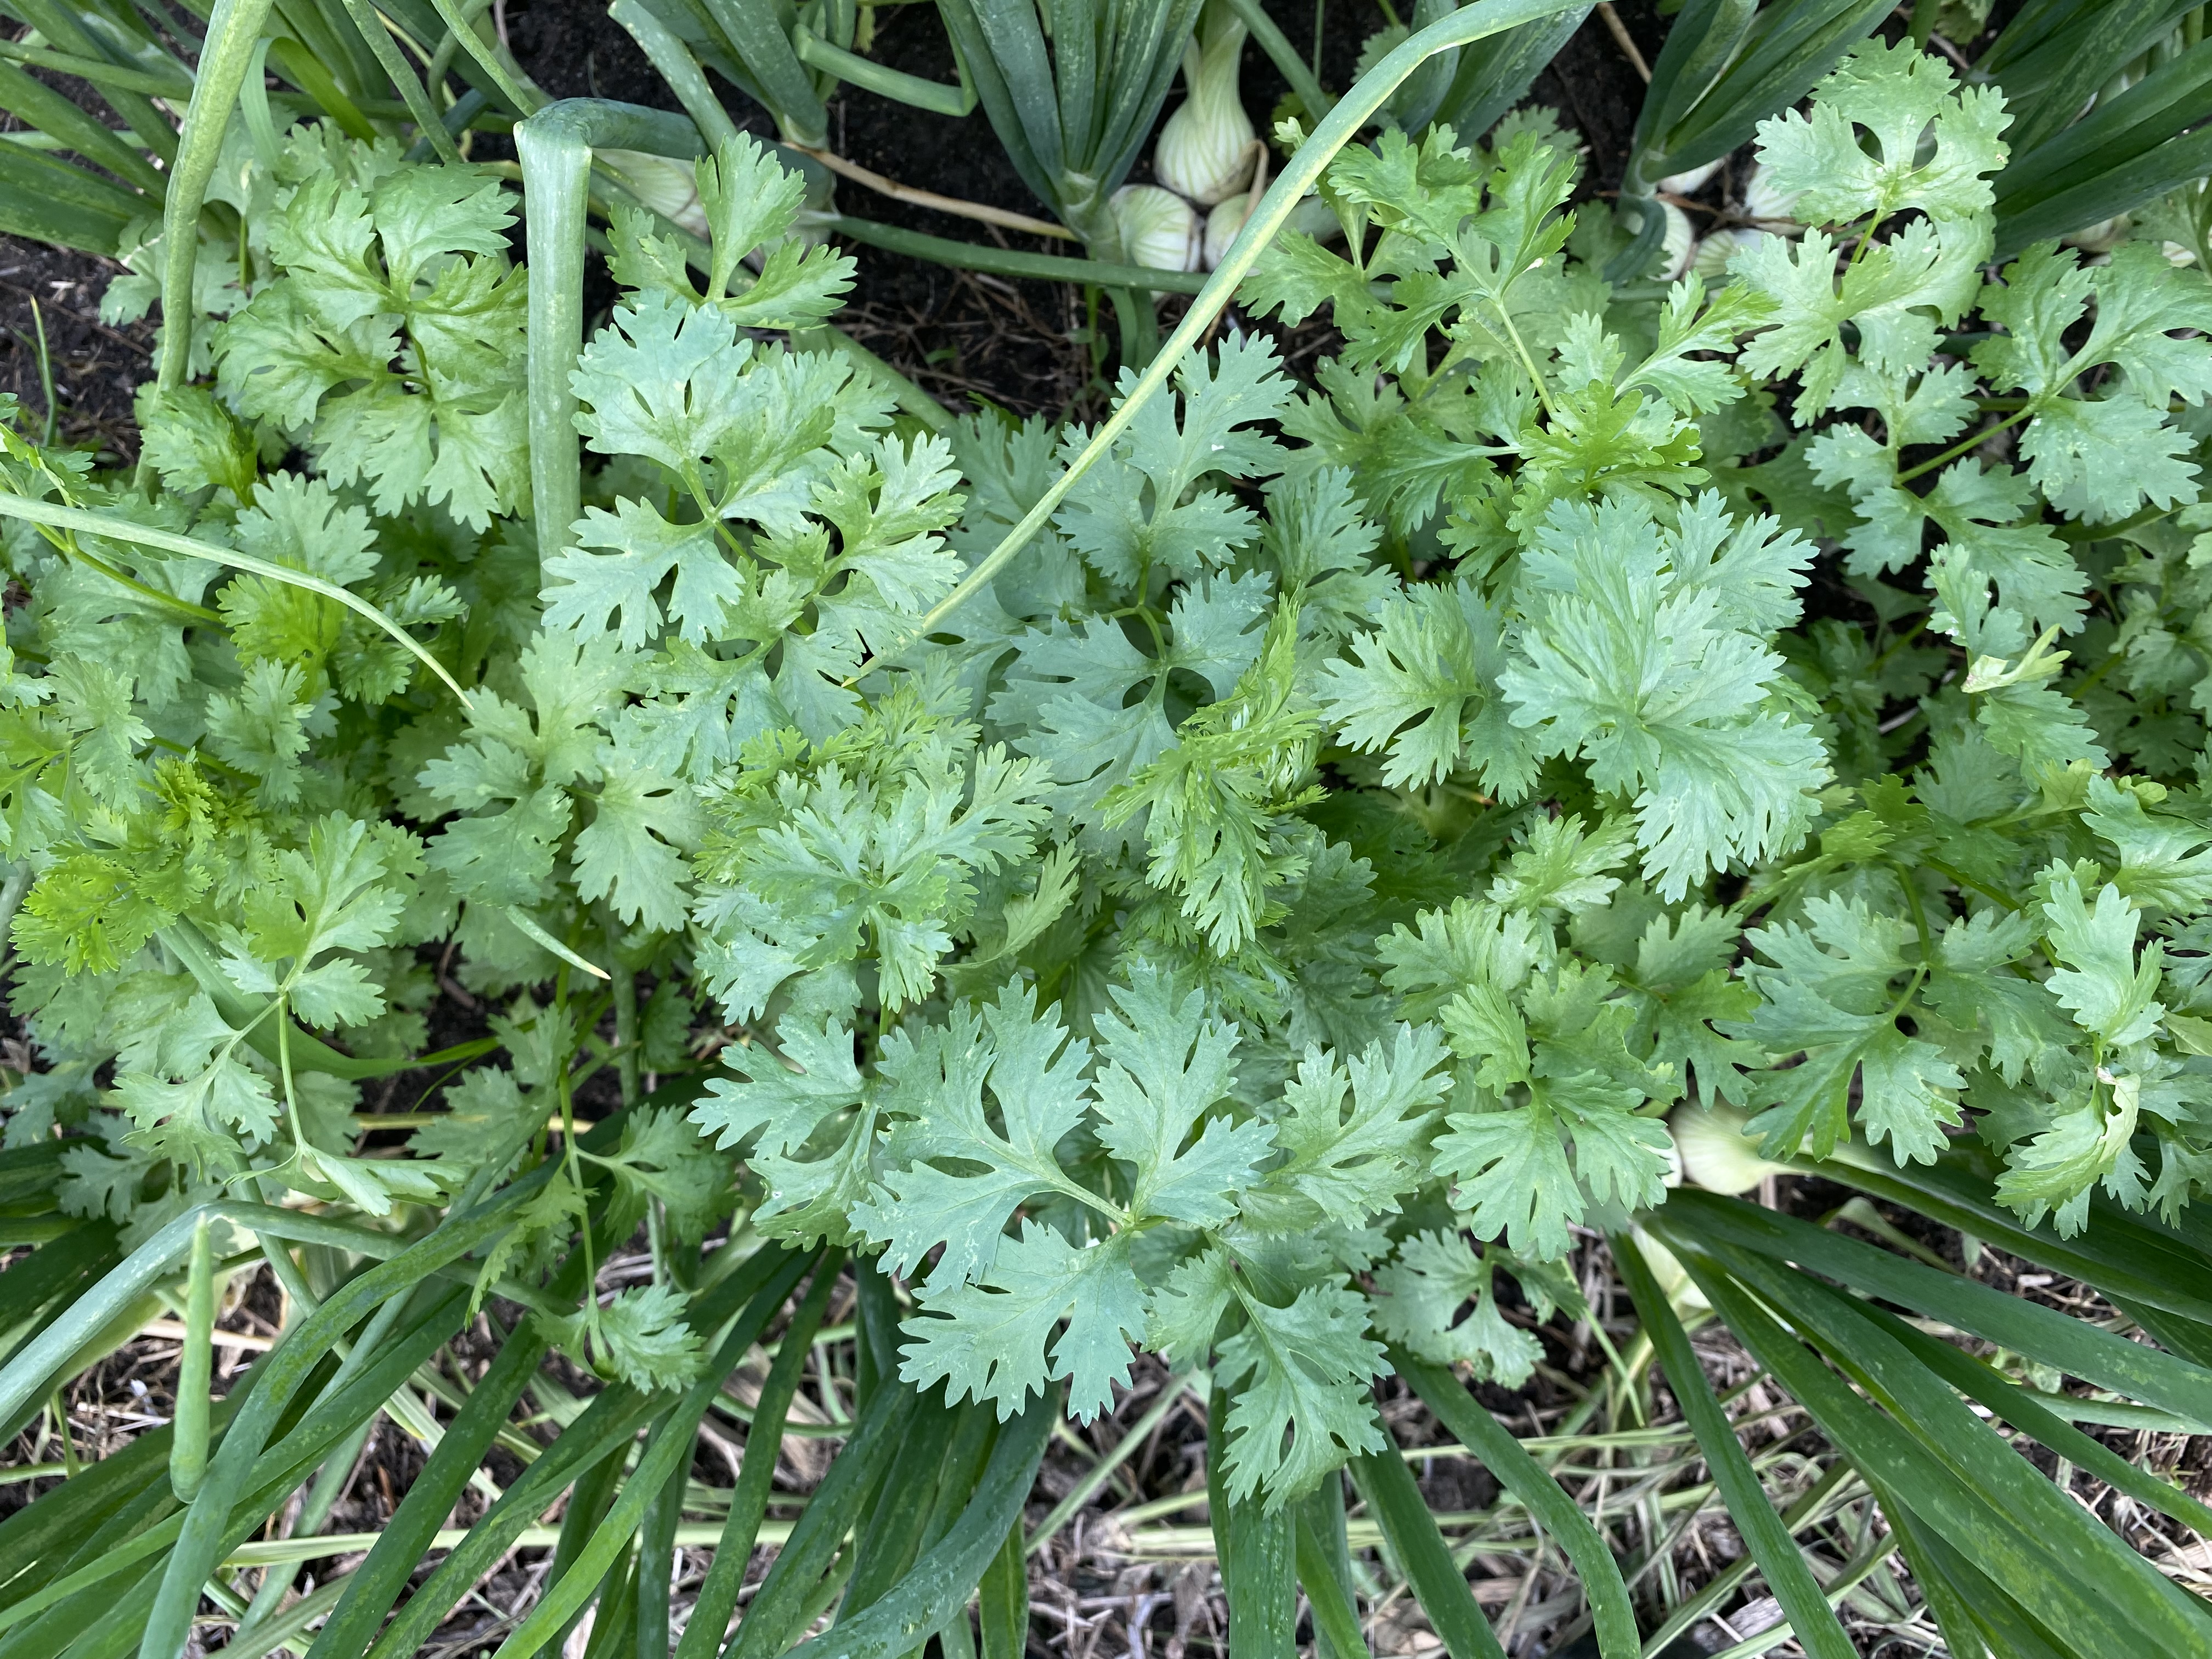
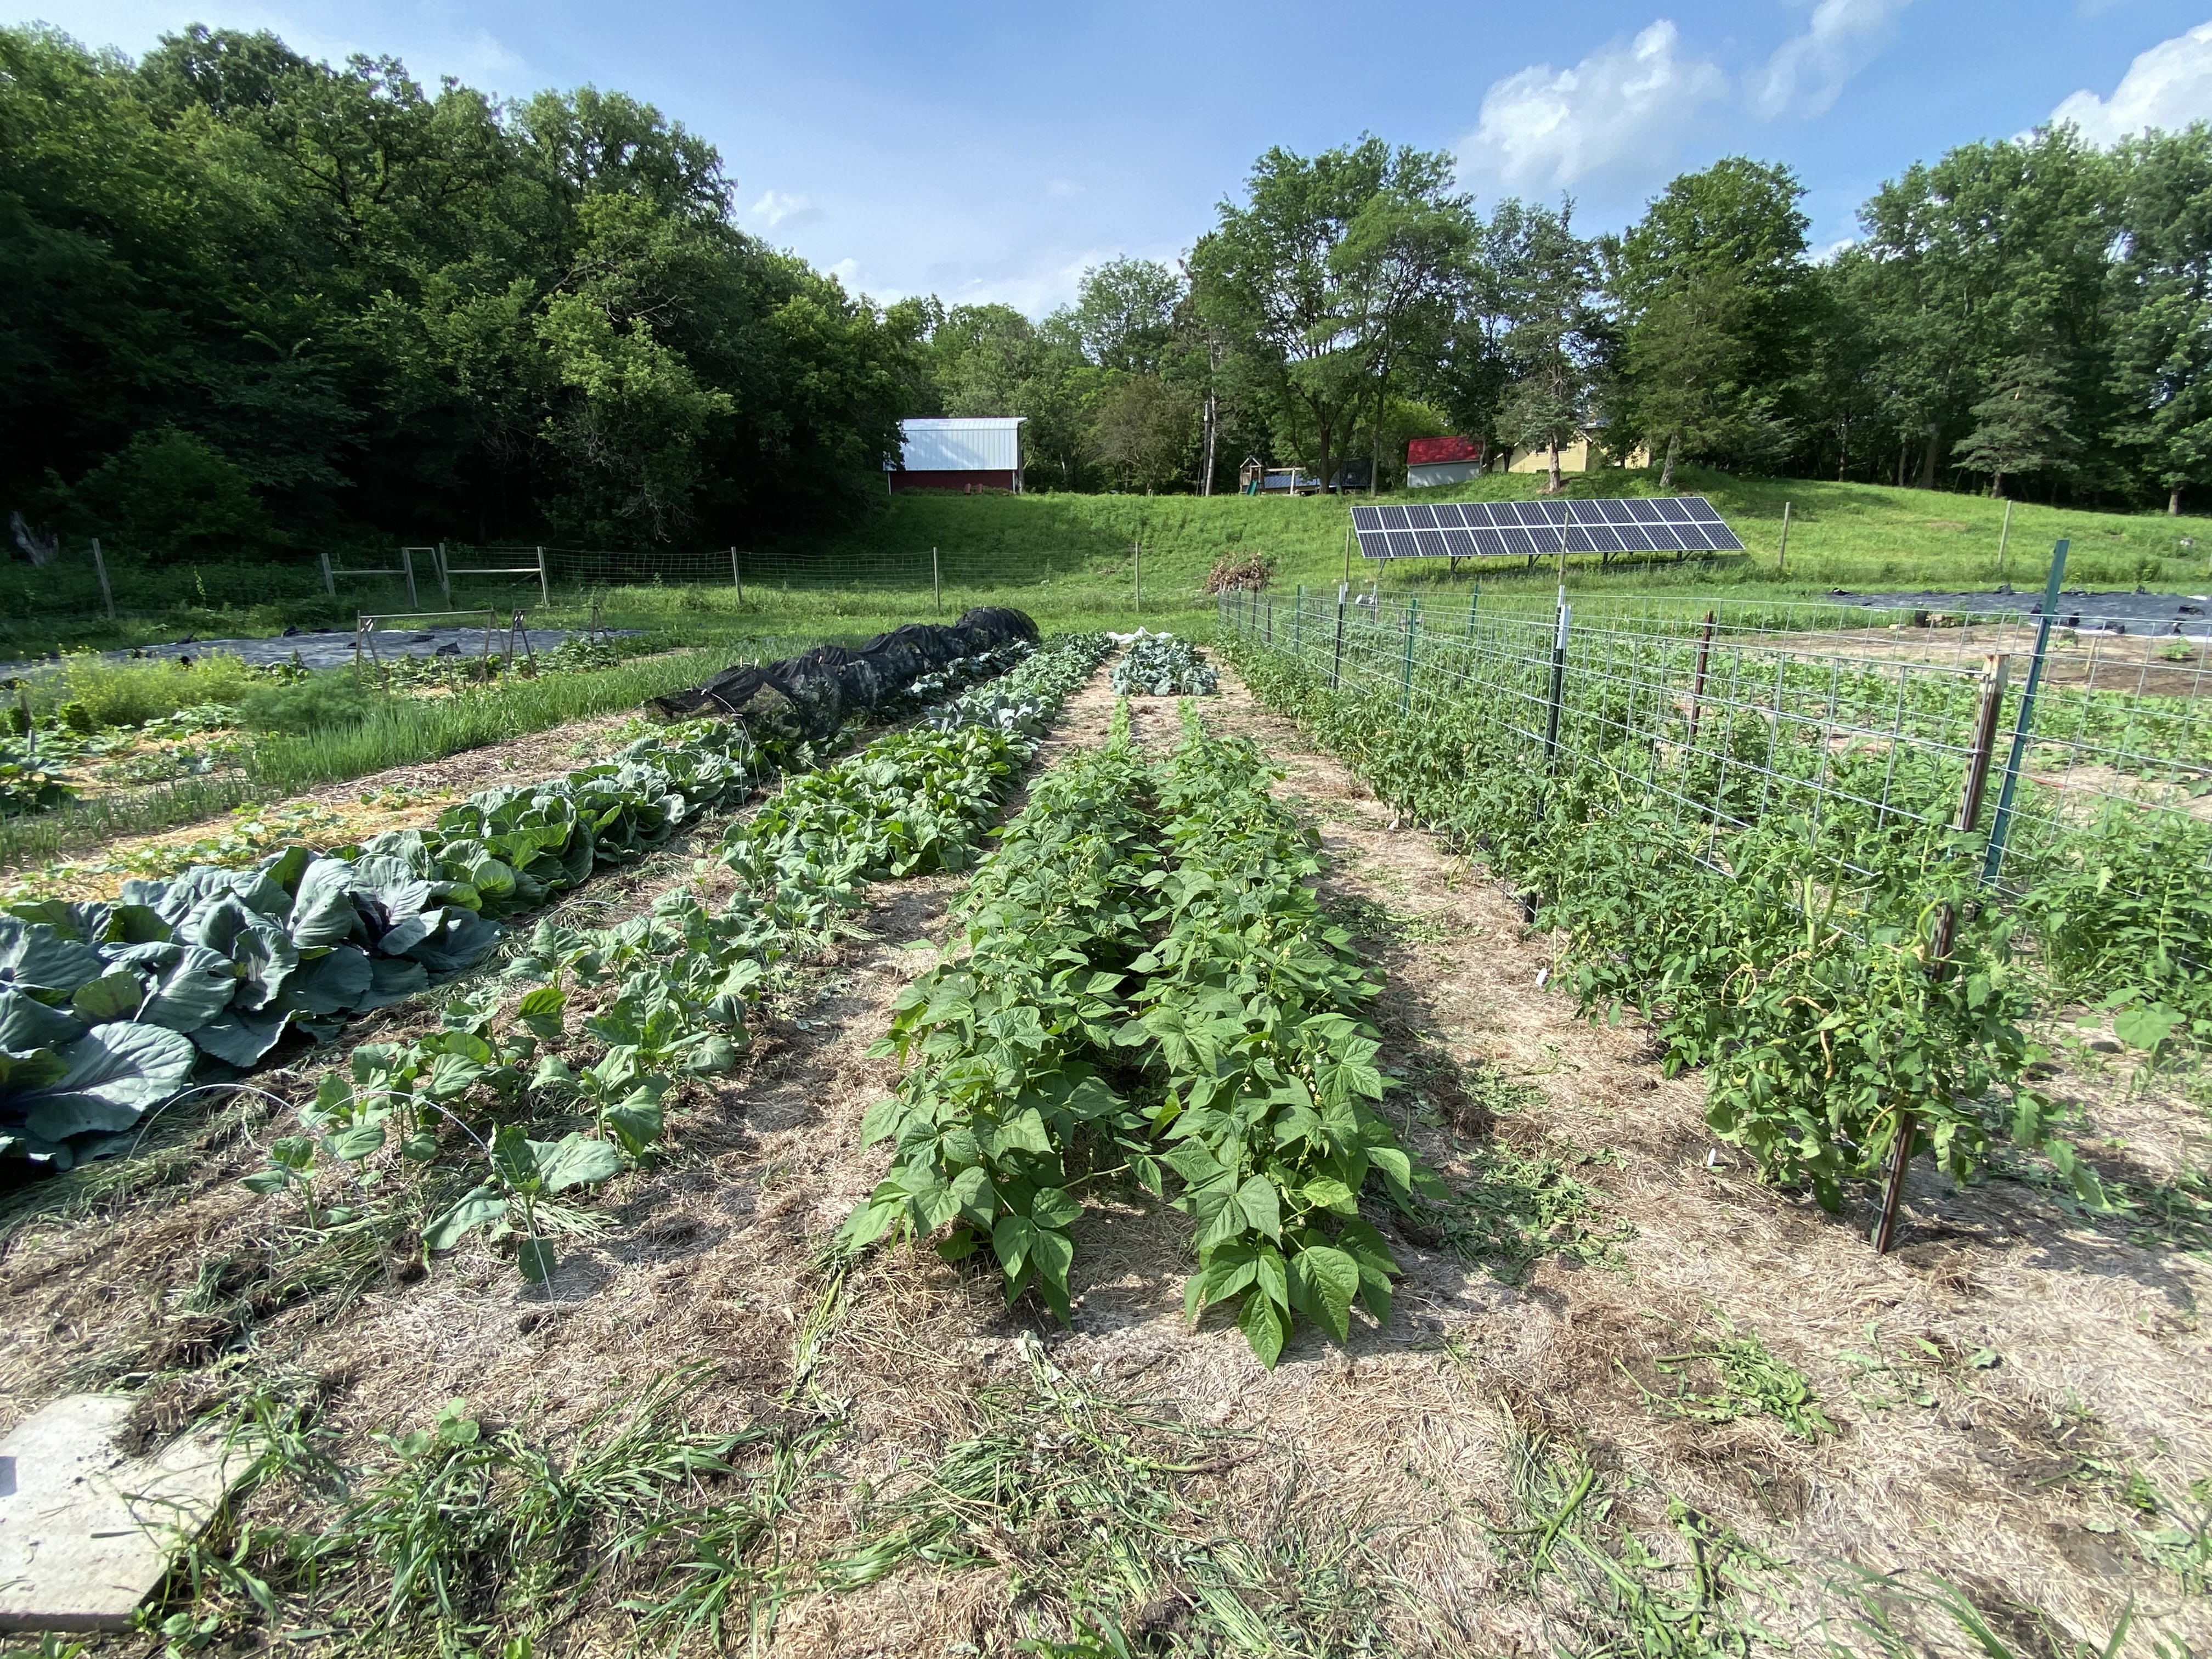
This past week I weeded some more, tied up the tomatoes some more, and spread some straw underneath the cucumbers and melons to try and keep them dry and off the bare soil. (This helps to prevent some soil-borne diseases that like to infect these crops in the warm, wet weather we’ve been having.) I’m also seeding some fall crops like Romanesco cauliflower, watermelon radishes, broccoli, and cabbages.
One of our biggest tasks was to weed the garlic again. This time was rather more exciting than last time though. As Simon and I were sitting on the ground weeding across from each other, I heard a strange sound just behind me. Imagine my shock when I turned around to find three baby skunks playing together just two feet away from me. I didn’t know I could jump up that quickly! Simon and I tore off running out of the field and then watched from a safe distance as three more babie came out to frolic. Their mother must have heard them because all of a sudden, she came tearing through the potato patch right at us before deciding to reverse course and leave us alone. (Phew!) We kept watching the babies until they sauntered off, nervous about being sprayed but also grateful to have witnessed this. Baby skunks are adorable, and this was probably the first and last time we’ll ever see them in the wild. There is never a dull moment on the farm, that’s for sure!
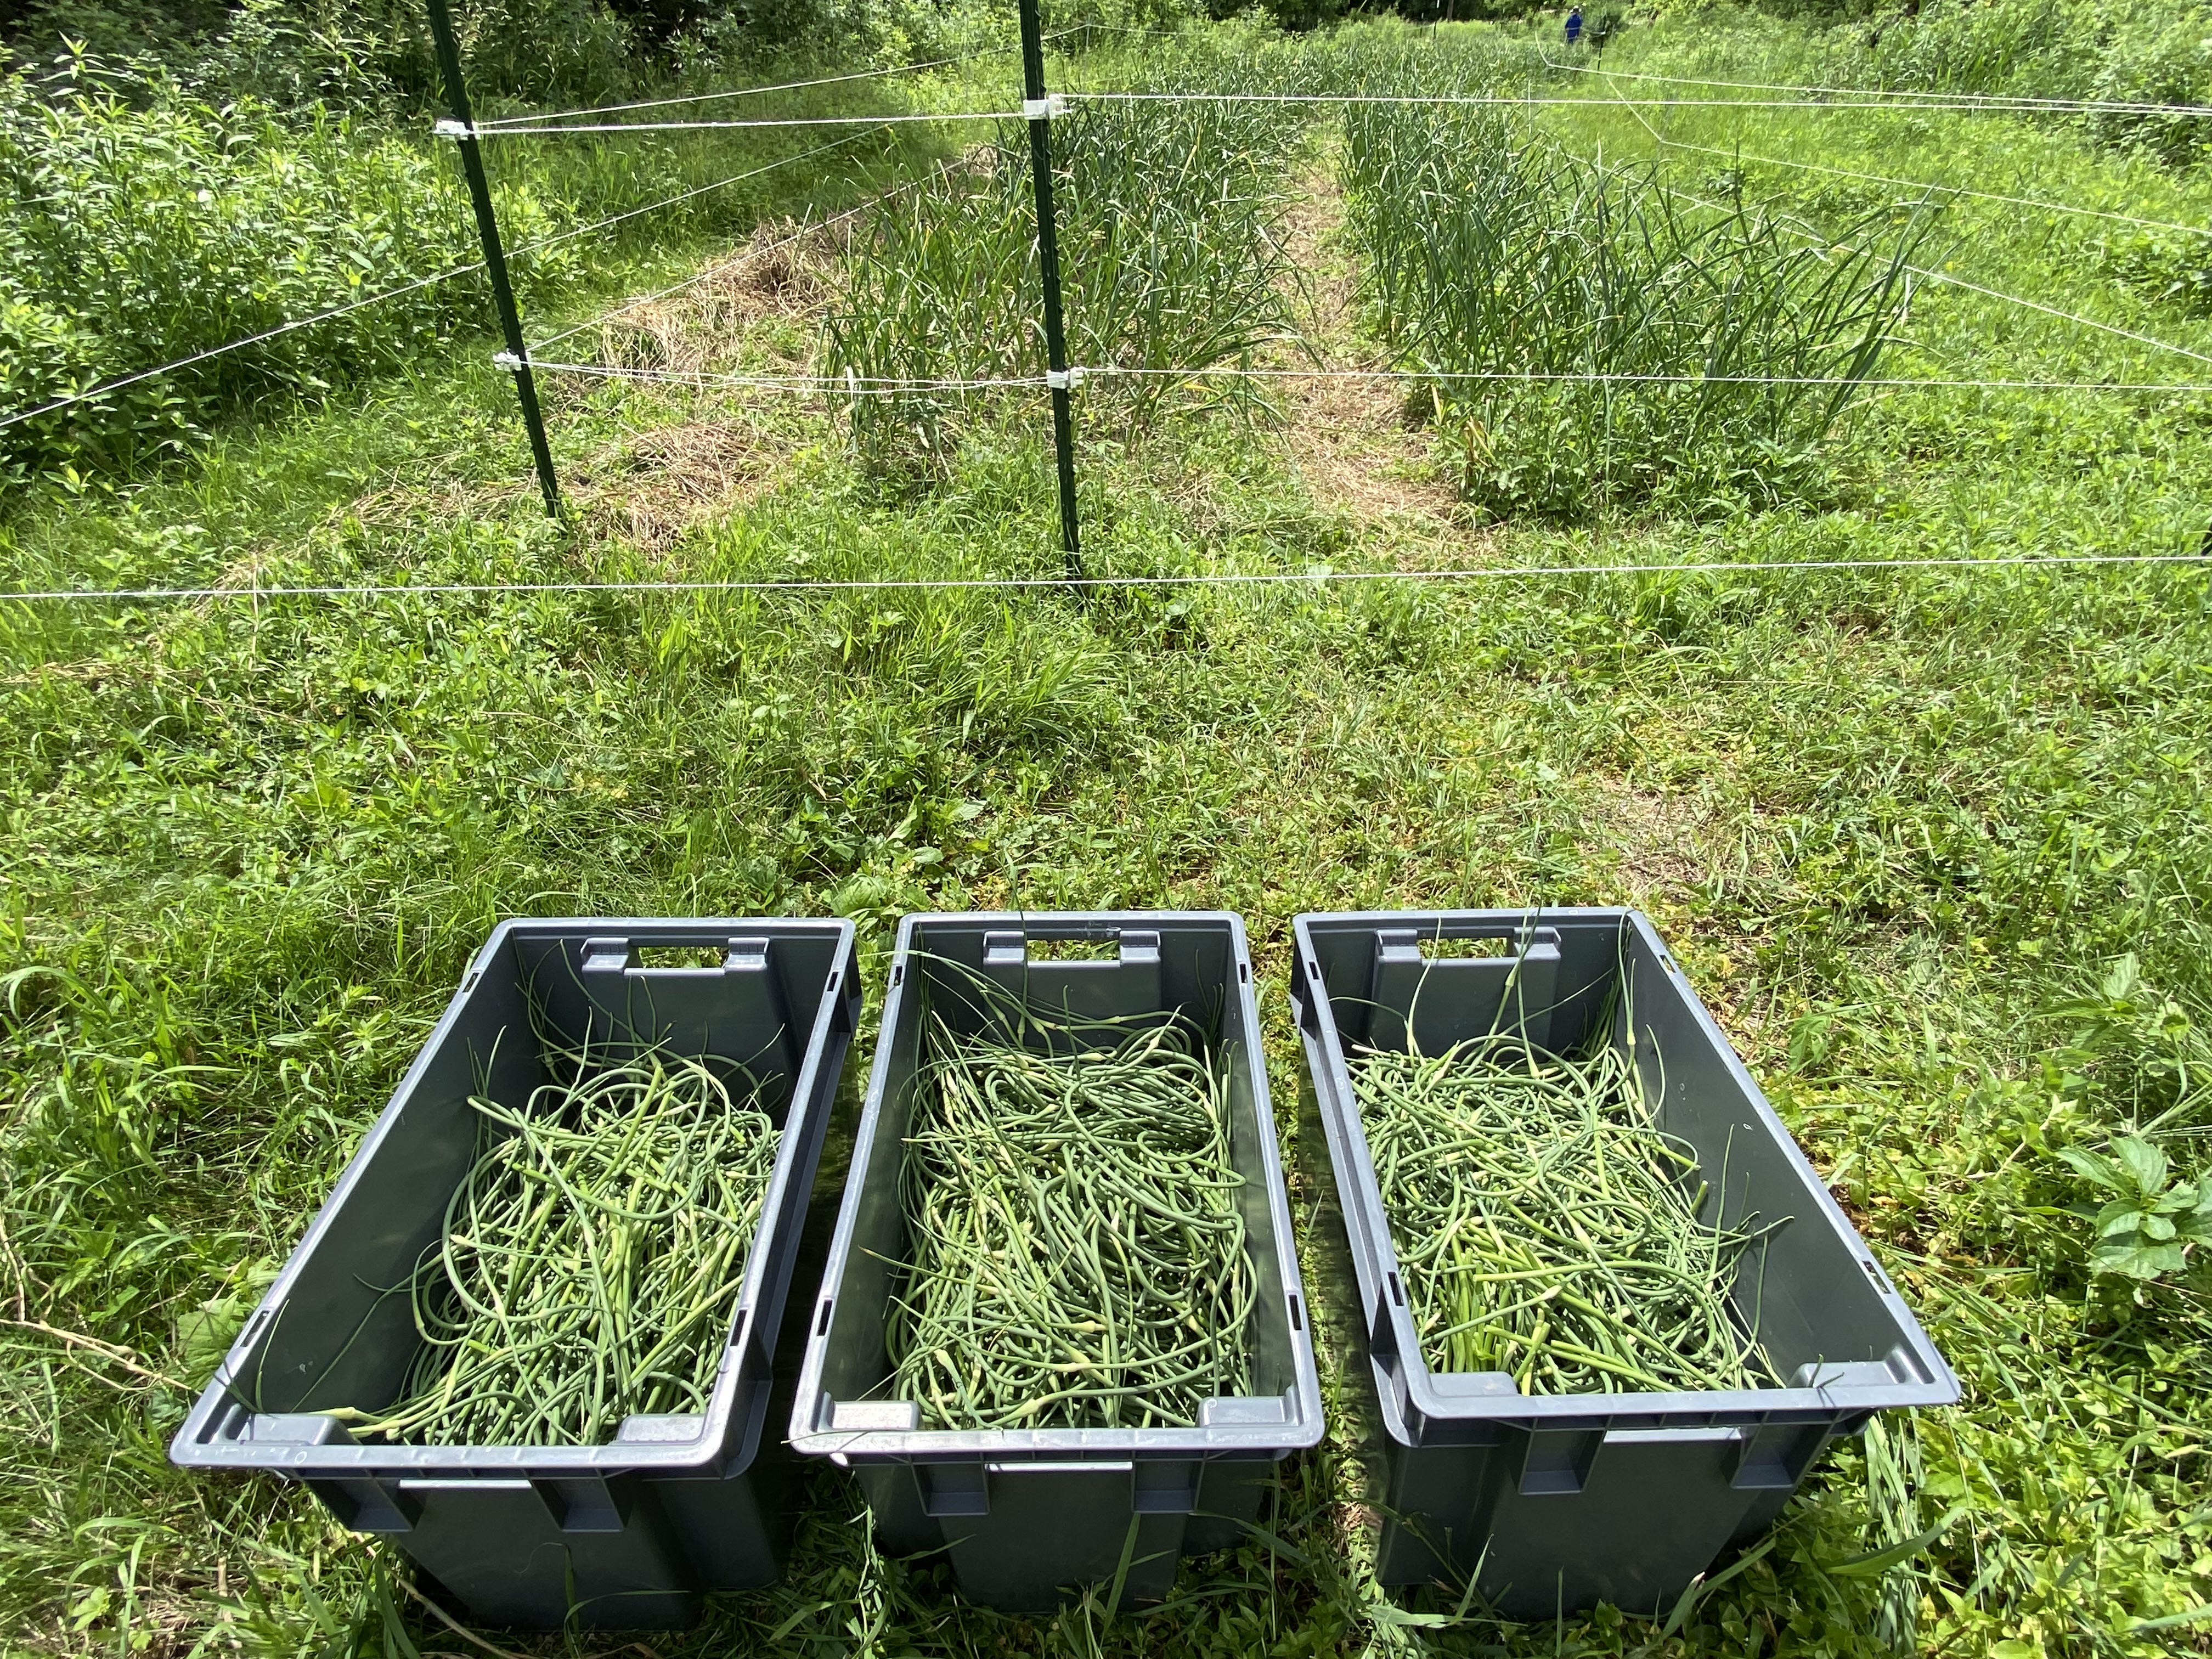

The other garlic-related work we did was to harvest all of the garlic scapes. The varieties of garlic that we grow are hardneck (as distinguished from softneck varieties). Hardneck varieties tend to grow best in colder, northern climates, and we’ve had good success with them. They send up a flower stalk called a “scape” that starts at the base of the garlic bulb and goes up through the neck. This stalk causes the neck of the bulb (the place where the stalk meets the bulb) to have a “hard neck” and thus, the name. If you fail to cut these scapes off at a certain time, the garlic plants put all of their energy into flowering rather than growing big bulbs, so Simon came out and helped me make short work of it. Would you believe it only took the two of us one hour to harvest around 3,000 scapes? Of course, our hands smelled of garlic for what seemed like days afterwards, but I love that smell, so it was alright with me!
Recipes
Make sure to scroll down to last week’s newsletter where I put a bunch of recipes for beets, cilantro, bok choy, etc. that you have in your box again this week.
Beet, Sugar Snap Pea, and Avocado Salad // Uses Beets, Snap Peas // Vegetarian
Burrata with Charred and Raw Sugar Snap Peas // Uses Snap Peas // Vegetarian
Kale Salad with Apples and Cheddar // Uses Kale // Vegetarian
This is one of our favorite ways to use kale. The recipe comes from Martha Rose Shulman and was featured in Salads with Sweetness, Crunch, and Zest
Makes 4 to 6 servings and takes 5 minutes to prepare.
- 4 cups very finely chopped or slivered curly kale or Russian kale (about 6 ounces on the stem, or half of a 3/4-pound bunch, stemmed and washed in two rinses of water)
- 2 tablespoons coarsely chopped toasted almonds
- 1 apple, sweet, like a Fuji, or a sweet-tart, like a Gala, Braeburn or Pink Lady, cored and cut in 1/4-inch dice
- 1 ounce sharp Cheddar cheese, cut in 1/4-inch dice
- 2 tablespoons fresh lemon juice
- Salt to taste
- 1 very small garlic clove, puréed
- 5 tablespoons extra virgin olive oil
- 2 tablespoons freshly grated Parmesan
- Combine the kale, almonds, apple and Cheddar in a large bowl.
- Whisk together the lemon juice, salt, garlic and olive oil. Add to the salad, and toss well. Sprinkle the Parmesan over the top, and serve.
Kohlrabi and Kale Salad // Uses Kohlrabi, Kale // Vegetarian
This is best made ahead and allowed to sit in the fridge for a few hours before eating. Also, make sure to “massage” your chopped up kale (rub it around between your hands) with olive oil before adding it to the salad.
Kohlrabi and Carrot Slaw // Uses Kolhrabi // Vegetarian
Lily’s Lemony Fennel, Radish, and Kale Salad // Uses Fennel, Kale (you can substitute the kale in your box for dinosaur kale), Radishes (if you have some left over from last week, but you don’t need them for this recipe to work) Sugar Snap Peas // Vegetarian
Roasted Chicken with Clementines and Arak // Uses Fennel
Sausage, Greens, and Beans Pasta // Uses Kale (or Rainbow Chard if you have some left over from last week)
Sesame Noodles with Kale and Mushrooms // Uses Kale, Garlic Scapes (if you have some leftover from last week)
Sesame sauce adapted from Molly Yeh; Recipe from The Leek & the Carrot
Makes 2-4 servings
Takes 20 minutes
2 tablespoons peanut oil
1/2 pound baby bella or crimini mushrooms, sliced
1 bunch kale, stems removed, chopped
Kosher salt and freshly ground black pepper to taste
8 ounces of your favorite Asian noodle (I used Udon but would have used Soba if I had any)
Sesame Sauce:
3 garlic cloves, minced
3 tablespoons soy sauce
3 tablespoons honey
3 tablespoons tahini
2 teaspoons sesame oil
1 (or 7) pinches of red pepper flakes
- Heat peanut oil in very large skillet (or wok if you have one) over medium high heat.
- Add mushrooms, stirring often, for 5 minutes until tender. Add kale and continue cooking (and stirring) until wilted. Salt and pepper to taste.
- Bring a large pot of salted water to a boil. When boiling, add noodles and cook according to packaged directions. Drain and rinse with cold water.
- Meanwhile, prepare the sauce by combining all sauce ingredients in a mason jar and shaking vigorously (you could also mix it in a bowl but I like this method because then you can make a double, triple, whatever batch and easily save the leftovers without dirtying a dish).
- Combine kale, mushrooms, cooked noodles and sesame sauce in a large bowl. Eat warm or cold.
Shaved Apple and Fennel Salad // Uses Fennel // Vegetarian
Takes 15 minutes
Serves 2-4
1 Granny Smith apple
1 large fennel bulb
Apple maple vinaigrette (below)
Pinch red pepper flakes
1/2 cup halved walnuts, toasted
- Cut unpeeled apple into 1/8-inch thick slices (with a mandoline or fancy knife skills). I sliced one side until I reached the core and then continued on another side and continued all the way around the apple until only core remained. This yielded slightly different size pieces, but it didn’t seem to matter much.
- Cut the stems and base off your fennel so that you are only left with the bulb. Cut it in half lengthwise and remove the core (it will be in the middle and kind of triangular; it will be much harder than the rest of the fennel and pretty obviously inedible). Cut each half into 1/8-inch thick slices (again mandoline is preferred but fancy knife skills will work too).
- Throw apple and fennel into a medium bowl. Toss with half of the vinaigrette and red pepper flakes. Taste and add more vinaigrette according to your preference. Add toasted walnuts and serve at room temperature or cold.
Apple Maple Vinaigrette 2 tablespoons olive oil 2 apple cider vinegar 2 tablespoons maple syrup 1/2 tablespoon lemon juice 1/2 teaspoon stone-ground mustard 1/2 teaspoon Kosher salt Few grinds of black pepper
- Combine all ingredients in a small bowl. Whisk vigorously until well-combined and slightly opaque in color (this means it’s emulsified!).
- Taste and adjust seasonings to your preference. Don’t forget that the apple will add quite a bit of tartness and sweetness to the overall salad.
Steak Sandwiches with Fennel Slaw // Uses Fennel, Cilantro
Week 4, June 28, 2022: It Takes a Village (of Bugs!)
Before I started farming, I worked at the Bloomberg School of Public Health (Johns Hopkins) doing public outreach with faith communities, schools, and other organizations in the greater Baltimore area about food security and sustainable agriculture. One of my favorite things about that job was teaching people about our food system and the ways in which they could do their own little part at making it more sustainable and fair for all involved – consumers, farmworkers, processors, food service workers, and farmers alike. (A CSA membership is a good way to help!)
I was therefore thrilled when Practical Farmers of Iowa got in touch with me this past spring and asked about the farm and the work we are doing to restore and build pollinator habitat. The result of our conversation was this article and a field day that we’re hosting on July 16th when we will gather together with farmers and others who want to learn about our efforts and from each other. If you are free and fancy a nice walkabout and lunch, I hope that you will join us.
What’s in My Box this Week?
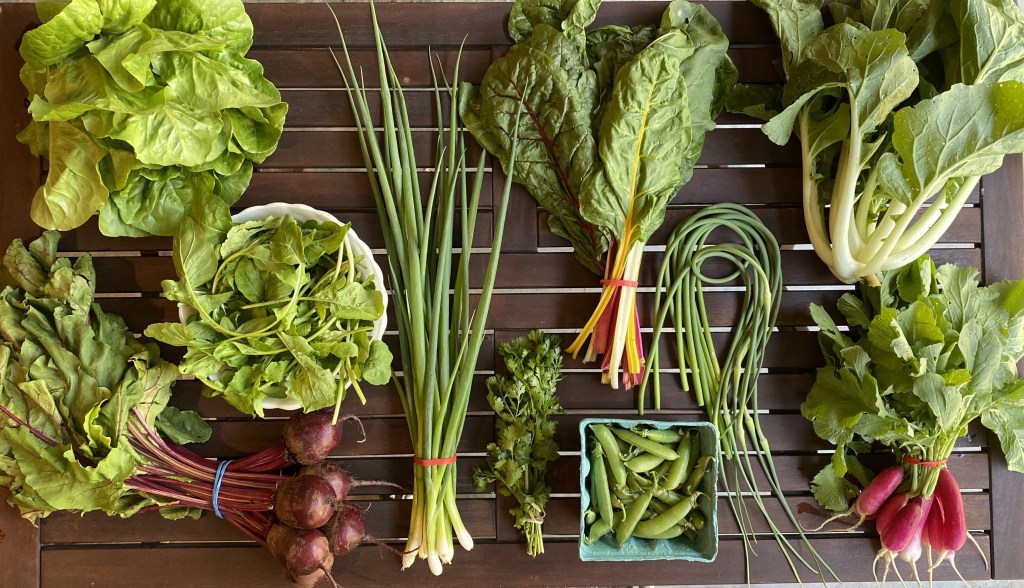
ARUGULA – I planted a second succession of arugula about a month ago, not sure if it would be too hot for it to grow well, but it did, and so you’ll get a little more of this green in your box this week. Arugula doesn’t last much longer than a couple of days, so try and use it right away. Store it in the fridge in a plastic bag.
BOK CHOY – This is the first time I’ve grown this, and I’m excited to see what you think. Store unwashed in the crisper drawer of your fridge. Use within a couple days for best texture. Greens will wilt relatively quickly. Stems will retain firmness a while longer.
BEETS – You can use both the roots and the leaves of beets. If your beets still have greens attached, cut them off, leaving an inch of stem. Store the beet roots unwashed in a plastic bag in the crisper bin of your refrigerator. They will keep for several weeks. For the greens, keep them dry and unwashed until ready to use in a sealed plastic bag in the fridge for up to a week.
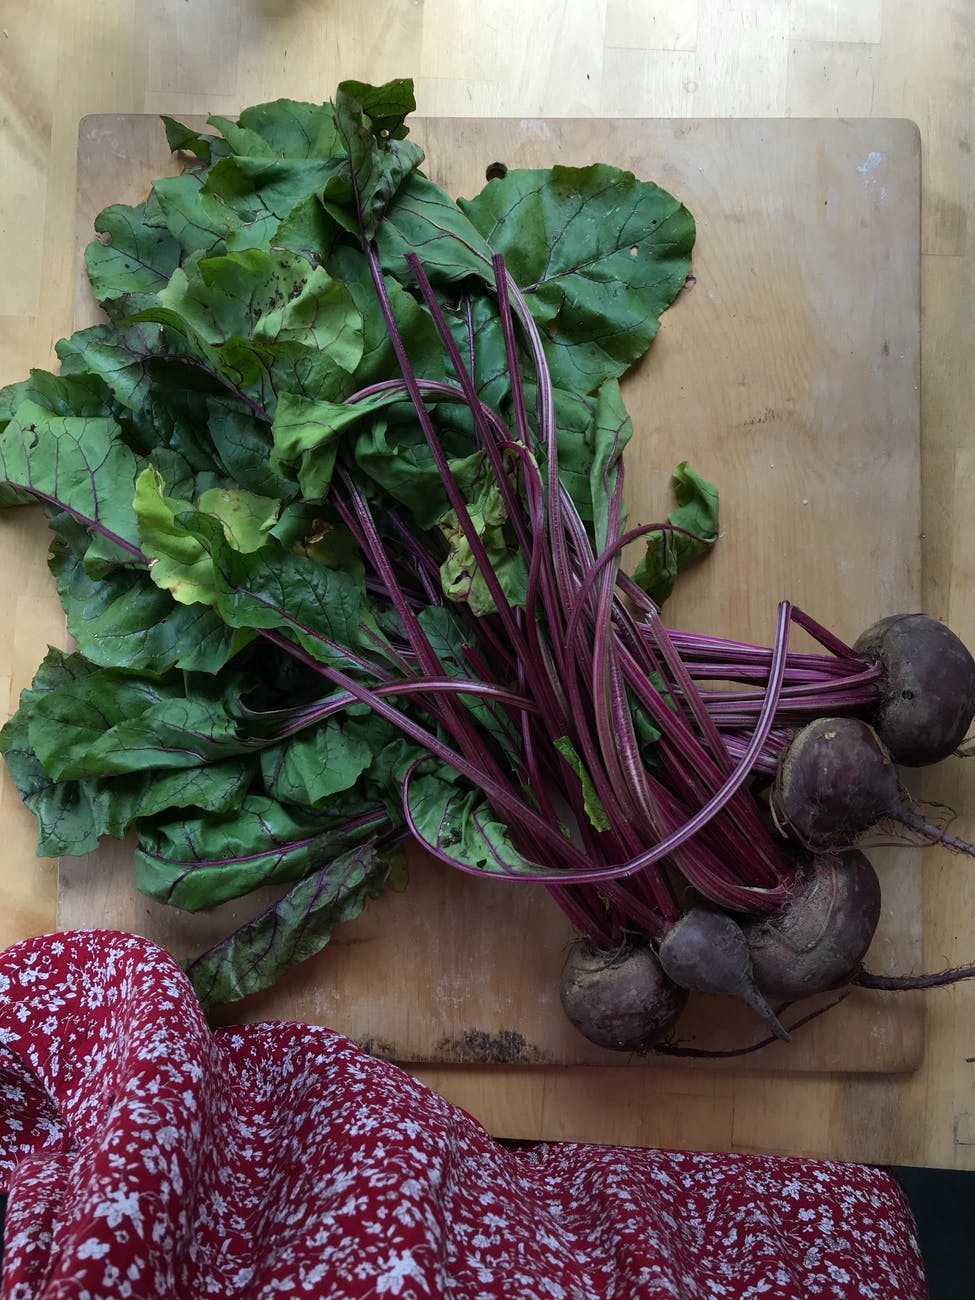
CILANTRO – Stand upright in a container with an inch of water. Then cover the herbs loosely with a plastic bag and refrigerate for up to 2 weeks.
FRENCH BREAKFAST RADISHES – This will be our last week for radishes. Store for up to two weeks in a plastic bag in the fridge. Store greens separately, ideally gently wrapped in a damp paper towel. Use the greens as quickly as possible.
GARLIC SCAPES – Garlic scapes will last up to three weeks loosely wrapped in plastic in your fridge. If you can’t get to them, they can also be chopped and frozen for later use. I like to take a handful out of the freezer bag and add them to pasta dishes in the winter for a subtle, fresh garlic taste.
HEAD LETTUCE (Romaine-Like) – Store loosely in a plastic bag in the crisper drawer of your fridge. Keep unused leaves on the head. Ideally use within a week, but it will probably store for up to two weeks if needed.
RAINBOW CHARD – Wash the chard only right before using. To store, place in a plastic bag with most of the air removed and put in the fridge. It is best used within a few days.
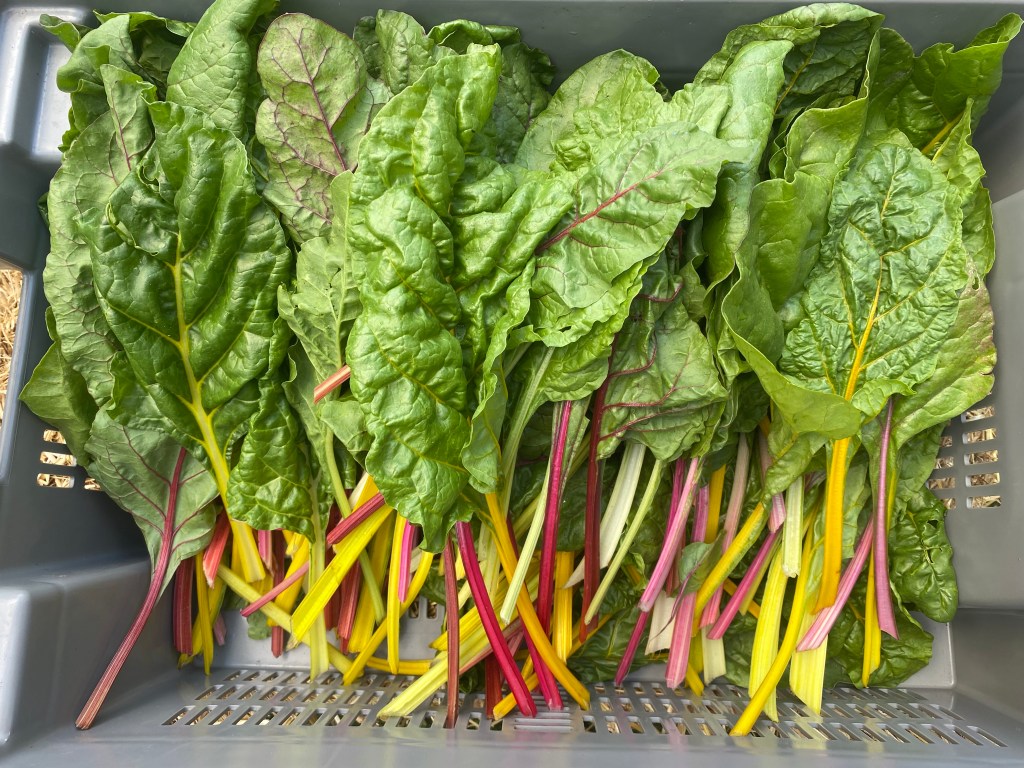
SCALLIONS (Large Shares Only) – Store in the crisper in your refrigerator. If you use after a week, just peel off the dry or “slimy” outer layer of the scallion, wash, and use the rest.
SUGAR SNAP PEAS – I have tried for many a year to grow peas and I’ve never had much success, so this year I decided to save myself the embarrassment of yet another sad pea crop and just buy some in for you. This week and next, your peas will be coming from Easy Yoke Farm, an organic farm which sells produce at the Rochester Farmers’ Market and People’s Food Co-Op. Their produce is always beautiful and delicious, and you’ll really enjoy these peas.
Peas are very perishable, and snap peas are best eaten fresh. Keep them in the fridge and eat within two to three days.
Notes from the Field
It’s a little crazy to admit this in the middle of the growing season, but I didn’t spend very much time with the vegetables last week. They are now off and mostly doing their own thing which is to grow, grow, grow. As soon as they have a fair number of leaves, they can photosynthesize more, and the more they photosynthesize, the more they grow, and so on and so on. Plants that had just a few leaves a couple of weeks ago are now nearly fully grown and blossoming. As long as I keep them weeded, well-nourished, and free of pests going forward, I can pretty much let nature take its course.
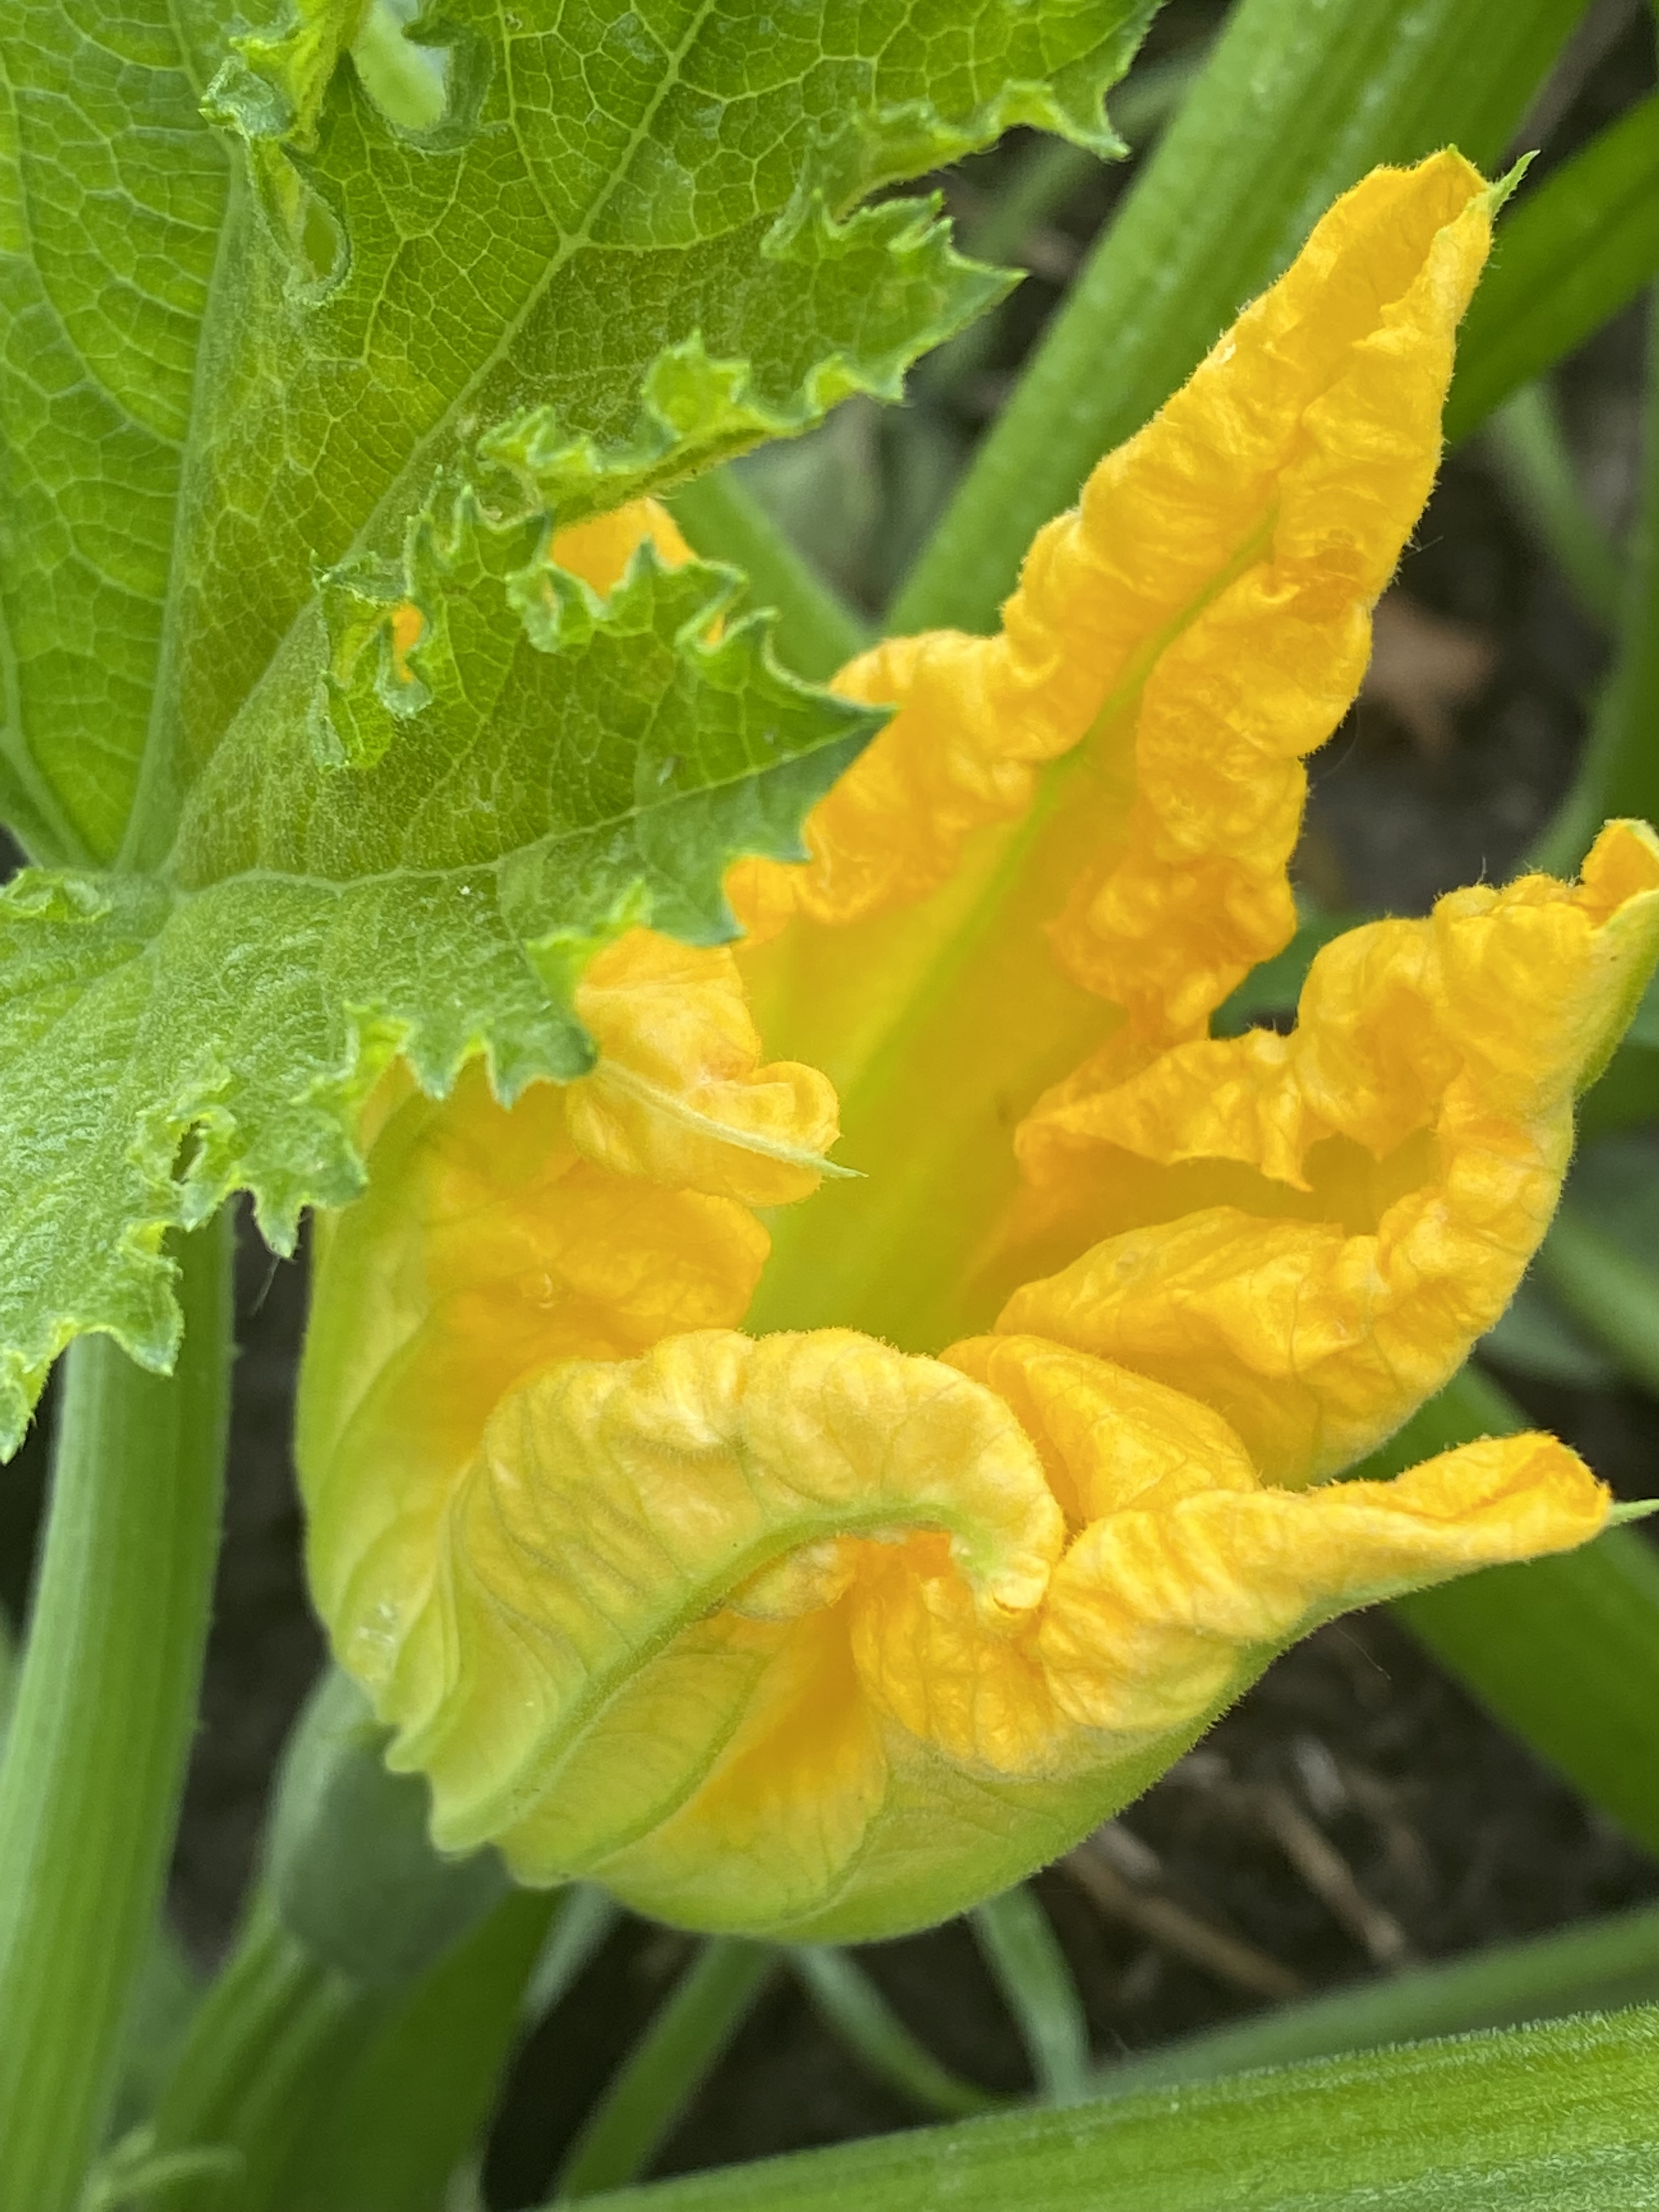
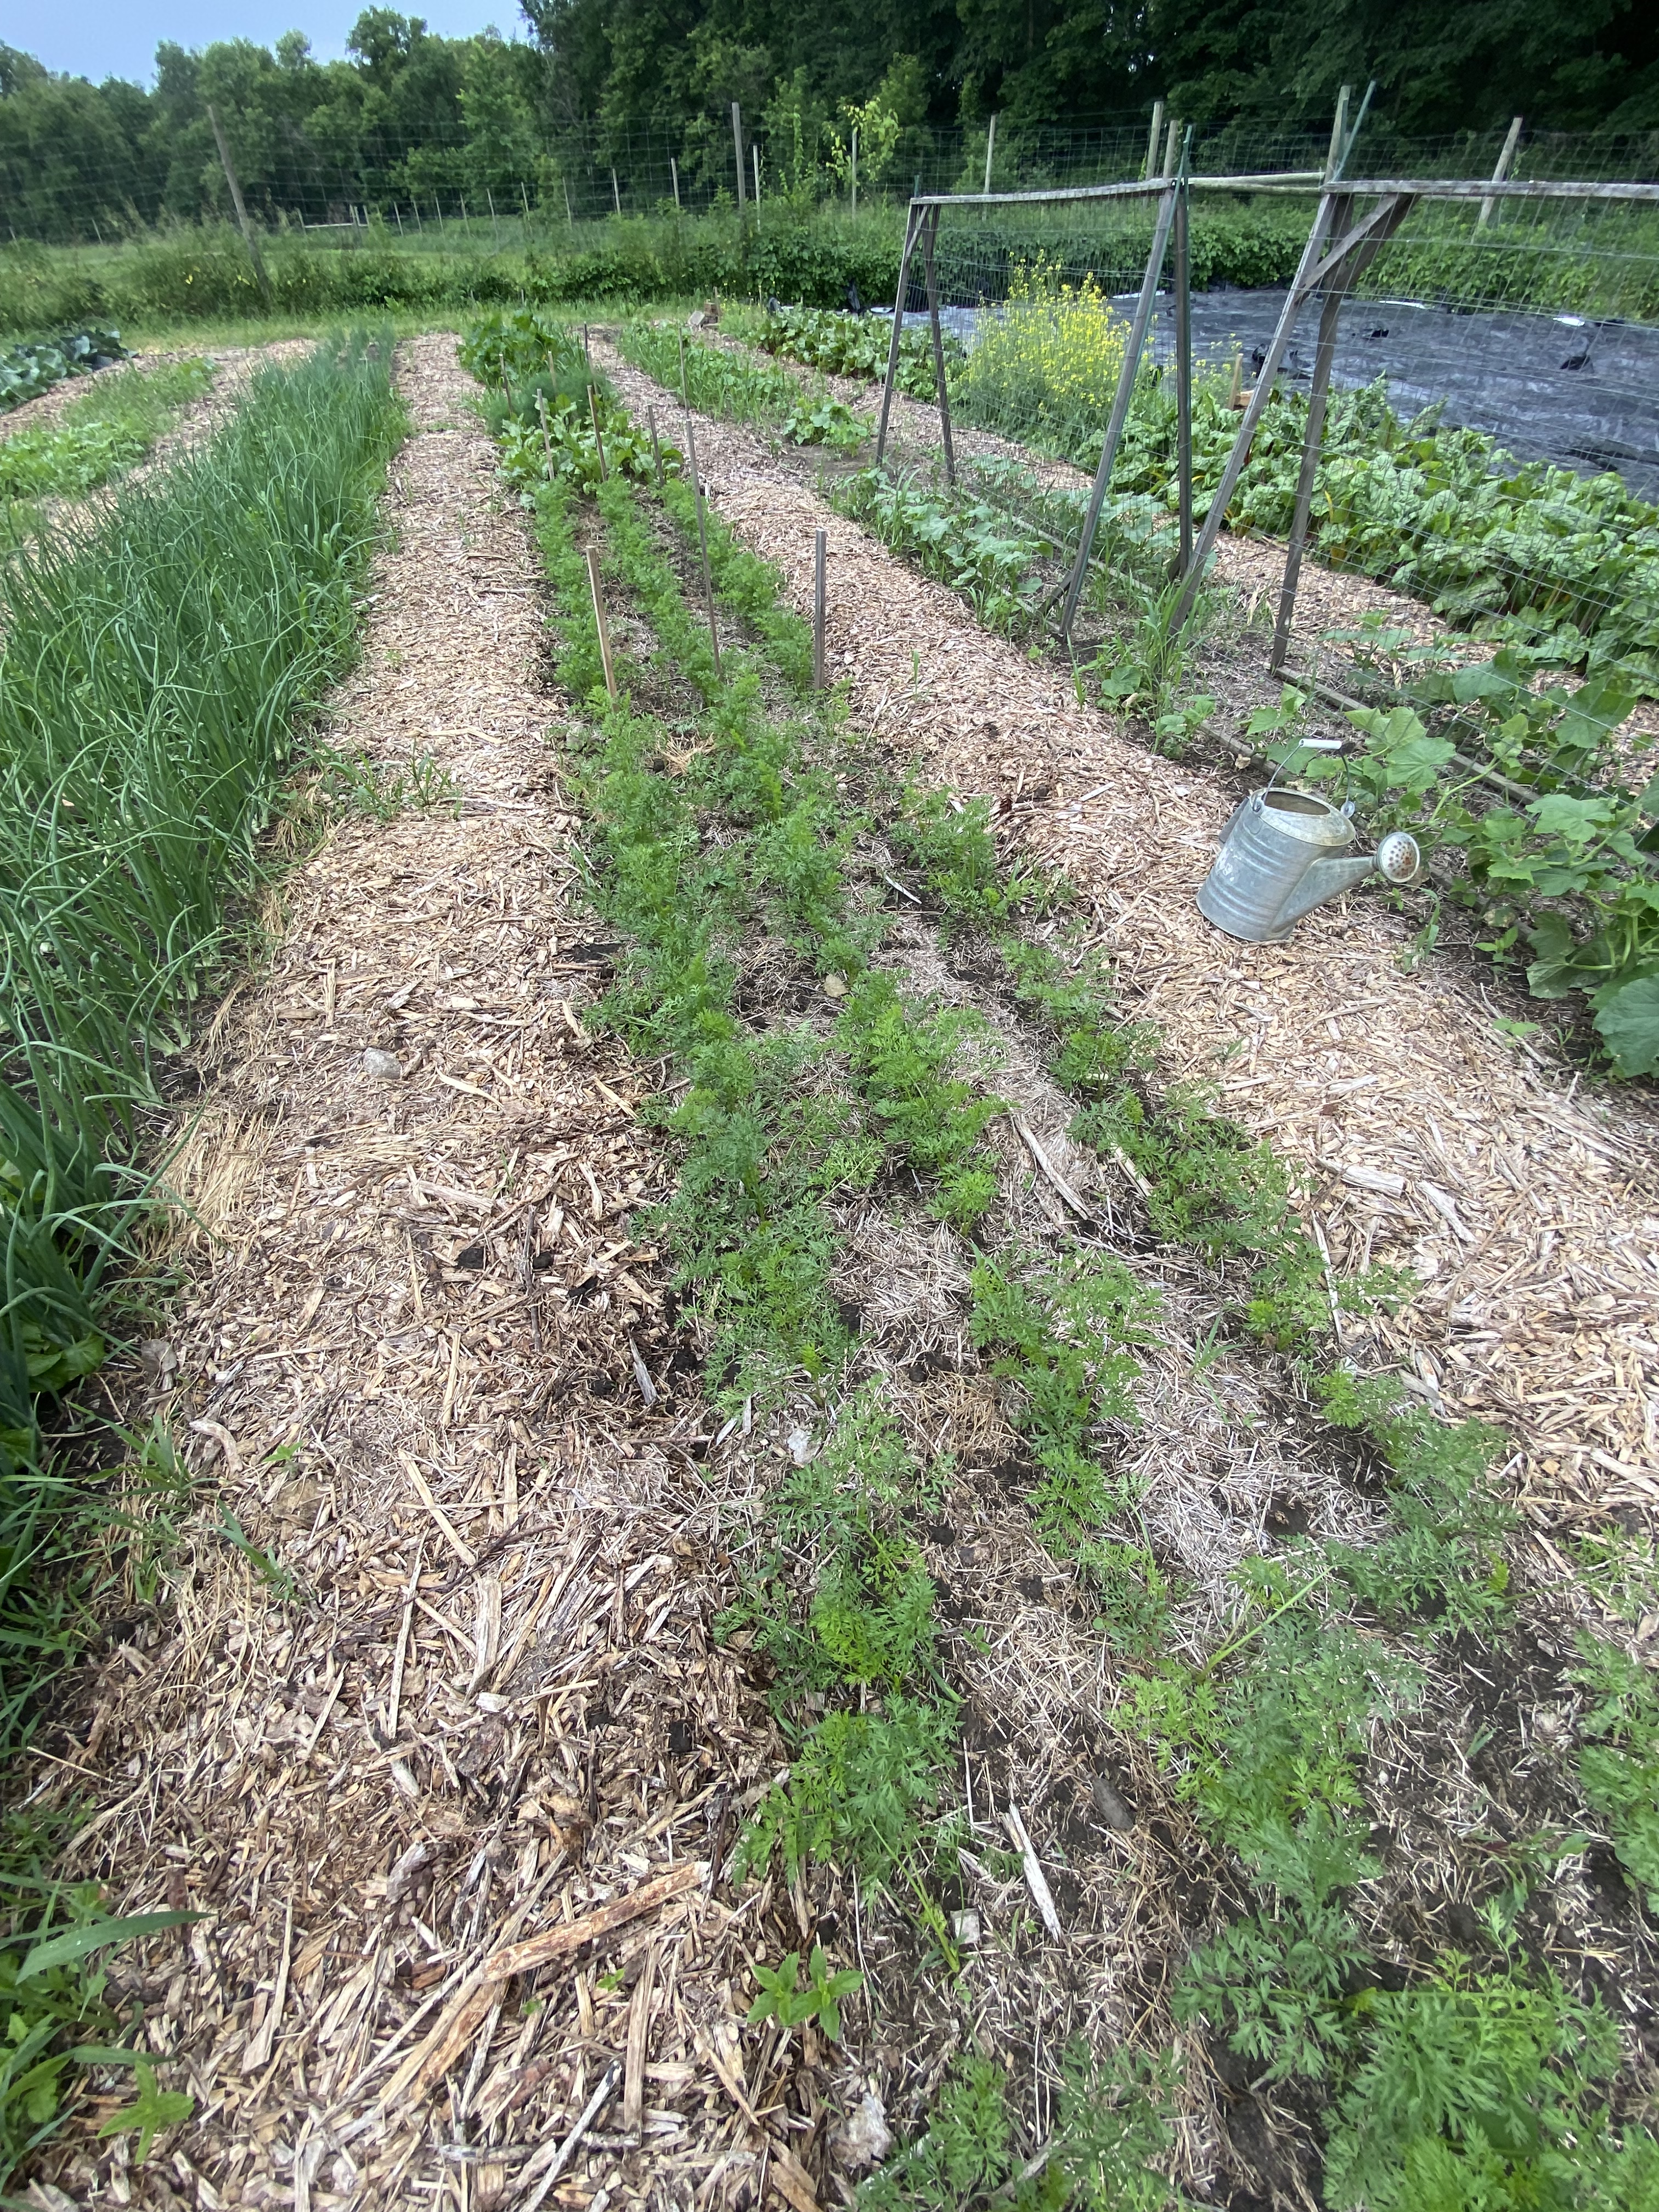

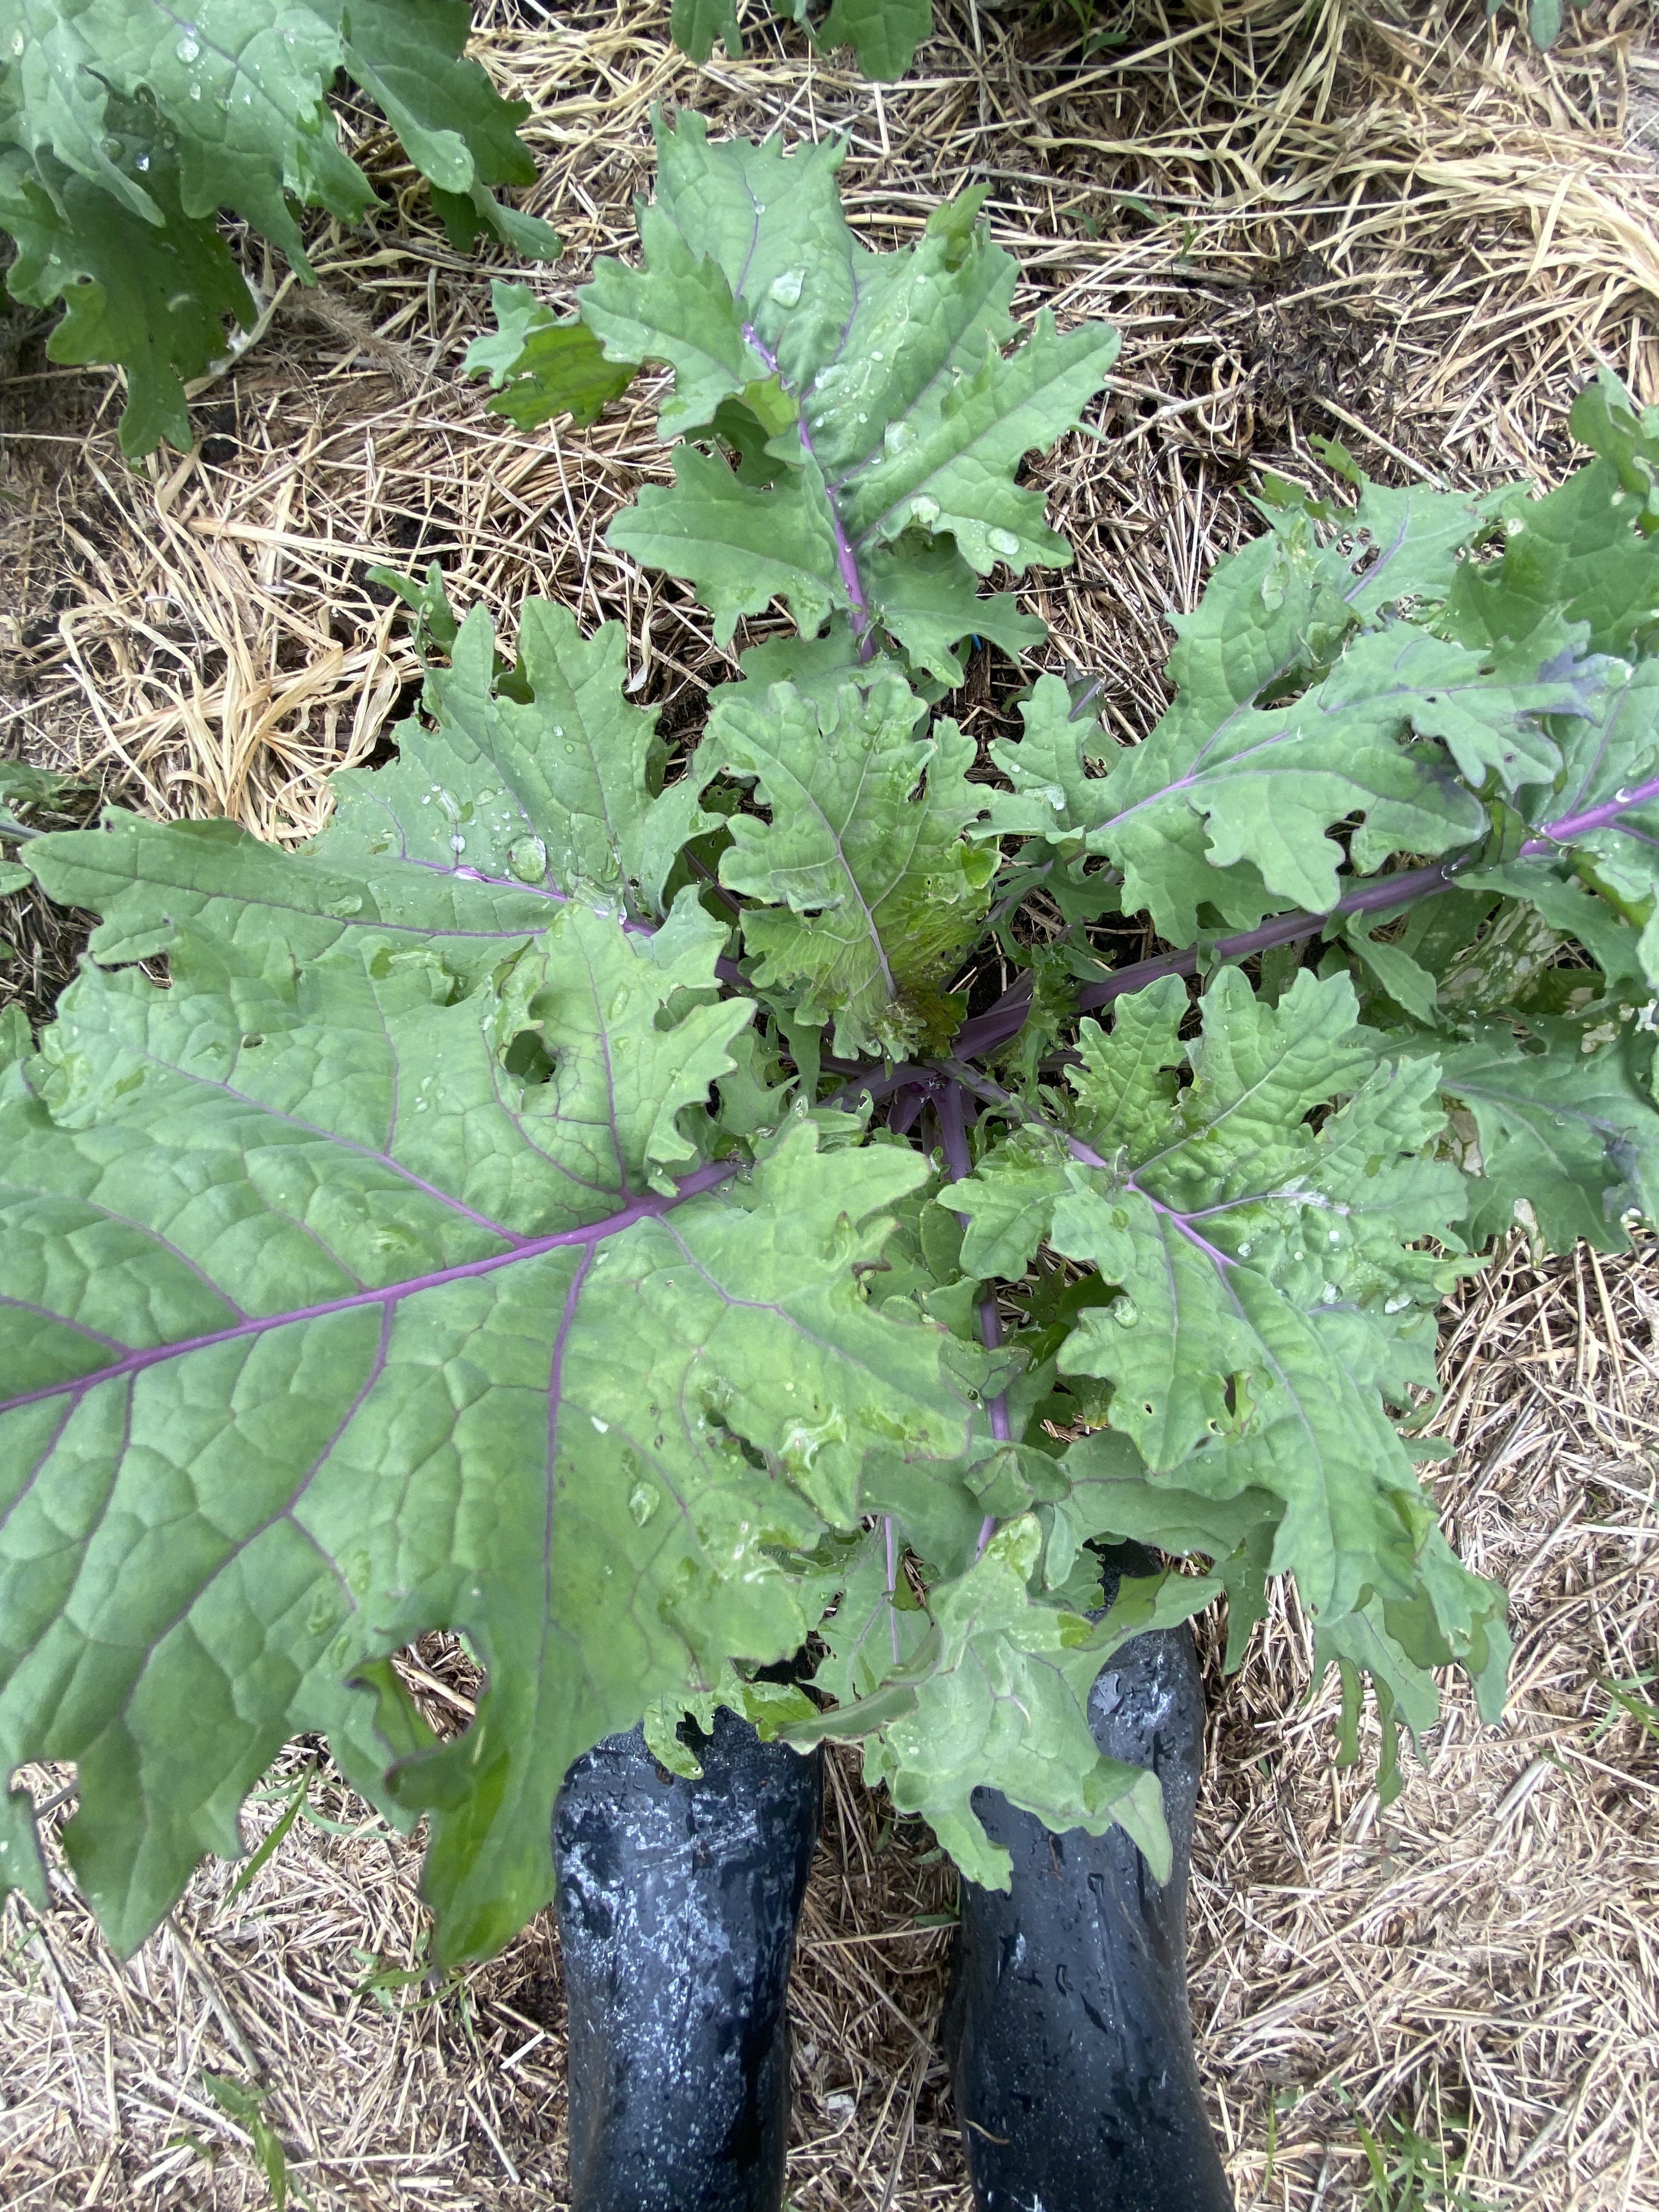
Thus, this past week, I turned my attention away from the vegetables to the areas surrounding the production field in order to nurture the whole farm system that helps me do what I do. The kids and I walked through the asparagus field and randomly seeded around 200 sunflowers throughout the rows. We hope that these 12-foot tall flowers will attract beneficial insects, like lacewings and predatory wasps that will prey upon the asparagus beetle larva as they munch their way through the asparagus ferns now that we’ve stopped harvesting. If it works, we should have fewer beetles next year which means less spear damage and more spears that we can sell and share. I also spent a bunch of time seeding flowers in the herb garden. Some of these are edible, but I mostly grow these for my own enjoyment and for the native bees and pollinators that show up when they bloom.
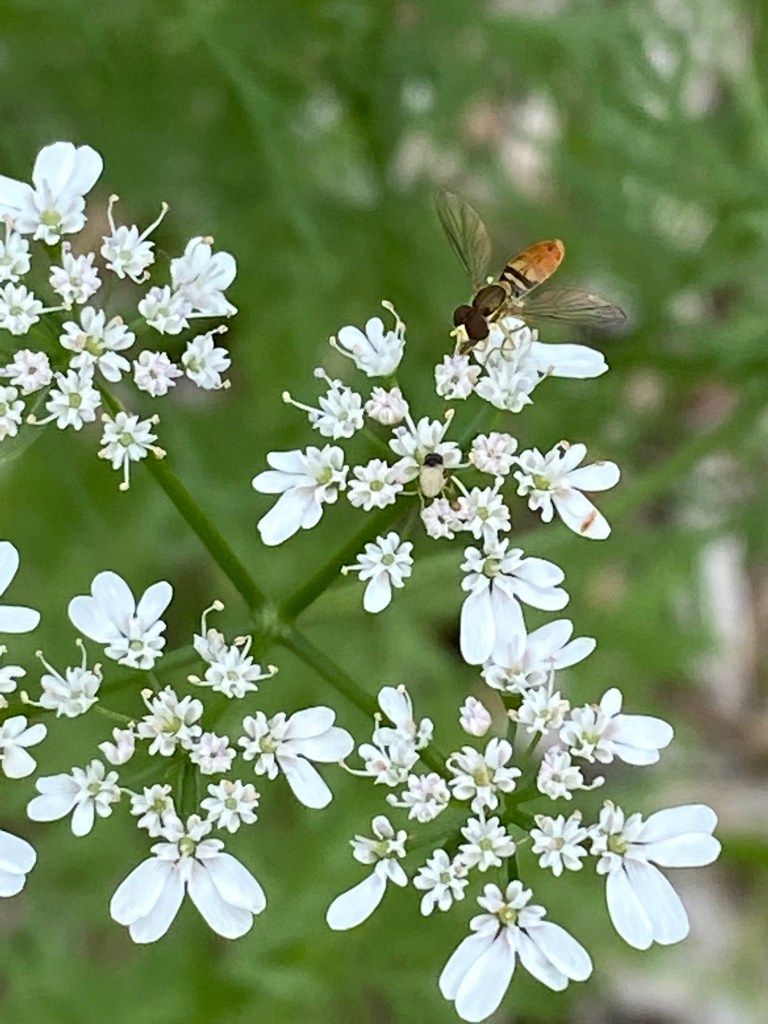

Yesterday, we had a crew of folks come out and spend an entire day helping plant around 600 plugs of native plants into an area just south of the production field. This planting was supported with a grant from the Wildlife Conservation Society and administered by Xerces Society which works to create pollinator habitat and conserve invertebrate insects. The grant also paid for us to seed 110 species of native plants on the north side of the field this past year. Once these plants grow, they will attract loads of native bees, butterflies, and other pollinators and insects that will move back and forth between their new habitats and our farm field, pollinating our crops and keeping insect pests in check. Plus, it will be stunning to look at, a benefit for us humans which is hard to quantify.
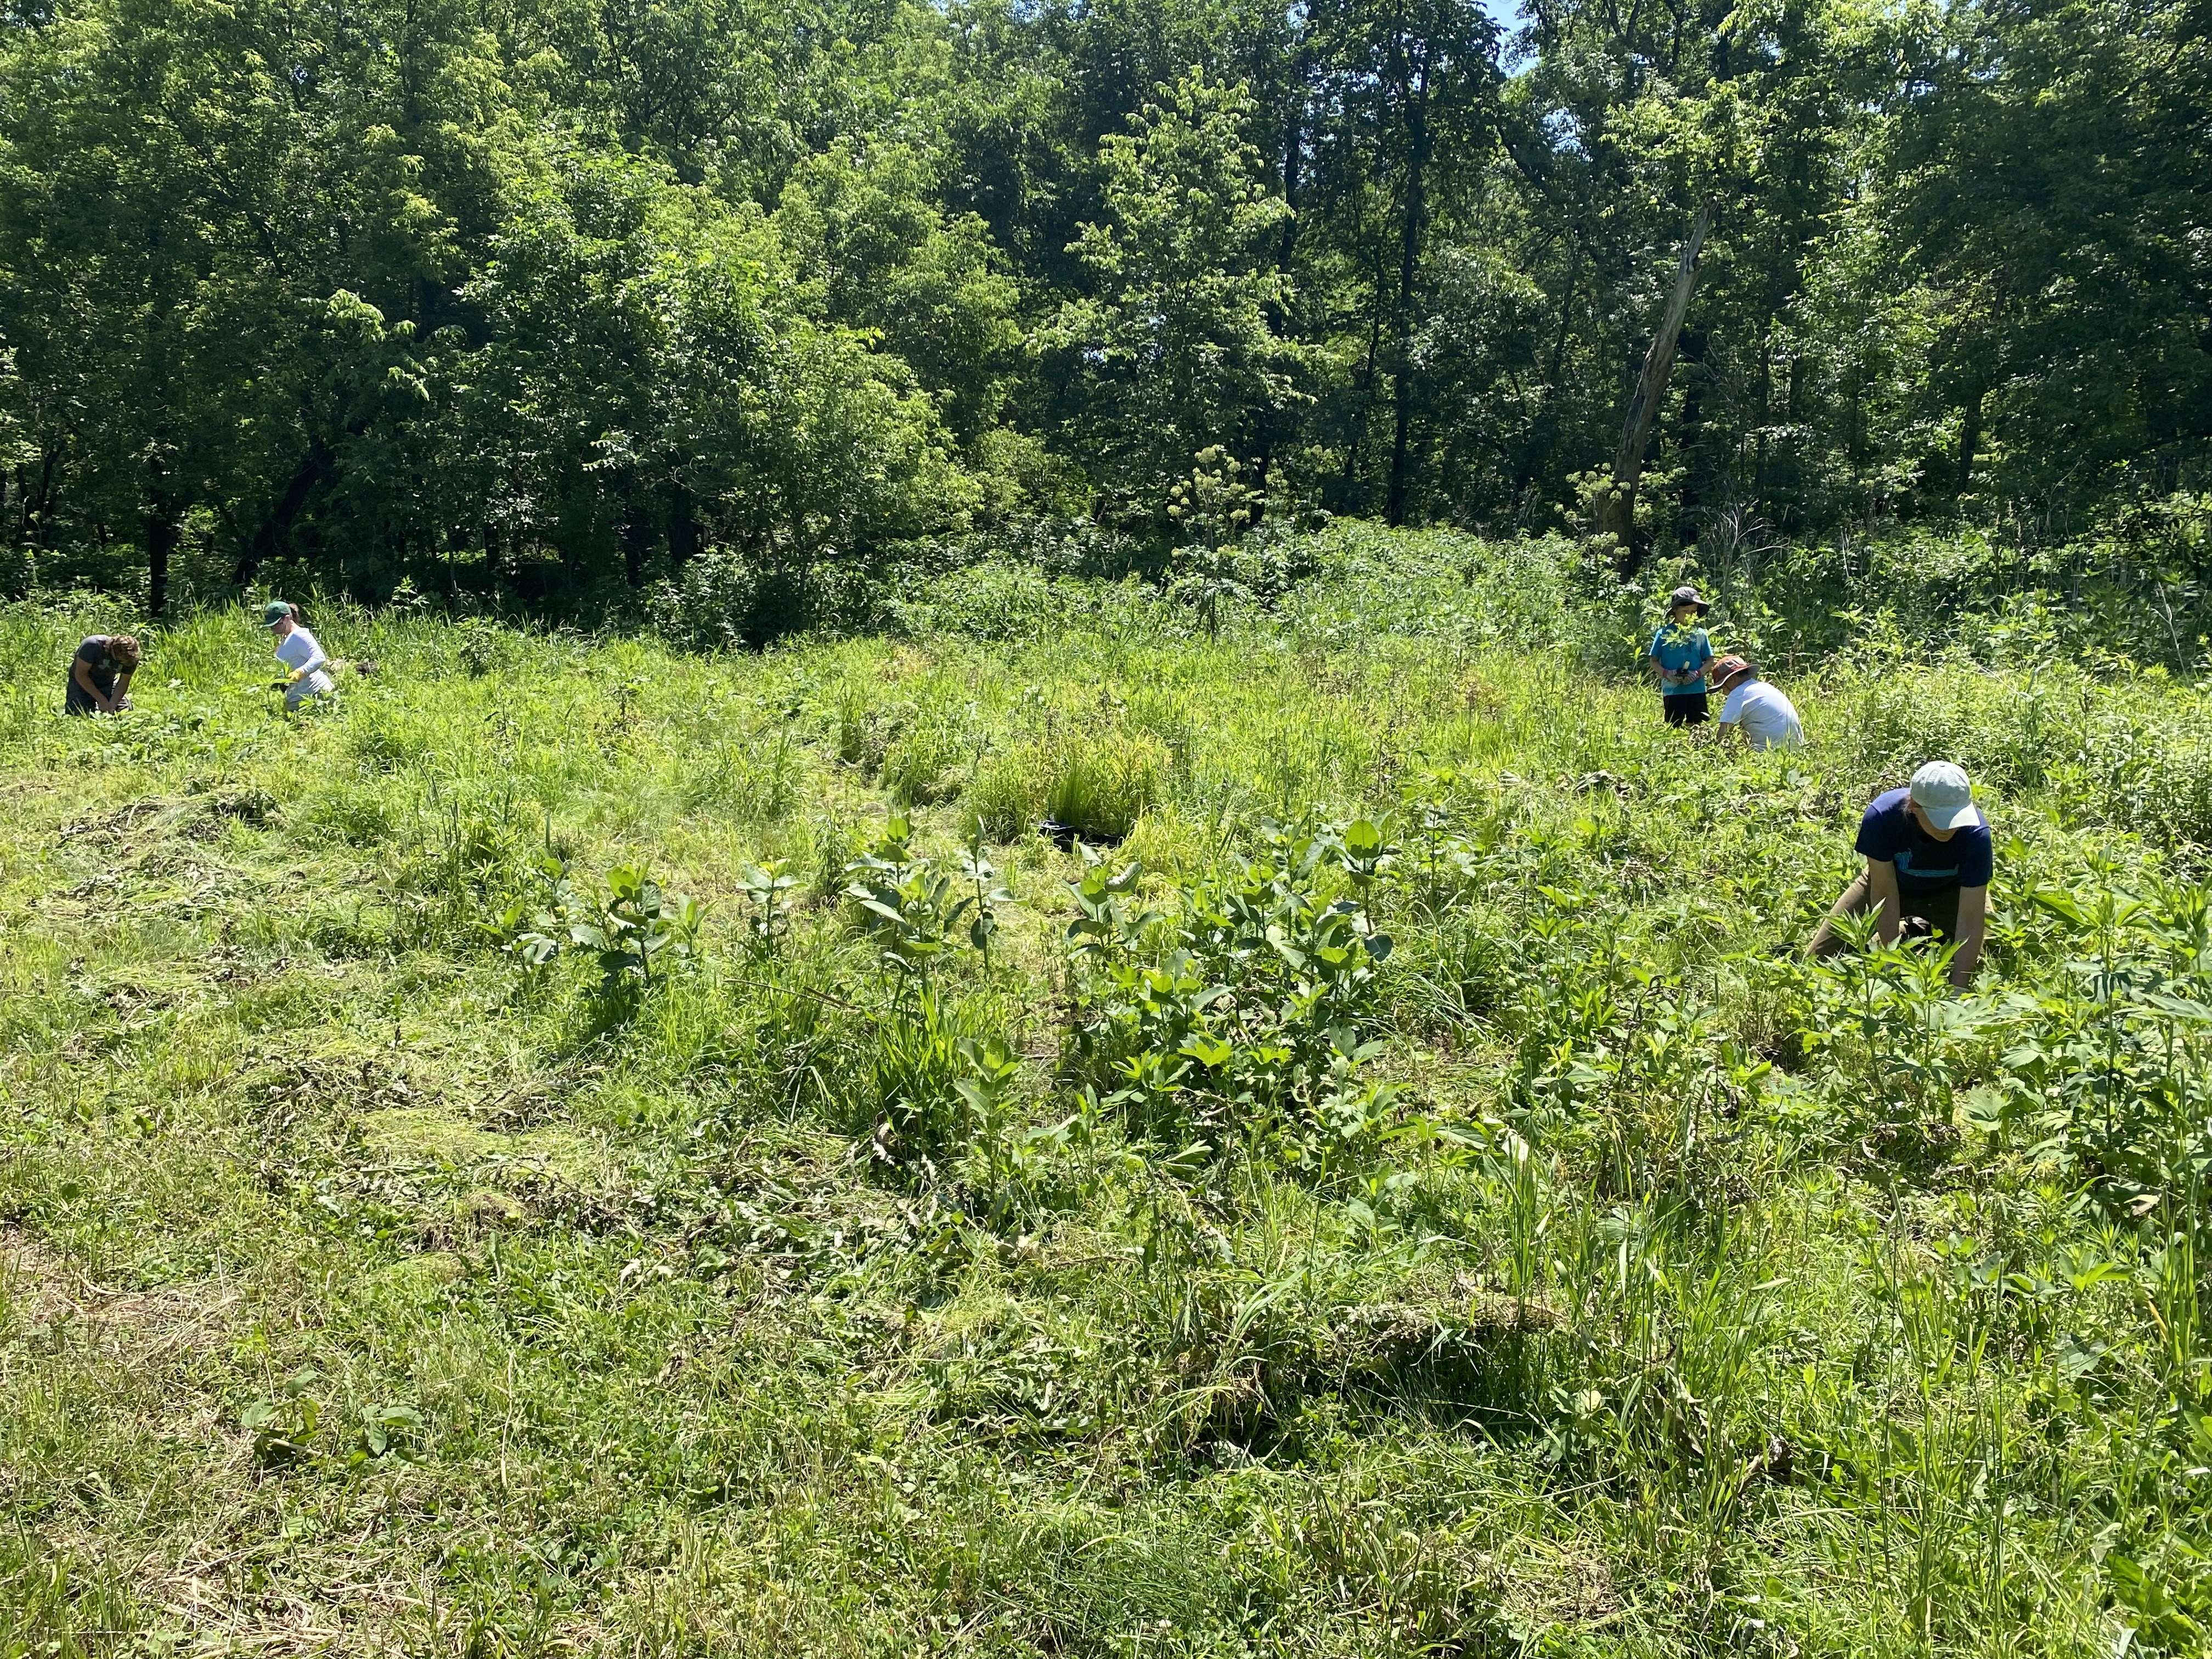
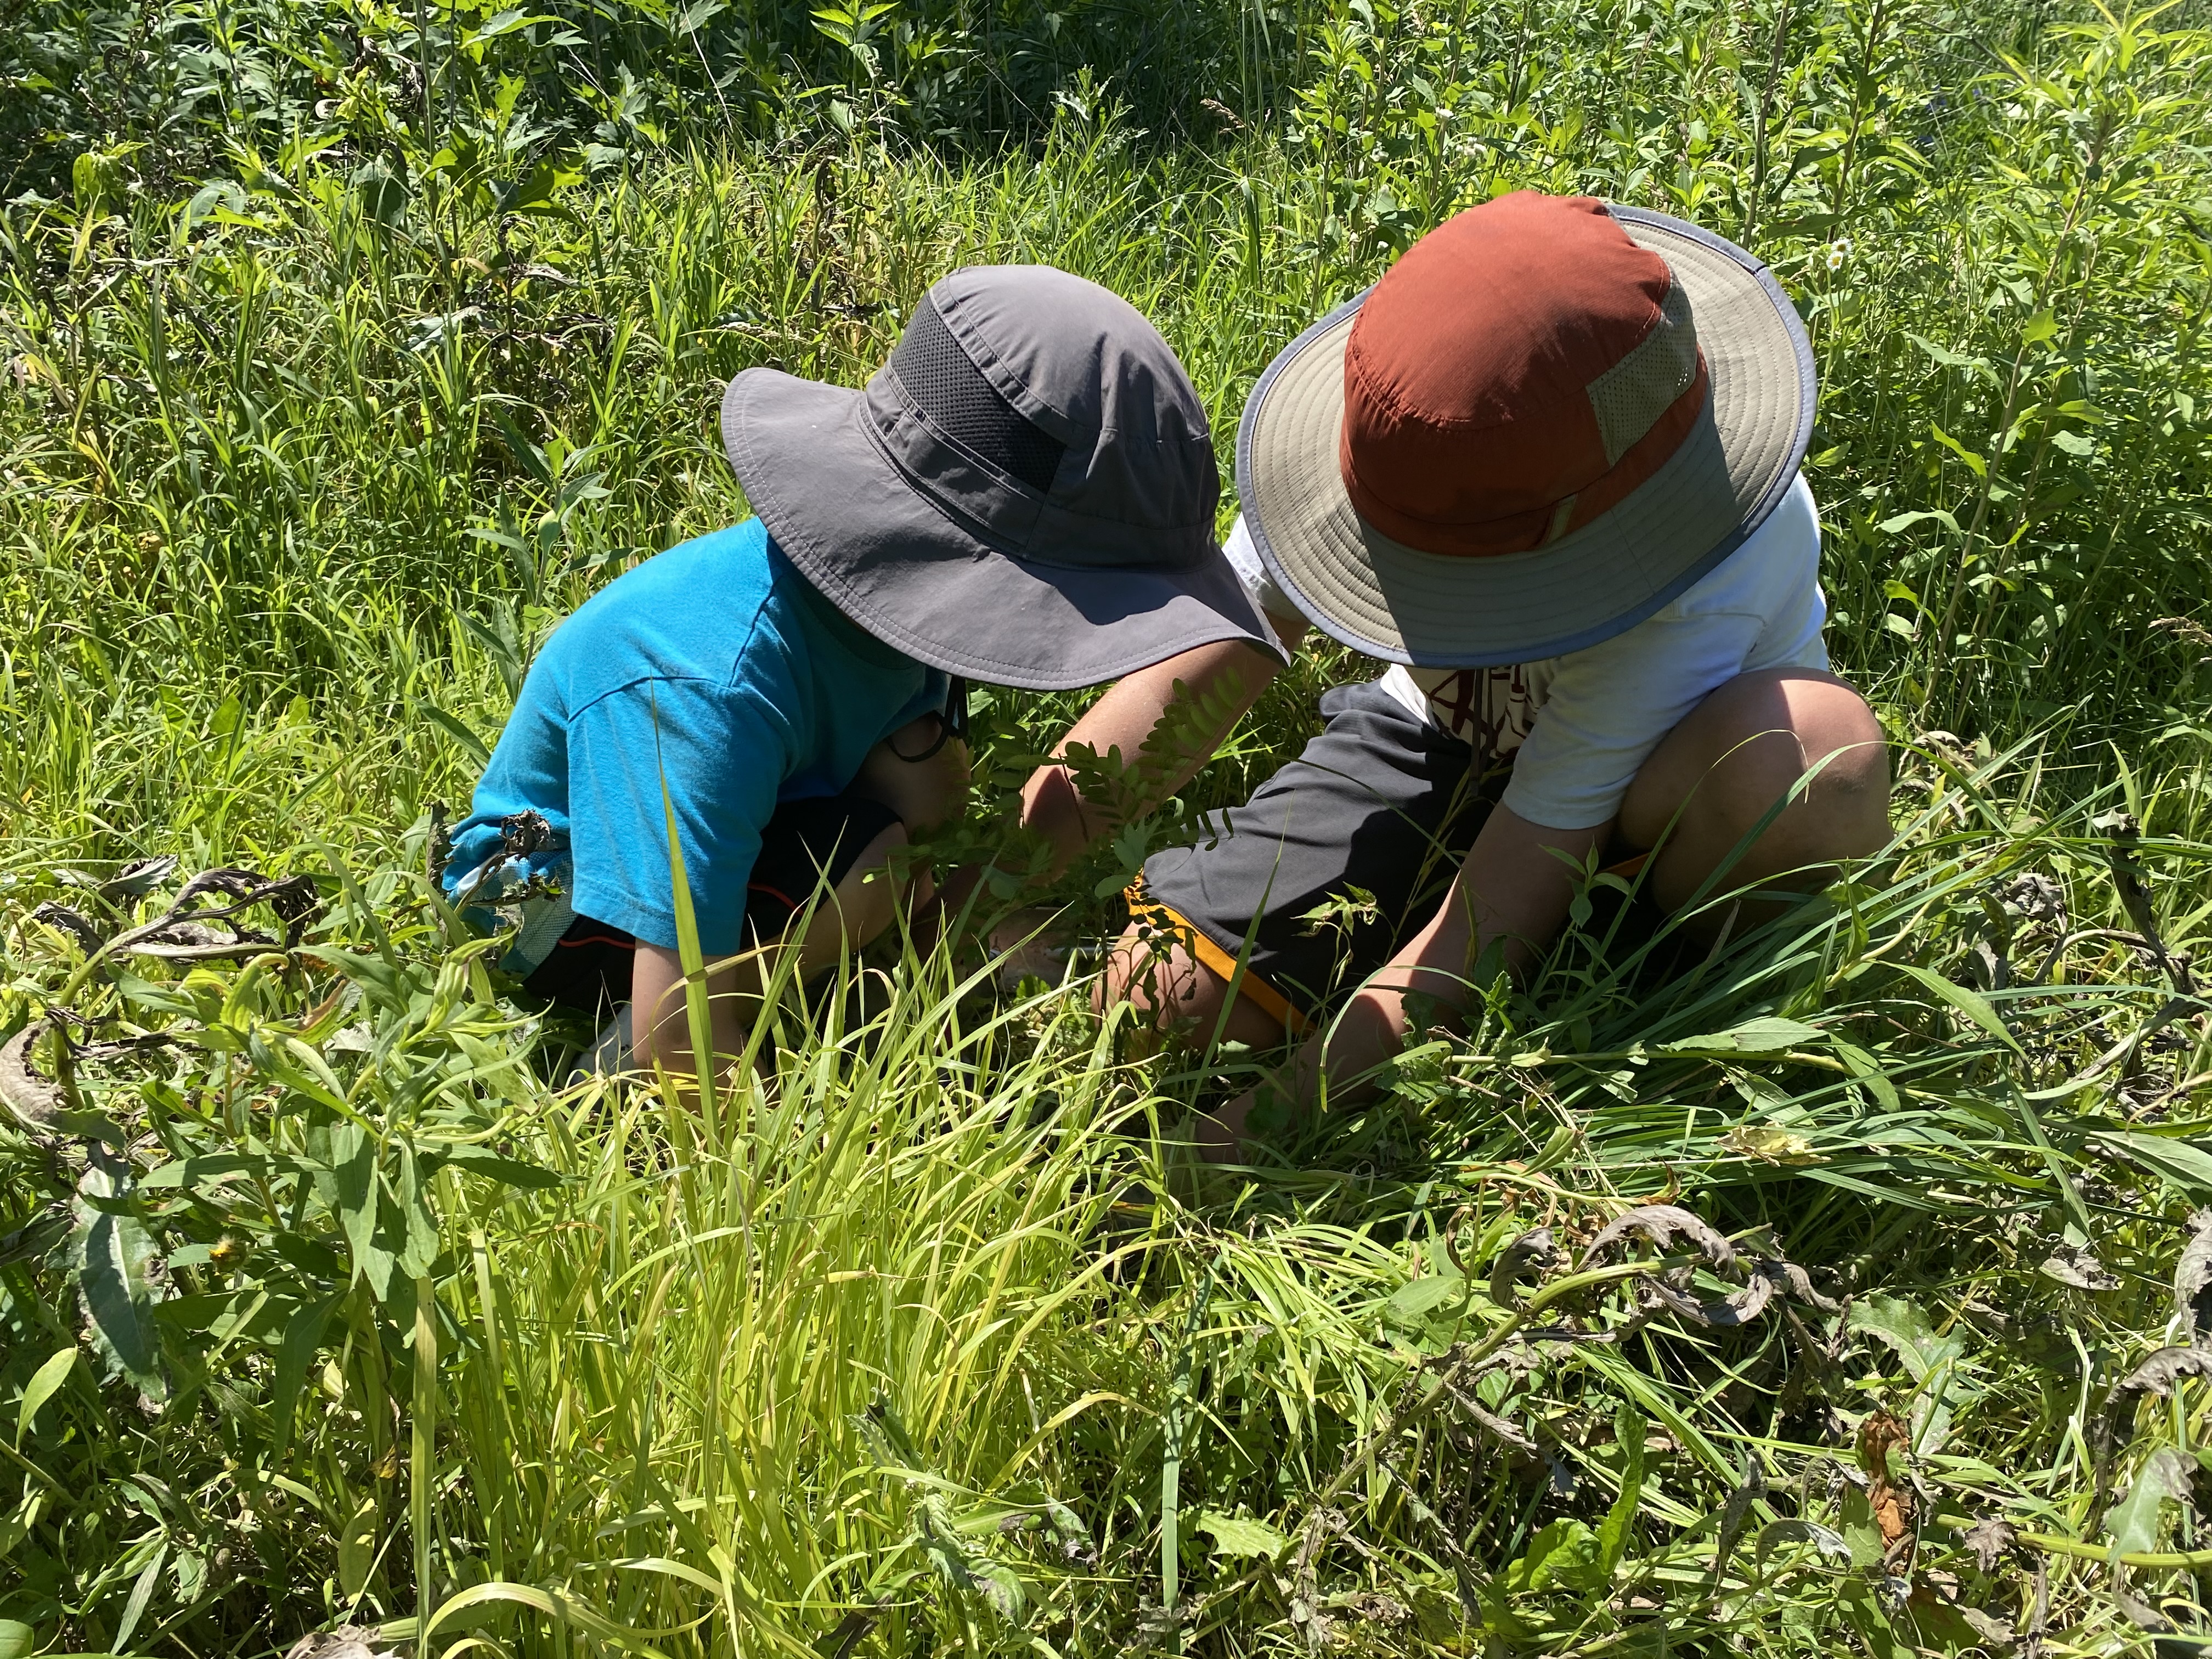

Recipes
Chicken Caesar Salad // Uses Romaine Lettuce, Garlic Scapes (can be substituted for garlic cloves)
Beet and Berry Smoothie // Uses Beets // Vegetarian
Chickpea Lettuce Wraps // Uses Lettuce (says Bibb, but you can use other types), Green Onions (tops of scallions), Cilantro // Vegetarian (but you could cook some chicken and add that in, too)
Fudgy Vegan Beet Cupcakes // Uses Beets // Vegan
Green Beans with Cilantro Pesto // Uses Snap Peas, Cilantro // Vegetarian Recipe from Raleigh’s Hilltop Farm
Takes 15 minutes
Makes enough for 4 as a side (or 1-2 as a meal, as it is for me often)
4 cups green or yellow beans, ends trimmed
1 cup snap peas, ends trimmed, optional
Cilantro Pesto (makes approximately 2/3 of a cup):
3 cloves garlic, minced
1/4 cup toasted almonds
1/4 cup parmesan
1 cup cilantro (stems and leaves are fine; it was just about 1 bunch for me)
1 tablespoon lemon juice, fresh if you’ve got it
1 teaspoon Kosher salt
1/4 teaspoon red pepper flakes
Freshly ground black pepper
1/4 cup olive oil
- Bring a large pot of water to boil on the stove. Blanche (submerge in boiling water) beans for three minutes. Remove from water and cover with ice cubes or place hot beans in an ice bath to stop the cooking immediately. This will help keep their crispness. Blanche the snap peas for 1 minute, if using. Remove to an ice bath or cover with ice cubes. Strain the beans and peas in a colander and shake a few times to make sure most of the water is removed.
- Prepare the pesto by pulsing garlic and almonds in a food processor until very fine. Add cilantro. Pulse until the mixture resembles a course meal. Add lemon juice, salt, red pepper flakes and pepper. Turn the food processor on and slowly add the olive oil. You may need to scrape down the sides of the food processor occasionally.
- Add 1/4 cup of cilantro pesto to the cooled and dried beans and peas. Save the rest in the fridge for some other use. Add more salt and/or red pepper flakes to taste.
Grilled Carrots with Lime and Cilantro // Uses Cilantro // Vegetaria
Midwest Bok Choy Ramen Salad // Uses Bok Choy, Scallions, Radishes // Vegetarian Recipe from Raleigh’s Hilltop Farm
Takes 15 minutes
Serves 2-4
1 head bok choy, sliced thinly (stems and greens)
1 bunch radishes, greens removed, cut into matchsticks
1 bunch scallions, thinly sliced
1/2 cup roasted and salted cashews, roughly chopped
1/4 cup white or black sesame seeds (or a mixture)
Noodles from 1 package of beef ramen
Dressing:
5 tablespoons vegetable oil
1 tablespoons toasted sesame oil
2 tablespoons rice wine vinegar
2 tablespoons honey
Flavor packet from 1 package of beef ramen
Pinch Kosher salt
- In a large bowl, combine bok choy, radishes, scallions, cashews, sesame seeds and ramen noodles. Toss to combine.
- In a small bowl, whisk together all dressing ingredients until smooth and uniform. Pour over bok choy mixture and stir well to evenly coat. Let sit 15 minutes before eating.
Roasted Beets with Goat Cheese and Toasted Walnuts // Uses Beets //Vegetarian This is a super easy and super delicious way to make beets. Simply wash one bunch of beets, cut off the top part of each beet where the stems had been, pierce each beet several times with a fork, coat them in olive oil, stick them on a baking sheet, and cover the pan loosely with foil. Bake at around 375 degrees until the beets are soft when pierced with the tip of a sharp knife or skewer. While the beets are baking, toast about 1/4 cup of walnuts in a non-stick frying pan on the stovetop over low heat, until they are warm, being careful not to let them burn. Cool the walnuts and then coarsely chop them. Sprinkle the cooked beets with between 2 and 4 ounces of crumbled goat’s cheese according to your taste, toasted walnuts, and a little salt and pepper. Enjoy!
Slow Cooker Beef and Bok Choy Fried Rice // Uses Bok Choy, Scallions
Snap Pea Salad with Chard & Pistachio Pesto // Uses Chard, Snap Peas // Vegetarian Recipe from Raleigh’s Hilltop Farm
Takes 15 minutes
Serves 2-4 as a side + lots of leftover pesto for your fridge
4 cups snap peas or snow peas, ends trimmed
2 tablespoons Chard & Pistachio Pesto (see below)
1/2 teaspoon Kosher salt
1/2 teaspoon red pepper flakes
1/4 teaspoon freshly ground black pepper
- Bring a large pot of water to a boil over high heat. Blanche peas for two minutes, drain and rinse with cold water.
- Add peas to a small bowl with remaining ingredients and toss to coat evenly. Enjoy warm or cold (I like it best some hours later once it’s been chilled.
Chard & Pistachio Pesto:
1 bunch rainbow chard (5-6 leaves)
1/2 cup shelled and toasted pistachios
2 garlic cloves
1 teaspoon Kosher salt
1/2 cup olive oil
1-3 teaspoons lemon juice
- Prepare rainbow chard. Remove stems and roughly chop. Set aside. Tear leaves into small pieces.
- In a food processor, chop pistachios until finely ground. Add garlic, salt and chard stems. Process until consistent in size and then add leaves. Continue to puree until leaves are all finely chopped, you may have to scrape down the sides occassionally.
- Turn the food processor on and run it while you drizzle in the olive oil. Process until smooth. Add
Wild Mushroom and Bok Choy Pasta // Uses Bok Choy, Garlic Scapes (these can be substituted for garlic cloves) // Vegetarian
Week 3, June 20, 2022: The In-Between Times
Happy Summer, everyone! It’s hard to believe, but tomorrow marks the longest day of the year and the official start of summer. Time is flying by on the farm. Nearly all of the crops that need to be seeded have been and now it’s more or less a waiting game until the real harvesting begins. We are a little in between the spring crops that are starting to fade away due to the heat of summer and the summer crops which are just starting to flower in preparation for fruit setting. Thus, this week you’ll have a little less in your box than you did over the last two weeks, but I’ll make up for it later, I promise.
What’s in My Box this Week?
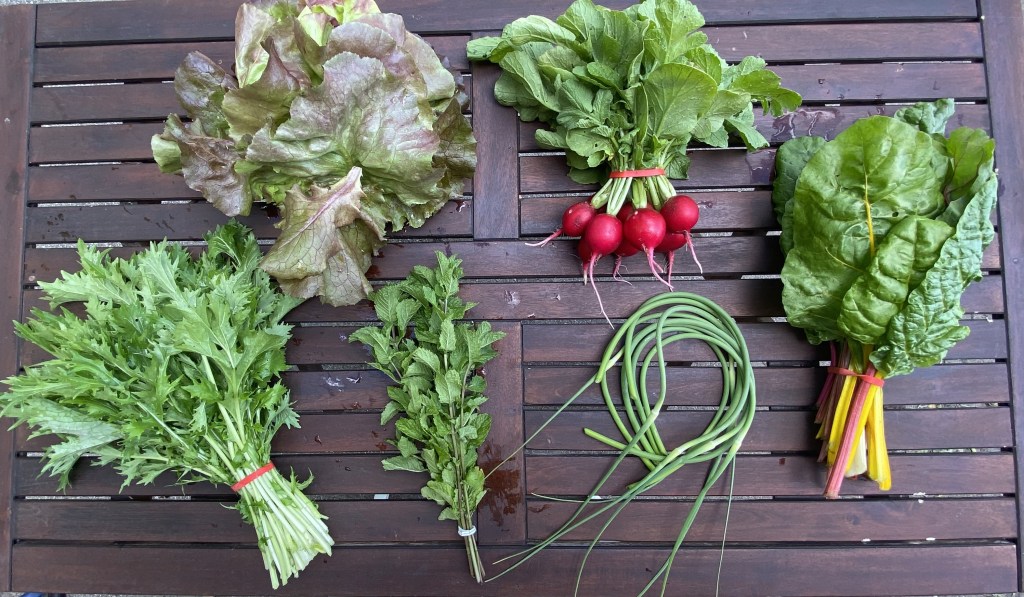
CHERRY BELLE RADISHES – Members will receive radishes again this week, but for most they will be of a different variety. These little red beauties are an heirloom variety from Holland with a mild flavor and crisp texture. Store for up to two weeks in a plastic bag in the fridge. For longer storage of roots, cut off the greens before placing the roots in the fridge and store the greens separately, ideally gently wrapped in a damp paper towel. Use the greens as quickly as possible.
GARLIC SCAPES – Garlic scapes are the flower stalks of hard-neck varieties of garlic plants. We have to cut these off before they flower so that the garlic puts energy into growing a big, fat bulb instead. These shoots are edible and delicious. They are mild and sweet with just a hint of garlic. You can chop them and use them in place of garlic cloves, make a salad dressing, or throw them on the grill like you would scallions.
LETTUCE – Store unwashed lettuce in a plastic bag in the refrigerator for up to 2 weeks. If you do find any spoiling leaves while you’re waiting to use it, simply pull those out to increase storage time.

MINT – Given the heat wave this week, I thought some cool, refreshing mint might be just the ticket. For best storage, place in a small glass or jar (stem side down) in about an inch of water.
MIZUNA – I tried some in the field this morning and it tastes good to me. Hopefully, it will withstand the heat over the next two days and not turn bitter. If it’s still yummy when I go to harvest Wednesday morning, I’ll include this in your box again. To store, keep dry, unwashed greens in a plastic bag in the fridge for up to a week. Wash right before using.
RAINBOW CHARD – I grew up never eating greens as a child, so things like kale and chard were a novelty to me when I started farming. Rainbow chard is beautiful plant with some leaves having red stems, some yellow, and some pink. I like it because it’s tender and you can add it to just about anything you’d like – eggs, pizza, pasta, salads. The stems should be removed before you cut up the leaves, but you can eat them stems, too.
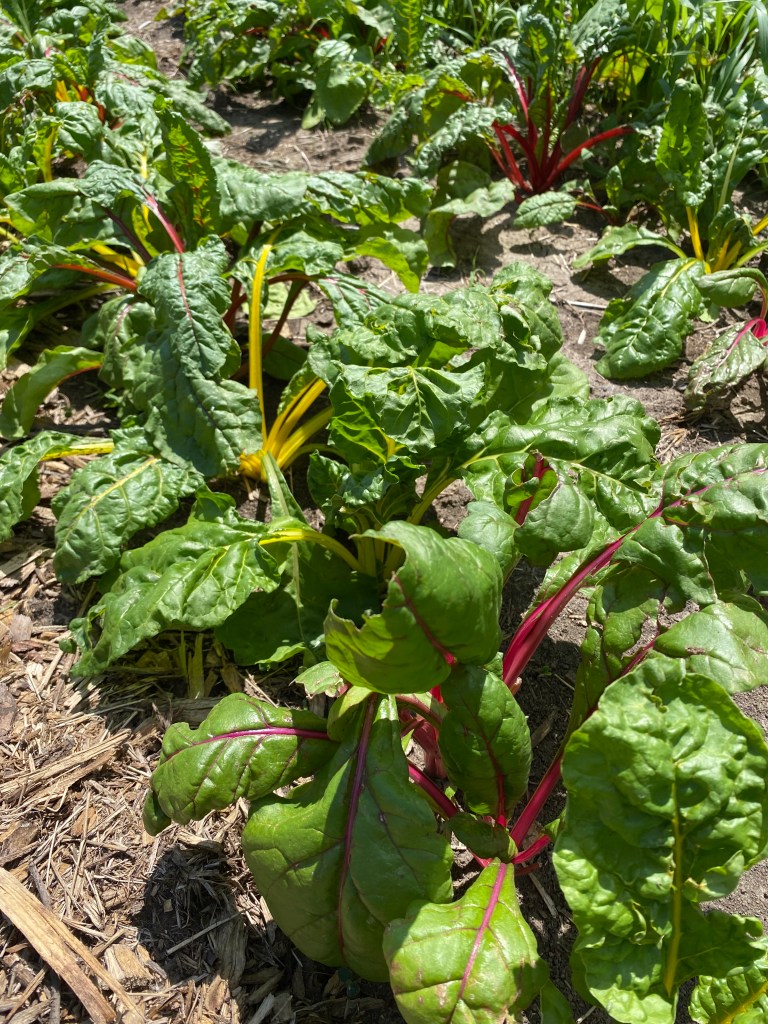
If you are going to saute the entire plant, just remember that the stems take a little longer to cook than the leaves and plan accordingly. Wash the chard only right before using. To store, place in a plastic bag with most of the air removed and put in the fridge. It is best used within a few days. You can also freeze chard and use in dishes later on.
Notes from the Field
At the risk of stating the obvious, it’s hot out there! We just returned from the kids’ swim lessons and I would have absolutely jumped into the pool with them if I’d had the chance. I’ve been trying to beat the heat by getting out into the field as early as possible the last few days and then retiring inside for the afternoons. Early morning is actually my favorite time of day to work on the farm. The air smells fresh and the sunlight rising above the field is warm and welcoming. It’s a good way to start the day.
Last year, when we had the heat wave at the beginning of June, all of our tiny little broccoli seedlings decided to bolt (flower), so none of them ever formed those nice, big, round heads that we look forward to. It’s not so much air temperature as it is soil temperature that makes this happen. The ideal soil temperature for broccoli is between 65 and 75 degrees. Any warmer than that and the plant is signaled to hurry up and reproduce. Of course, hot air and sun beating down can warm soil up pretty quickly, especially on a day like today. I measured the soil temperature yesterday in the broccoli bed and it was up to 82 degrees. Uh oh!
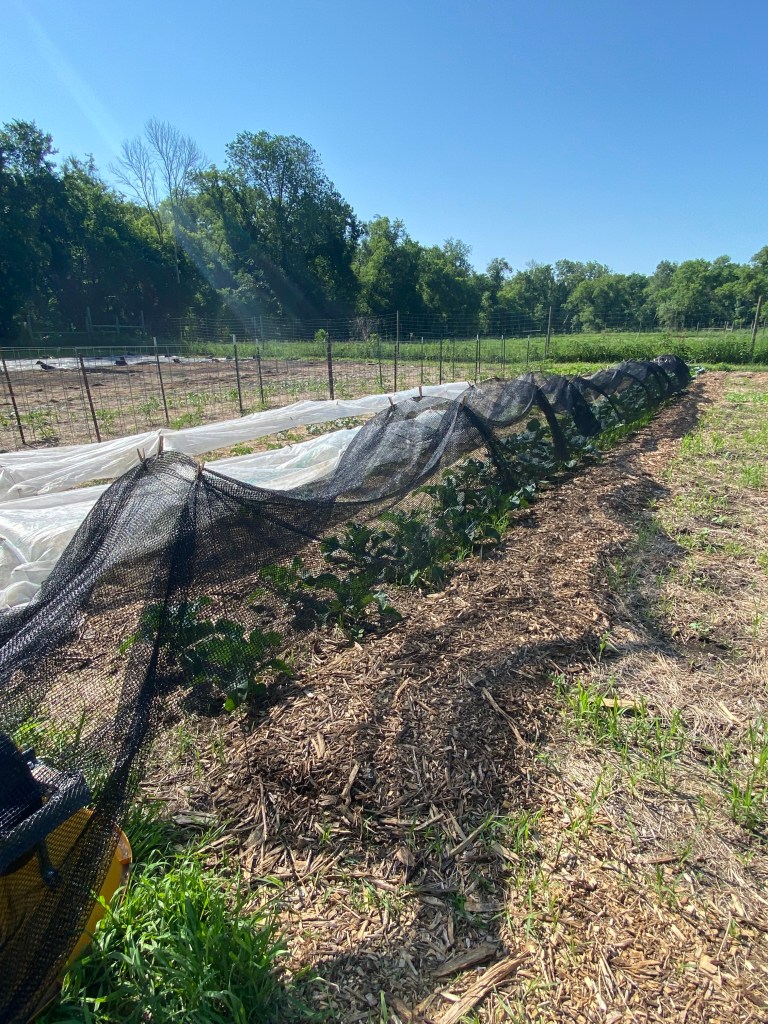
To help save the broccoli, Erik and I created some shade by placing shade cloth and reflective row cover over the broccoli as well as on some others that prefer it on the cooler side (Kailan, Bok choi, cauliflower, etc.) I also gave all of the plants a very good drink as wetting the soil not only cools it down right away, it also increases plant evapotranspiration, creating a microclimate by drawing heat up and out of the ground. This is the first time I’ve used shade cloth. I figured I ought to have a tool like this in the toolbox for when the weather gets too hot too early in the season. I hope it works!
Another tool I’ve had to pull out this past week is kaolin clay. An organic pest control, the powdery clay coats the plants and only eventually washes off in the rain after a couple of weeks. The clay repels and irritates a wide range of insects and also reduces fungal disease like powdery mildew. I’ve been having a lot of trouble with flea beetles and Colorado potato beetles going to town on the eggplant, so I applied the clay to the plants to deter them. I’ve been scouting for potato beetle eggs, too, and have found a lot. The sneaky bugs lay their eggs on the undersides of the leaves making them hard to find. The eggs are a beautiful orange color, but I take only pleasure in squishing them!
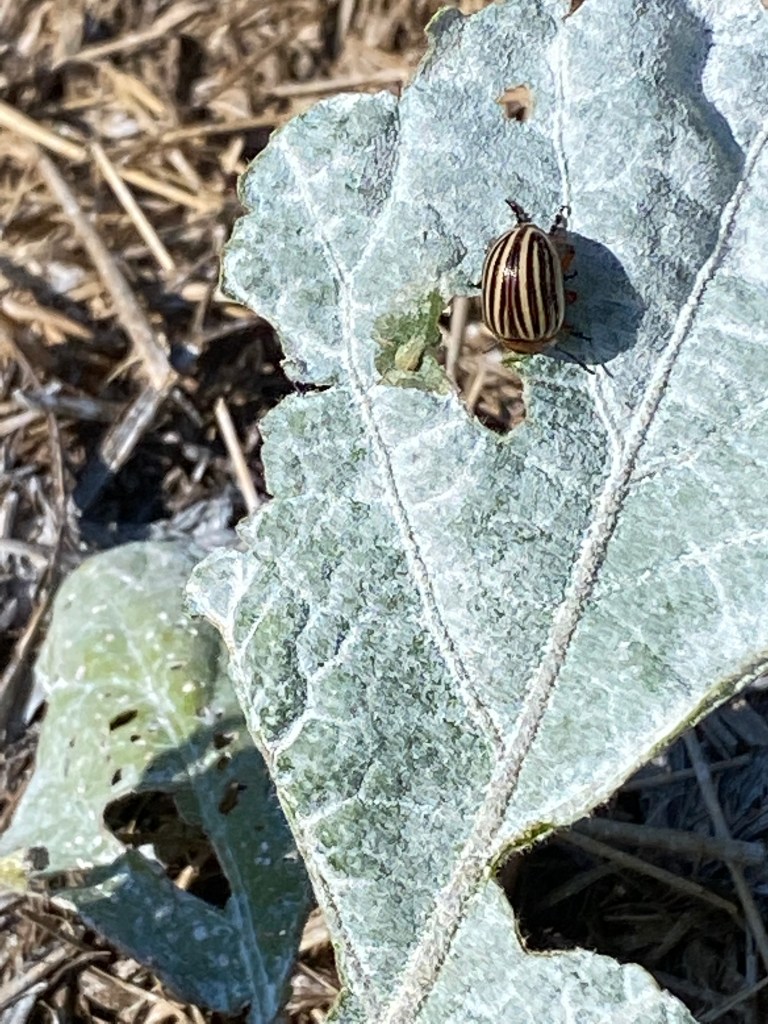
leaf coated with kaolin clay
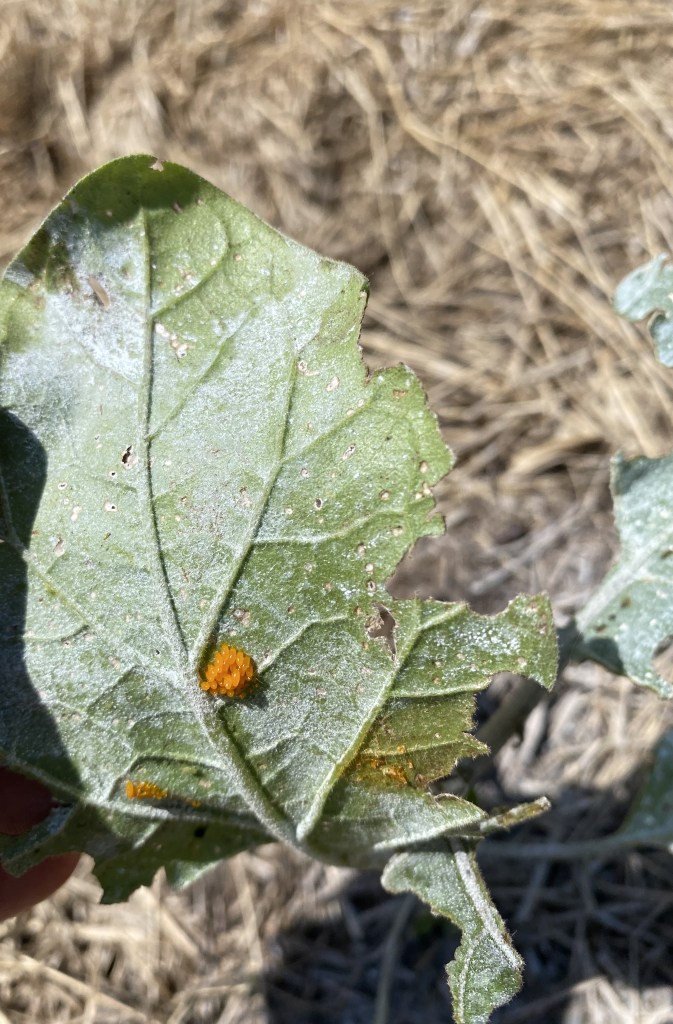
underside of eggplant leaf
On another note, we seem to have more or less recovered in good shape from the flood. The one sad piece of flood-related news is that you won’t be seeing any strawberries in your box this month as I had intended. Since the flood waters touched many of the ripening berries, there is a food safety risk to eating them, and we want to keep you safe. The good news is that I planted two types of strawberries this year, one of which (ever-bearing) is supposed produces berries in the fall, so if all goes well, you’ll get some of those. I’ve read they might be smaller than the other type (June-bearing), but I feel like having strawberries in the fall is pretty special and worth the reduction in berry size.
This week I will finish weeding and seeding the rest of the herbs and flowers in the herb garden, prune and tie up the tomatoes, and move some of the winter squash seedlings that were in the flooded area into a space that will be better for them going forward. Here are some photos from around the farm this past week. Notice the very first tomato!
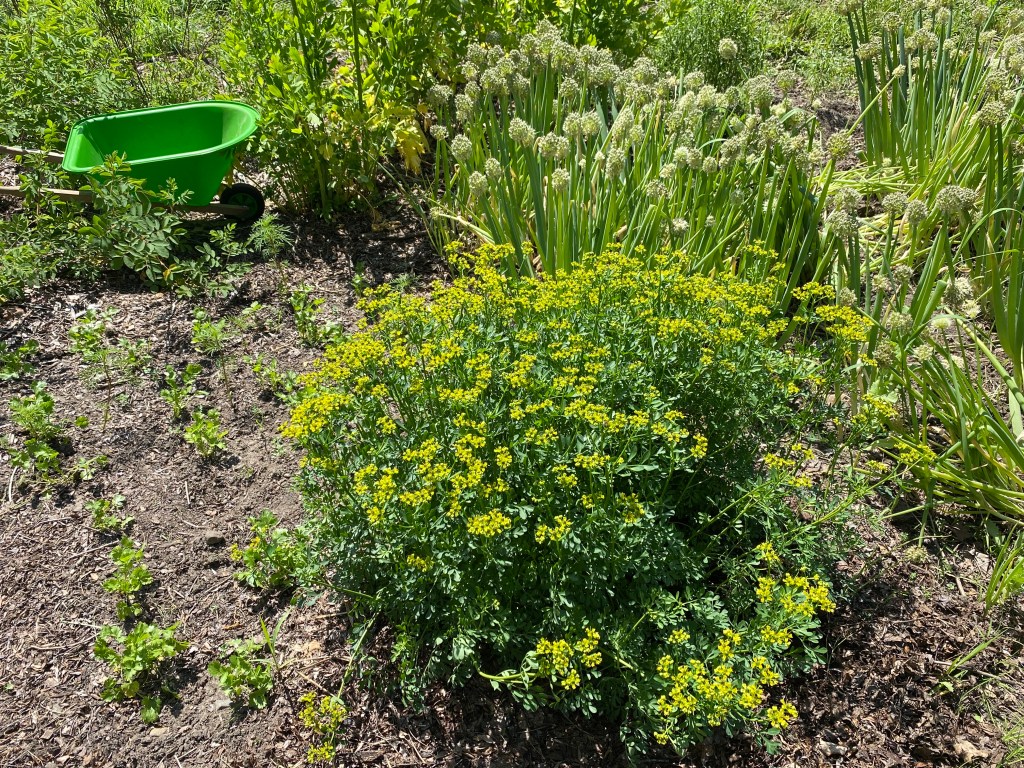
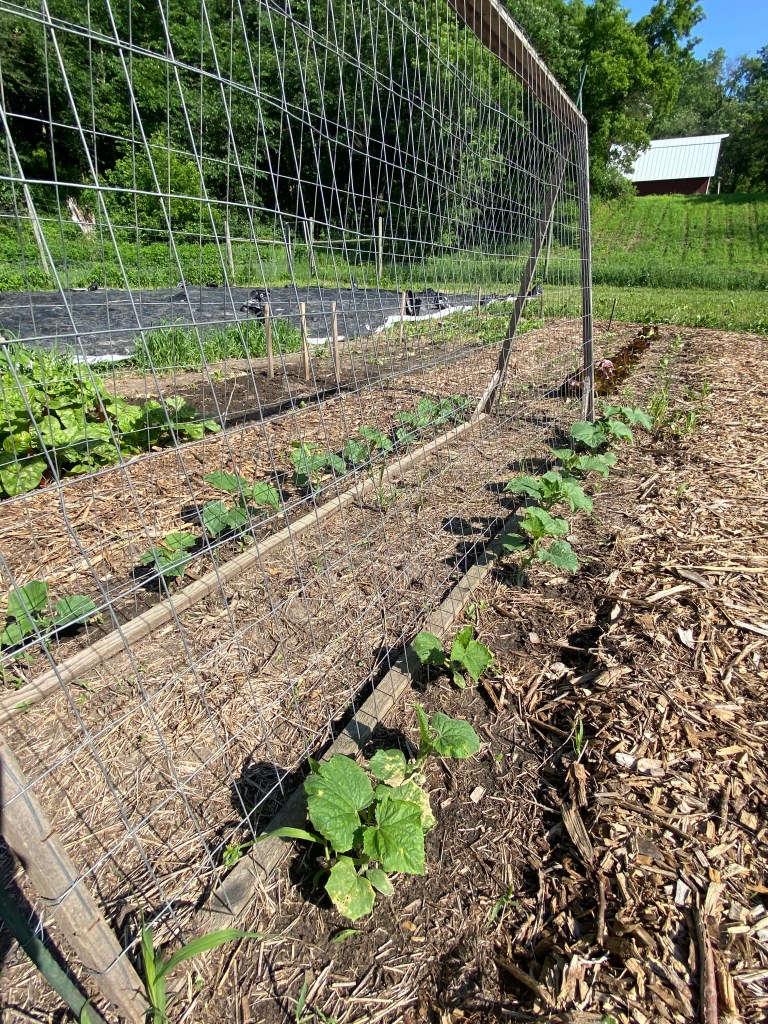

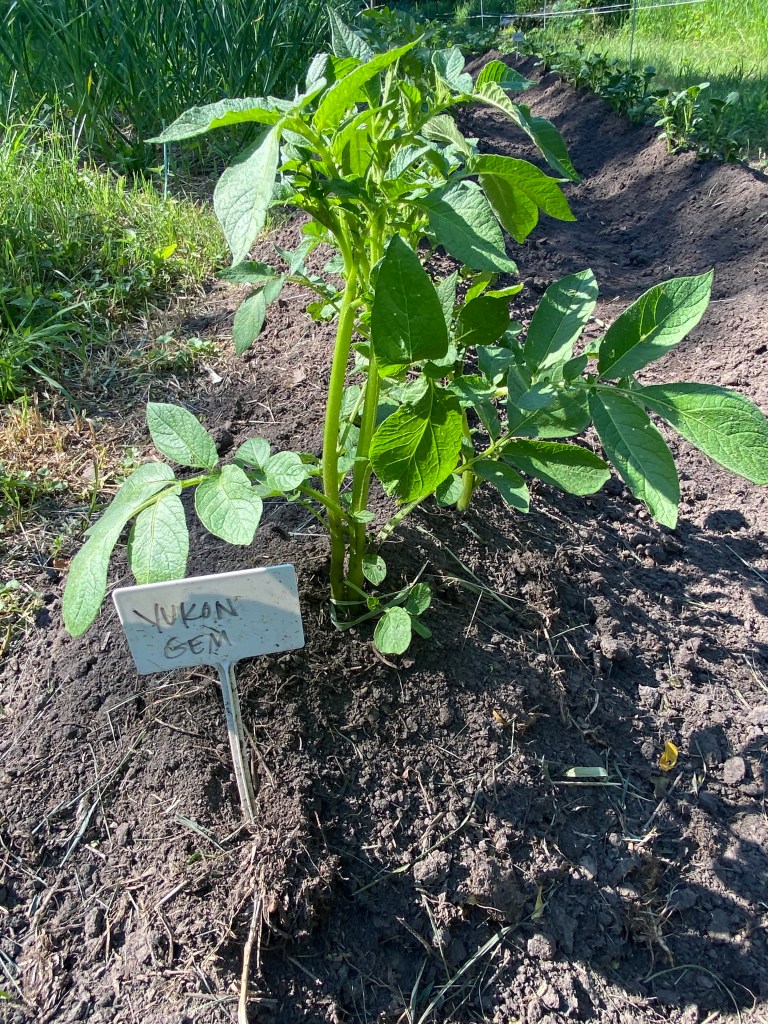
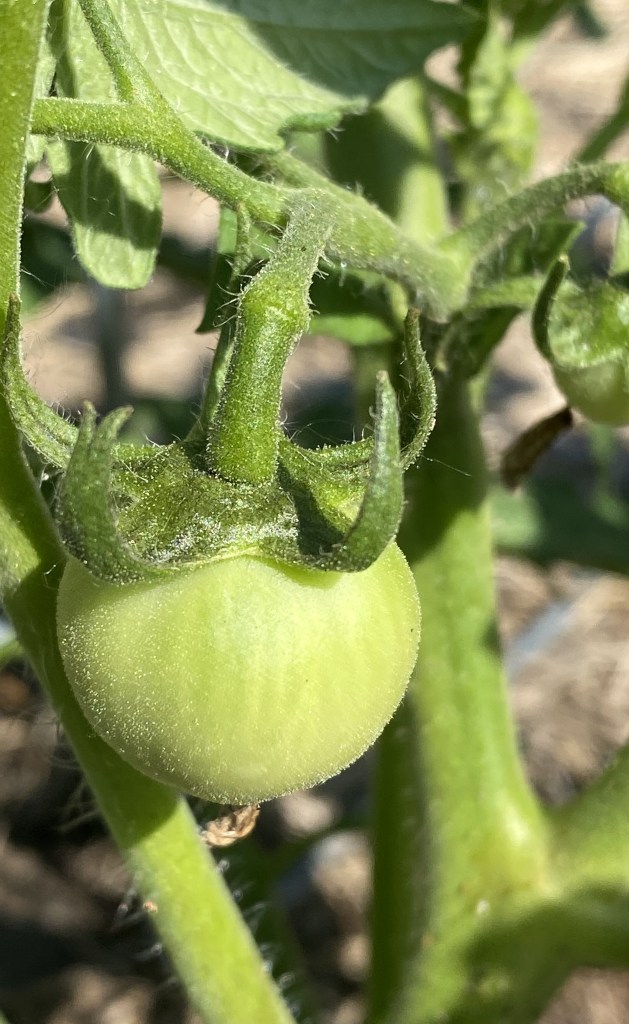
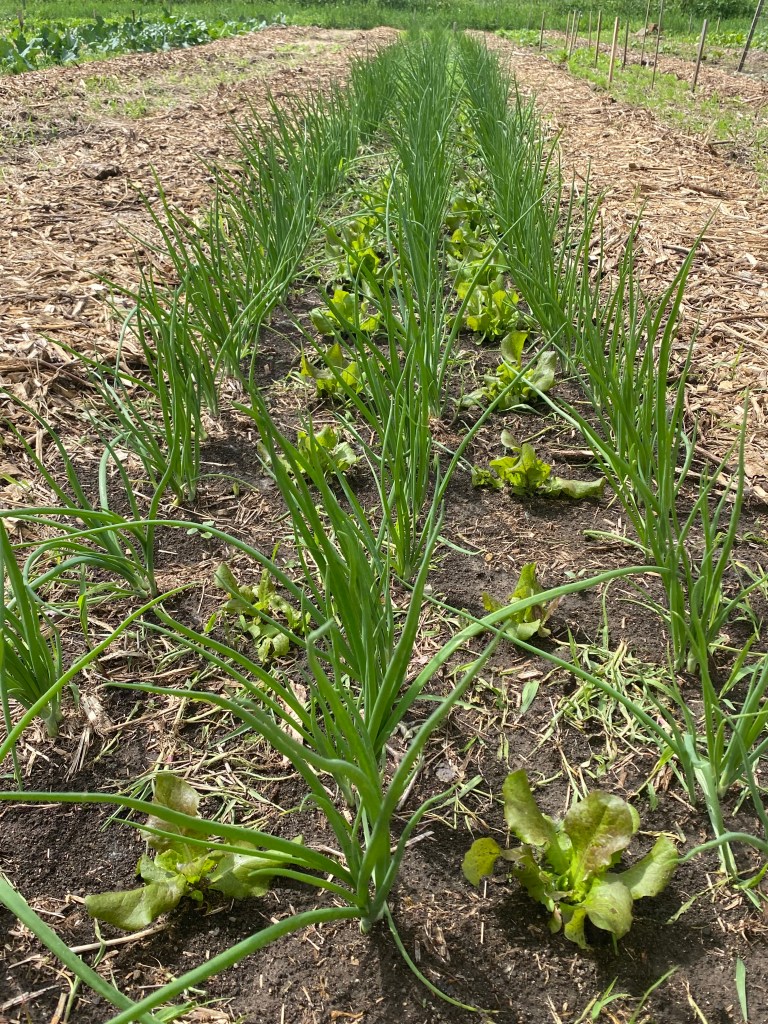
Recipes
I’m giving you a bunch of pasta recipes this week because, let’s face it, it’s hard to be in the kitchen for too long when it’s this hot out! These are fairly quick and easy recipes that are sure to please.
Caramelized Corn with Mint by Julia Moskin // Uses Mint // Vegetarian
(Takes 30 minutes; makes 10 to 12 servings)
4 to 5 cups fresh corn kernels, white or yellow (from about 12 cobs) or two 16-ounce bags frozen corn
1 stick (4 ounces) unsalted butter
1/2 cup chopped fresh mint
salt to taste
If using frozen corn, drain between layers of paper towels until thawed, about 30 minutes. In a wide skillet, melt half the butter over high heat. Add half the corn and cook, stirring often, until golden and browned (kernels may begin to pop), about 10 minutes. Stir in half the mint and sprinkle with salt. Transfer to a serving bowl. Repeat with remaining corn, butter, mint and salt.
Garlic Scape Alfredo, Two Ways by Lauren Rudersdorf // Uses Garlic Scapes // Vegetarian
(Takes 20 minutes; makes 2 cups of sauce)
2 tablespoons butter
1/4 cup minced garlic scapes, flowers and tough ends removed (if you’ve got more, use them!
1/2 teaspoon Kosher salt
1/4 teaspoon freshly ground black pepper
1/4 teaspoon red pepper flakes
2 tablespoons flour
2 cups whole milk
1 cup finely shredded finely shredded Parmesan
Melt butter in a large saucepan over medium low heat. Add garlic scapes, salt, pepper and red pepper flakes. Saute for 5 minutes until garlic scapes are slightly softened and very fragrant. Add flour and reduce heat to low. Stir until well until incorporated and just slightly golden brown. Add whole milk and cook until thick (about 5 minutes). Add Parmesan cheese and stir until melted. Remove from heat.
Mint Lemonade // Uses Mint // Vegetarian
Rainbow Chard and Carrot Hash // Uses Rainbow Chard (could also substitute Garlic Scapes for garlic cloves)
Sausage, Greens, and Beans Pasta // Uses Rainbow Chard
Snap Pea and Rainbow Chard Linguine with Garlic Scape Alfredo by Lauren Rudersdorf // Uses Rainbow Card, Garlic Scapes // Vegetarian
(Takes 20 minutes (plus time to make sauce); makes 4 servings)
8 ounces dry linguine pasta
1 cup Garlic Scape Alfredo
3 rainbow chard leaves, stems removed
1 cup sliced snap peas
1/4 cup finely shredded Parmesan cheese
1/2 teaspoon Kosher salt
Bring a large pot of salted water to a boil over high heat. Once boiling, add pasta and cook for 8-9 minutes until just al dente. Heat alfredo sauce over medium low heat in a large skillet. Once pasta is cooked, remove pasta with tongs and place
in alfredo pan, reserving the cooking liquid. Add chard, snap peas and 1/4 cup of the pasta water. Stir to combine and cook until chard is wilted and peas are bright green, about 5 minutes. Add additional pasta water to loosen sauce if necessary.
Finish with Parmesan cheese and salt. Serve hot.
For more ideas of how to use garlic scapes, check out Bon Appetit’s 10 Things to Do with Garlic Scapes
Likewise here is their 19 Swiss Chard Recipes That Will Make You Wonder “Spinach, Who?”
Week 2, June 13, 2022: The Busiest Time of the Year
Ah… mid-June. It’s the time when everything is happening all at once. There are still seeds to be planted; there is harvesting to be done; the weeds are flourishing and need to be pulled; and the insect pests have started to find the crops. This is the time on the farm that really keeps a person hopping. It’s also the time when you start to see the fruits of your labor from the past couple of months, and it’s very satisfying to see the plants filling out and the berries ripening. I can now look out my window and actually make out that there are plants growing down in field where just two weeks ago they were so little you could barely make them out. And, of course, it’s most satisfying to go down and harvest what you’d like to eat and to enjoy the super fresh produce.
This week you’ll see a few repeats in your box. It’s the last week for asparagus and rhubarb, and you’ll be getting a bunch of different leafy veggies. Although the temperatures are going to be much warmer this week, according to the University of Minnesota’s weekly vegetable report, soil temperatures are still cooler than average which means that some crops like cukes are still taking a while to find their groove. That should change soon, but in the meantime the crops that like lower temps are thriving and so these are the ones that you’ll see this week.
What’s in My Box this Week?
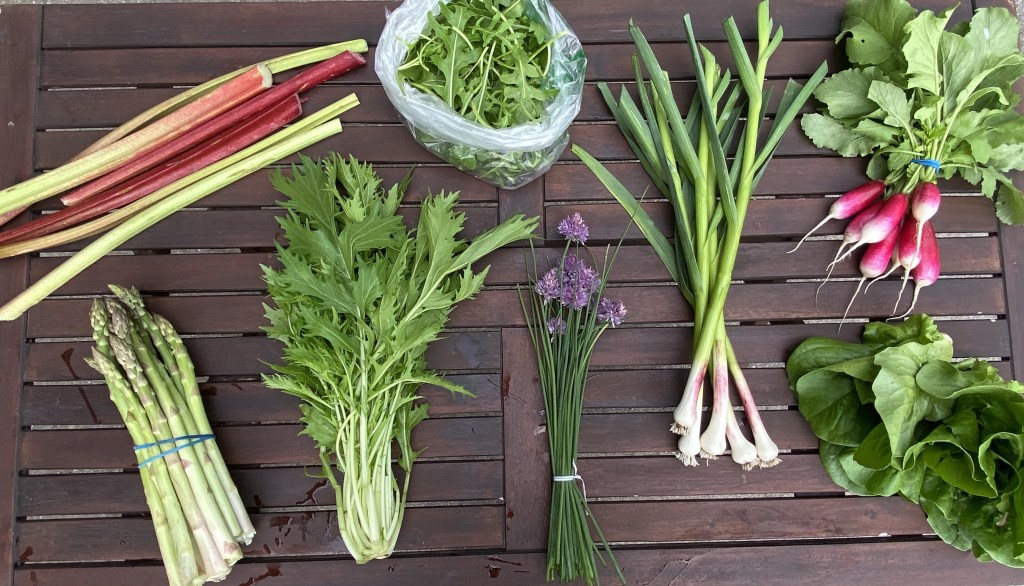
ARUGULA – Arugula has a peppery, spicy, and slightly bitter taste, so a little bit can go a long way. The arugula was very slow to get going this year and hasn’t quite sized up to where I would like it to be. Still, it needs to be harvested as the hot temperatures to come will make it super spicy, so I’m going to include it for you even though the amounts might be on the smaller side. Arugula doesn’t last much longer than a couple of days, so try and use it right away. Store it in the fridge in a plastic bag. Arugula is most often paired with other greens, like in a salad, and I like to throw some leaves on a tomato-sauce based pizza.
ASPARAGUS – The best way to store asparagus is standing up in a glass or jar with all of the ends submerged in an inch or two of water. Loosely cover the asparagus with a plastic bag and keep in the fridge for up to a week.
CHIVES WITH BLOSSOMS – Chives are in the allium (onion) family and grow very well in cool weather. So well, in fact, that they’re already starting to flower, and these blooms are actually edible. They taste like chives and can be added to salads, dressings, or potato dishes. I also like to just gather them together into a small bouquet and place them in a small vase to enjoy on the windowsill in my kitchen. (Makes doing the dishes more pleasant!)
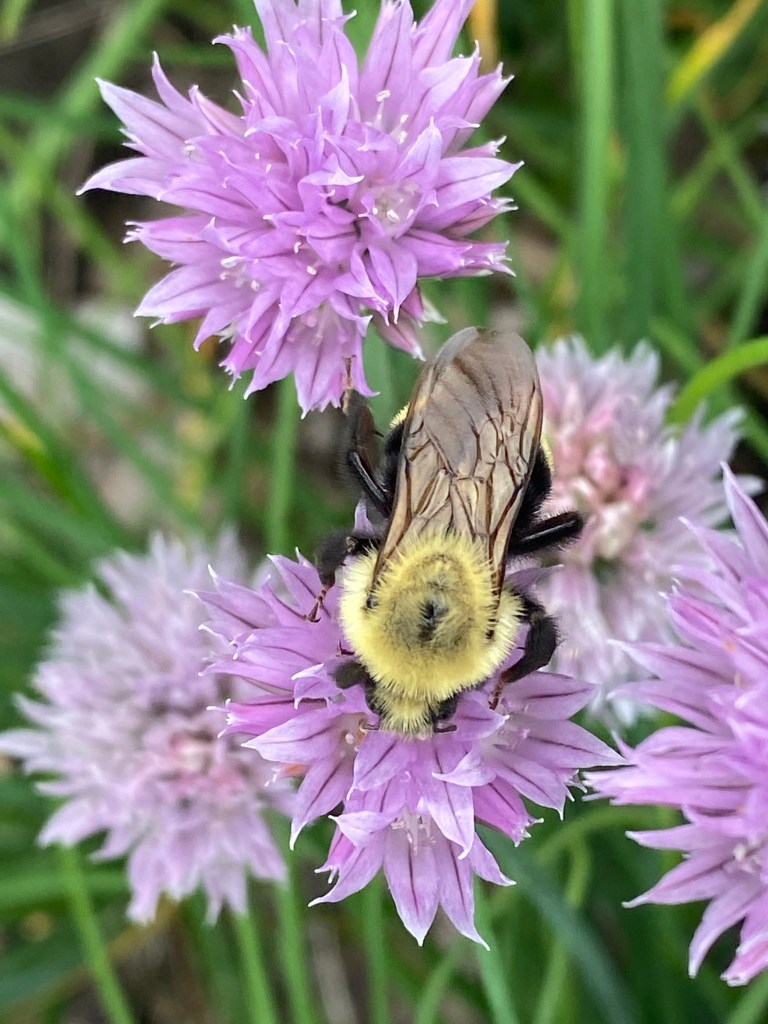
Some of the chives you receive this week will have a blossom. For these, pull them out of the bunch, remove the blossom, place in a bag or container in the fridge, and compost the woody stem. The blossoms are best used within 3-5 days. The rest of the chives are best stored in a small jar with about an inch of water. Make sure to put the stem side in the water, not the tender leaf tops. You can also keep them in the fridge in a plastic bag.
FRENCH BREAKFAST RADISHES – Members will receive radishes again this week. Store for up to two weeks in a plastic bag in the fridge. Store greens separately, ideally gently wrapped in a damp paper towel. Use the greens as quickly as possible.
GREEN GARLIC – Store in the crisper of your fridge and use within five to seven days. For best storage, wrap bulbs (the white part) in a damp paper towel. Just trim the ends and the dark green portion (as you would do with a leek), and use like regular garlic.
LETTUCE – Store unwashed lettuce in a plastic bag in the refrigerator for up to 2 weeks. If you do find any spoiling leaves while you’re waiting to use it, simply pull those out to increase storage time.
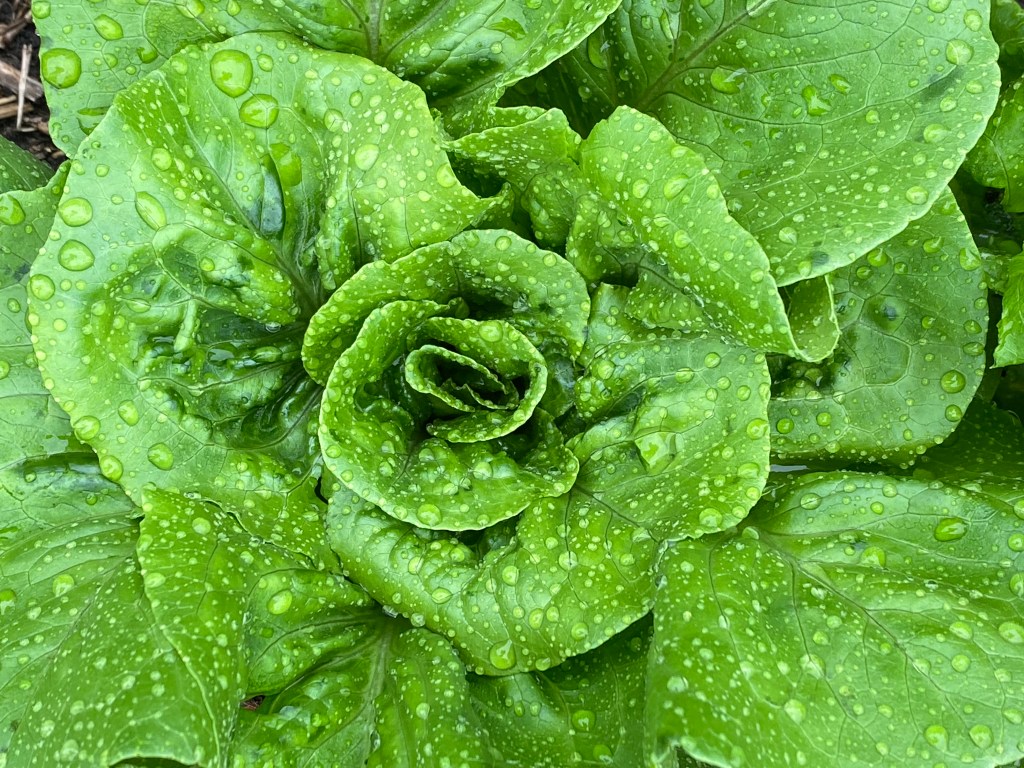
MIZUNA – This elegant Japanese green has a delicious spicy flavor and texture similar to arugula, but with a milder taste. You can use it raw in salads or, if it’s a little too on the spicy side for you (we didn’t think it was particularly spicy when we tried it yesterday on some BLTs, but I suggest you take a small bite and see what you think), you can saute it in some garlic and olive oil or add it to a stir-fry or soups. Cooking it will help tamp down any spiciness there might be. To store, keep dry, unwashed greens in a plastic bag in the fridge for up to a week. Wash right before using.
RHUBARB – To store rhubarb, wrap rhubarb loosely in damp paper towel and place it in a plastic bag in the fridge. When you’re ready to use it, remove about an inch from the bottom of the stalk. It is best used within a week. You can also chop and flash freeze rhubarb in freezer bags for future use.
Notes from the Field
I was just about to send this newsletter out yesterday when my son yelled at me to come and look at the farm field. We had been watching amazed at the amount of rain that was falling that morning (more than three inches in about 90 minutes) and it had thwarted my plans to do some field work, but it never occurred to us that it might flood out there. Unfortunately, that is just what happened. The seasonal creek which runs adjacent to our farm field and is normally dry this time of year quickly filled up with water rushing off of upstream fields. Most of the farm fields around us have only recently planted and their corn and soybean crops are barely growing. When you look at these fields you see a little bit of green and a lot of brown, meaning that most of the ground is still bare. When that much rain falls on land that isn’t covered with living plants, it barely soaks in and instead just runs off. Yesterday all of that water ran off into our stream bed and then overflowed its banks into the asparagus and strawberry fields. (Look how it bent the asparagus in the picture below!)

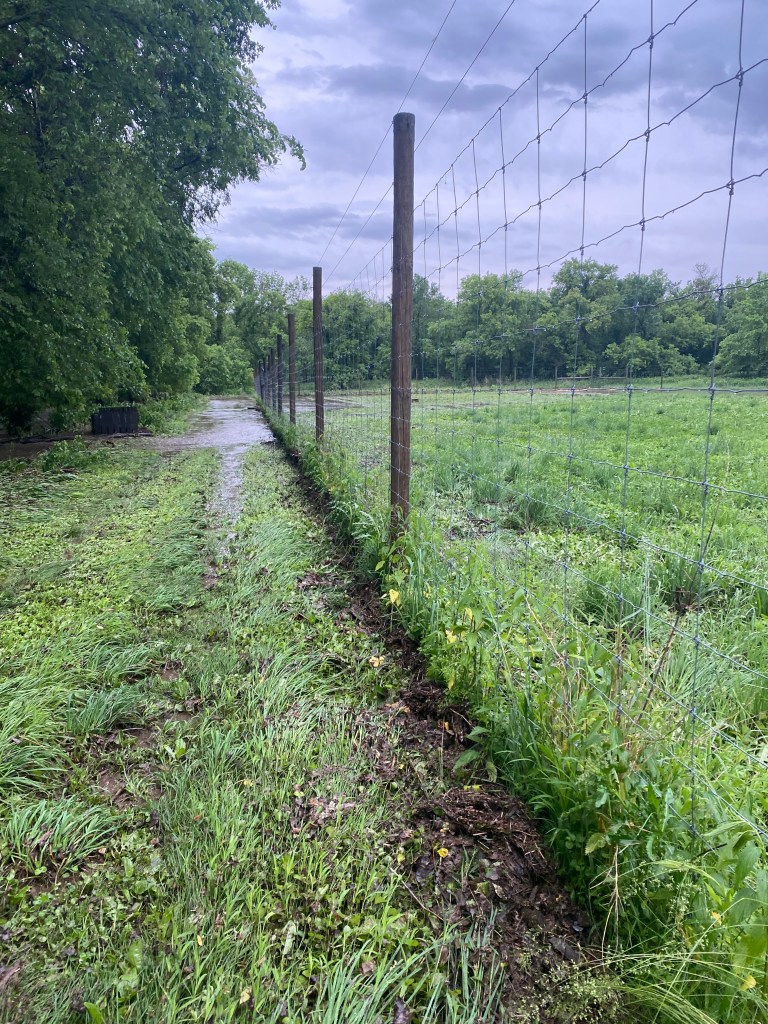
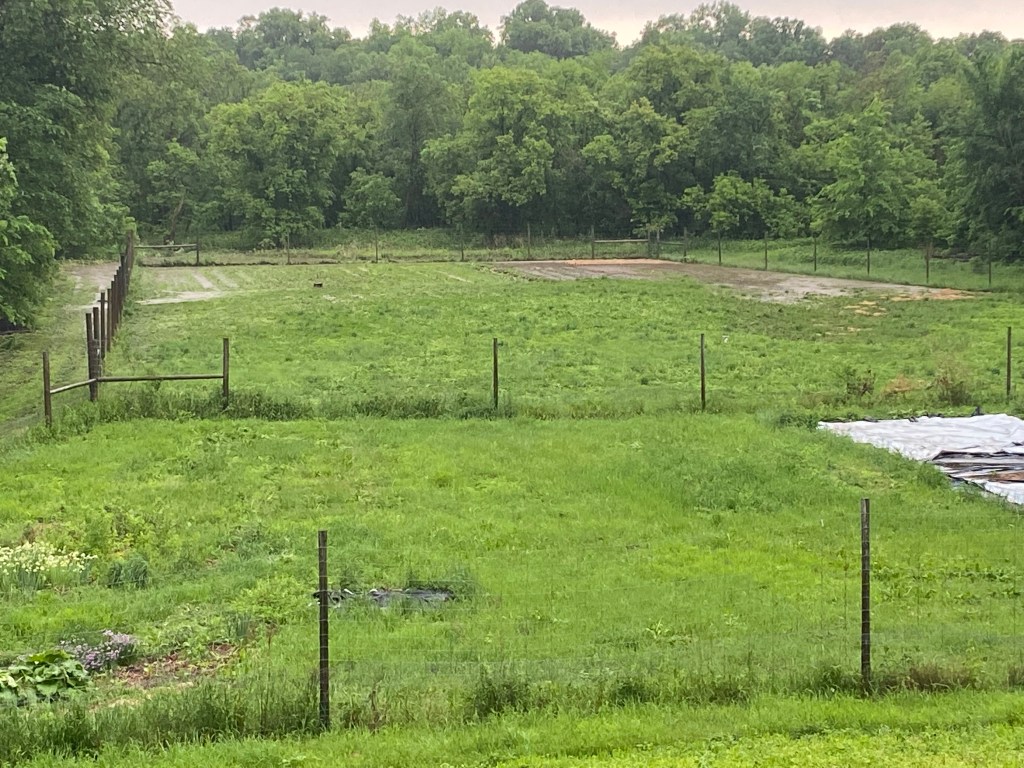


As you can imagine, this was incredibly stressful to see. We worried that the waters might creep up into the vegetable field, but luckily they quickly receded, leaving a very soggy field behind. This was the one area we had actually tilled this year, in order to plant winter squash, and so the soil was newly bare and not yet protected with a cover crop like in the rest of the field. Some of the soil here definitely washed away into another part of the field, and I had to go and tuck some seedlings back into the mud as they had uprooted in the flood. Thank goodness we have cover crops planted everywhere else. They did a good job of allowing some of that extra water to just soak in and kept our soil in place.
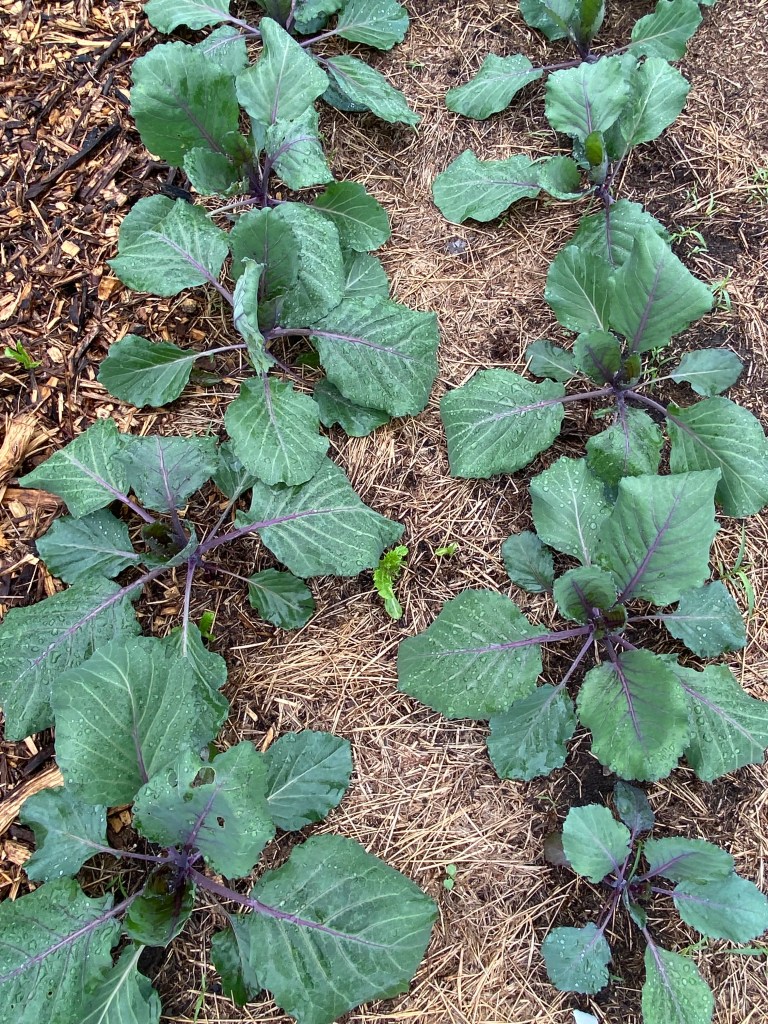
This week I had planned to seed black beans, Daikon radishes, carrots, turnips, Romanesco, Napa cabbage, and parsley, but after a less-than-ideal downpour like this, it may be days before the soil dries out enough to dig into it again especially as more rain is forecasted for tomorrow. If I rush it and the soil is too wet when I seed, I risk compacting the soil and making it harder for air and water to get to the plants’ roots later on.
I also increase the chances that the soil will crust over on top and act more like a paved driveway than a sponge, meaning water and soil could run off of my field as well. It’s hard to wait sometimes when there is a schedule to keep, but in the long run, it makes things better all around.
Thus, I am in a bit of a holding pattern this week. I’ll be covering up some of the crops that prefer cooler temperatures with shade cloth to protect them from the heat wave that is coming next week and maybe weeding some more garlic. At least this much rain will make weeds come out that much more easily! I will wrap up the asparagus harvest and keep an eye out for the first ripe strawberry. The berries are growing fat and plump down there. It’s only a matter of time before you’ll have some in your box.
Recipes
I’m going to guess that you weren’t able to use all of the recipes for the veggies you received last week, so I will let you scroll down to last week’s newsletter to revisit recipes for asparagus, radishes, rhubarb, and spinach. Here are some things you can do with the veggies that are new to your box this week:
Arugula Pesto // Uses Arugula // Vegetarian
Blueberry Arugula Salad // Uses Arugula // Vegetarian (although Shared Legacy Farm, where this recipe originates, suggests adding grilled chicken for a complete meal).
Chive Blossom Vinegar // Uses Chive Blossoms, Chives // Vegetarian
Garlicky Roasted Potatoes with Wilted Greens and Bacon Gremolata // Uses Mizuna (Can also substitute Spinach or Arugula or maybe even try a bit of all three?)
Lemon and Parmesan Arugula Salad // Uses Arugula // Vegetarian
Simple Mizuna Salad with Radishes // Uses Mizuna and Radishes // Vegetarian
Spring Salad with Lemon Cream, Chives, and Green Garlic // Uses Green Garlic, Chives, Lettuce // Vegetarian
Spring Vegetable Pizza from Raleigh’s Hilltop Farm // Uses Asparagus, Chives, Chive Blossoms, Green Garlic, Radishes // Vegetarian
8-ounce Pillsbury Crescent dough sheet
8-ounce package cream cheese
1/4 cup Greek yogurt
3 tablespoons minced chives
1 green garlic stalks, minced
1/4 teaspoon garlic powder
1/2 bunch asparagus, shaved
1 bunch radishes, halved and thinly sliced
5-10 chive blossoms, separated
Flaky sea salt
- Preheat oven to 375 degrees F.
- Roll out crescent dough onto small baking sheet (9×13”). Bake for 10-15 minutes until golden brown. Remove from oven and let cool for 30 minutes.
- In a small bowl, combine cream cheese, yogurt, chives, green garlic and garlic powder. Season with salt and pepper.
- Once crescent dough crust is cooled, spread cream cheese mixture over crust.
- Add all veggies and sprinkle with salt. Cut into slices or squares, and serve immediately.
Week 1, June 6, 2022: A Tale of Two Summers
What a difference a year can make! I was listening to the radio while working in the field this past Friday and the announcer mentioned that last year on that date, we experienced a record high temperature of 97 degrees. This was followed by about nine days of above 90-degree weather and a pretty extensive drought. I remember this time very well. We waited as long as we could to put transplants into the ground, knowing that they would struggle in the heat, and when we could no longer hold off (seedlings really don’t like being in pots for too long), they really struggled. The potato and cucumber beetles showed up en masse to attack the stressed plants and we spent hours each day watering and rigging up little shade covers to help provide the seedlings with some relief. We definitely had some yield losses last year, and I am not anxious to repeat the summer of 2021 anytime soon.
Contrast that with this summer and so far we are averaging about 20 to 30 degrees below what we were seeing last June. This means that we are still behind with plant growth, but we are getting just the right amounts of rain right when we need it, and it is so much more enjoyable working in this type of weather. Next week things should really take off when daytime temps start to reach into the 80s with nighttime lows in the 60s. Tomatoes LOVE that kind of weather, and I am thrilled because I love tomatoes.
What’s in the Box this Week?
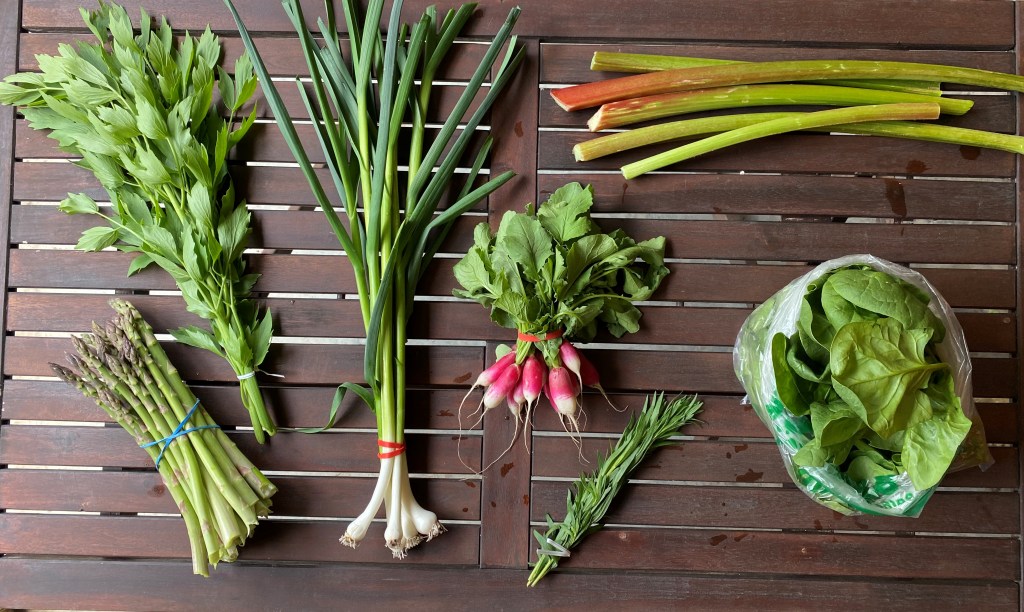
ASPARAGUS – The crop that keeps on giving! Again, the best way to store asparagus is standing up in a glass or jar with all of the ends submerged in an inch or two of water. Loosely cover the asparagus with a plastic bag and keep in the fridge for up to a week.
FRENCH BREAKFAST RADISHES – The variety you’re getting this week is known for its mild, subtly sweet, and peppery flavor. These are often scored with an “X” and dipped in butter as a snack in France and frequently sprinkled with salt and put on top of buttered toast. They are equally good raw in a salad. Store for up to two weeks in a plastic bag in the fridge. Store greens separately, ideally gently wrapped in a damp paper towel. Use the greens as quickly as possible.
GREEN GARLIC – Green garlic is simply an immature garlic bulb with a milder taste than that of fully mature garlic. Store it in the crisper of your fridge and use within five to seven days. For best storage, wrap bulbs (the white part) in a damp paper towel. Just trim the ends and the dark green portion (as you would do with a leek), and use like regular garlic.
LOVAGE – Largely unknown to most gardeners and foodies today, lovage has a long history. The British were introduced to it by the Romans way back when, and early English colonists brought it over to our shores in the 1600s. Lovage has both medicinal and culinary uses and tastes a bit like celery with hints of parsley and anise. It is best stored in a plastic bag in the crisper of your fridge, but can also be frozen for later use. (More on that below.)
RHUBARB – One of our CSA members, Donna, described rhubarb as an “old-fashioned” veggie, and it does remind me of grandmothers and aunts who would make strawberry rhubarb pies or other similar deserts. It is one of the earliest spring crops and can be red or green. Most recipes that use it call for sugar because it can be so tart. To store rhubarb, wrap it loosely in damp paper towel and place it in a plastic bag in the fridge. When you’re ready to use it, remove about an inch from the bottom of the stalk. It is best used within a week. You can also chop and flash freeze rhubarb in freezer bags for future use. I make a delicious strawberry-rhubarb applesauce in the fall using rhubarb I froze this time of year.
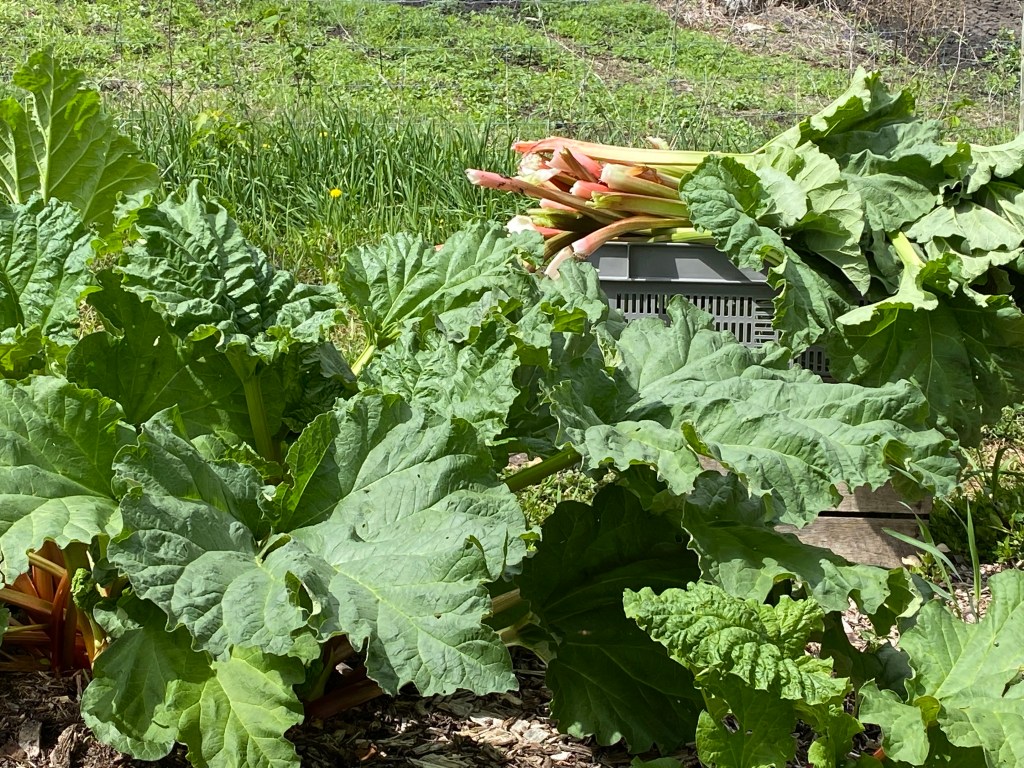
SPINACH – Full-share members will get spinach this week and there’s a good chance that half-share members will, too. If you don’t get it this week, you’ll get it next. Store dry, unwashed spinach in a sealed plastic bag for up to two weeks in the fridge. Right before using, wash the leaves in a basin of lukewarm water and spin dry. Try to use within a week. If it does get limp, you can still use it in cooked dishes.
TARRAGON – This herb is a favorite of French gardeners everywhere who use it in some of their most famous sauces (béarnaise). It has a bit of anise taste and is good for meats like chicken and lamb, as well as seafood and egg dishes. Tarragon is frequently combined with vinegar or lemon to make salad dressings and marinades. The best way to store tarragon is to place it in a jar with a small amount of water and loosely cover in plastic before putting in the fridge, similar to storing asparagus. Tarragon can also be frozen and added to soups and other dishes later on.
NOTE: I have found the best way to freeze herbs like lovage and tarragon is to chop them up in a food processor, add some water, and spread the mixture out in an ice cube tray. For some detailed instructions on how to do this, check out this Gardener’s World article.
Notes from the Field
This week’s field notes will be short and sweet. I spent several days putting more transplants into the ground (eggplants, artichokes, peppers, and tomatoes) and also seeded some more radishes and dill.
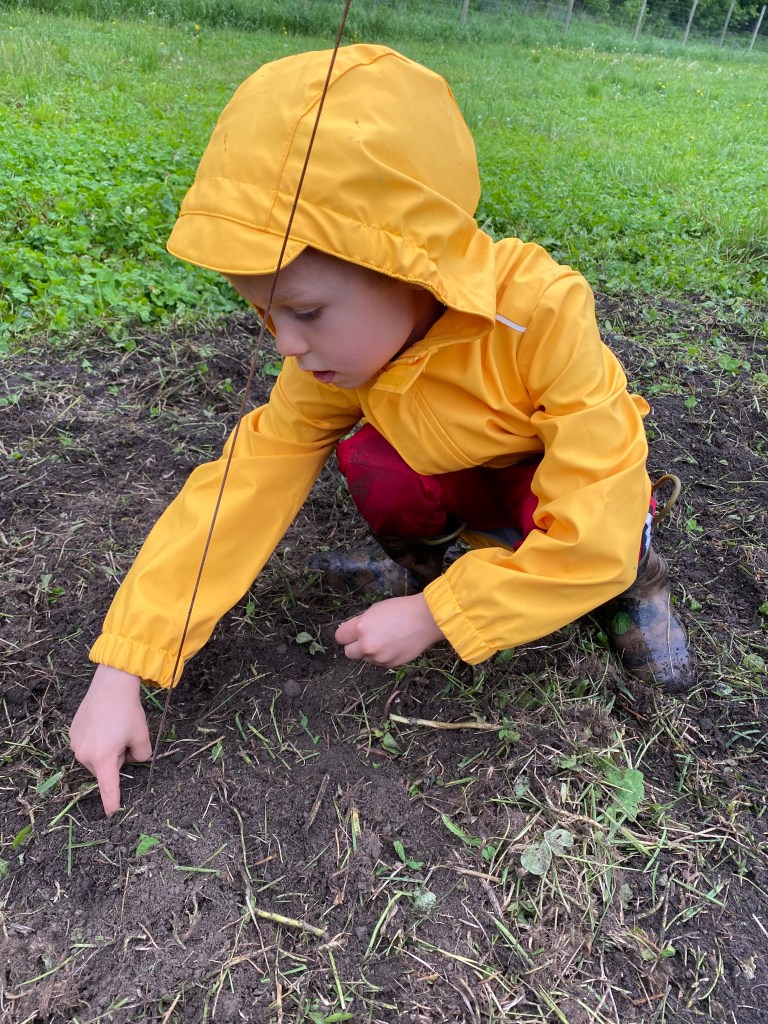
Erik and Luka ventured out into the light rain with me yesterday morning to get some winter squash and pumpkins seeds into the ground so that we could benefit from Mother Nature watering them for us over the course of the afternoon and evening. I am starting to see some flea beetle damage on the eggplants already (flea beetles are CRAZY for eggplant!), and I think the plants are large enough to come through, but I will keep an eye on them each day in case some sort of intervention is needed.
I did manage to get some flower seeds in the ground on Friday. I planted a whole 3′ x 75′ row of orange, yellow, red, and coral zinnias which, when in full bloom later this summer, will attract butterflies and bees and make us happy to look at.

I also planted some marigolds saved from the seed of plants that my dear friend, Jan, had given me several years ago. Jan was the mother-in-law of Erik’s cousin who liked to come and spend a day every week helping out on the farm in its early days. We became close, and it was such a pleasure to spend time talking and learning from her as we worked. Jan passed away due to cancer a few years ago, and I miss her dearly. But every year I grow marigolds saved from the seeds of those she gave to me in her honor. The marigolds also make us very happy to see each year and they help keep Jan alive in our hearts.
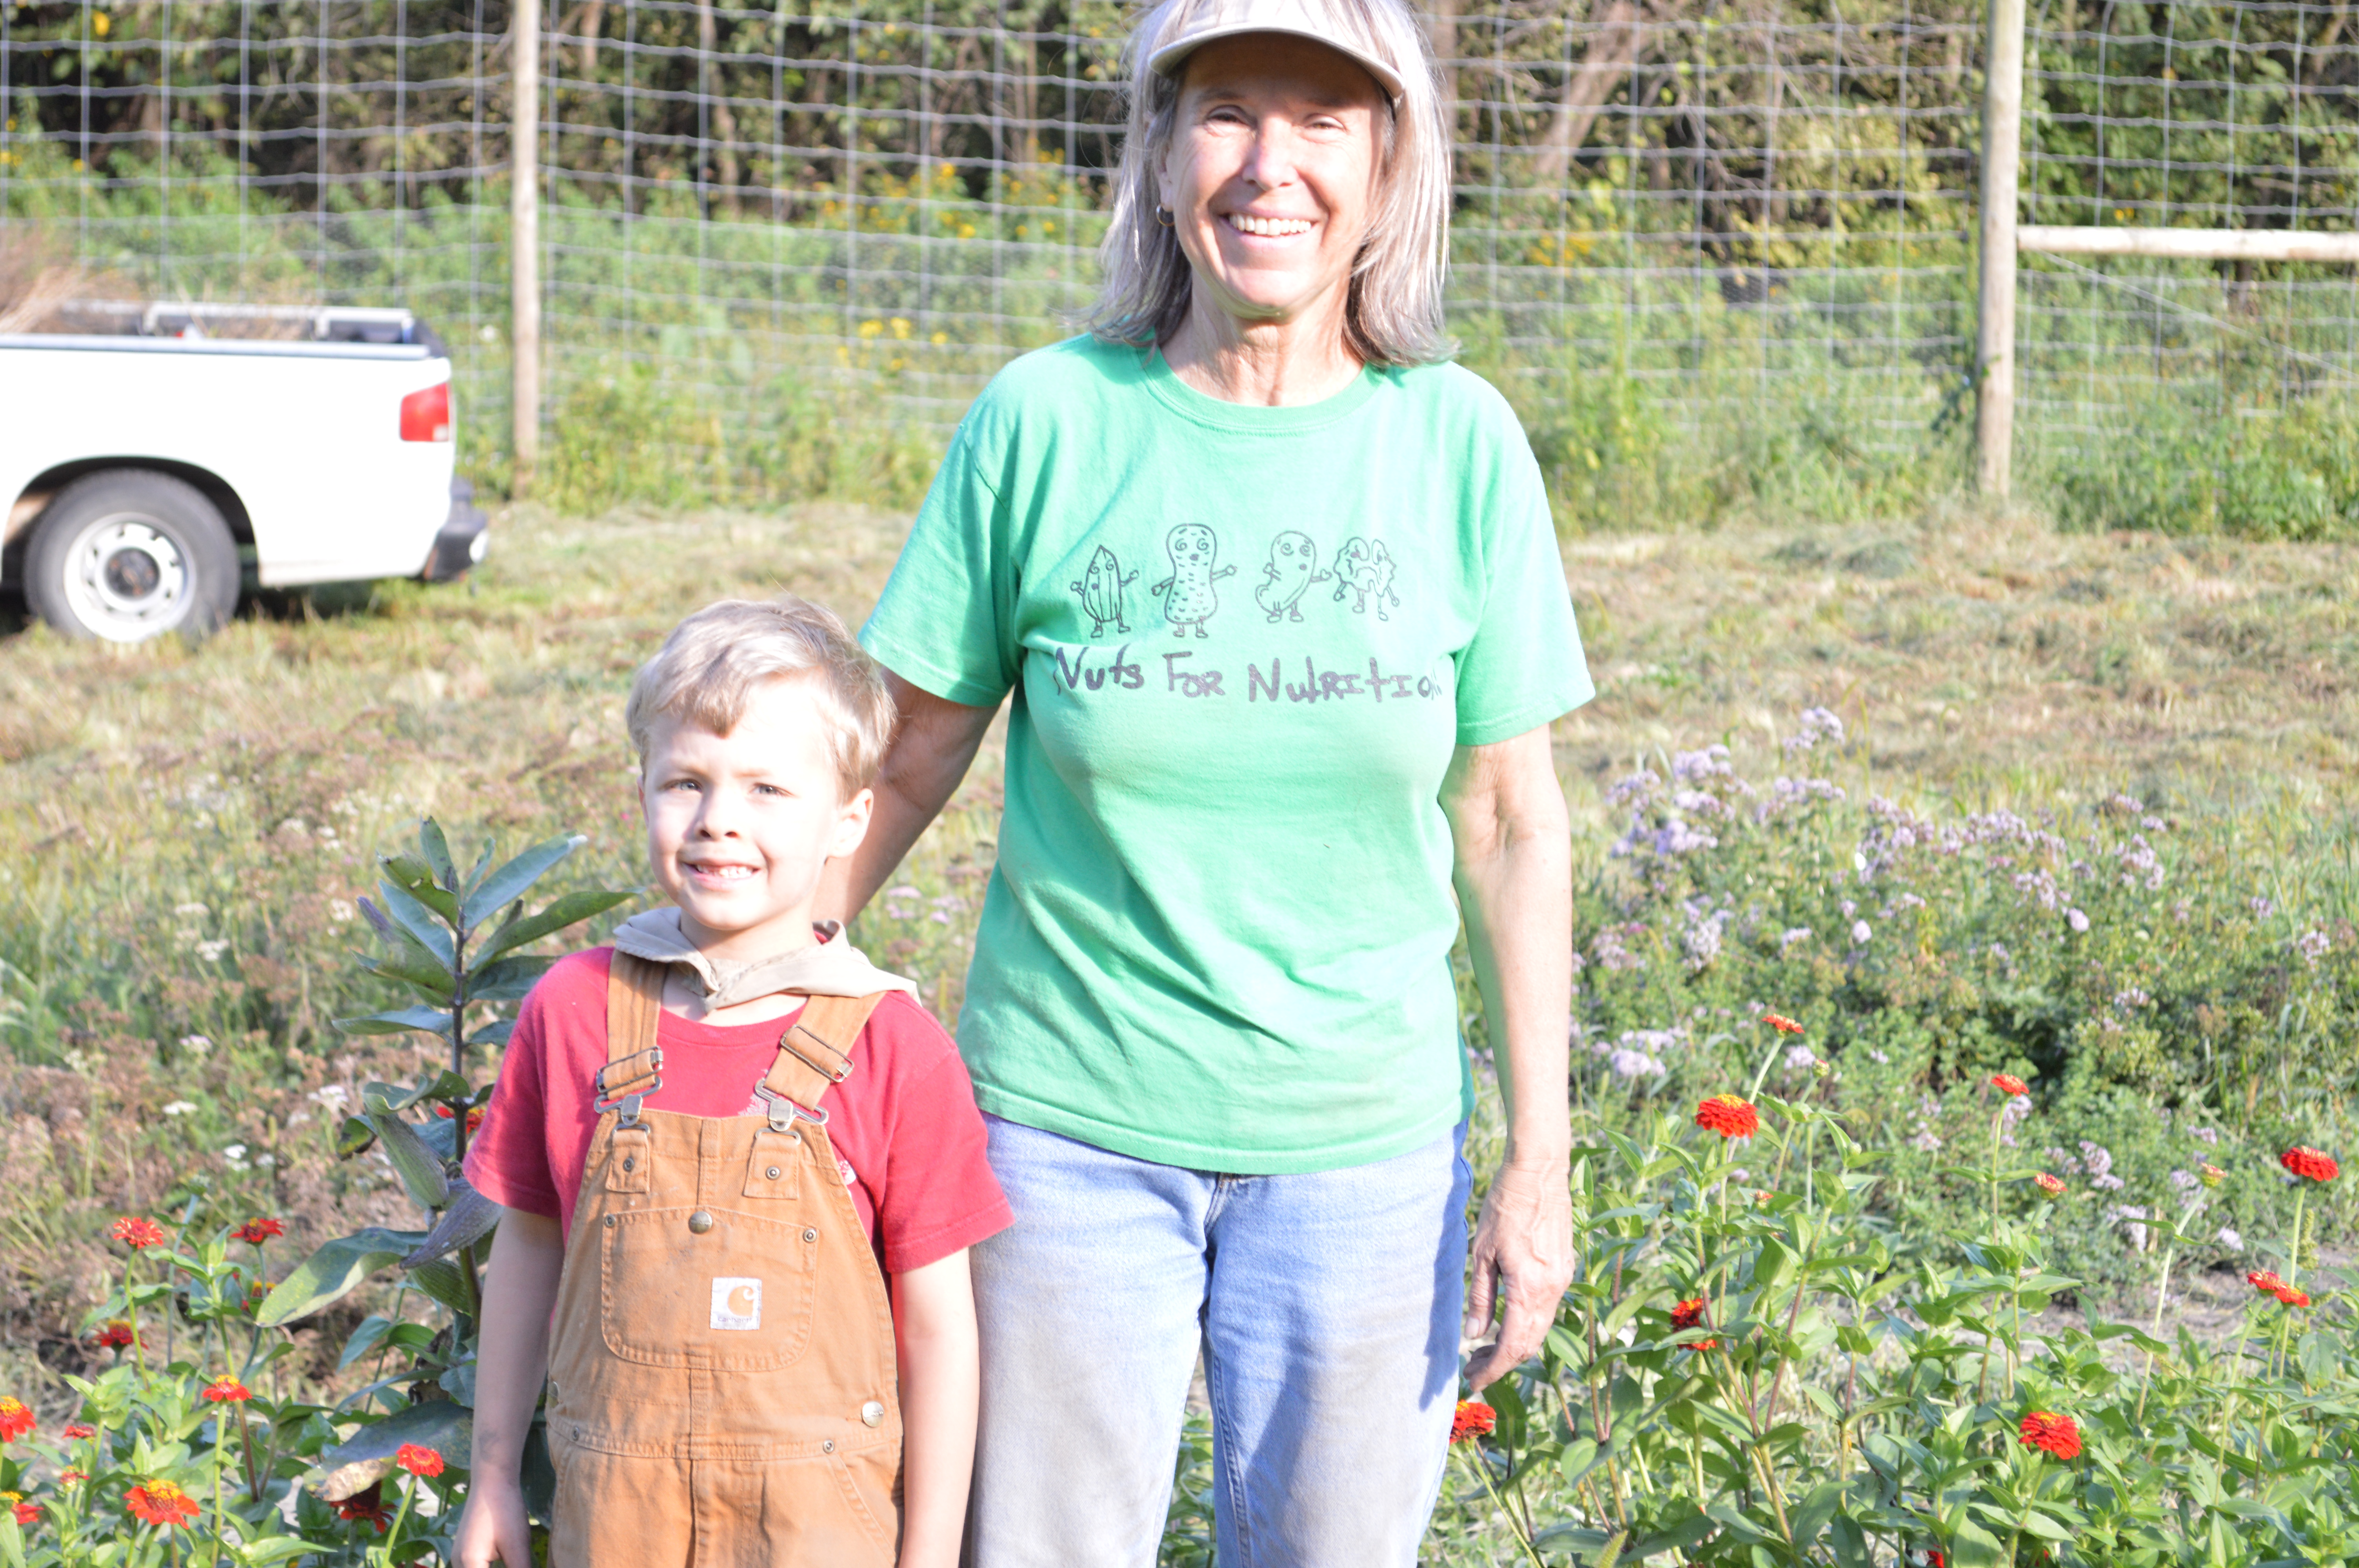
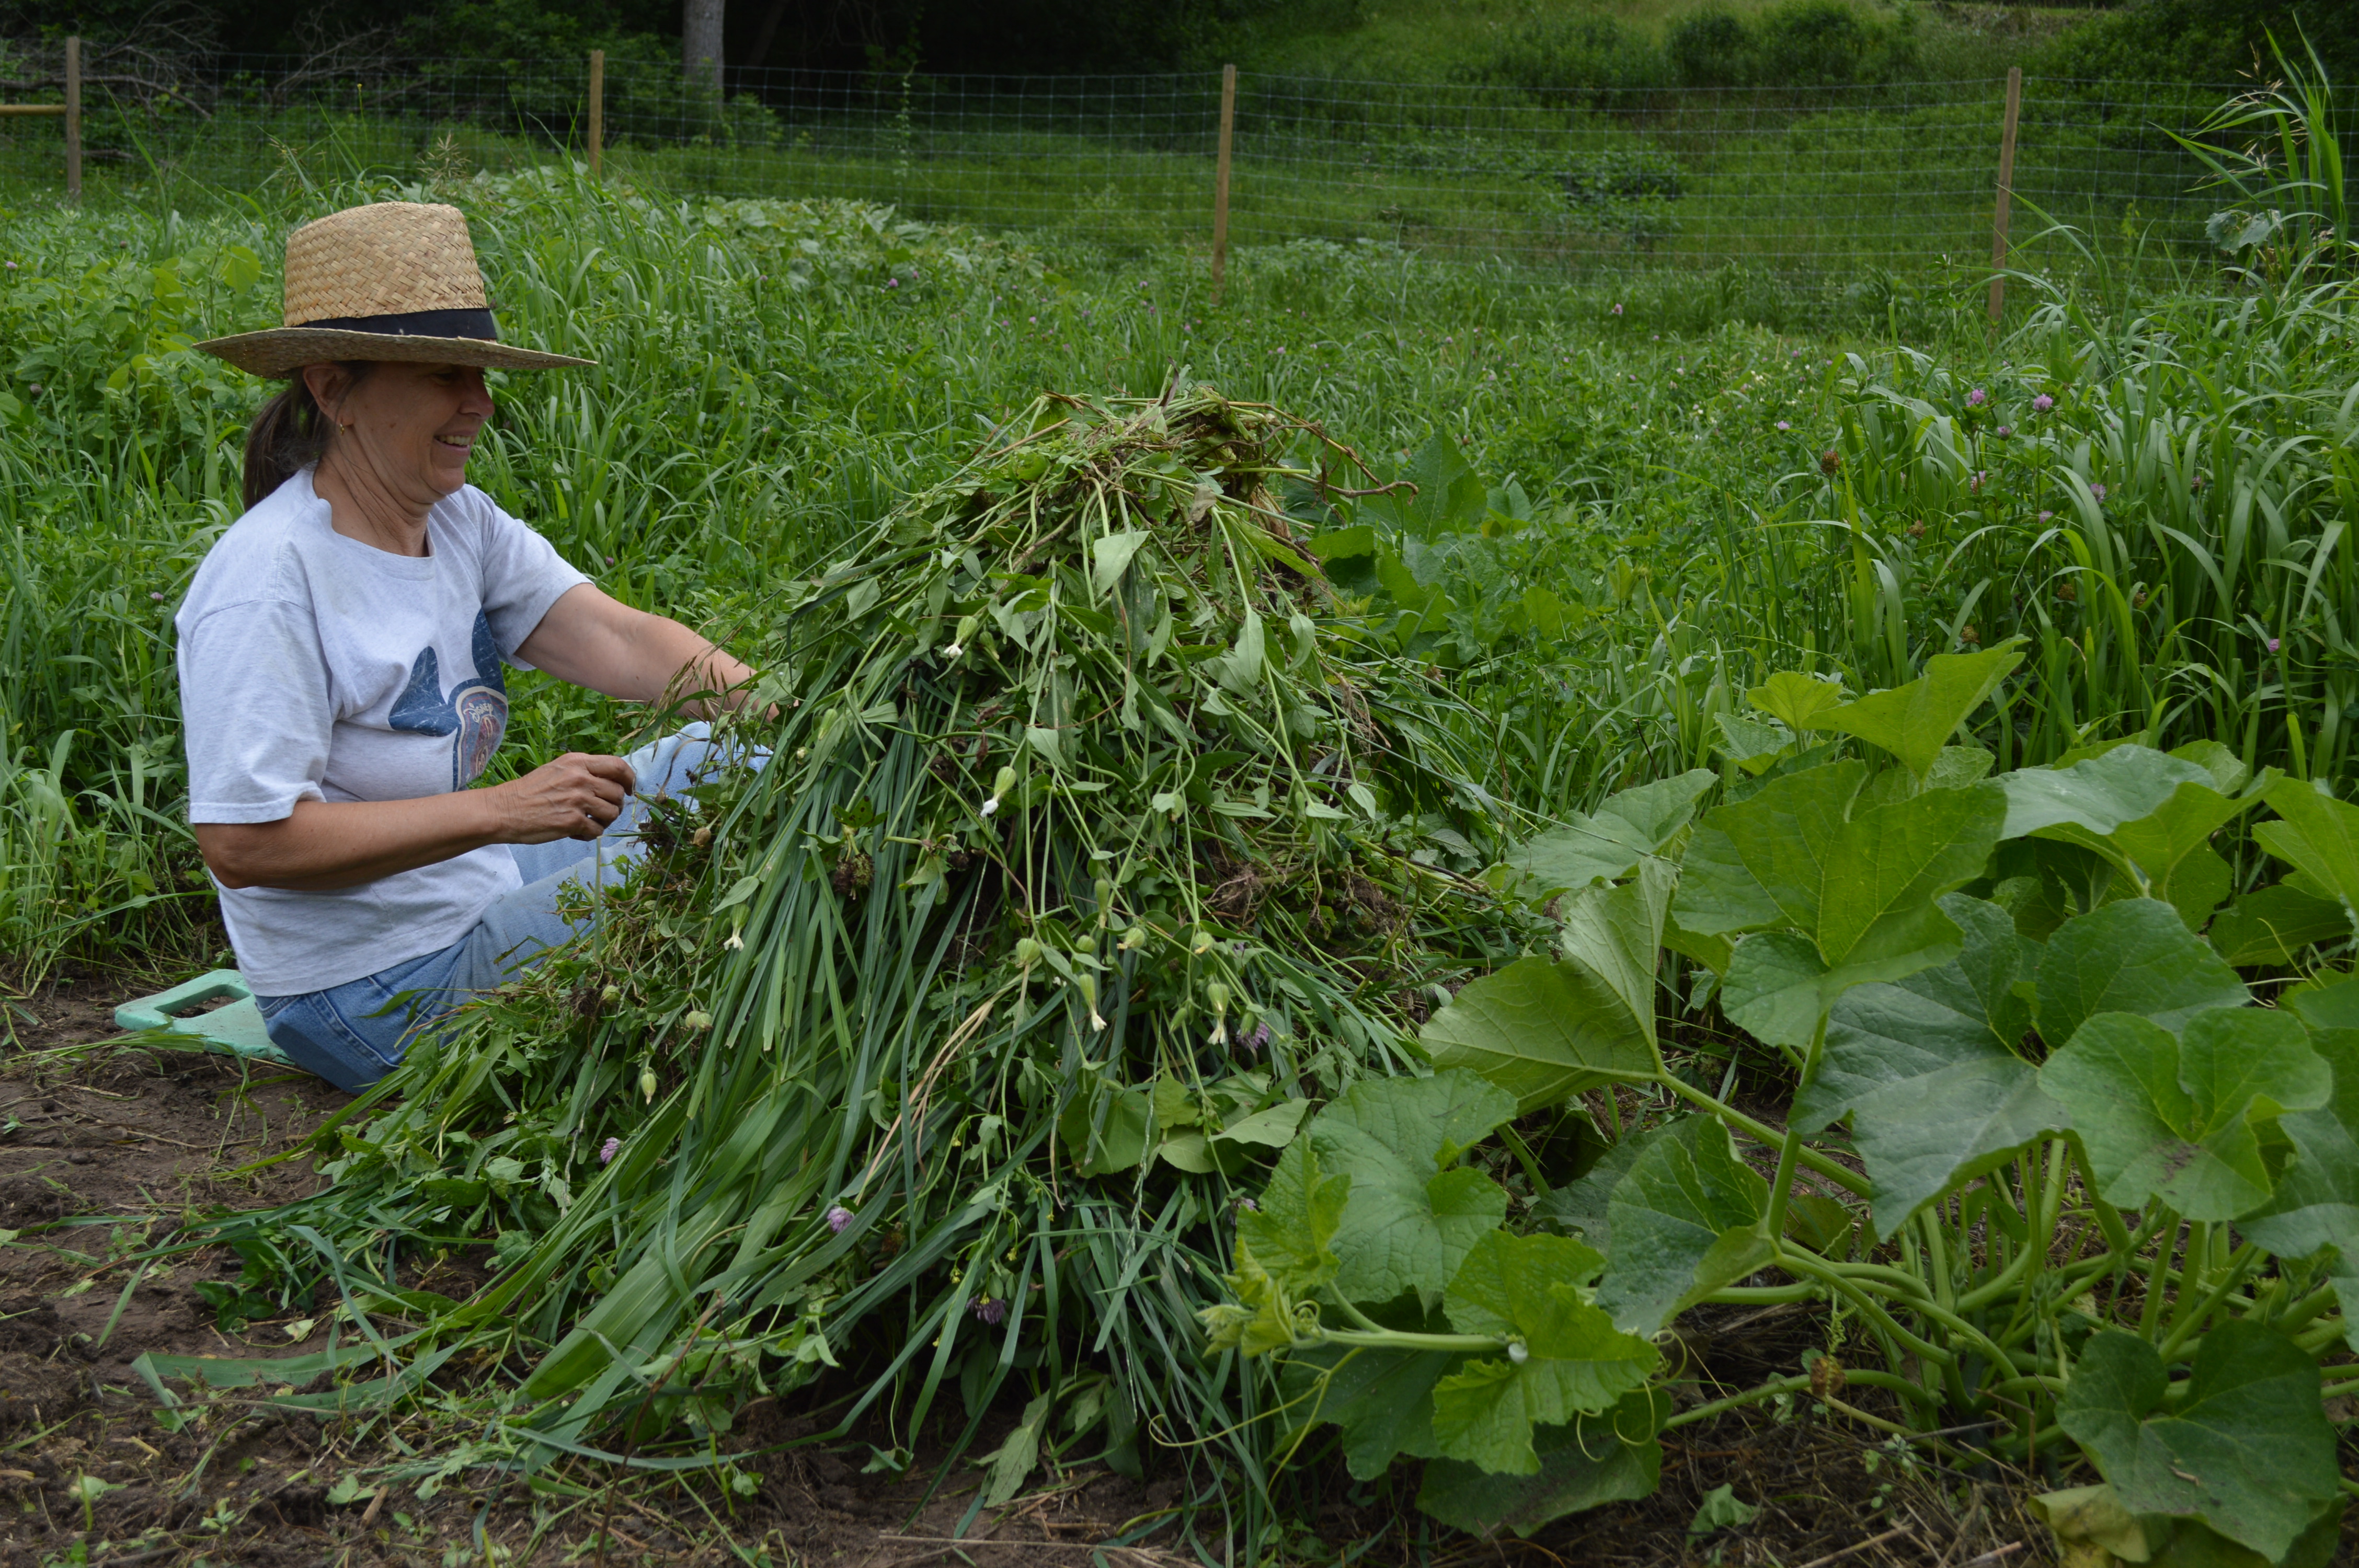

Recipes
I know that typically soup is for fall and winter, but I’m including some soup recipes here since the evenings are still quite cool and these are light soups that are perfect for spring.
Asparagus, Goat Cheese, and Tarragon Tart – I just bought regular puff pastry dough in the frozen section for this, and it was fine. The recipe calls for crème fraiche. If you make this and the asparagus soup below, you could just save a large spoonful of crème fraiche from this recipe for the soup and save yourself some money.
Easy Rhubarb Cake – This recipe comes from Raleigh’s Hilltop Farm, a CSA in Wisconsin:
1 box regular-size yellow cake mix + ingredients on package (eggs, oil, water)
4 cups rhubarb, cut into 1/2-inch pieces
1-1/2 cups sugar
1 cup heavy cream or half-n-half (or whole milk)
- Preheat oven to 375 degrees.
- Mix cake according to the directions on the box.
- Pour into greased 9×12 baking pan.
- Sprinkle rhubarb evenly over cake batter. Then sprinkle sugar evenly over the rhubarb. Pour cream over top of all. DO NOT STIR.
- Bake at 375 degrees for 45 minutes, but check after 30. If it’s browning too much, turn the oven down to 350 degrees.
French Rhubarb Cake – I haven’t tried this recipe myself, but the CSA customer of a friend of mine highly recommends it.
French Salad Dressing with Lovage – This recipe comes from Erik. He made it up after discovering similar salad dressings when we were living in France shortly after we got married.
- Two parts vinegar (high quality white, apple cider or balsamic are all excellent options, classic French uses white wine vinegar).
- One part extra virgin olive oil (the higher quality, the better).
- About 3 tsp. of Dijon mustard per about 3/4 cup of the dressing. You can adjust to your own taste and desired consistency.
- Salt and pepper to taste.
- 1 heaping tablespoon of finely chopped lovage.
- Sugar or honey to taste, if desired.
- Optional: one finely minced garlic clove.
SHAKE WELL to get the full effect of all ingredients as you taste and tweak.
Old-Fashioned Lovage and Potato Soup – We made this last night. I added twice as much veggie stock and milk for a lighter soup and everyone loved it.
You can also use lovage as a substitute for celery in pretty much any dish you’d like. You won’t need nearly as much of it as you would celery since it has a stronger taste. I substitute it for celery in my coleslaw, for instance.
Lovage is equally delicious chopped up and added to your favorite potato salad recipe.
Pan-Roasted Asparagus Soup with Tarragon – Super easy to make. I like to add a little sour cream, crème fraiche, or plain yogurt for a little bit of tang if I happen to have some in the fridge.
Sauteed Spinach – Saute spinach until tender in a large sauté pan with olive oil, a pinch of salt, and garlic or onion. Once the color turns bright green, it’s all done. This generally takes just a matter of minutes.
Shaved Asparagus, Spinach, and Mushroom Quiche
Tarragon Chicken – The easiest chicken recipe I use. Takes about 10 minutes to prepare.
White Bean and Asparagus Salad with Tarragon-Lemon Dressing
May 31, 2022: And We’re Off!
Today marks our very first CSA delivery! I’m not calling this Week 1 since you’re only getting asparagus, but I think that freshly harvested asparagus is a pretty good way to kick off the season. From now on, the format of my newsletters will change a little bit to focus more on what you’re getting each week and will include a recipe or two to give you some ideas about how you might prepare your produce. I’ll also include some storage tips in case you can’t get to cooking your veggies right away and a mention of what’s going on at the farm each week. Let’s get started!
What’s in the Box this Week?
ASPARAGUS – The best way to store asparagus is standing up in a glass or jar with all of the ends submerged in an inch or two of water. Loosely cover the asparagus with a plastic bag and keep in the fridge for up to a week.
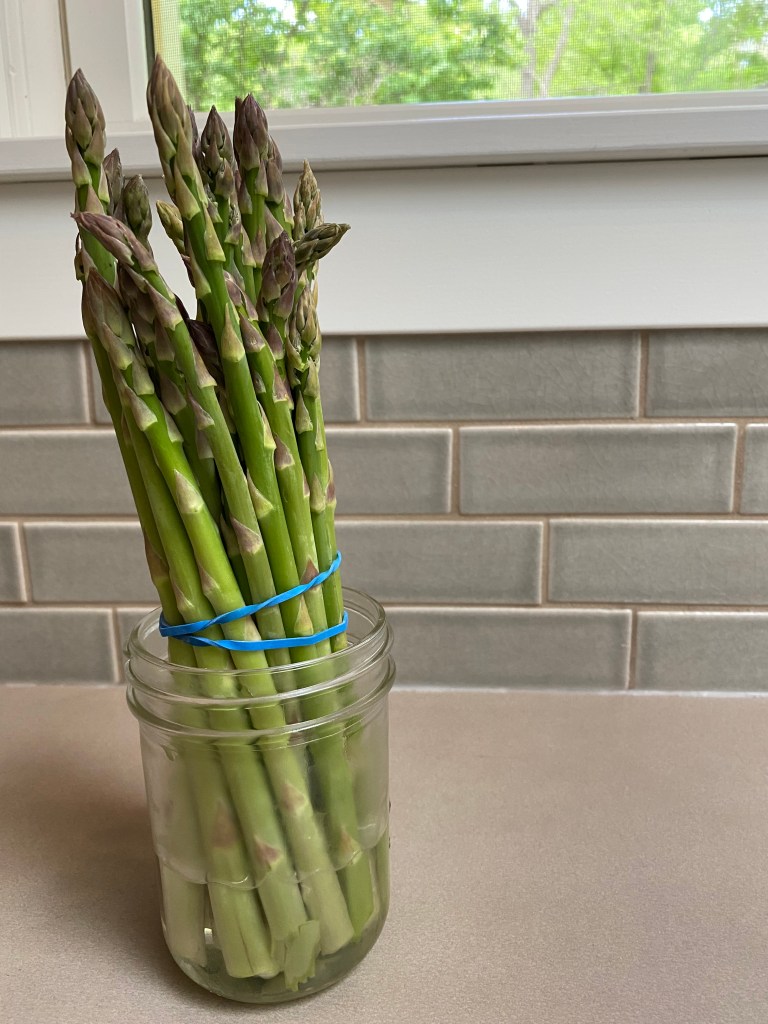
Our asparagus is harvested at its “snapping point” which is the lowest spot on the asparagus spear that is not fibrous and tough, meaning you can eat nearly all of it. However, if you do wait several days to eat it, I might go ahead and cut off the bottom inch before cooking in case it’s gotten a little woody sitting in the fridge.
Fun Fact: Did you know that you can actually watch asparagus grow? Especially on hot days, it can grow up to seven inches each day. Yesterday I harvested in the morning and in the evening, it grew so quickly!
Notes from the Field
The biggest news, of course, is that we have started the CSA on time with your first delivery of asparagus! I really do love asparagus. It is such a hardy, dependable crop. Even if the weather is generally failing to cooperate, I’m still able to count on having something green ready to enjoy this early in the season. The bad news is that, despite having some truly spectacular spring days this past month, the weather has not been all that conducive to growing plants. Between the cold in April, the cool weather last week, and the hot, dry winds of this past weekend, our plants have taken a bit of a beating. Every time something like this happens, it sets them back a little and lengthens their time to maturity and harvest. My best guess right now is that you will have a full share in about two weeks. The good news is that we should have at least a few more items to give you each week in the meantime. This year’s CSA will start off as a trickle rather than a flood!
This week starts summer vacation for the kids. I call them my “assistant farmers” as they often help out in the field. Sometimes this is reluctant help, but usually once we start working together, we have a lot of fun. They pitched in to weed the strawberries and spread some straw mulch this morning and were excited to end their work with a visit to the bluebird house where they discovered that some chicks had hatched!
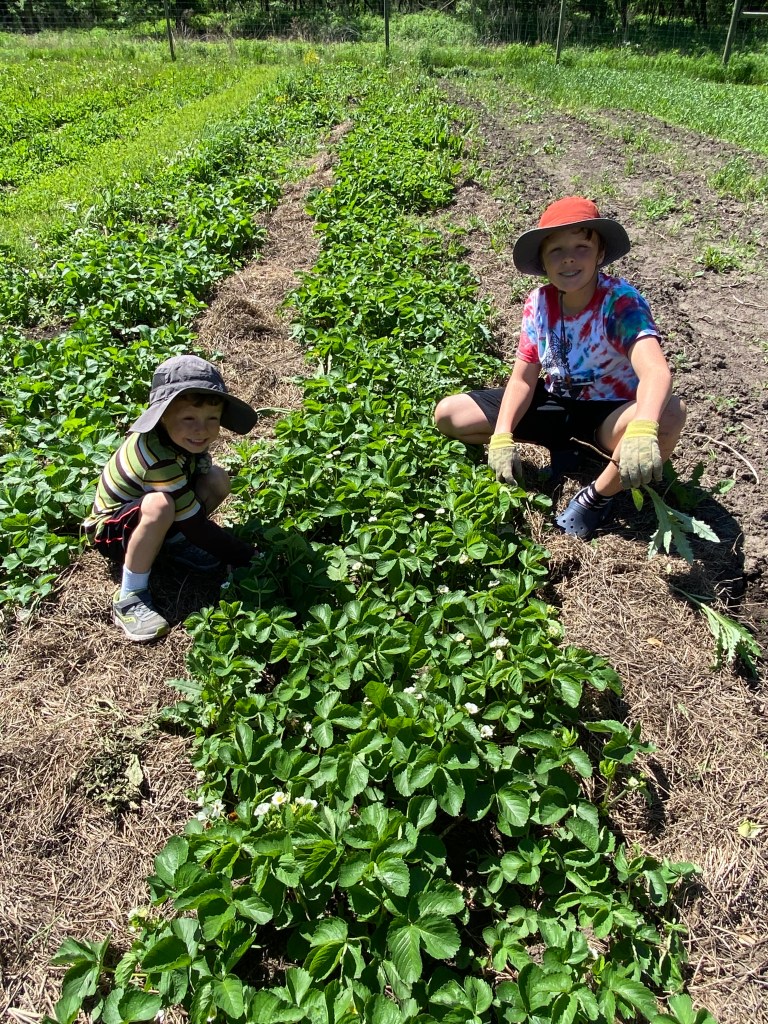
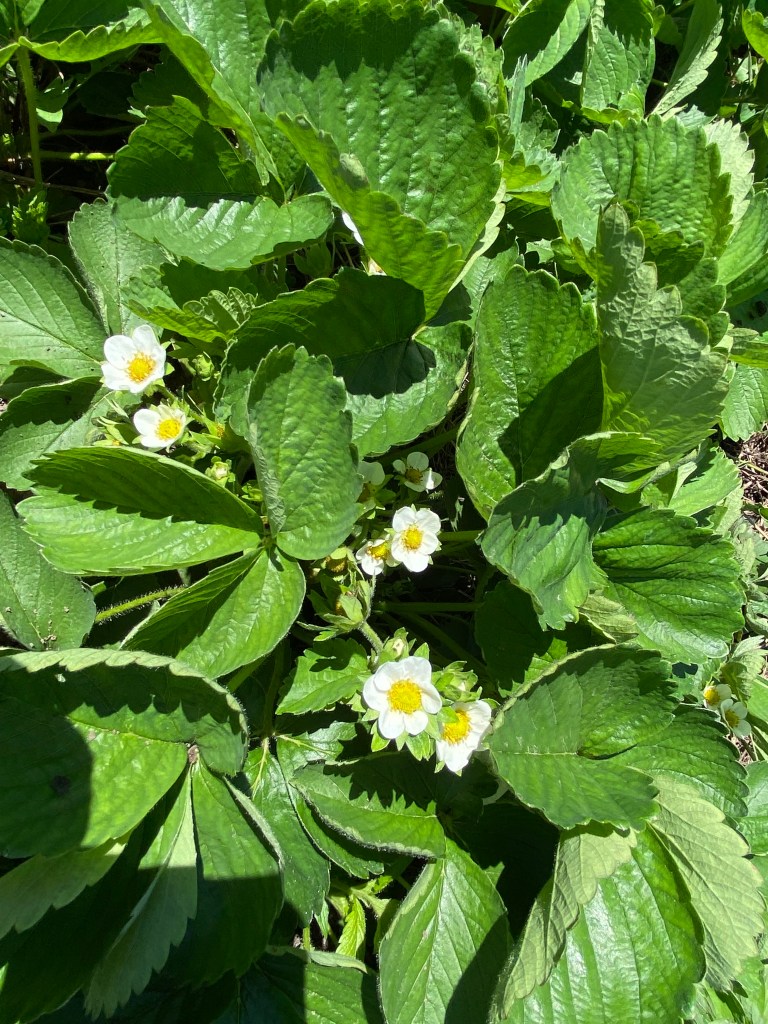
Over the past week we saw a lot of germination in the fields. The parsnips, zucchini, cucumbers, and okra all sprouted, and the strawberries are in full bloom. Erik kindly put up the tomato trellises for me over the weekend, and this week I will transplant out all sorts of veggies: tomatoes, peppers, eggplants, tomatillos, ground cherries, and others. As you may recall, I seeded hundreds of plants back in April. These all germinated wonderfully, but then they all languished and none of them actually grew to a size that would allow them to be planted outdoors. I have started seeds in the same way for years with never any trouble like this. It’s true that they are always a little wimpy because I don’t have a greenhouse to provide them optimal growing conditions, but I’ve never had 100% failure before and my current thinking is that it has something to do with the potting soil. You can imagine how frustrating this situation has been.
Thank goodness for all of you, our CSA members. Because each of you paid for your veggies in advance of receiving them, I was able to take some of that money and purchase transplants from other farmers as it was too late to try and start over. (Thank you Sogn Valley Farm and Pearson Organics; their broccoli seedlings are on the left and mine are on the right). With farming as with so many other endeavors, it really does take a village.
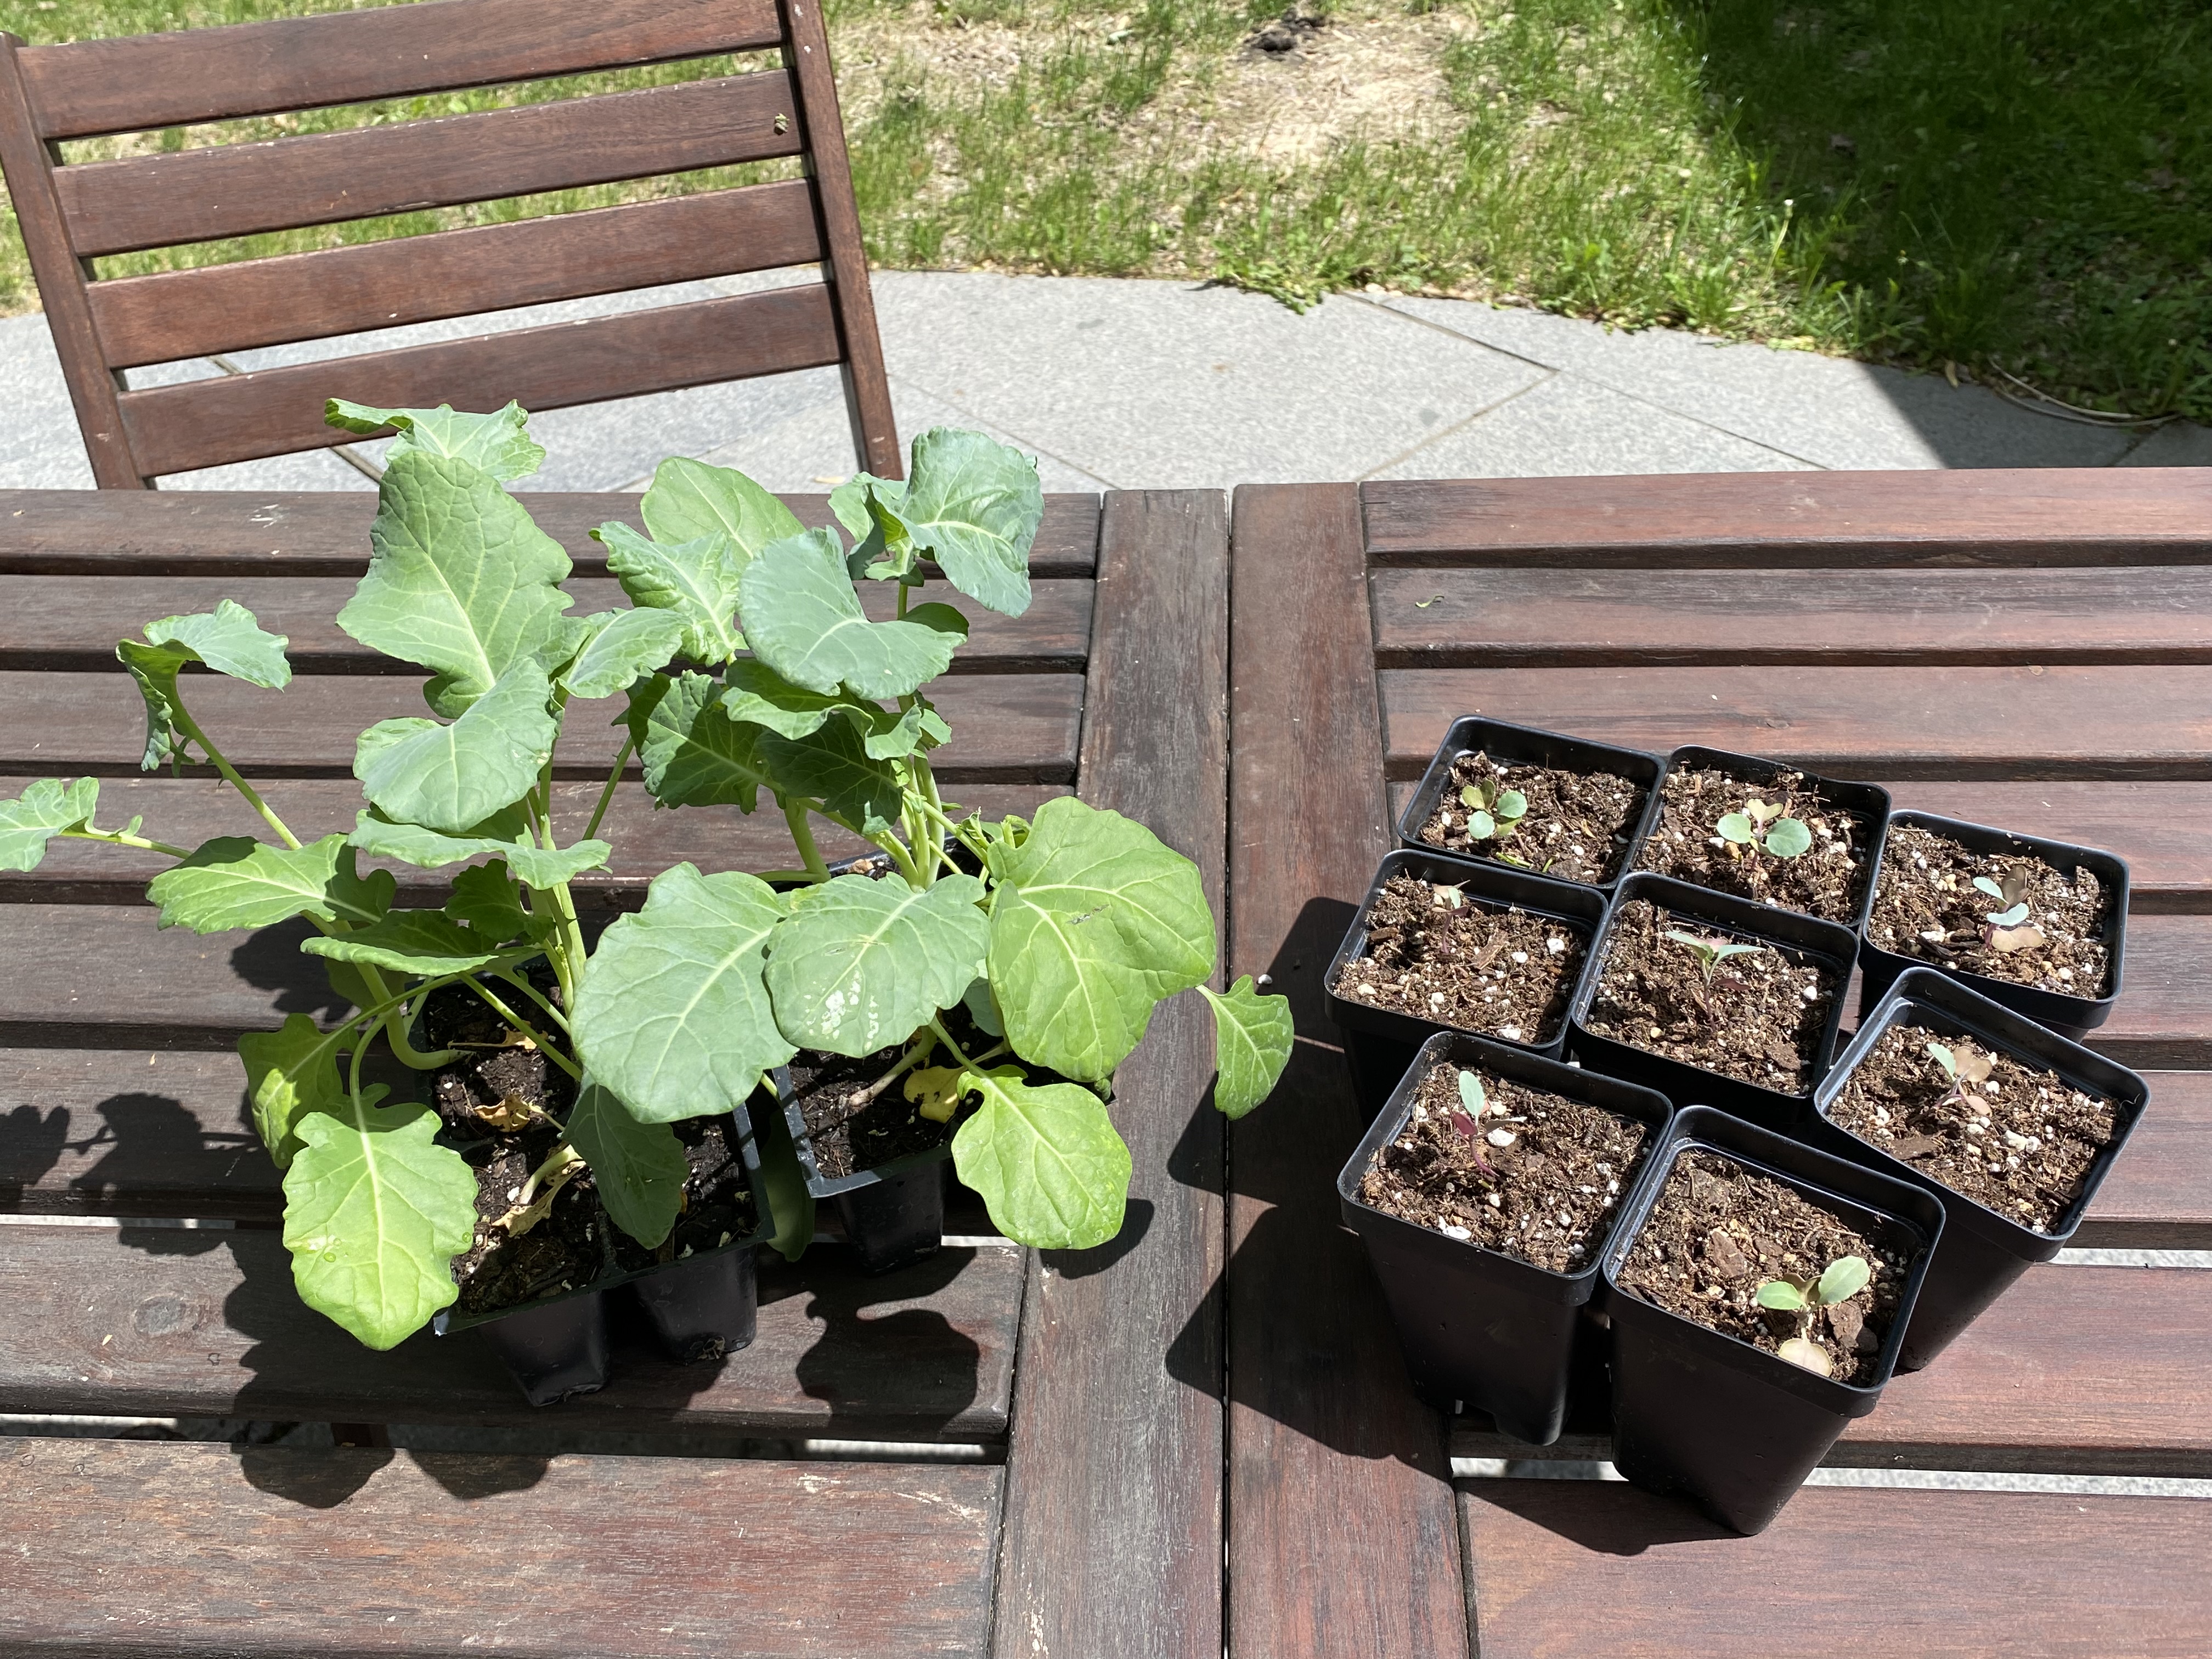
Recipes
Here are a couple of recipes for asparagus that we’ve enjoyed over the years:
- Asparagus Pesto from the New York Times
- Roasted Asparagus with Parmesan from AllRecipes (you can drizzle olive oil on the asparagus if you don’t have olive oil cooking spray. Once you drizzle it on, move the asparagus around until it’s coated in the oil, and voila!)
Of course, you can always just stick in on the grill or under the broiler with a little olive oil, salt, and pepper. Or, if you’re like me and one of my other customers, you can grab it out of the fridge and snack on it fresh throughout the week. However you cook it, enjoy!
May 23, 2022: To Weed or Not to Weed?
This past week I spent a whole bunch of time weeding. In some ways, I rather enjoy this task. I can put on some music or a good podcast or I can just listen to the birdsong. Weeding can also be a bit meditative under the right circumstances. It’s a nice time to let my mind wander, and I often come up with solutions to various problems while doing it.
I used to weed a lot more than I do nowadays. I generally prefer nicely mowed fields with crops growing in neat and tidy tows, so for much of my time farming, the presence of weeds anywhere drove me crazy. I once paid Simon five cents for every dandelion he could dig up in the asparagus patch. Unfortunately, I really underestimated how many were in that field. By the time he finished, I had to fork over $60. You do the math! Yesterday, the kids helped me harvest asparagus and Simon commented, “It doesn’t look like I ever weeded any dandelions at all. You should probably just accept that they are here to stay.”
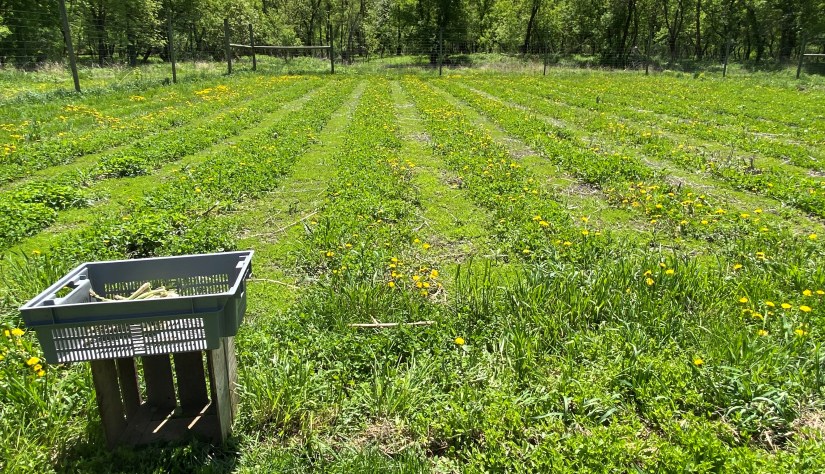
I think that I am starting to agree with Simon. Don’t get me wrong. I am not about to let weeds grow in the veggie plots, but if they are elsewhere in the field, for the most part, I’m okay with it. I’ve started to ask myself, “What is the ecological purpose of these weeds?” and it turns out there are many, a good deal of which help to keep the farm healthy and resilient (which equals delicious, healthy food).
For one thing, weeds assist in maintaining biodiversity on a farm. Different plants perform different functions which, as a whole, keep things in balance. (You never seen a monocrop in nature.) Different plants also attract various types of beneficial organisms and pollinators, and I need their help to grow healthy plants.
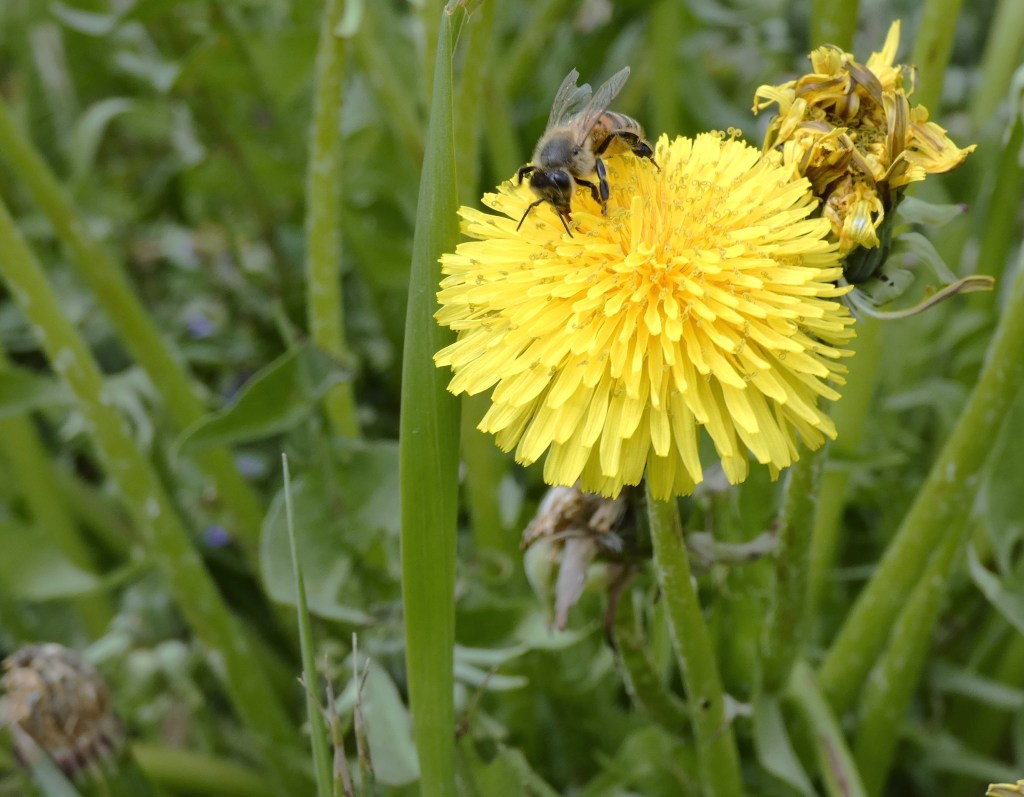
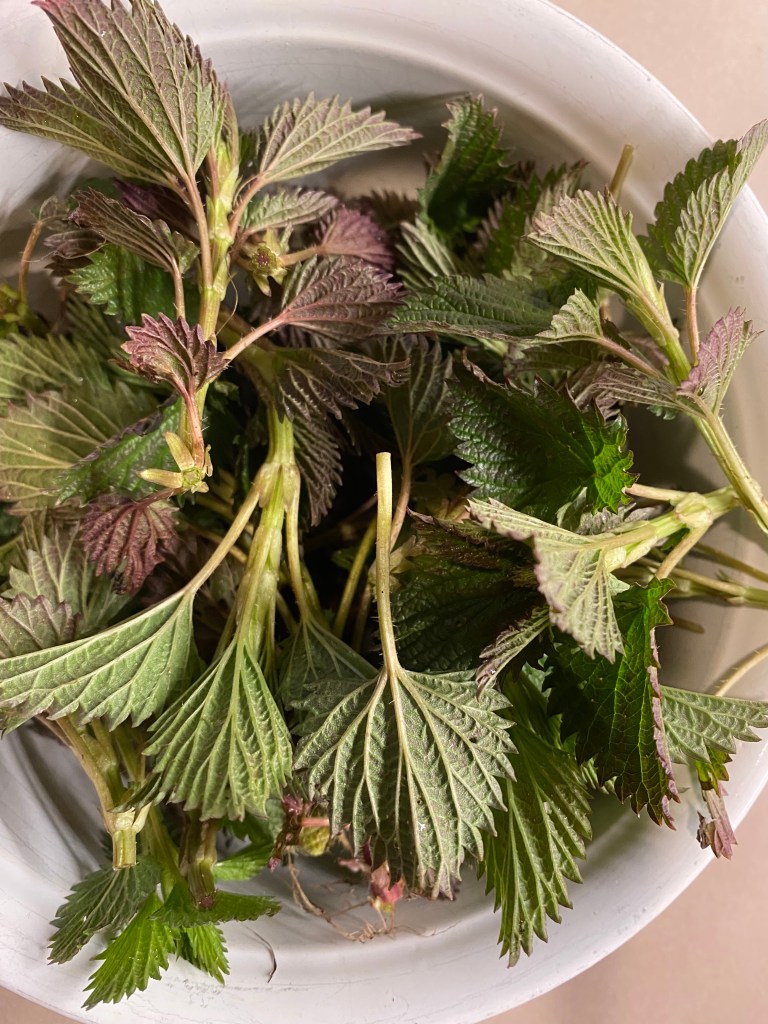
Even those pesky dandelions have a purpose. Dandelions have long tap roots that hold soil in place and they bring up nutrients to the surface for veggies to more easily access. They also loosen hard-packed soil, so that more water and air can get in. We definitely inherited some compacted soil on this farm, and it turns out that, together with good farm management practices, the dandelions can do a pretty good job at helping to return this land to health. Finally, some weeds like purslane, Lamb’s quarter, and stinging nettle (shown here) are very nutritious and good to eat.
Despite my new-found appreciation of weeds, most of our veggie crops have been bred in such a way that they don’t compete too well with other plants. Thus, top of the agenda this week is to weed the newly planted strawberries and the garlic and veggie seedlings that have sprouted. I am also seeding cantaloupe and beans, planting potatoes, and transplanting cabbage, broccoli, kohlrabi, and cauliflower. I will start to harden off some artichokes and tomatoes, gradually increasing the time they spend outside to get them used to varying temperatures and moisture changes before they are planted out in the field for good.
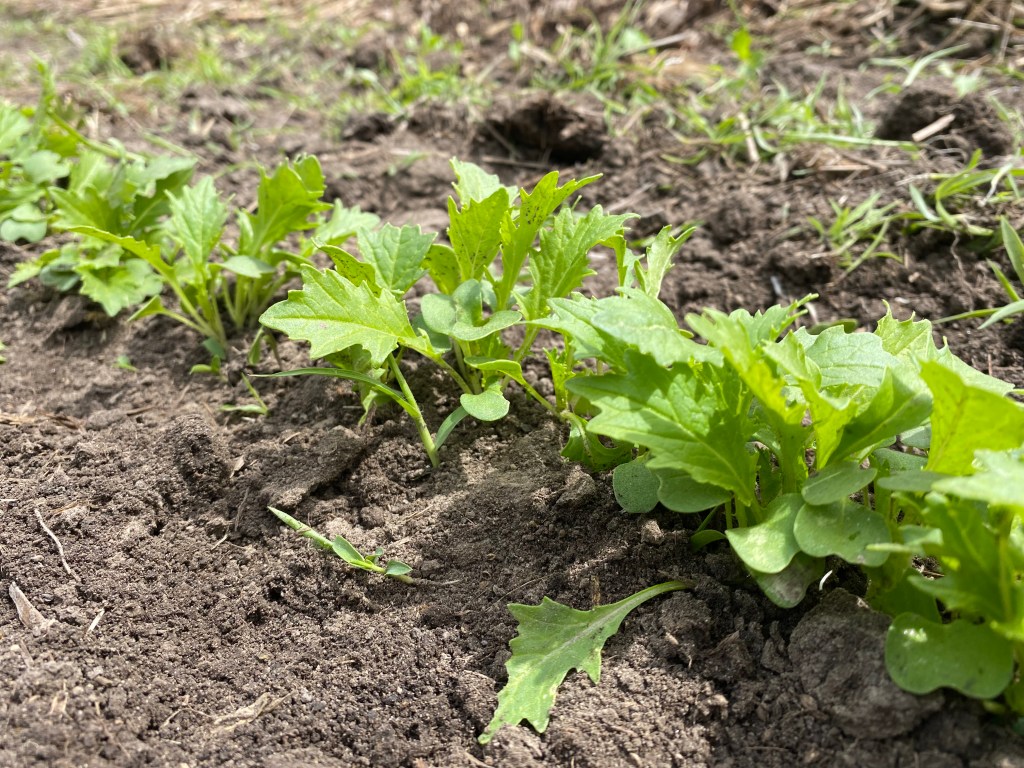

(I am not very good at making straight rows!!)
Next week will be exciting! It will mark our first official week of CSA! We will start off with just asparagus for Week 1 as the other crops aren’t quite ready yet, but I am hoping that we’ll be able to increase the number of items for Week 2. This most recent cold snap has probably set things back yet again, but we will see.
May 16, 2022: The Asparagus is Up!
On our farm, it just isn’t spring until the asparagus starts to grow. This finally happened last week and we are already harvesting many, many pounds worth each day. Asparagus is a long-lived perennial crop. We first planted ours a year after moving here, in 2014. Erik’s Uncle Jerry came for a long weekend and helped us dig thirteen long trenches into which we carefully laid 1,300 asparagus crowns. Like most perennial crops, you can’t harvest newly planted asparagus for two to three years, but, as with the strawberries, it was worth the wait and now we typically celebrate asparagus season with a good week or two of near nightly asparagus-themed meals. Our favorite this past week was a creamy linguine with asparagus, peas, and morel mushrooms which we were thrilled to find yesterday while walking in the woods!
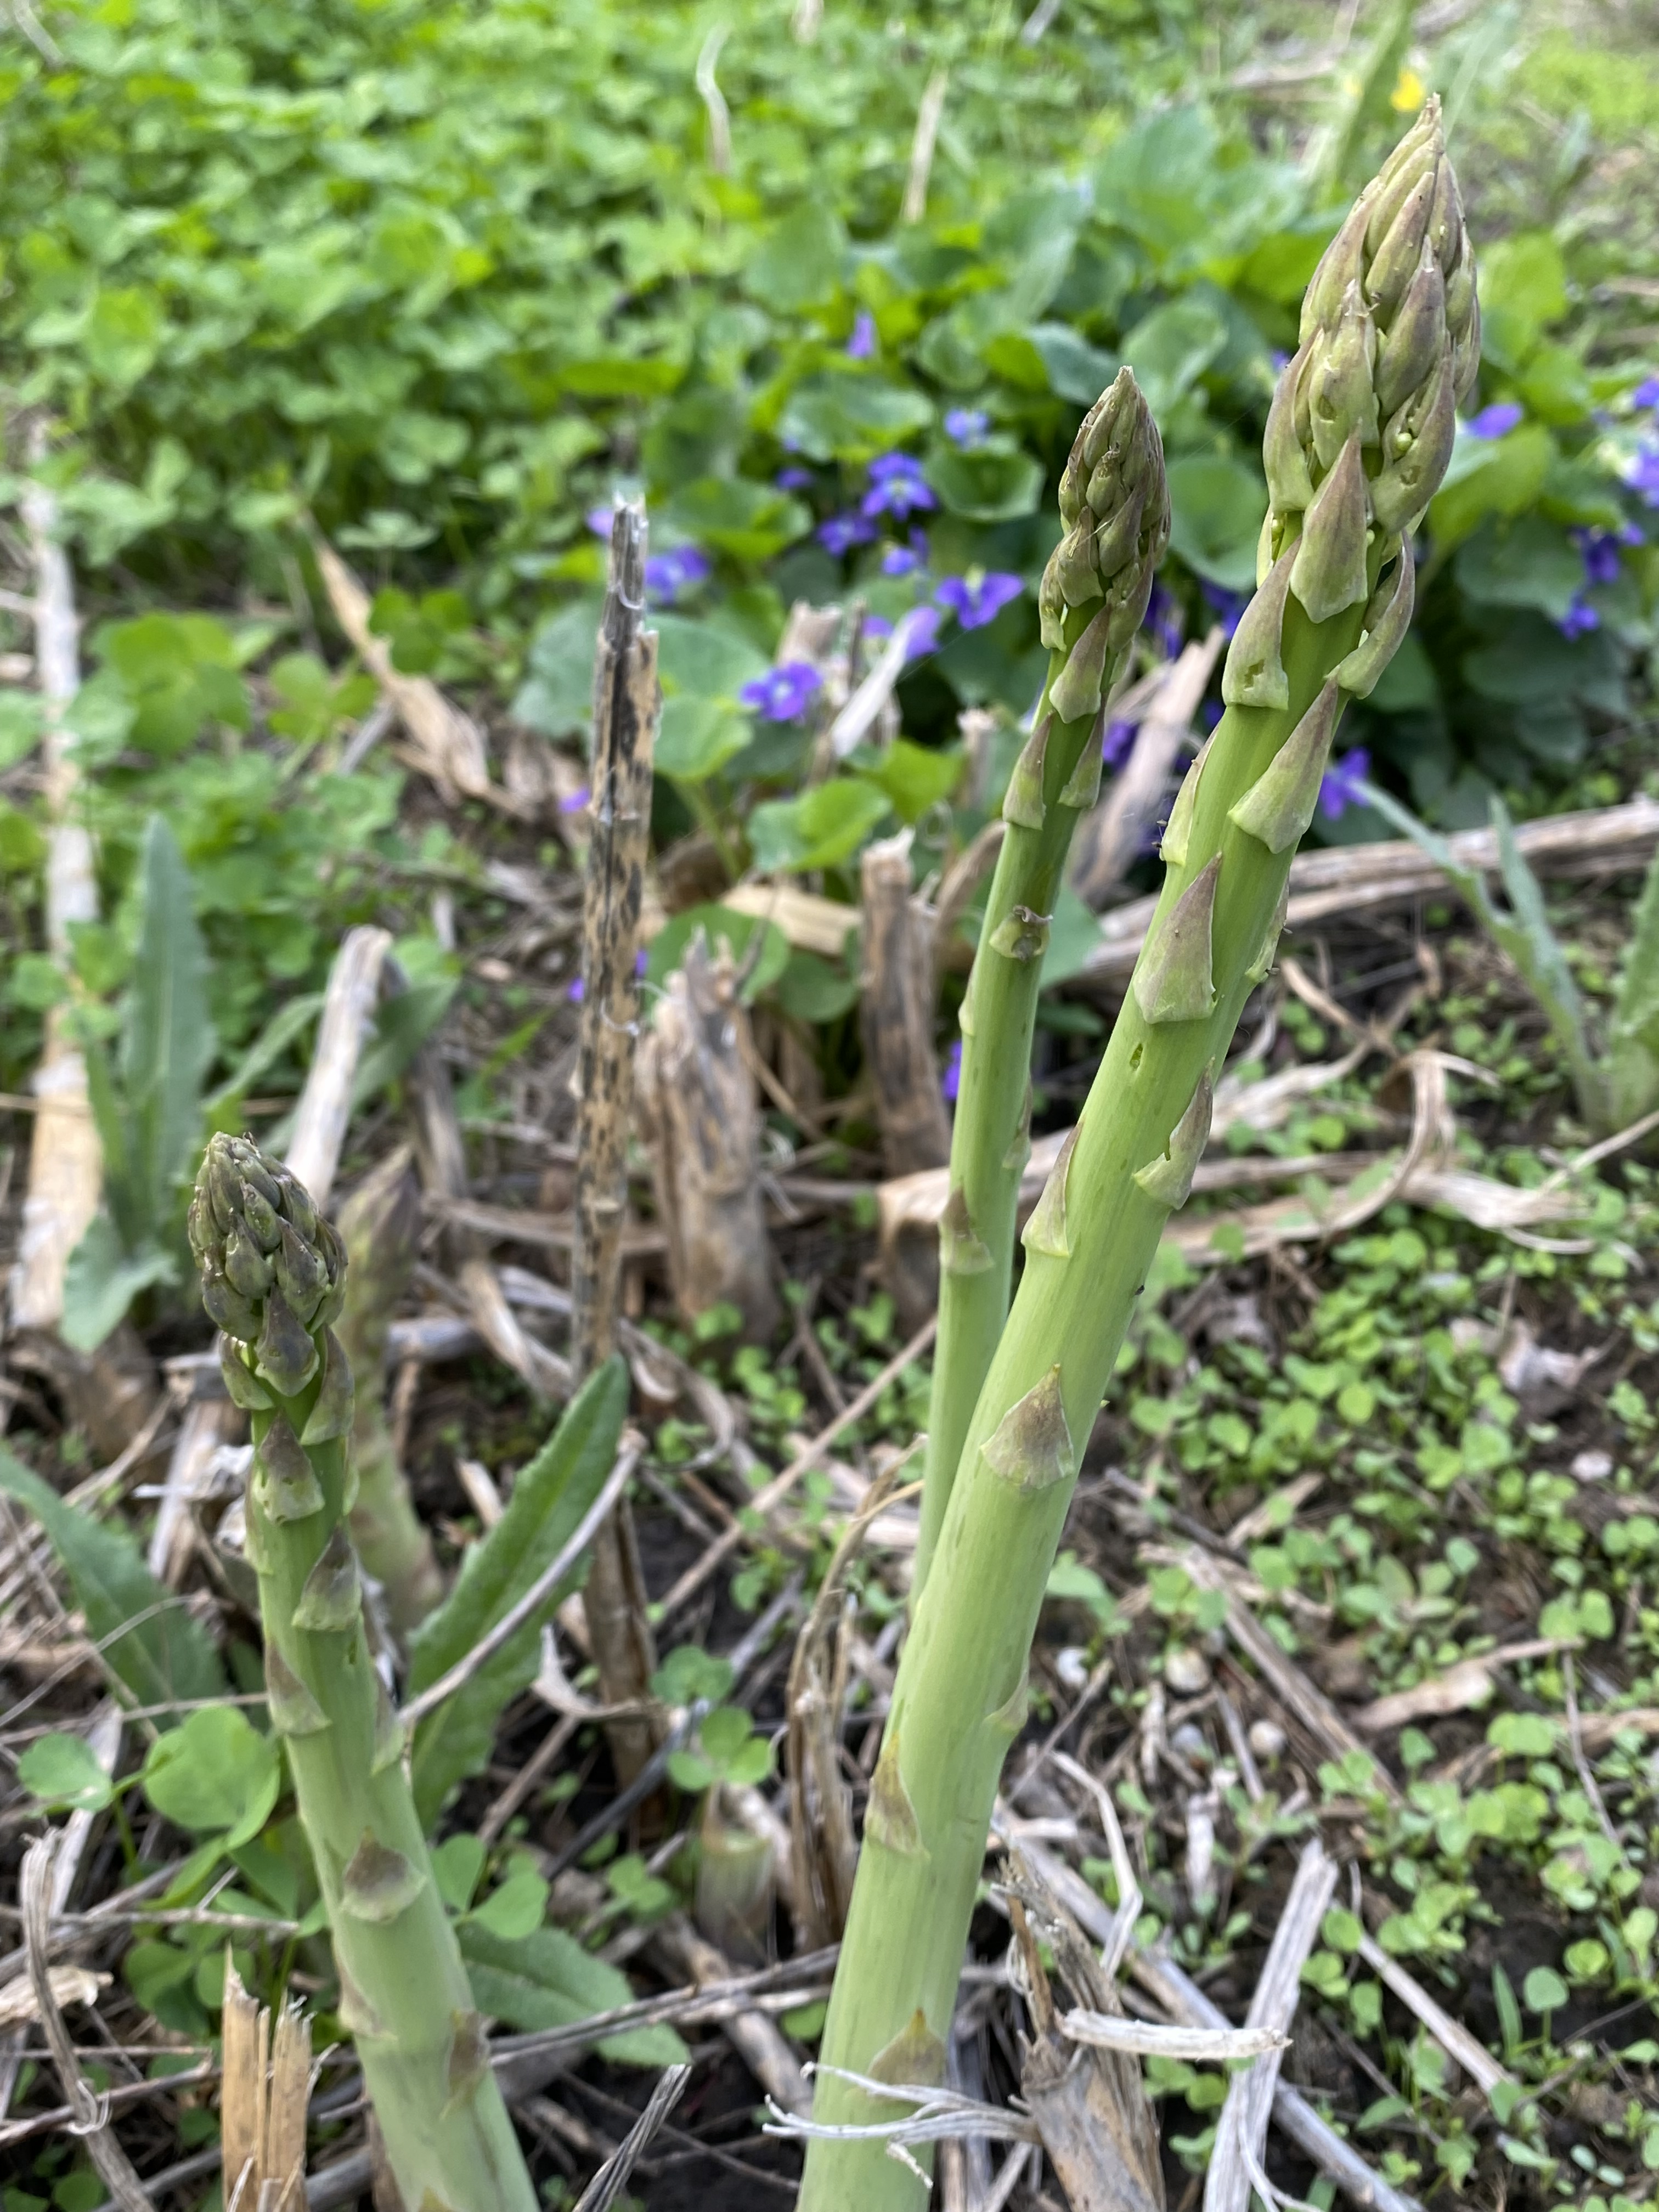

I recently came across this lovely passage about asparagus, written by Marcel Proust in 1913:
“What fascinated me was the asparagus, tinged with ultramarine and rosy pink which ran from their heads, finely stippled in mauve and azure, through a series of imperceptible changes to their white feet, still stained a little by the soil of their garden-bed: a rainbow-loveliness that was not of this world.”
If that doesn’t make you want to eat some asparagus right now, I don’t know what will! (It kind of also makes me want to paint a picture of it…)
Other than the asparagus, things are now progressing just as I hoped they would. The arugula, beets, lettuce, spinach, Swiss chard, and mizuna have all spouted in the field. I always hold my breath a little until I see things start to come up, and then I feel relieved and grateful, remembering that nature generally has these things all worked out if I just follow some basic directions.

Besides encouraging the veggies to grow, the warm weather and rains made the cover crops (and weeds!) in our field grow so tall so quickly that Erik had to haul out the mower, lest we start to loose tools in the jungle down there.
This week, I will be transplanting some onion starts, planting the new strawberries and rhubarb, fertilizing and weeding the garlic, and seeding a whole bunch of other crops. This is about the most perfect spring weather a farmer could ask for and I will be enjoying it to the fullest.
May 6, 2022: The Sun is (Finally!) Shining
Two weeks have passed since my last newsletter, and I have to confess that not a whole lot has happened on the farm since then. The soil temperature has stubbornly stayed around 60 to 65 degrees for weeks on end which means that many of the seeds that were supposed to already be planted out are still tucked up warm and cozy inside of their seed packets. Still, I did manage to get a few crops into the ground last week: beets and lettuce were seeded as well as arugula which can germinate at just 40 degrees!
The garlic has been growing very well since we took off the row cover and put up the electric deer fence two weekends ago. It is amazing to see how resilient plants are: the garlic seems to have recovered just fine from the earlier deer grazing and is now growing strong and tall.
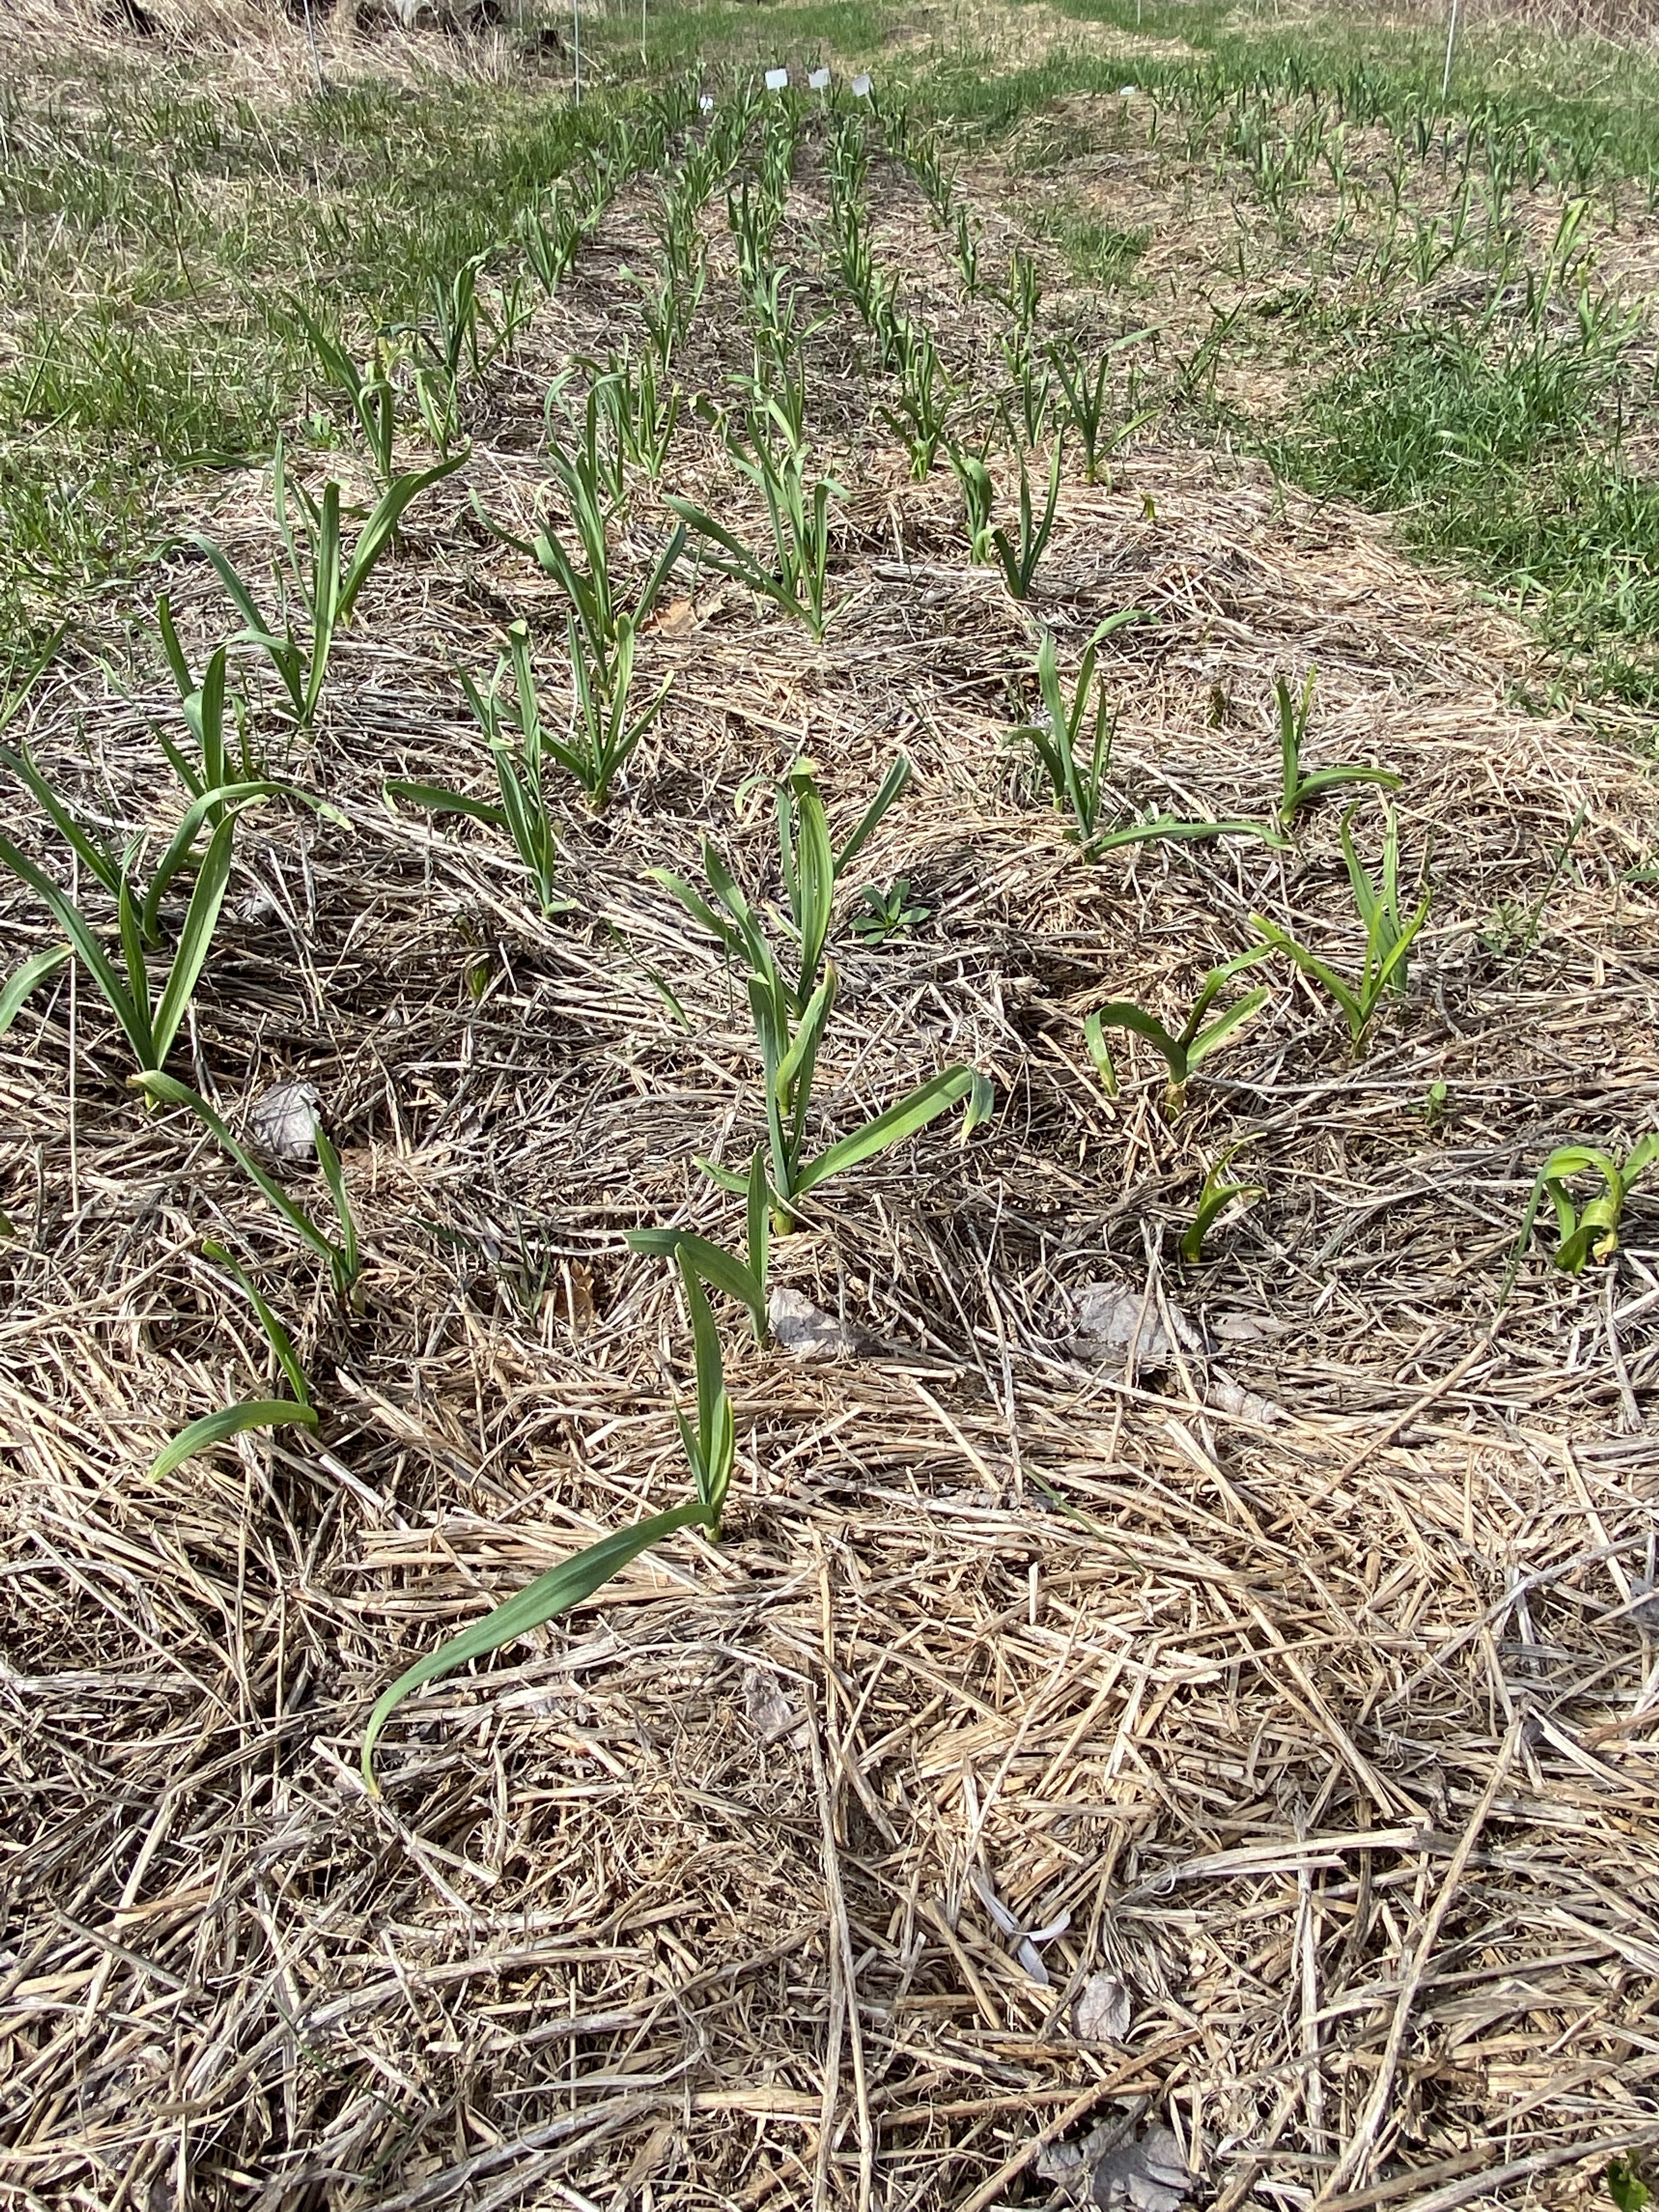
Yesterday I raked the straw mulch off of the strawberries. Typically I wait until we’ve had about a week of 40 degree overnight temperatures to do this and normally this occurs around the third week of April. Doing it this late means that we might not be able to harvest strawberries until July this year. I haven’t farmed during a spring like this before, so it will be interesting to see how quickly the plants can catch up. Next week, I have 200 more strawberry plants arriving to be planted.
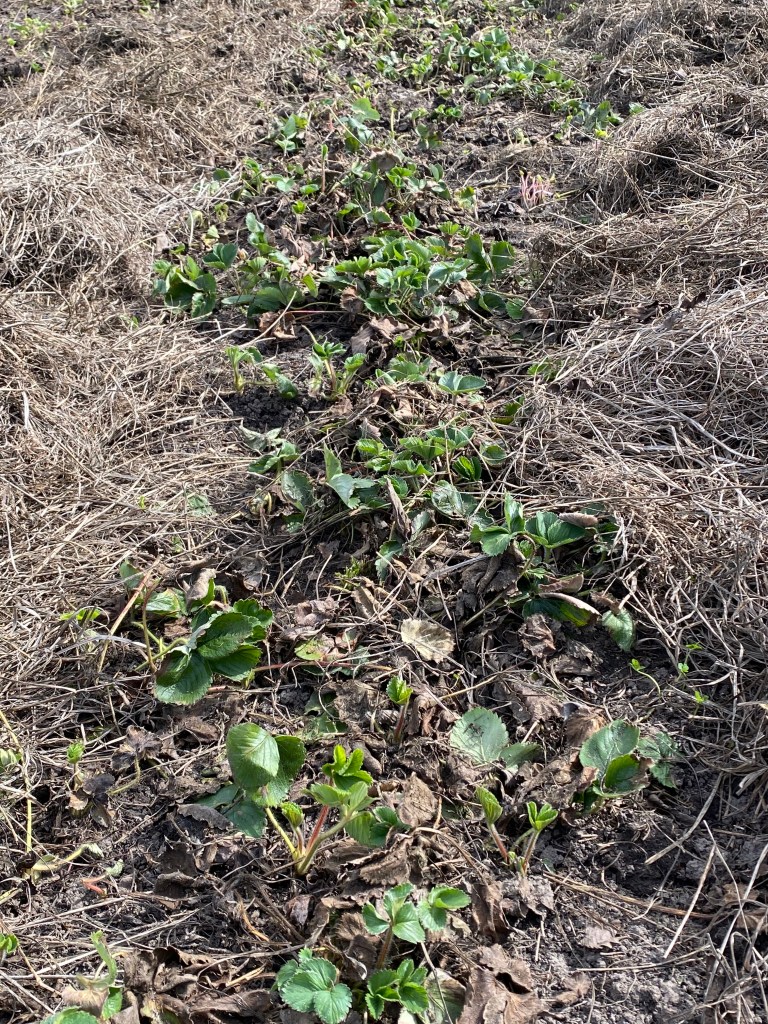
Strawberries are perennials and so for the first year after planting, I can’t harvest any berries. In fact, I actually have to pick off any flowers that show up because I want the plants to put their energy into growing nice, strong roots rather than into reproducing (a berry is, after all, one way a plant can spread its seeds around to make baby strawberries). Those strong roots will ensure that the plants are healthy, providing us with many big, delicious strawberries for years to come. Believe me, it is worth the wait!
One thing that had me very excited while I was down in the strawberry field was seeing an Eastern bluebird sitting on the bluebird house we always put down in the field for them. Every year, we have a couple of bluebirds build a nest and hatch out one or two clutches of baby birds. The kids and I enjoy checking on the nest and hatchlings as the summer goes on, and I enjoy having the birds to keep me company while I’m working in the field. Eastern blue birds are insectivores, and I like to think that they are helping us out by eating some of the insect pests that would otherwise eat our crops. In 2021, hundreds of thousands of bluebirds died in a freak February storm down south, where they spend their winters, and no bluebirds found their way to our farm last year. We really missed having them around and I am thrilled to welcome them back.

This upcoming week I should be able to get many more seeds into the ground, especially if we continue to get some sunshine to warm the soil. I may also be able to start transplanting out some of the seedlings that were started inside. Right now, I think that we may be a week or two behind from when I hoped to get you your first CSA box, but we’ll see. Nature has a way of surprising me!
April 2022: Will Spring Ever Arrive?
If there is one thing that working outside on the farm has taught me over the years, it’s how very little control I have over things. This spring is a case in point. Mother Nature seems determined to hold on to cold, gray, wintery days for as long as she can. In a way this isn’t so bad; I’ve been able to get a lot of indoor projects crossed off my list, but I need to stick some seeds in the ground next week and so I am really, really hoping that temperatures start to warm up soon. This is not only because it’s more pleasant to work outside when it’s sunny and warm, but also because I want to make sure you have your first CSA box ready on time.
The good news is that I have hundreds of little seedlings under grow lights inside a warm, cozy house right now and as soon as outdoor temperatures rise, they’ll be transplanted into the field where they will really take off. Many veggies do best if they are started as seeds indoors rather than direct seeded into the ground. This gives varieties that take a long time to mature a head start in places like Minnesota where our growing season is short. So far, I’ve started tomatoes, cabbage, broccoli, Bok choy, lettuce, eggplants, cilantro, and leeks, among others. Look at these beautiful little artichokes and peppers. In just a few months, you’ll be eating veggies from these!
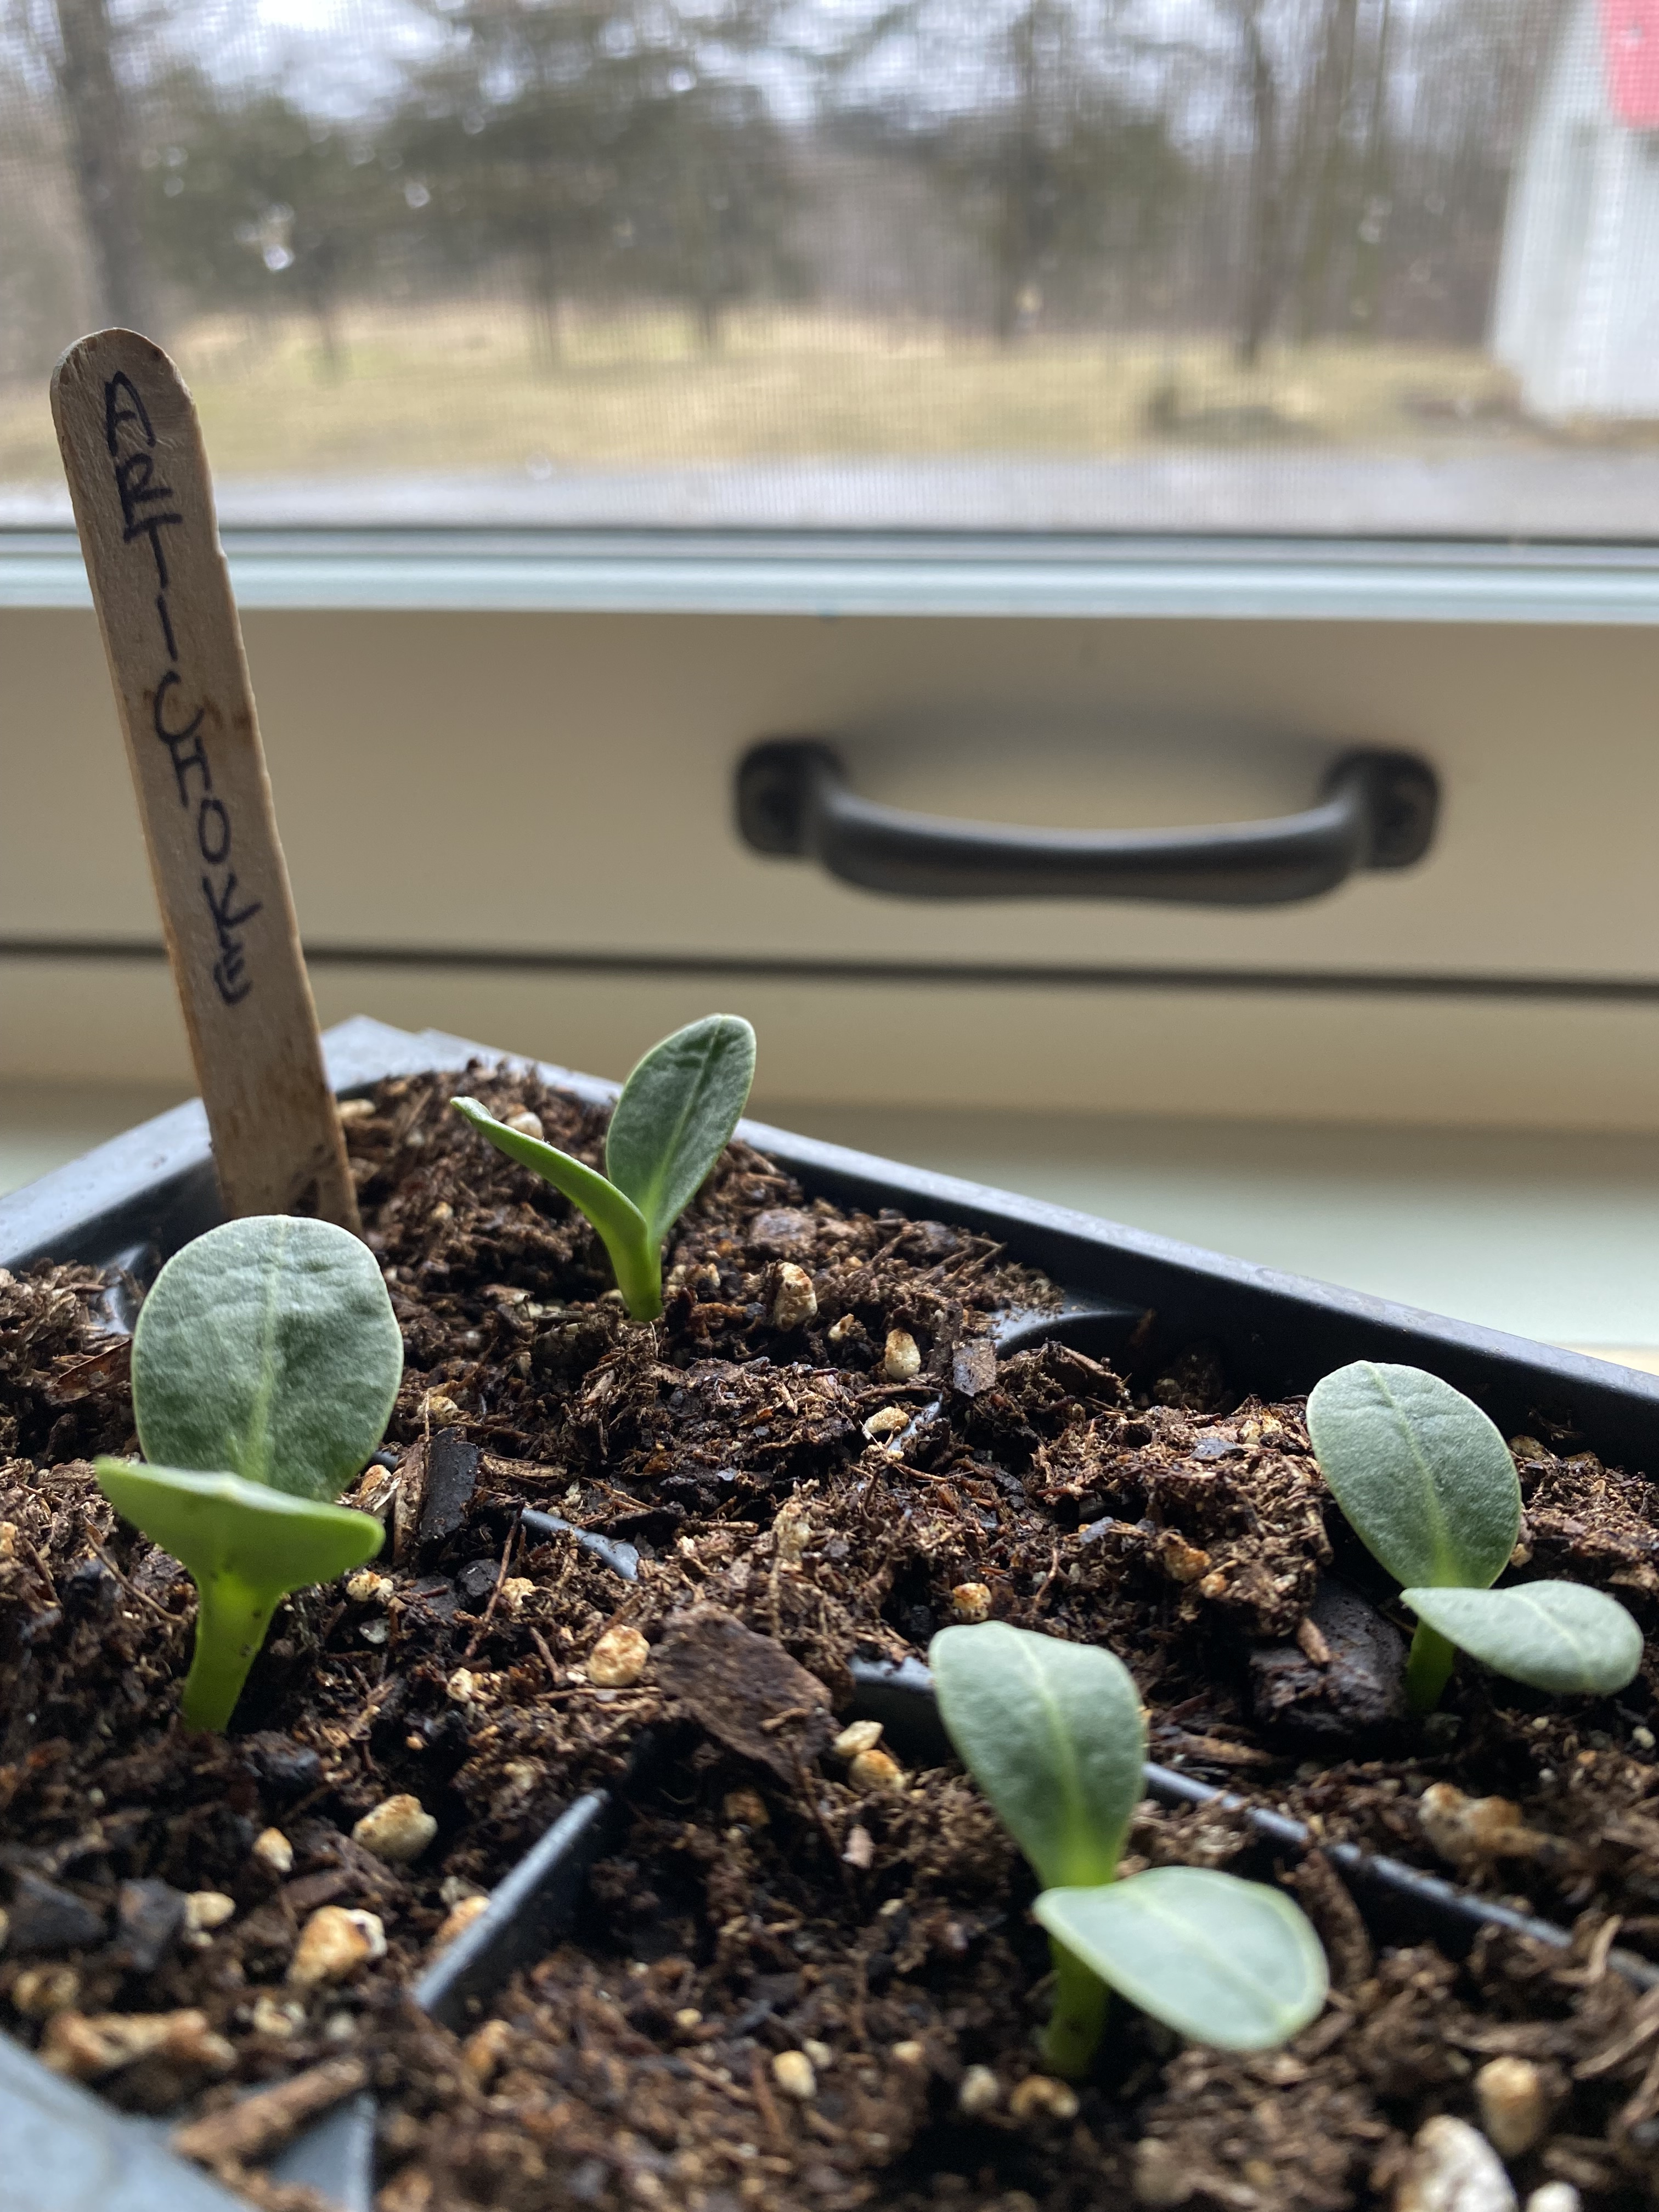
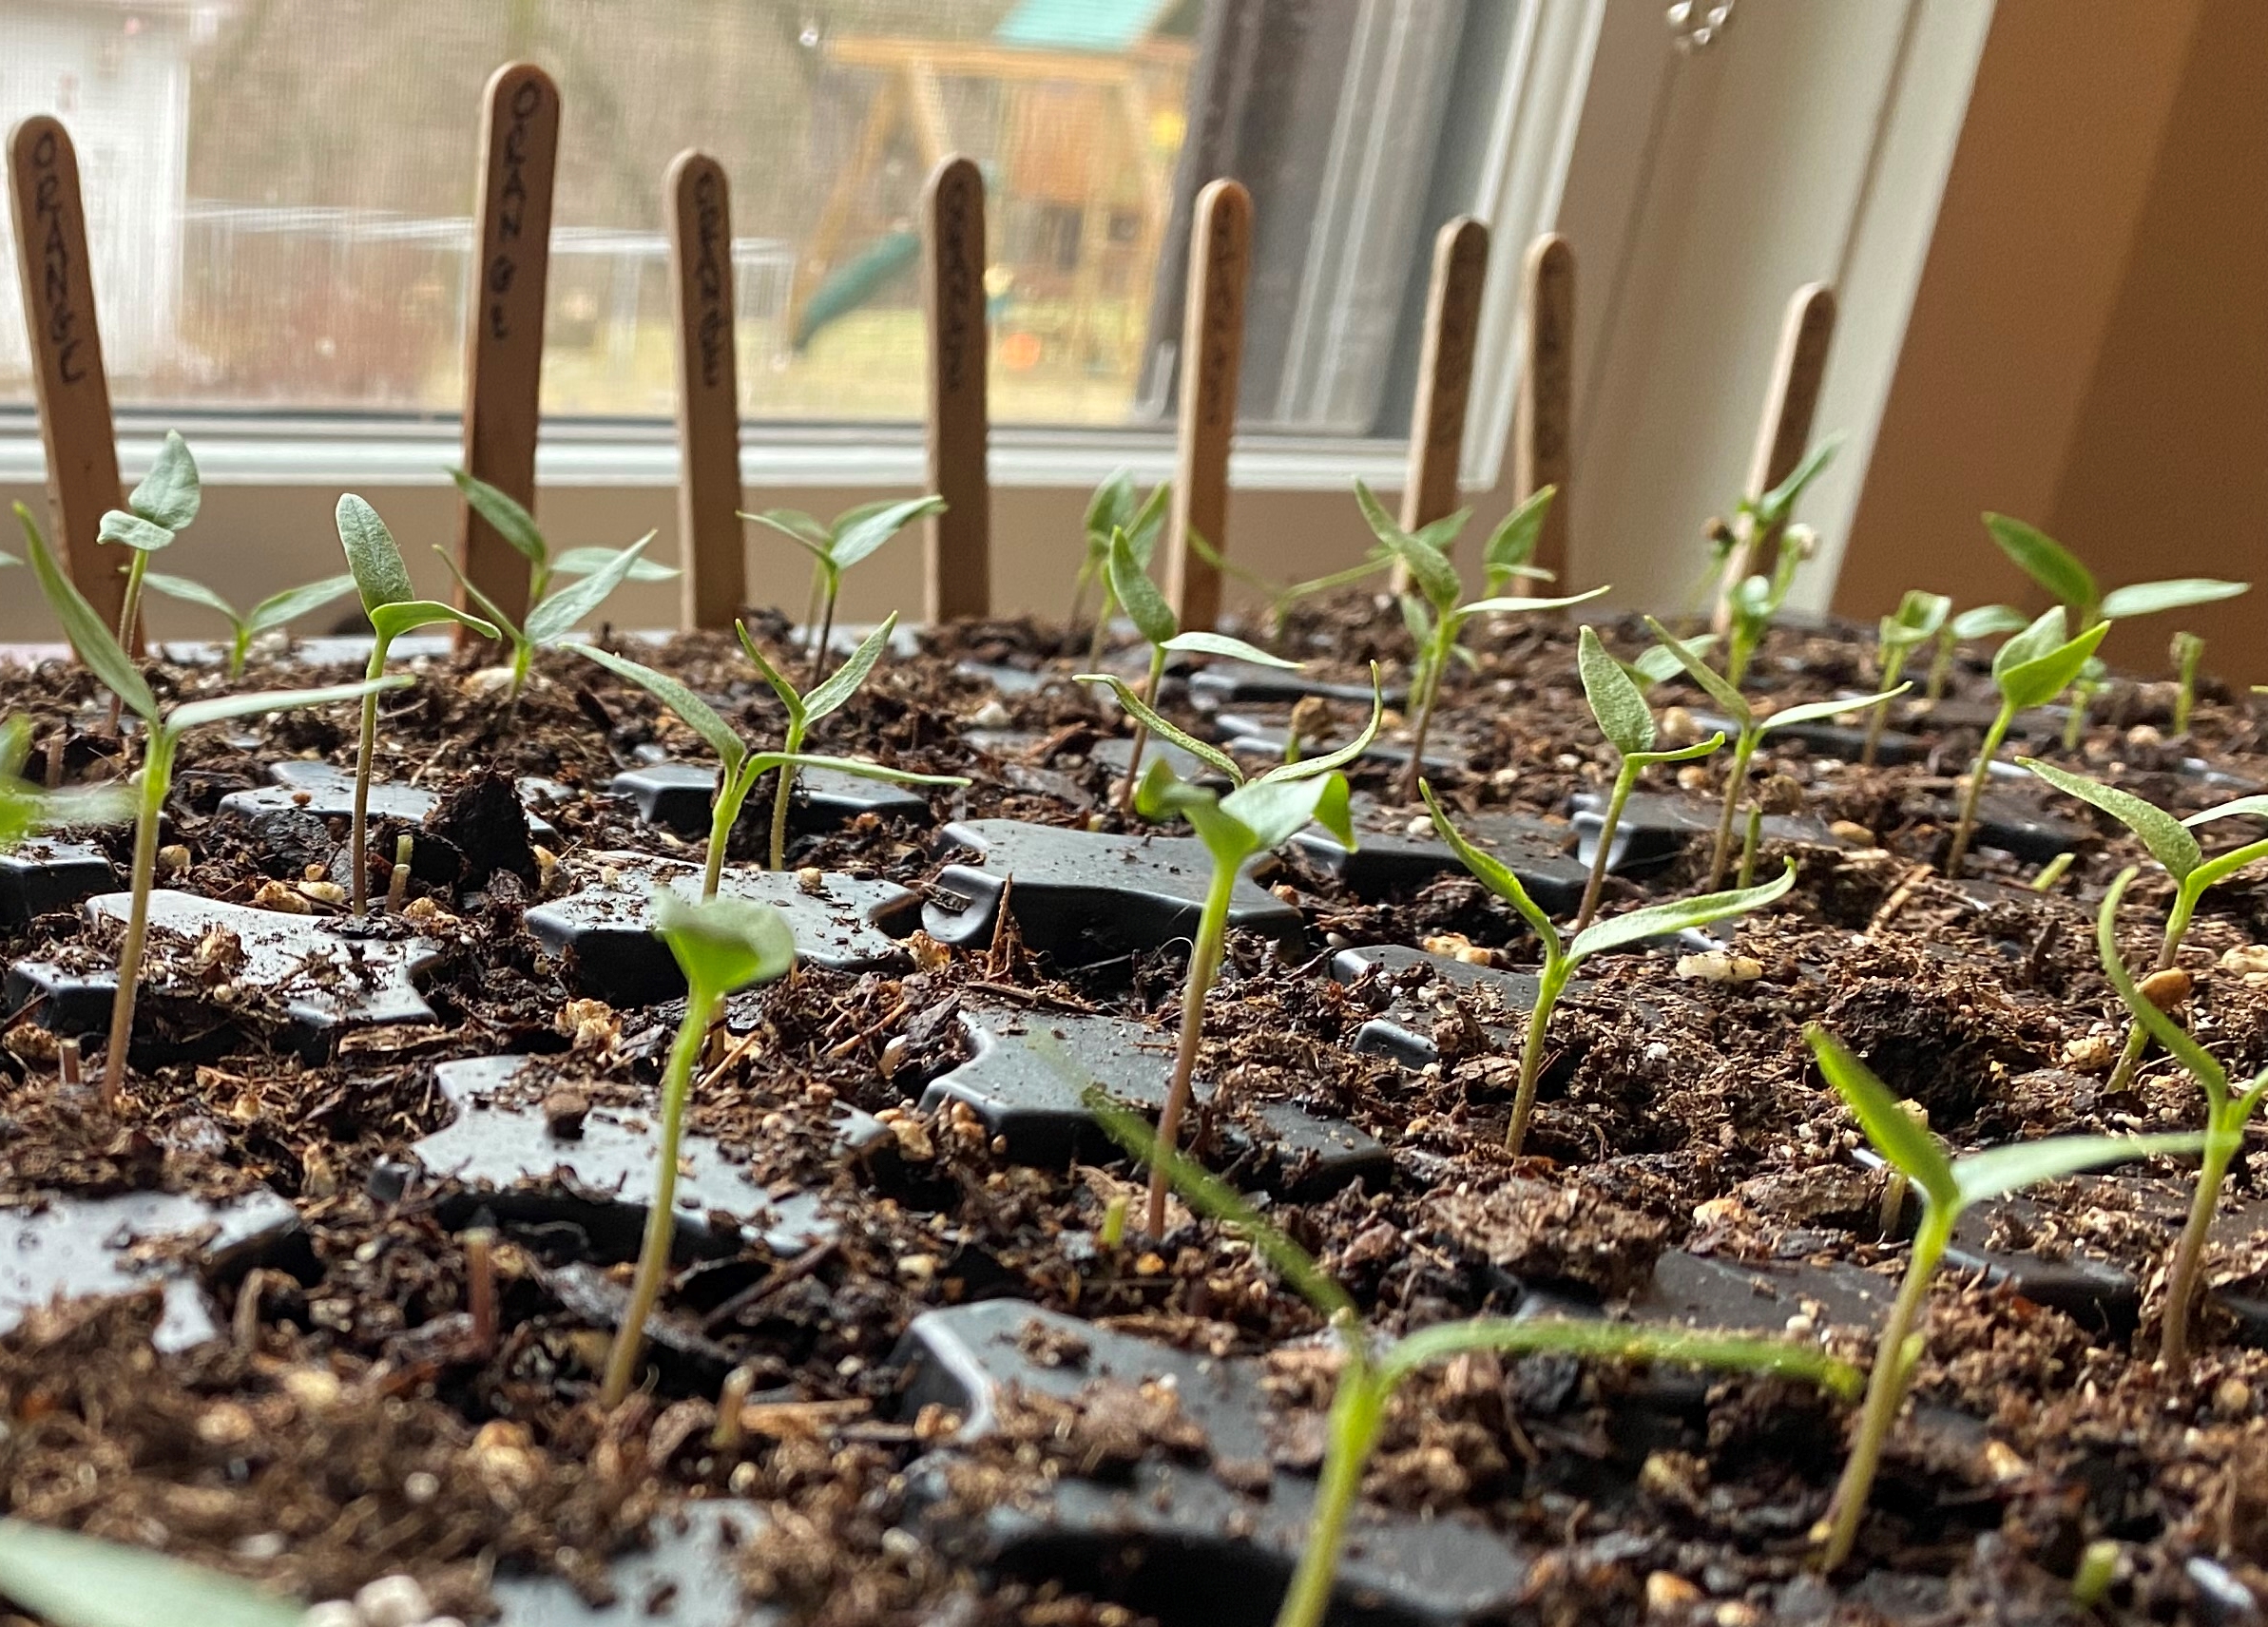
Things are happening outside, too, despite the weather. Last weekend, I pruned back herbs like oregano, mint, tarragon, and sage so that they’ll send out new stems that won’t be woody and tough. I saw rhubarb and chives pushing up through the soil and my one gooseberry bush is budding out.
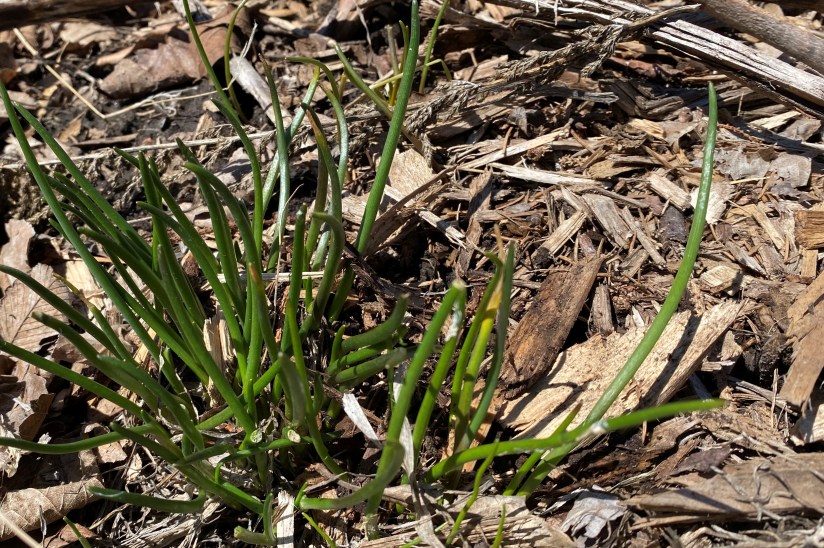
Our garlic is starting to sprout as well – something I look forward to every spring – but this year we are having a problem with some rogue deer who have decided that garlic is not only delicious to us, but delicious to them as well. This is very strange. Deer typically avoid garlic as it has a strong smell that they normally don’t like. We actually planted our garlic outside of the deer fence this year; when we did that two years ago, they never touched it. Well, so much for that. It turns out that deer will eat anything and everything under the right circumstances and they have chomped on pretty much every shoot that has come up so far.
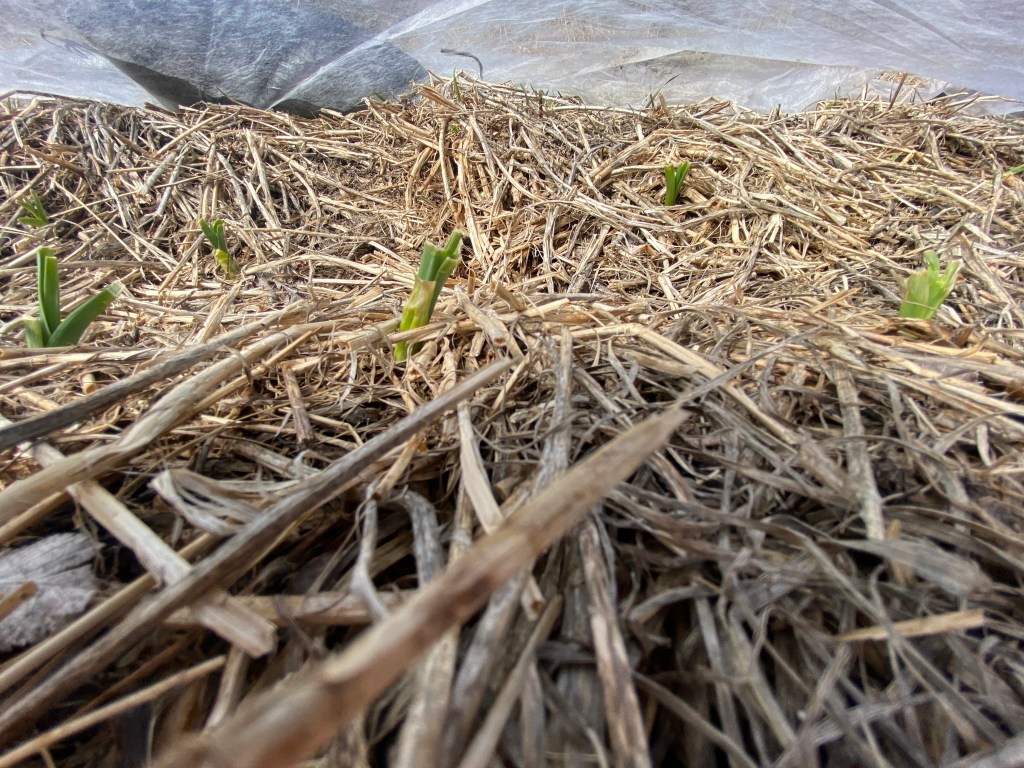
We think this is because, with spring being so late this year, not much else is growing out there and they are hungrier than usual. Still, we can’t let them graze on garlic. If the plants have to expend too much energy putting out new leaves to make up for the ones that were eaten, the bulbs will be smaller than we would like. Thus, we ran to the store Tuesday morning and purchased an electric fence to put around the field which we will install this weekend. To protect the beds in the meantime, I went to the nursery and filled 100 bags with 1/2 cubic yard of bulk sand that I hauled to the field and used them to hold down row cover that will block the deer until the fence goes up. It’s a good thing I’ve been working out this past winter. 100 bags of sand weighs a ton. You can imagine how well I slept that night!
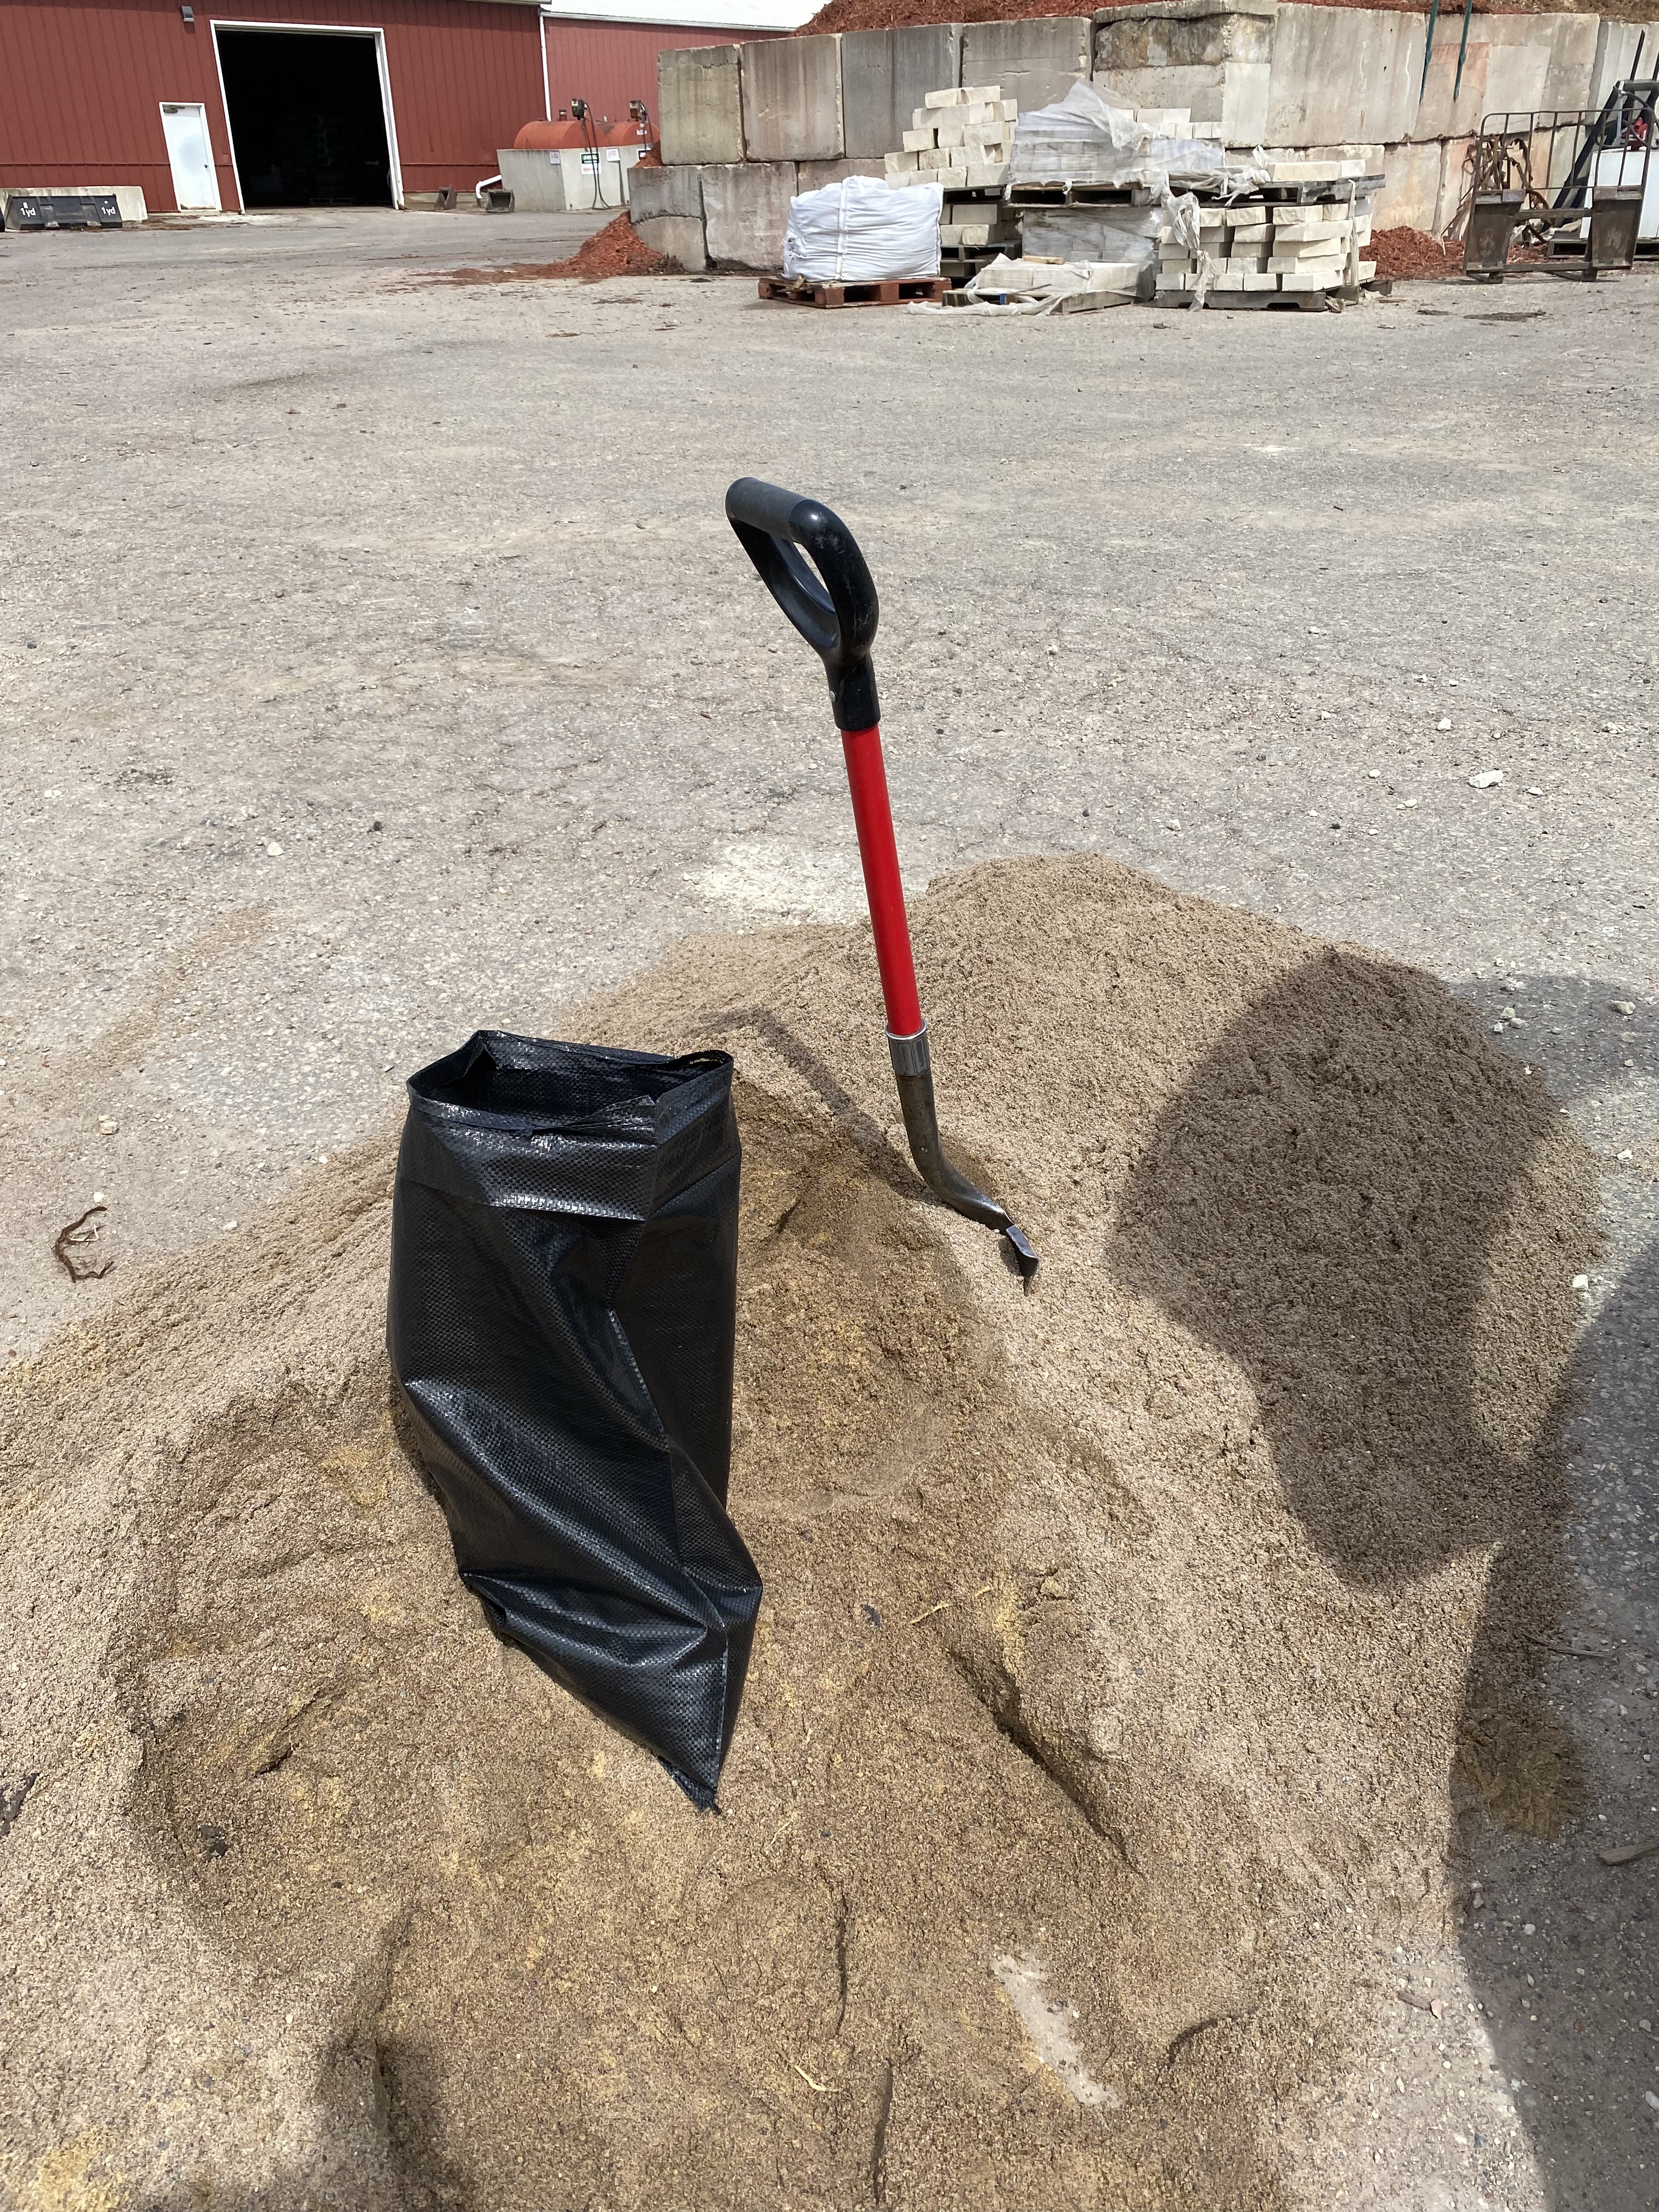
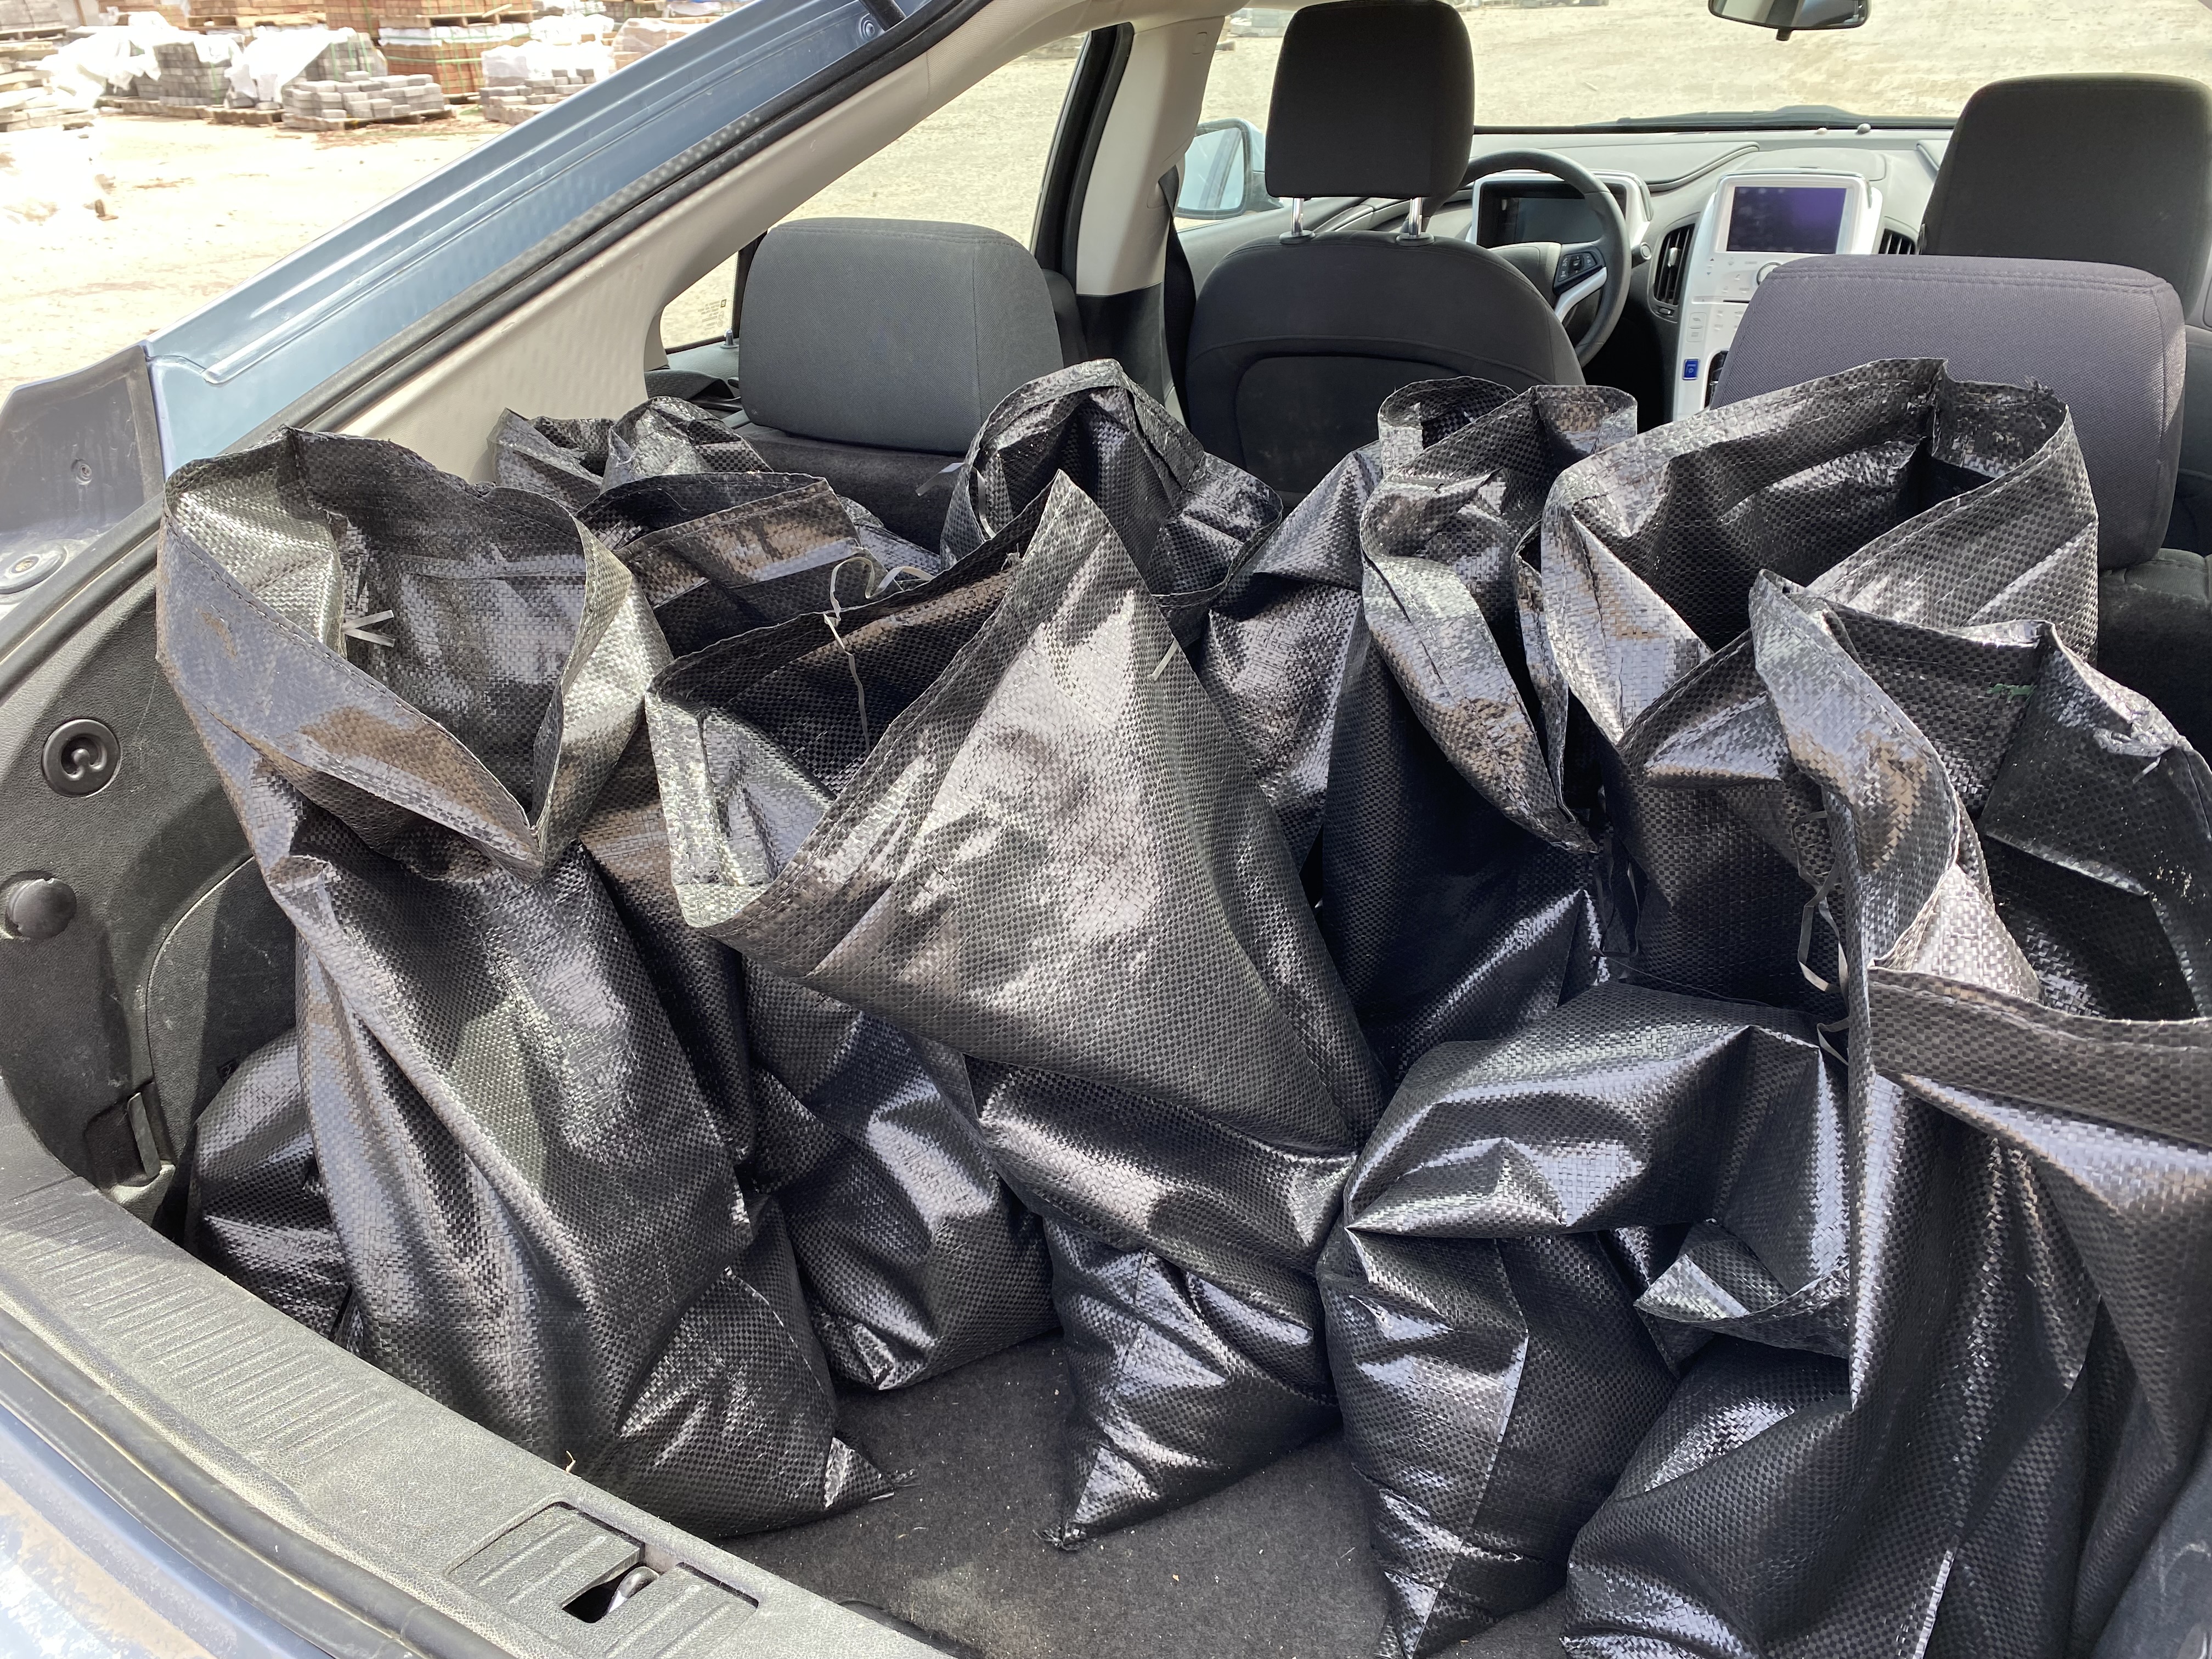
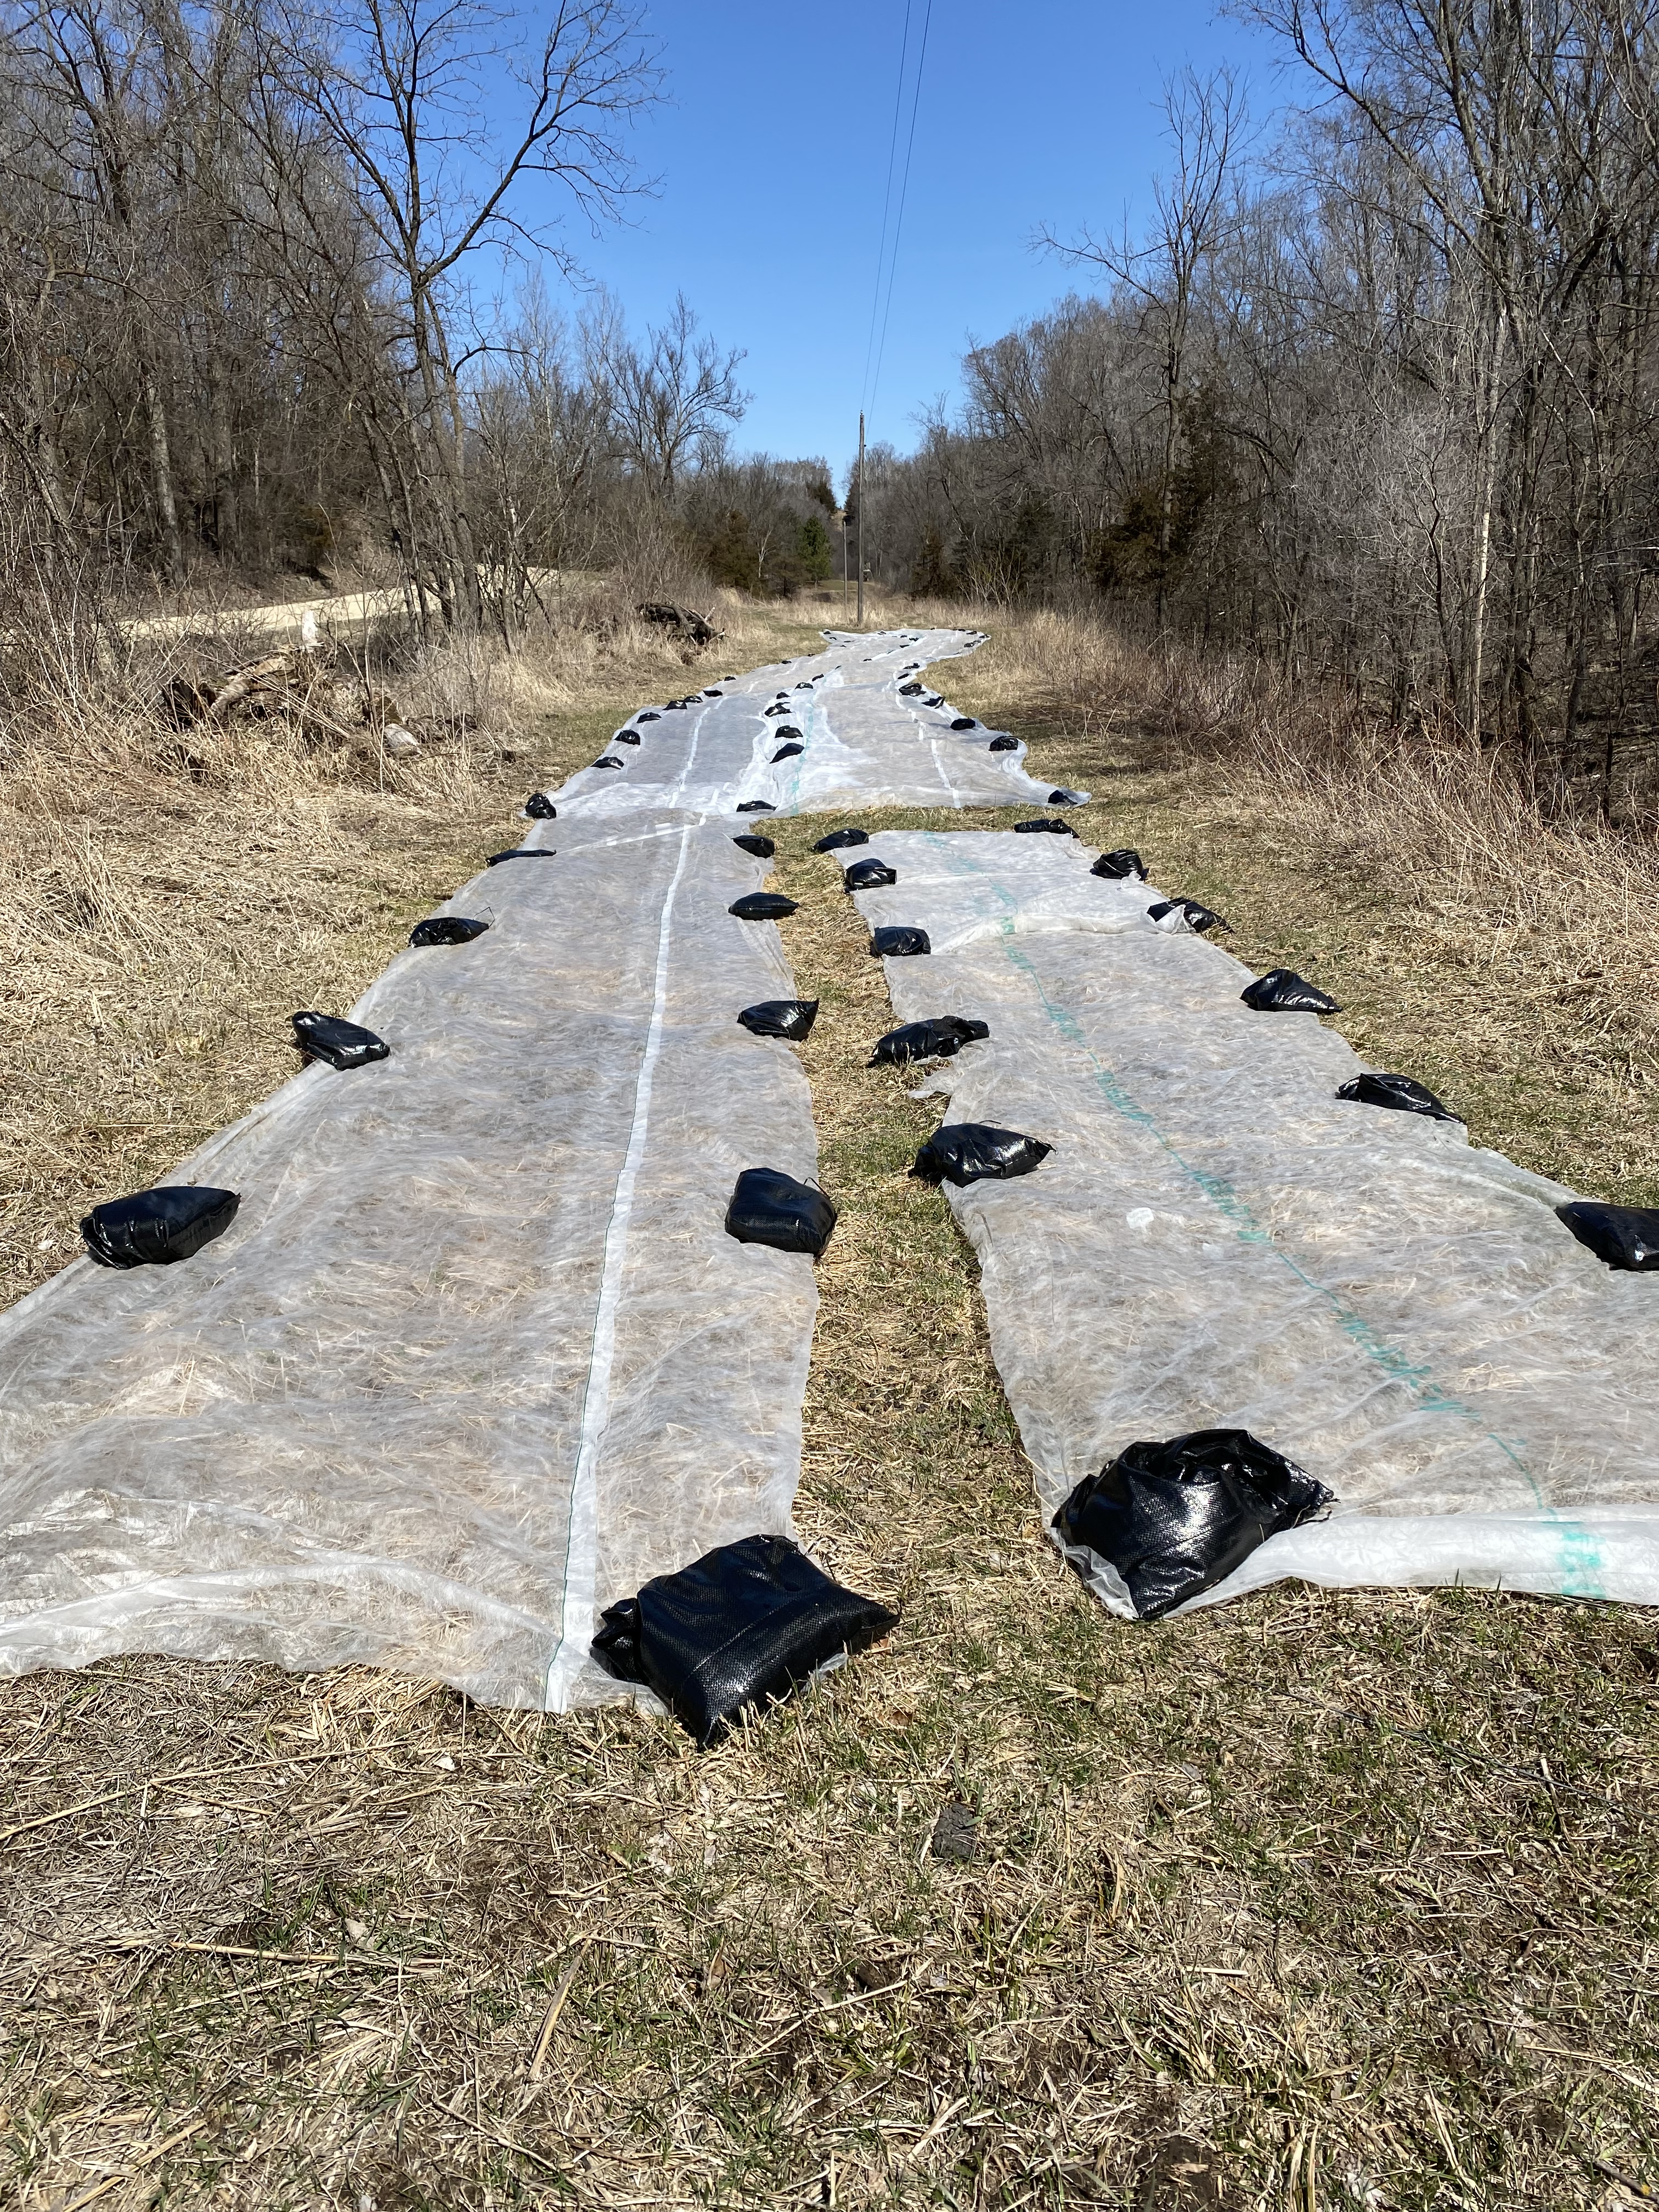
Next week I will start planting in the field. Keep your fingers crossed that the weather cooperates…
